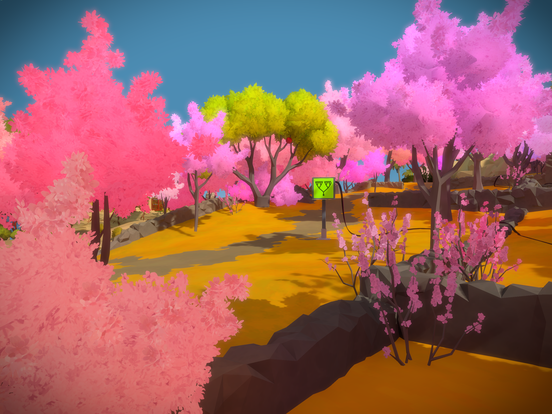
The Witness: Puzzle Solutions and Symbol Guide
Unlock every puzzle in The Witness with this complete symbol guide and walkthrough for environmental, perspective, audio, and secret puzzles.
There’s something special about the silent island in The Witness—a place packed with puzzles that both invite and confound. Anyone who’s walked those quiet paths knows the satisfaction of tracing the right line, and the frustration of coming up short when a new symbol leaves you stumped. The challenge doesn’t just come from the complexity of the puzzles themselves, but from learning the meaning behind every shape and sign etched onto each panel. Whether you’ve spent hours circling that one particularly stubborn door, or you’re just curious about how to make sense of all these cryptic rules, understanding the logic of The Witness is key to truly enjoying what the game has to offer.
Symbol Guide
The Witness teaches through experimentation, not instructions, so every symbol you see on a puzzle panel hints at a rule you need to understand before you can solve it. Here’s a breakdown of the main puzzle symbols, what they mean, and how to approach them—spoiler-free where possible. You’ll find these symbols dotted across the island, each bringing its own set of logic twists.
Squares (Colored Squares or Blocks)
- What they look like: Small colored squares, sometimes of more than one color.
- What they mean: Every area enclosed by your drawn line must contain blocks of only one color—or, put another way: different colors must be separated from each other.
- How to solve: Plan your route so that each group of colors is cut off from others. If there’s a lone yellow square and a group of blue ones, your path must keep them in different zones.
- Common mistake: Accidentally grouping two colors together.
Tetrominoes (Tetris Pieces)
- What they look like: Blocks shaped like Tetris pieces—L, I, square shapes, and more.
- What they mean: The area you draw has to “fit” the given set of tetrominoes—meaning the number of grid spaces you take up with your path must exactly match the sum of the shapes you see.
- How to solve: Imagine laying the tetrominoes inside the boundary you create. All the empty spaces inside the shape should be filled by the tetrominoes, with no more and no less.
- Tricks: Shapes may need to be rotated or reflected (but not overlap each other).
- Common mistake: Over- or under-allocating space.
Dots (Filled Circles)
- What they look like: Small black or white circles filling grid points.
- What they mean: Your drawn line must pass through every dot. It doesn’t matter how you get there, but every dot segment needs to be activated.
- How to solve: Look for a route that allows you to hit every dot once.
- Common mistake: Missing out a dot in an out-of-the-way spot.
Stars
- What they look like: Small four-pointed star shapes, usually colored.
- What they mean: Each “region” you draw (separated by your path) must contain exactly two stars of the same color. If there’s an odd number, or if different colors are together, the puzzle won’t solve.
- How to solve: Group stars into pairs of the same color—no more, no less in each zone.
- Common mistake: Grouping stars of different colors, or leaving a star unpaired.
Hexagons (Hollow Dots/Honeycombs)
- What they look like: Small hollow hexagons set on the intersections of the grid, looking a bit like honeycomb cells.
- What they mean: Your path must pass over each hexagon to activate them, but only the hexagons—not the entire panel.
- How to solve: Map a line that covers every hexagon in one go. Sometimes, you’ll need to double back or take a winding path.
- Common mistake: Overlooking a sneaky hidden hexagon in the corner.
Black and White Squares
- What they look like: Squares filled with black or white.
- What they mean: Each separate area made by your line can only contain one color. Unlike the colored block puzzles, here you must keep black from white, every time.
- How to solve: Draw your path to divide all black squares from white ones—think of it as making sure there are "no mixed neighborhoods."
- Common mistake: A path that allows even a single white and black square in the same area.
Environmental Clues and Advanced Symbols
The Witness isn’t just about what you see on a screen—sometimes there are clues outside the puzzle panel. In some late-game puzzles, symbols are intentionally left ambiguous, and players need to pay attention to the environment or subtle variations in the symbols.
Colored Backgrounds
Sometimes, a panel’s background color or pattern gives you a hint as to which rule applies or which piece you’re missing.
Broken or Missing Symbols
Especially in the latter half of the island, you’ll come across challenges where parts of the panel or some rules seem “broken.” These usually expect you to infer the missing part from earlier puzzles or environmental context.
Quick Tips
- Practice makes sense: Each area of the island teaches a new symbol or rule, starting simple before layering complexity. Tackle early puzzles in an area to learn the rule before facing combinations later on.
- Take notes: If a symbol doesn’t make sense yet, screenshot it or jot down its location; you’ll probably spot a tutorial puzzle nearby.
- Observe and experiment: No symbol appears randomly. If you’re unsure what a sign means, mess with the path or mimic what seemed to work on other panels.
- Combinations: Later panels will mix several symbols together. Apply rules one at a time and try to meet every requirement.
Wrapping Up the Rules
The moment symbols finally “click” is one of The Witness’s best feelings. Every rule on the island has a logic and a progression that the game gently ramps up. Pay attention to what each symbol wants, practice on simple panels, and you’ll get the hang of even the nastiest puzzles on the island. Happy tracing!
Environmental Puzzle Guide
The Witness is famous not just for its panel puzzles, but for the way the whole island is secretly a giant puzzle. Environmental puzzles—sometimes called "line puzzles" or "nature puzzles"—ask you to literally trace solutions with your eyes in the world around you, not just on screens. Here’s how they work, where to find them, and tips for solving them.
What Are Environmental Puzzles?
Environmental puzzles use elements from the game's surroundings as a sort of hidden grid. You’re looking for lines, shapes, and paths in the landscape that match the glowing paths from puzzle panels—complete with a start and end point—usually in the form of a circle (for "start") and a rounded line endpoint.
When you spot one, standing in exactly the right spot and lining up your viewpoint turns the environment itself into a puzzle you can "trace" with a button press, just like the glowing yellow lines on a regular puzzle panel. Solving an environmental puzzle sends a bright streak of light through the area, which often triggers visual or audio feedback.
How to Spot Environmental Puzzles
Keep an eye out for anything in the world that looks like a maze, a serpentine line, or anything that vaguely resembles the signature puzzles you solve at panels. They can hide in:
- Tree branches
- Shadows
- Waterways
- Walls and fences
- Sunbeams
- Paths and worn trails
- Oddly lined-up rocks or structures
Sometimes you'll even see a faint circular mark or a curious shape on the ground, on leaves, or on architectural features—a subtle hint that you might be staring at a puzzle just waiting to be solved.
How to Solve
Solving environmental puzzles is all about lining up your perspective. Here’s how the process usually plays out:
-
Scout the Area Walk around and look for anything that stands out as a circular "start point," usually contrasting against the background.
-
Adjust Your View Move your character and viewpoint until pieces of the scenery line up to form an unbroken glowing path, just like the drawn line on a panel.
-
Trace the Path When it all clicks, you’ll see the prompt to start tracing. Hold the button and slowly move your aim to follow the "drawn" line from beginning to end.
-
Watch for Feedback If successful, a solid white or yellow line appears, and you’ll often hear a distinct sound effect. Many of these lines radiate toward the mountain’s laser.
Where to Find Environmental Puzzles
Environmental puzzles are hidden all over the island—some in obvious places, others tucked away in side paths or high-up viewpoints. Look for strange visual alignments whenever you:
- Stand on balconies or lookouts
- See colorful panels on the ground or rooftops
- Glimpse unusual shadows on the floor
A few regions where these puzzles are especially common:
-
The Beach and River Valley Look for driftwood, leaf arrangements, and even docks or bridges that naturally create snaking lines.
-
The Orchard and Swamp Trees, crops, and even irrigation channels sometimes line up to create perfect puzzle paths.
-
The Quarry and Shaded Forests Shadows cast by beams, posts, or stone ridges can trace an outline, especially at certain times of day.
Some of the trickier ones require you to manipulate the environment—opening doors, moving platforms, or even waiting for the sun’s angle to shift.
Types of Environmental Puzzles
Environmental puzzles come in a few main varieties:
Shadow & Light
These puzzles use moving or stationary shadows to "draw" a line. Look for fence shadows, bars, or gaps in walls.
Water & Reflection
Some puzzles take shape when you spot their reflection on the water. The start and end circles might be upside down or only visible from certain directions.
Foliage
Overlapping branches, vines, or flower beds often line up to create hidden solutions.
Multi-Layered
Occasionally, you’ll need to align elements from foreground and background, or from different heights, to create the correct line.
Tips for Mastering Environmental Puzzles
- Take your time — Don’t rush. Sometimes backing up or changing your height makes the solution obvious.
- Use landmarks — Noticing an oddly placed rock or marked tile? Try to see what lines up with it.
- Change the environment — Doors, shutters, or light sources you can manipulate may be blocking or revealing a solution.
- Think outside the panel — Environmental puzzles often use shapes and scales that wouldn’t fit on normal panels. Patterns on rooftops, coastlines, or even cracks in stone can be fair game.
- Be patient — Sometimes a solution only pops into place under specific lighting or after a story event (like raising water).
The Purpose of Environmental Puzzles
Aside from unlocking extra secrets, environmental puzzles emphasize the main theme of The Witness—pay attention to what’s all around you. They never block progress through the main story, but many tie into the island’s biggest mysteries and some late-game hidden content.
Conclusion
Environmental puzzles challenge your observation skills and sense of perspective. They're some of the most satisfying secrets in The Witness, rewarding you for paying attention and being curious. Next time a tree's shadow, snaking branch, or cracked wall looks oddly familiar, try "drawing" the solution—and see just how far the rabbit hole goes on the island.
Perspective Puzzle Guide
Perspective puzzles are some of the most memorable challenges you’ll face in The Witness, mainly because they blend the line between the game's panel puzzles and its environment. Instead of simply observing panels, you’ll often need to position yourself in the exact right spot for the world itself to transform into a puzzle. Here’s everything you need to know to master perspective puzzles across the island.
What Are Perspective Puzzles?
Unlike the environmental puzzles you solve by tracing lines in the world, perspective puzzles require you to see the landscape in a very specific way. It’s about how elements in the physical game space—objects, shadows, or structures—combine from a certain angle to mimic the panel puzzle underpinnings. The challenge isn’t always about finding the pieces, but figuring out where to stand and how to look at them so everything aligns.
Recognizing a Perspective Puzzle
Sometimes it’s obvious—there’s a massive sculpture or arrangement that looks suspiciously like a path. More often, they’re super subtle, spread out across different layers of the environment. Clues you might spot include:
- Sections of a shape that appear disconnected unless viewed from the right spot.
- A partial circle on a wall, with the rest of the circle hinted at elsewhere.
- A line that doesn’t continue, but when the camera moves, click—now the line is complete.
- Arrangements that seem random until their purpose becomes clear from a new vantage point.
Environmental feedback helps, too: a shadow that just barely forms a curve or sections of path that suddenly line up.
Step-by-Step: Solving Perspective Puzzles
Let’s break down the process to tackle these unique enigmas:
1. Find the Puzzle Pieces
Look for:
- Unusual color contrasts or shapes on surfaces (walls, ground, ceilings).
- Fragments of a line, circle, or maze structure that look broken or out of place.
- Partial objects that seem like they’d fit together, if you could just see them all at once.
2. Adjust Your Position
Perspective matters! Move around the area—walk left and right, step forward and back, or even crouch down and look up. If you’re on PC or console, use both movement and camera controls to fine-tune your view.
Often the right position is marked by small visual hints, such as:
- Scuff marks or footprints (in optional puzzles).
- A stone placed subtly at the "correct" angle.
- Design elements naturally guiding you to a particular lookout point.
3. Look for the "Start" and "End"
Most perspective puzzles, just like environmental line puzzles, have a specific "start" point (usually a circle) and an "end" (rounded bar or dot). These can take odd forms, but they always mimic the familiar puzzle language.
4. Align and Trace
Once everything lines up—maybe tree branches fill in a gap on a wall, or two street lamps create the path’s end—hold the solve button and slowly trace the path, mimicking how you would on a panel. Don’t rush; slow and meticulous tracing usually does the trick.
5. Celebrate and Watch for Feedback
Did the line animate along your path, and did you hear that sharp chime? Congrats, you got it. Sometimes, solving a perspective puzzle triggers substantial changes—panels activate, doors unlock, or simply, a bright light travels toward the mountain. Occasionally, you’ll just get bragging rights (and maybe a trophy/achievement).
Perspective Puzzle Hotspots
While perspective puzzles appear across the map, some locations are famous for especially satisfying examples:
The Symmetry Island
Home to puzzles where moving platforms and viewpoints play tricks on your spatial awareness. Look across the water at certain sculptures and align their parts for surprising results.
The Quarry
Scattered construction material, moving cranes, and half-completed structures can sometimes form the solution—with only the right viewpoint revealing the answer.
The Mountain
The area around—and inside—the mountain is packed with perspective trickery. These usually tie into late-game secrets, so keep your eyes peeled.
Advanced Tips
Layer Cake
Sometimes, the environment requires you to combine information from different distances—maybe shadows up close pair perfectly with a fence far away. Imagine you’re “flattening” the world with your gaze until everything clicks.
Use Your Tools
Some puzzles let you manipulate the environment. Move platforms, rotate bridges, or shift objects to create new perspectives—especially in puzzle-rich areas like the Swamp and Jungle.
Check All Angles
If you’re stuck, change your approach entirely. Panoramic puzzles, where an entire segment of the island comes together from a high vantage point, are a fan favorite. Don’t be afraid to walk far away from the puzzle area—sometimes the right spot isn’t where you expect.
Light and Time
Lighting plays a massive role, too. Some perspective puzzles only solve properly when the sun casts the right shadows. If parts of a shape look unfinished, consider revisiting at a different time of day.
Common Perspective Puzzle Pitfalls
- Missing the Start or End: Without both, the puzzle simply won’t activate. Sometimes an out-of-place manhole cover, bench, or even a plant is serving as your marker.
- Overthinking: It’s easy to get stuck over-complicating things. Step back—sometimes the most abstract, distant point has the answer.
- Not Moving Enough: If everything’s almost right, keep adjusting your position by inches until it snaps into place.
Perspective Puzzles: Final Thoughts
Solving perspective puzzles can feel magical, as the landscape transforms into a solution hiding in plain sight. They reward curiosity and patience, encouraging you to look at familiar places from unexpected points of view. The next time you’re sure you’ve seen every secret in The Witness, remember—there might be a solution hidden just a few paces to the left or right. Keep your eyes open, and let the island surprise you.
Audio Puzzle Guide
The Witness isn't just a treat for your eyes—it challenges your ears, too. The game’s subtle audio-based puzzles require you to pay attention to the natural soundscape. If you thought you could mute the island and blast your own tunes, think again—some solutions depend on what you hear.
Here's how to tackle The Witness' audio puzzles, where to find them, and tips to help your ears decode the clues.
Where You'll Encounter Audio Puzzles
You’ll mainly run into audio-based puzzles in the Jungle area (northeast part of the island). There, mysterious panels with wavy lines signal that sound, not sight, leads to the answer. Other spots, such as certain caves and the endgame sections, also feature sound-driven challenges.
Understanding Audio Clues
Audio puzzles always center on patterns or differences you hear. Expect to identify things like:
- Pitch: Is the sound high or low?
- Direction: Which side does it seem to come from—left, right, or center?
- Sequence: Listen for distinct parts, such as groups of bird chirps, footsteps, or machinery clicks.
Each panel translates these sound patterns into a path you can draw. Instead of looking for visual clues, grab some headphones—the details can get lost on tinny speakers.
Breaking Down Jungle Audio Panels
These panels use sound fragments, usually birdsong, as the main clue. The panel lines split into branching paths, each branch representing a possible pitch, duration, or turn based on what you hear.
Birdsong Puzzle Example
One early Jungle puzzle features three branches at each fork. You’ll hear a fast, high chirp, and two slower, lower ones:
- Left path: Lowest pitch
- Middle path: Mid pitch
- Right path: Highest pitch
To solve, listen to the sequence—for example, high, low, high, mid—and match each to the appropriate panel branch as you trace.
Pro Tip: Use the Restart Button
If you lose track, just lift off the panel to restart. The sound sequence loops back, letting you hear it as many times as you need.
Types of Audio Hints
You’ll encounter three main sound types:
1. Pitch-Based
Branching lines correspond to high or low notes. Follow the path matching each pitch as you trace from start to finish.
2. Left/Right Audio
Some puzzles use stereo cues. If you hear a sound only in your left ear, trace the left path; right sound goes to the right. If it's centered, pick the middle.
3. Sound Patterns/Clusters
Listen for groups: a group of three chirps followed by a single note. Each group stands for a segment of the line to trace. Refer to how many branches are at each junction.
Trickier Variations
As you progress in the Jungle, the sound puzzles layer in complexity:
- Sounds might overlap, requiring you to separate one pattern from another.
- Environmental noise—like running water—can mask the clues. Look for panels with little soundproofing.
- Some birdcalls mimic patterns (e.g., fast chirp, slow trill). Take your time and parse them out.
Advanced Audio Puzzle Strategies
Headphones Make a Difference
Stereo separation is crucial. Good headphones help you pinpoint left/right sounds and subtle differences in tone. It’s much tougher on low-quality laptop speakers.
Break Down the Sequence
Write down or tap out the rhythm on your desk if you need. Not every clue is about pitch—sometimes how many times a note plays in a row is the answer.
Watch for Visual Hints—Sparingly
A few panels feature small carvings or shapes matching the number of sets in the chime pattern. Don't rely on this, but it can confirm your sequence is correct.
Use the Environment
Sound sometimes "travels" differently in different parts of the Jungle. Move to an isolated, quieter spot if you're struggling to pick out a tricky note.
Common Audio Puzzle Pitfalls
- Ignoring Overlapping Sounds: The game loves to stack competing noises. Focus on the bird, not the running water.
- Misjudging Pitch: If you can't tell high from low, try listening at a lower volume. Fatigue can make it harder to tell them apart.
- Losing Track of Sequences: Don’t hesitate to replay puzzles until each note is clear in your mind.
Notable Audio Puzzle Moments
- Jungle Gate: The most famous set, heavy on pitch/pattern matching.
- Cave Echoes: Later, a series of endgame puzzles require even sharper listening, mixing reverb and masking noises.
Wrapping Up
Audio puzzles flip the script on what we expect from a puzzle game—they reward patience, focused listening, and a willingness to tune out distractions. If you slow down and really listen, you’ll find these challenges both fair and satisfying. Remember: In The Witness, sometimes the key isn’t what you see at all, but what you hear.
Secret Puzzle Guide
The Witness hides more than meets the eye. Beyond the mainline challenges and glowing panels, there’s a layer of secrets that rewards those who pay close attention and value curiosity. This section covers some of the more elusive puzzles, including environmental secrets and the fabled audio log panels. If you want every achievement, or just crave the satisfaction of seeing “everything,” this guide can help you track down hidden solutions and interpret the subtle tricks Jonathan Blow packed into the island.
The Obelisk Panels and Environmental Lines
One of The Witness’s greatest tricks sneaks into your view once, then never lets go: environmental puzzles. These aren’t on panels at all. Instead, they’re patterns in the world that look oddly familiar—shapes that echo the lines and dots found on the standard puzzles.
How Environmental Puzzles Work
Instead of drawing on glass panels, you use your perspective to trace a path with your eyes. Each hidden path mimics the style of a puzzle solution from elsewhere in the game. If you pause and look at trees, buildings, shadows, or even puddles, you’ll sometimes notice a line—complete with a circle at one end, and a goal at the other.
To solve
- Stand so the entire path is visible in frame.
- Hover your sight over the start of the line (usually a circular spot).
- Hold your interact button and slowly pan across the line until you reach the other end.
If the path is correct, a white light travels along the shape and streaks toward a nearby black obelisk—a sign you’ve found a secret environmental solution.
Types of Environmental Puzzles
- Shadows: Branches or architectural elements cast perfect puzzle-shaped shadows.
- Object Alignments: Lines on roads, fences, or waterways match puzzle paths when seen from the correct angle.
- Reflections and Light: Surfaces like water or glass sometimes create mirrored lines.
- Natural Features: Roots, hedges, or even arrangements of flowers occasionally set up perfect puzzles.
Keep a lookout for places where part of a line seems incomplete or broken. Changing your position—walking around, crouching, or climbing—might align things just so.
Related Obelisks
There are seven black obelisks around the island, each collecting environmental solutions from a particular zone. When you solve these hidden puzzles, a line on the obelisk lights up. To fully complete the game, you’ll need to find and trace all of them.
Tips
- The Marketplace and Symmetry Island have some of the trickiest environmental puzzles.
- Later solutions can involve combining reflections with perspective—for example, painting a line with both a branch and its mirrored image in water.
The Secret "Challenge" Room
Arguably the most well-hidden late-game secret is the "Challenge" area, an optional, advanced puzzle gauntlet tucked beneath the mountain. Here's how to reach and tackle it:
How to Find the Challenge
- Go to the Theater. In the movie room (with projectors), activate the panel beneath the screen.
- Enter the mountain and solve the endgame elevator track panels as normal, but watch for a stone wall on your left in the winding corridors.
- Use the alternate path (which opens once you’ve completed specific environmental puzzles and have activated every laser).
- Solve the hidden panel by the wall to reveal a secret door that leads into the Challenge chambers.
What’s Inside?
- Timed Puzzle Gauntlet: You’ll face a series of randomly generated puzzles under a strict time limit, with a musical track that acts as your clock (often the “In the Hall of the Mountain King” remix).
- Mixed Puzzle Types: Expect a brutal mix—shape puzzles, symmetry puzzles, and even an environmental one or two.
- Reward: At the end, claim the elusive triangle-shaped audio log, an achievement, and ultimate bragging rights.
Pro Strategy: Practice pathing and reading complex symbols ahead of time. You only get one shot per attempt unless you restart.
Audio Logs and Secret Messages
While the island’s panels make up most of the brain teasers, The Witness has a slew of hidden audio logs stashed in obscure places—look for odd little recorders, especially in out-of-the-way or hard-to-see corners. Many require solving a side puzzle (panel or environmental) to access.
Example Locations
- Inside the windmill basement: Solving a panel unlocks an elevator to a deep audio log room.
- By the mountain entrance: An off-path nook hides another recorder.
Some of these logs contain cryptic philosophical quotes, game design commentary, or clues for the ultimate secrets.
Developer Easter Eggs and Final Secrets
The biggest secret of all is the secret ending. Here’s how to trigger it:
- Have all lasers activated and finish the main game.
- Return to the beginning of the island (your starting point by the boat).
- Look for environmental paths you couldn’t trigger before. One of these unlocks a super-secret elevator that takes you “beneath” the game.
- Navigate past some intentionally disorienting puzzles for a bizarre glimpse behind the scenes.
This ending is more of a reward for those who want to see every layer of the game—not necessary for regular completion, but unforgettable for lore hunters.
In Summary
The Witness has hidden puzzles and secrets layered on top of its main challenge. From environmental patterns traced across trees and water, to audio logs and the infamous “Challenge” room, its secret puzzles reward patience and creative thinking. The best trick is to slow down and question the obvious. If something in the world feels “off,” it might be a hidden solution waiting for the right perspective. Puzzle on, and keep searching—The Witness respects your curiosity.