The Talos Principle Puzzle Solutions Guide
Unlock every challenge in The Talos Principle with our complete puzzle solutions guide, including sigils, stars, connectors, and more!
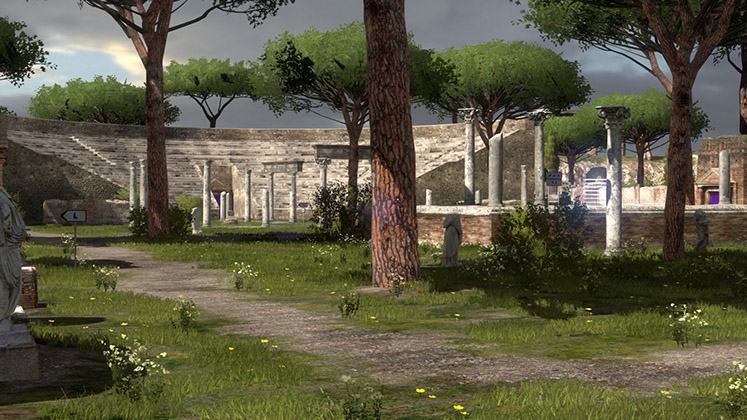
The Talos Principle drops you into a world where ancient ruins and advanced technology intertwine, challenging you to think your way through a series of intricate puzzles. With each laser, connector, and jammer you encounter, the game steadily ramps up both its difficulty and the sense of satisfaction that comes with figuring things out. Still, even the most thoughtful players can find themselves staring at a seemingly unsolvable setup. It’s easy to get stuck, especially when a single misplaced block can throw off an entire solution. Whether you’re looking to keep up the momentum or simply need a gentle nudge past a tricky section, knowing how to approach these puzzles can make the experience a lot more enjoyable.
Sigil Guide
Sigils are the core rewards for puzzle completion in The Talos Principle. They look like Tetris-style pieces and serve as your key to unlocking new areas, tools, and ultimately, progression through the game. Understanding how these sigils work, where to find them, and what to do if you’re missing one can make your time in the simulation much smoother.
What Are Sigils?
Sigils are puzzle pieces awarded each time you solve a main puzzle. Each sigil has a specific color and shape. You’ll spot their icons above or near puzzle archways. Collecting certain collections of these pieces unlocks doors to new puzzles, gadgets, and sections of the game’s world. So when you wonder if a particularly tough puzzle is worth the time, just remember that each solved challenge inches you closer to unlocking fresh content.
Types of Sigils
There are three main colors of sigils, each tied to different game progress:
- Green Sigils: These open the majority of doors to new puzzle areas. You’ll encounter these early on, especially in the first group of worlds.
- Yellow Sigils: These allow access to new tools and key progression doors, letting you visit advanced sections and puzzles.
- Red Sigils: These are rarest. Red sigils are usually tied to the more challenging puzzles and eventually needed to reach the game’s main “ending” area.
There are also “star” sigils, which unlock special, hidden content. These are for those who truly want to hunt everything down.
Finding Sigils
Every puzzle “hub” world has multiple puzzle gates, each marked with a sigil shape above it. Completing the puzzle inside grants you the piece displayed. The map and terminals can help you keep track of which puzzles you’ve completed and which sigils you haven’t picked up yet. Closed gates with sigil icons mark untouched puzzles. If you’ve completed a puzzle, the icon will either disappear or appear dimmed.
Early Game
When starting out, focus on gathering green sigils. These will help you open doors to new hubs, letting you build your toolkit and expand your map. Most beginner puzzles yield green pieces, letting you get the hang of the basics without overwhelming you.
Progression Requirements
When you try to pass through locked doors, you’ll often be asked to “build” a key out of collected sigil pieces. If you’re missing even one required piece, the door won’t open. Use the nearby puzzle terminals to double-check which pieces are still needed. Revisiting previous areas is normal, especially as you unlock new tools that help with hard puzzles.
Special Sigils and Stars
Hidden throughout the world are “star” sigils, marked by silver stars rather than blocky shapes. These often require thinking outside the box, sometimes using tools from other nearby puzzles or solving environmental riddles. While you don’t need all stars to finish the main story, they add new challenges and unlock bonus content for achievement hunters.
Backtracking for Sigils
Don’t be surprised if you need to backtrack. The Talos Principle is designed to encourage creative problem solving and “aha!” moments. Sometimes, puzzles that seemed impossible on the first go become crystal clear after gaining a new tool or seeing a similar setup somewhere else. If a sigil seems out of reach, make a note of it and come back later.
Tips for Collecting Sigils
- Use your map: Each hub world displays sigil icons for puzzles you haven’t finished. Don’t wander aimlessly; pull up the map to check missed puzzles.
- Watch for clues: Puzzle names and messages at terminals sometimes give hints at hidden or tricky sigils.
- Replay with new tools: Some areas can only be solved once you’ve collected lasers, connectors, or other advanced equipment. There’s no shame in coming back once you’re better equipped.
- Pace yourself: If you find yourself stuck on one piece for too long, take a break or check a different area. Often, fresh eyes help.
What Happens If You Miss a Sigil?
You won’t be permanently locked out of progressing for missing one sigil, but you will need to backtrack if a door requires a specific shape or color you haven’t collected. Thankfully, the game is generous with guidance — terminals and door prompts list which pieces are missing and from which hub world. Make use of these features so you never spend hours stuck looking for “one last piece.”
Conclusion
Sigils are both your reward and motivation in The Talos Principle’s world of puzzles. If you ever lose track, consult the map, revisit old puzzles, and keep experimenting with your newfound gadgets. Collecting every sigil gives you the satisfaction of tracking real progress, unlocking more puzzles, and uncovering the deeper mysteries hiding behind every locked gate.
Tetromino Guide
Tetrominoes are the building blocks you'll find throughout The Talos Principle, not just as rewards for puzzle-solving, but also as tools for opening new areas and features. While anyone who's played Tetris will instantly recognize these shapes, using them in The Talos Principle requires a different kind of logic. Below, you'll find tips and detailed explanations for handling tetromino puzzles so you don't get frustrated staring at a grid for ages.
How Tetromino Locks Work
Whenever you reach a new gate or upgrade station, you'll be prompted to "assemble" a key using a specific collection of tetromino-shaped sigils you've collected so far. The challenge is simple in theory: fit all the provided pieces into the outlined area without overlap or gaps. But tetromino locks are a different beast compared to traditional block puzzles because the game gives you no hints about how to rotate or place pieces—it's pure trial, error, and spatial reasoning.
Common Tetromino Shapes
The game uses classic Tetris pieces as sigils. Here’s a quick refresher on what you might see:
- I (a straight 4-block bar)
- L (three blocks in a row, one block below)
- J (mirror image of the L)
- O (square, 2x2)
- T (three blocks in a row, one sticking out in the middle—like a T)
- S and Z (zig-zag shapes, mirror images of each other)
While the shapes themselves never change, the combinations and the grid into which they must be packed will get more complicated as you progress.
Strategies and Tips for Tetromino Puzzles
Tetromino locks can trip up even confident puzzle fans, especially when the pressure is on to open a new area. Try the following tips to get past these moments—and avoid that urge to just click randomly hoping for a miracle.
1. Start Big, End Small
Begin with the largest or most awkward piece first. Big pieces create constraints quickly; if you leave them until last, you'll end up with impossible gaps. Try slotting the “I” or “L” shapes into corners or edges first, then work in the smaller pieces.
2. Work the Corners
Look at the edges and corners of the puzzle area. Often, certain pieces naturally fit in these spaces, which instantly cuts down on options. Place square “O” or ending parts of “L”/“J” pieces in these tighter spots.
3. Rotate and Reflect
Remember, you can both rotate and flip (mirror) the pieces. Sometimes that “stubborn” shape only fits if you reflect it. Get comfortable with trying every orientation.
4. Don’t Be Afraid to Reset
If you find yourself stuck, don't just keep dragging pieces around aimlessly. Clear the board and start again. A fresh perspective makes a world of difference.
5. Look for Negative Space
Sometimes, it’s easier to solve a tetromino puzzle by thinking about the gaps you’re creating rather than the pieces you’re placing. If a configuration leaves a gap that no remaining piece fits, backtrack immediately and try a different placement.
6. One Piece at a Time
Try placing just a single piece at a time and mentally running through the possible placements for the remaining shapes. It may feel slow, but it keeps frustration at bay and gives your brain space to try out options.
Example: Opening a Door
Say you have a door that asks for an “L,” a “T,” and an “O” piece, and the outline is a roughly square area. Begin by dropping the “O” in one corner—because it fits perfectly in corners. Next, see which corner or edge fits the “L” naturally. The “T” is tricky but is best used to fill in those weird, awkward spaces left behind. If you fill two opposite corners, the remaining piece likely fits snug in the remaining spot.
Star Tetromino Puzzles
Some of the star gates use much weirder, irregular puzzle grids. Here, every piece counts even more, and you’ll likely need to rotate and reflect pieces in odd ways. Also, don’t hesitate to return after a break—sometimes the solution is clearer after you’ve worked on other puzzles.
When to Seek Help
Unlike most of the first-person puzzles, tetromino locks are pure logic and don’t rely on gadgets. If you’re stuck for more than five minutes, consider looking up a hint or taking a breather. These sequences are purposefully meant as mental palate cleansers between the more physical puzzle rooms.
Conclusion
Tetromino gates might look like a simple twist on Tetris, but they’re brain teasers in their own right. Approach them systematically, experiment with orientation, and don’t hesitate to start over if you hit a wall. In The Talos Principle, every tetromino unlock brings you one step closer to unraveling the game’s deeper secrets—so don’t let these tricky shapes keep you from making progress. Just keep trying new combinations, trust your pattern-spotting skills, and enjoy the moment when the final piece slides perfectly into place.
Star Guide
In The Talos Principle, stars act as secret collectibles hidden across the main worlds. Unlike standard sigils, these aren’t required for basic progress, but gathering them adds extra layers to the game’s challenges and unlocks secrets, bonus levels, and even alternative endings. Stars are cleverly hidden, and reaching them often demands observing your surroundings closely, pushing puzzle elements beyond the intended solutions, or skillfully bending the game’s mechanics.
What Are Stars?
Stars appear as large, glowing, pentagram-shaped tokens tucked away in some of the game’s puzzle regions. You’ll likely spot your first star early on, but reaching it isn’t always straightforward. Sometimes, the path to a star has nothing to do with the immediate puzzle room and everything to do with elements outside, or even from another area.
Collecting stars is completely optional for finishing the main story, but they’re tied to some of the game’s juiciest secrets, including access to the elusive Star Worlds.
How Many Stars Are There?
There are 30 stars scattered throughout the base game’s main worlds. Each area contains a handful of stars, generally one or two per world, although some are a bit trickier and may involve revisiting or thinking outside the box. You can keep track of the stars you’ve collected via the pause menu or in the central hub.
General Tips for Finding Stars
- Pay attention to the environment: If you see a glowing star but can’t immediately reach it, scan for clues. Sometimes, a hidden ladder, a portable item, or a tricky jump can get you started.
- Use puzzle elements outside their intended area: Some stars require bringing fans, jammers, or connectors from one puzzle to another. This is rarely possible in normal puzzles, but certain paths or hidden windows let you “smuggle” items.
- Search for hidden buttons or switches: Neatly camouflaged buttons can, when pressed, unlock secret doors or platforms to access stars.
- Think laterally: Sometimes the solution involves using environmental geometry, timing, or combining tools in unusual ways. The obvious path isn’t always the right one.
- Revisit old puzzles: Getting a piece of equipment from a puzzle you’ve already solved might help you reach a star you spotted earlier in the same area.
Notable Star Puzzle Examples
World A: The Window Smuggle
Early on, you’ll spot a star in World A that sits tantalizingly behind a fence. No tools in the immediate puzzle seem to reach it. The trick here is smuggling a jammer from a different puzzle through a window in one of the fences—a mechanic the game rarely asks you to use. Rest assured, you’re not breaking the game: sometimes this is the intended solution.
World B: The Environmental Button
In several World B puzzles, stars are perched high and out of reach. Here, hunt for tiny buttons—often blending into the stone walls—that open up side passages, letting you reach the star’s platform. Sometimes the button only appears after solving a nearby puzzle, so don’t skip anything.
World C: The Fan Swap
A classic World C star involves swapping a fan platform with something heavier (like a cube). Use this trick to redirect airflow or create a launch path that lets you grab the star. This style of puzzle rewards creative thinking and careful experimentation.
Star World: What Do the Stars Unlock?
Once you collect enough stars, you’ll unlock the gates to the Star World. This area contains some of the hardest puzzles in the game. Star World puzzles often combine mechanics and tools from the entire game and lack the gentle tutorials you find earlier. Solving all of these is its own reward, but completionists and lore-hunters will want to see everything Star World has to offer.
Star World Entrance
To access Star World, head to the central hub and look for the archway decorated with star sigils. Depending on your progress, you may need 10, 20, or all 30 stars to progress further. The Star World isn’t mandatory for reaching the basic ending but is key for anyone hunting for the “true” ending or the deepest narrative secrets.
Missing a Star? Common Hang-Ups
If you’re combing every puzzle and still coming up short, here are typical places that trip people up:
- Overlooking a movable item: Some stars require you to literally carry a tool out of its puzzle. A few puzzles offer slits or windows just wide enough to slide a connector or jammer through.
- Forgetting about crates or cubes: Boxes aren’t just for buttons—they can give you the height you need to scale walls and fences that hide stars.
- Obscured sights: Stars might sit just out of view until you look from a strange angle, like standing on a fan or jumping from a box.
- Double-puzzle tricks: Several stars ask you to think about how puzzles in one area interact. Bringing a tool from puzzle A into puzzle B might be the only way to reach the star—don’t be afraid to experiment!
Should You Go For All Stars?
Chasing stars can get addicting, especially once you spot one you can’t immediately reach. For completionists and puzzlers, collecting all the stars is a satisfying bonus challenge. It’s also a great way to extend your playtime once you’ve solved most standard puzzles. If you’re mostly interested in the story, you don’t need to hunt every single one—but finding a few will add depth to the game’s world.
Final Thoughts on Stars
Whether you’re after tantalizing secrets, a tougher batch of puzzles, or just want to see everything The Talos Principle holds, hunting stars is worth your time. Stay curious, experiment with every item, and don’t be afraid to revisit previous puzzles with fresh eyes. Sometimes, the strangest solution is the right one—and when that star finally clicks into your collection, the satisfaction is well worth the effort.
Connector Guide
Connectors are some of the most frequently used tools in The Talos Principle, and learning their quirks is essential to unraveling the game’s more advanced puzzles. Understanding precisely how connectors work can save you lots of frustration—especially when you’re working toward the trickier sigil puzzles or eyeing those out-of-reach stars.
What Are Connectors?
Connectors are pyramid-shaped devices that let you link beams of colored light (red, blue, or sometimes green) between a generator and a receiver. Most gates, forcefields, or doors tied to this mechanic require continuous, unobstructed light. The connector can aim at multiple targets at once, but remember: beams of different colors can’t overlap.
How to Use a Connector
- Pick Up the Connector: Stand near one and press the interaction button. You’ll see colored circles around to show which light sources or targets are in range.
- Targeting: While holding the connector, tap the interaction button on the desired source or receiver to “mark” it. Lines will show the beam’s potential path. You can link multiple objects at once, depending on the puzzle.
- Placing the Connector: Once you’ve made all your selections, set the connector down. It’ll shoot beams between everything you connected, as long as it has a clear line of sight.
Line-of-Sight Rules
This is where most headaches happen with connectors. A beam only works if nothing is blocking the straight path between the connector and its targets. Fences with mesh holes, glass windows, and even some gates let beams through, but solid walls and certain obstacles will break the link. Objects you place, like boxes or jammers, can accidentally block beams as well, so always double-check.
Tip: Crouching or adjusting your angle when placing a connector sometimes fixes a blocked path.
Mixing Multiple Connectors
Some puzzles need you to chain connectors together—maybe the source is far from the receiver, or multiple receivers need powered at once.
- Chains: You can chain connectors from the starting light source to one, then another, and finally to the target. This helps tackle longer distances or tricky layouts.
- Multiple Beams: A single connector can handle more than one connection at a time, but if you mix colors or try to pass one beam through another, it won’t work.
When dealing with green beams, remember they’re typically for special puzzles or star challenges. These can’t mix with red and blue, so always keep their paths separate.
Color Mixing (or Rather, Not!)
Unlike some puzzle games, The Talos Principle keeps its beams true to color. Red must pass to red, blue to blue. If you try to cross the streams, nothing happens. Many advanced puzzles love to tempt you with overlapping or adjacent sources; don’t let them trip you up.
Common Connector Puzzle Types
Let’s break down the kinds of connector challenges you’ll see:
Splitters and Multi-Links
Some puzzles ask you to power more than one receiver from just one light source. Place a connector so all needed receivers are in view, and remember that all paths must stay open.
Bringing Connectors Across Puzzles
While rare, certain secrets hide just outside a puzzle area—so peek for slits or windows where a connector might reach. Some stars demand stretching a beam from two different segments. These spots are usually intentionally designed for sneaky use, so if you see overlapping energy sources, try to link them in creative ways.
Height and Angles Matter
If a connector won’t fire a beam, try placing it on a box or an elevated spot. This shifts the angle, sometimes freeing a blocked path. Conversely, crouch and aim from low down when you need to slip a beam through a narrow gap.
Time-Delay Connectors
For puzzles where you need an open gate, but also must grab a connector from inside, use pressure plates or fans to set up a temporary connection. Create a “bridge” with boxes if needed, then grab the final connector once you’ve passed the gate.
Connector-Related Star Tips
Unlocking stars often demands thinking outside standard rules for connectors:
- Look for spots where you can shoot a beam through a gap between puzzles.
- You might have to place a connector so that a beam “hops the fence” using a tiny open window or narrow slit.
- Sometimes you can drag a connector into the open world, link sources from two separate puzzles, and bring a beam to a hidden receiver that powers a star gate.
Always test every visible connection—some stars bend the usual rules and require multi-puzzle setups.
Troubleshooting Connector Issues
Even seasoned players get stuck on connectors. Here’s a quick checklist if things aren’t working:
- Walk around and check every angle—what looks open from one side might actually be blocked.
- If a connector doesn’t seem to connect, check for subtle tree leaves, posts, or puzzle debris blocking the beam.
- Try raising or lowering the connector’s position using boxes or fans.
- Double-check you’re using the correct beam color for each receiver. Accidentally aiming a red beam at a blue receiver won’t work.
Advanced Tricks
- Diagonal Linking: Sometimes zig-zag paths give you a better line of sight than a straight chain—especially in large areas with lots of columns.
- Temporary Bridges: You can sometimes use boxes to prop connectors up just for a few seconds, even if the setup feels awkward. This can help when needing to redirect beams quickly during time-based sections.
Mastering connectors is one of the most satisfying parts of The Talos Principle’s puzzle design. They’re both simple and tricky: easy to use, hard to get absolutely right every time. If you ever feel stuck, try repositioning, changing your perspective, or rethinking how you approach the chain. With patience and experimentation, those receivers (and the doors they open) won’t stay locked for long.
Recorder Guide
The Recorder gives you the power to “ghost” yourself, letting you record and replay a copy of your own actions. It’s one of the trickiest tools in The Talos Principle, but once you get the hang of it, you’ll tackle some of the game’s cleverest puzzles with confidence.
Let’s break down how the Recorder works, what puzzles use it, and some essential Recorder strategies.
What Is the Recorder?
In Recorder puzzles, you’ll find a special floating terminal with a red “record” button. Standing near it, you can record everything you do for a set period—up to about 60 seconds. When you stop recording, your “ghost” replays those actions exactly as you did them, while you move around freely. Both you and your ghost can interact with switches, boxes, connectors, jammers—basically anything a single player can use.
This means you can team up with your ghost to activate pressure plates, carry devices, or power beams in ways that are impossible solo.
How to Use the Recorder
Here’s a step-by-step to use the Recorder:
-
Start Recording: Approach the Recorder terminal and activate it. You’ll see a timer, and a message tells you recording has started. You’re now capturing everything you do.
-
Perform Actions: While recording, interact with puzzle pieces: carry items, connect beams, stand on plates, hold down switches, etc.
-
Stop Recording: Return to the Recorder terminal and hit the button again (or let the timer run out). Your actions are now saved.
-
Replay Ghost: A “ghost” version of yourself pops out, doing exactly what you just did on a loop. Now you can move freely as your ghost replays those actions.
-
Repeat as Needed: Some puzzles need multiple “takes.” You can record over your old ghost with different actions if you want. Each recording will overwrite the previous one.
Common Recorder Puzzle Types
Recorder puzzles test timing, coordination, and resource sharing. Here are the most common challenges:
1. Pressure Plate Tag-Team
A classic use: you record yourself standing on a pressure plate. While your ghost holds it down, you walk through the gate that opens. If there’s a connector or jammer to set up first, do all the prep while recording.
2. Recorder and Connectors Combo
Some puzzles need your ghost to hold a connector/jammer in a certain spot to keep a beam going, while you move ahead to use other tools. Pre-place the devices, hit record, pick up/place the item somewhere useful, then stop recording.
3. Fast Switches
Occasionally, there are two switches that must be hit in fast sequence—too quick for one person. With the Recorder, you can hit one, record that, then rush to the next during the replay.
4. Relaying Items
You can pass items between future-you and your ghost. For example, during the recording, carry a box to a tough location, drop it, then in real-time, pick up the box your ghost just “delivered.” This lets you “hand over” a device to yourself in clever ways.
Recorder Puzzle Tips
Plan Your Route
Before using the Recorder, scout the whole puzzle. Think about what items need to be where, and when: What should your ghost handle? What do you need in the present? Is there a timing trick involved?
Make Every Second Count
Your ghost only lasts as long as your recording, so don’t waste time standing still. Move efficiently—sometimes you’ll need two or three shorter recordings instead of a single long one.
Pre-Set Devices
If you’ll need a connector or jammer placed during the replay, set it up during your recording run. Sometimes it helps to drop or reposition items even if you don’t need them right then—future you might!
Use the Pause
It’s fine to stand still (even crouch or wait) during the recording if you need to delay your ghost's action for timing’s sake. For example, wait a few seconds before moving, so you and your ghost avoid colliding or shutting each other out.
Watch Out for Item Overlaps
You and your ghost can’t both pick up the same object at the same time. Always let your ghost handle a device before you try to interact with it in real time, or vice versa, to avoid weird item glitches.
Example Solutions
Let’s illustrate how a typical Recorder puzzle flows:
Puzzle Setup: There’s a pressure plate that opens a door, but it’s far from the gate, and you only have one box.
Step 1: Hit record, pick up the box, carry it over, and stand on the plate for about 10 seconds.
Step 2: Stop recording. Now, as your ghost replays those actions, you race through the open door.
Step 3: If needed, you can record a second run—maybe now carrying a connector and aiming a beam at a distant receiver, opening up the final segment.
Some later Recorder puzzles layer in several steps, requiring precise teamwork between live and ghost players. Don’t be afraid to experiment; most Recorder mistakes are reversible by simply re-recording.
Troubleshooting Recorder Puzzles
- Did an item “snap” away or disappear? You or your ghost probably tried to grab it at the same time. Make sure only one version of you handles something per recording.
- Ghost not opening a door long enough? Try recording a longer take, or stand still on the plate a few extra seconds.
- Out of time? If your ghost runs out before you finish moving, try splitting the actions into multiple shorter recordings, or plan a more direct route.
Advanced Recorder Tricks
- Use the ghost as a human bridge—for example, record yourself pressing a plate, then in the present, drop an item on top of your ghost, or time it so you both interact with different elements at once.
- Pull off timed swaps: record yourself prepping items, then swap their positions during the replay.
- If a puzzle feels “impossible,” double-check if you can hand off from ghost to live you, or take advantage of items dropped by your ghost for creative solutions.
Mastering the Recorder gives you a huge leg up on The Talos Principle’s late-game puzzles. It rewards clever planning and makes you feel like you outsmarted the system. Remember—if at first things seem overwhelming, pause, think through every action you’ll need from yourself and your ghost, then press record and get creative!