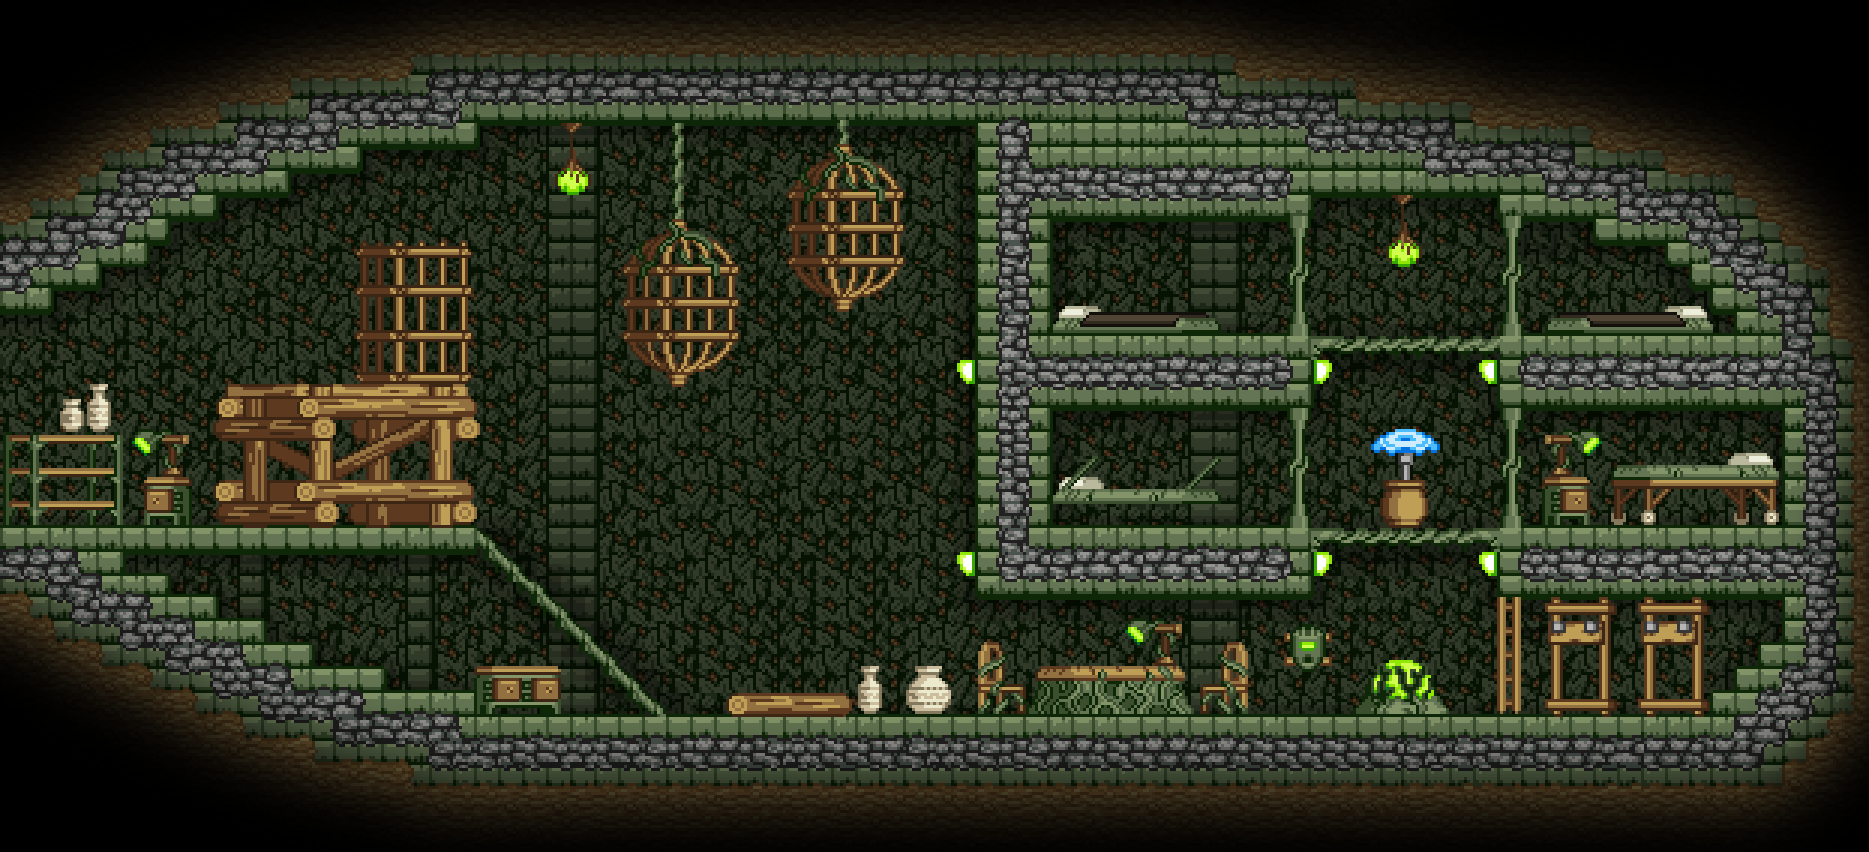
Starbound Base Building and Design Guide
Discover how to choose ideal planets, craft efficiently, fortify defenses, and optimize your perfect Starbound base with this comprehensive guide.
When I first started playing Starbound, I spent hours roaming planets, collecting materials, and building tiny, boxy shelters just to survive. But after a while, simple huts and cluttered storage piles weren't quite enough. Base building in Starbound isn't just about protection--it's an opportunity to personalize your corner of the universe, creating spaces that are functional, comfortable, and uniquely yours. Whether you're designing an efficient crafting hub, a sprawling agricultural center, or just a cozy interstellar home, thoughtful planning and creativity make a huge difference. Getting a handle on building mechanics, choosing appealing designs, and organizing your base layout effectively can transform your gameplay experience, offering a true sense of accomplishment and character in your Starbound journey.
Selecting Ideal Planet Locations
One of the coolest things about Starbound is definitely getting to pick the perfect planet for your space headquarters. Sure, you could just set up a shack on literally the first random asteroid you bump into, but choosing a better planet means fewer problems and way more fun down the line. Before starting your build, decide what your specific goals are. Let's talk about some of the major points to keep in mind when scouting your ideal location.
Consider Climate and Biomes
Every planet has different biome qualities and weather patterns that radically affect your base living situation. Planets can range from cozy forests and lush jungles to dry deserts, freezing ice worlds, and even planets drenched in acidic rainstorms. Take a minute to really evaluate how these biomes impact the direction you're taking your base.
- Lush and Forest Planets: Usually beginner-friendly with gentle weather, easy access to abundant trees, rich soil, and ample resources for early-game builds. If your base idea focuses on farming or quaint aesthetics, forest worlds are a relaxing choice. Just keep an eye out for occasional rainfall and friendly wildlife getting a bit too cozy.
- Desert and Savannah Planets: Generally sunny, dry, and perfect if crops aren't your primary reliance. These planets let you build expansive top-side bases without constant environmental hassles. Solar panels here are particularly effective due to clear weather, reducing your reliance on fuel sources. Watch out, though--dust storms still pop up occasionally.
- Snow and Tundra Planets: These chilly worlds are visually striking but require a bit more prep. Heating solutions are required here--campfires, space heaters, or warm clothing--to avoid freezing to death. However, if you enjoy an Arctic vibe and have the resources to maintain inside temperature, you'll appreciate how few aggressive creatures tend to lurk around these cold worlds.
- Toxic or Volcanic Planets: While these harsh biomes are attractive for players looking for late-game challenge and rare resources, building here demands caution. Lava and acid rain both damage your structures and your health. If you're aiming for a daring, fortress-like appearance, pick materials with high durability and resistance--shielded doors, rock-solid windows, and robust metal walls become must-haves.
Threat Levels and Enemy Activity
When landing on new planets, Starbound displays the threat level, showing how hostile that environment might be. Low-level planets are ideal early-game choices, letting you build and explore relatively peacefully. As you progress, you might pick planets with higher danger levels.
But here's the thing: setting up bases on threat-heavy planets means investing more into defenses. Turrets, security mechanisms, and well-placed spikes or walls become necessary for pushing back aggressive wildlife and unfriendly natives. Think about it--do you prefer putting more resources into protective measures, or would you rather spend that time and energy on creative design and decoration?
Proximity to Key Resources
Your base should provide easy access to items essential to your current gameplay. Always investigate your new planet thoroughly for nearby resources and NPC settlements before diving headlong into construction.
- Ores and Metals: Look for planets abundant in metals you need for your base's expansion. If your playstyle leans toward advanced technologies and futuristic looking structures, heavily mineralized planets allow easy access to alloys and advanced crafting without constant travel back and forth.
- Settlements and Villages: Finding a planet with nearby NPC settlements makes things so much easier. Allies provide opportunities for trading and quests, not to mention occasional collaborations. While NPC villages do spawn enemies sometimes--in the form of bandit attacks and hostile invasions--they generally add features to your home planet, making it feel lively and unique.
- Fuel Availability: Consider nearby access to fuel sources like moons, which often orbit planetary systems. Regular space travel and exploring far-away galaxies make easy-access fuel key to convenience and speed.
Terrain and Layout Potential
Terrain makes or breaks ambitious base projects. Take a little extra exploration time to navigate and assess a planet's overall terrain. Moderately flat areas near hills or mountains allow flexibility for sprawling bases, farming, or underground facilities.
- Flat areas: Open flatland simplifies building and layout for large projects. Extensive gardens, landing pads, and spacious buildings work best here, ensuring minimal landscaping headaches.
- High elevations or Mountains: A mountainside or cliff-side build can look spectacular, but can require heavy terraforming and careful scaffolding to keep things stable. Great for aesthetics, less ideal if you're in a rush or lacking resources and tools.
- Caves & Underground Spaces: Building underground provides excellent defense and weather protection. Burrow inside hill or mountain bases for hidden facilities, storage zones, research outposts--or create elaborate tunnels for easy resource mining.
Travel Convenience & System Placement
While planets feel isolated, don't lose sight of the bigger Starbound picture! Your base planet doesn't exist alone--it's part of a system and connected to other resource-rich worlds and docks.
- Star system proximity: Consider planets located close to major trading hubs or gate outposts. The fewer jumps you have to take between your base and key points, the more enjoyable your Starbound experience becomes.
- Easy Shuttle Access: Creating landing pads and convenient beam-down spots ensures traveling to and from your home is frictionless, making crafting, storage management, and resource gathering way less tedious.
Finding the sweet spot between climate, threat level, resources, terrain, and convenience sets you up for success in all your base-building ambitions. Making smart choices now cuts back annoyance later. And remember, your selection directly shapes your gameplay--so take a little extra time scouting locations before laying foundations and making this piece of the universe truly your own!
Efficient Base Designs
Creating an efficient base in Starbound isn't just about style points--it’s about making your virtual home work smarter, not harder. A well-designed base reduces wasted movement, simplifies resource management, and helps you survive tough planetary conditions without unnecessary hassle. Let's look at some key principles to make sure your base is efficient, practical, and stress-free.
Plan Your Base Layout Intentionally
Stop for a moment before dropping all your crafting stations and storage boxes in random spots. An organized floor plan can save you tons of time later. Think about making "zones" within your base:
-
Workshop Areas: Group crafting stations close by, such as your furnace, anvil, kitchen station, and crafting table. Having everything handy streamlines crafting sessions without making you wander all around your home planet base.
-
Storage Hubs: Keep storage chests organized near their matching crafting stations. For example, place a container for raw ores and bars next to your furnace, or ingredients storage by your kitchen. Label items clearly by category--ammo, building blocks, ores, food--to quickly find what you're looking for later.
-
Farming and Food Production: Position gardens and animal enclosures near the cooking area. This simple method cuts travel time significantly, minimizing tedious runs across your base carrying produce or meat each time you cook a batch of meals.
-
Resting & Healing Areas: Beds, healing equipment, and medical stations are good to centralize away from busy, functional zones. You want quick healing and resets between adventures without dodging furnaces and crafting tables.
With careful zone organization, everyday activities pick up speed and efficiency, while reducing your frustration.
Optimize Power Generation and Wiring
A big part of efficiency comes down to smart power generation and wiring strategies. In Starbound, certain equipment requires constant electricity or energy inputs--lights, automatic doors, wiring gates, teleporters, and refrigerators, among others. Here's how you make it painless:
-
Smart Wire Placement: Aim to place wiring behind walls and under floors, both hidden and clearly structured. It prevents clutter and ensures wires don't accidentally trigger traps or doors unintendedly. Color-coding (like red for power input, blue for door automation) can add clarity and save you headaches during later expansions.
-
Solar Arrays for Simple Efficiency: On planets with stable and sunny weather, solar-powered designs pay off tremendously. Solar panels generate renewable energy that's cost-effective for powering appliances and lighting setups--just don't forget backup batteries for nighttime or cloudy weather.
-
Backup Power Sources: Diversify energy sources, especially for harsher climates or underground bases. Generators powered by coal or oil offer stable backups if weather prevents solar panels from functioning efficiently.
-
Wireless Solutions for Convenience: Late-game tech upgrades open wireless wiring possibilities. This technology makes creating clean, streamlined connections a breeze, eliminating the nightmare of tangled wires entirely.
Integrate Defense Strategically
Even on safer planets, enemy visits are inevitable sooner or later. Efficient defenses give protection without turning your cozy home into an unsightly fortress. Here’s a smarter way to approach security:
-
Automated Turrets: Spaced evenly and positioned near major entrances or high-traffic areas, turrets tackle invaders so you don't have to run back each time you detect enemies lurking around.
-
Clearly Defined Entrances and Exits: Limit your base to a handful of easily defensible entrances and exits. Narrow corridors or bottle-neck sections make it easier to control invasions, minimizing resources spent on defense and maximizing comfort and efficiency.
-
Alarm Systems and Sensor Traps: Pressure plates, beam sensors, and alarm lights can provide passive-defense visibility. This way, you get alerted early to approaching threats without cluttering the base too heavily with defensive clutter.
-
Natural Defense Integration: Clever terrain manipulation helps with defense efficiency. Dig deep pits, build water moats, or leverage terrain height--such as cliff ledges--to naturally limit enemy access paths, saving energy and resources you'd normally use on complex security setups.
Ease of Access and Mobility within Your Base
Navigating your base with ease leads to a more enjoyable game experience. Instead of flying or jumping awkwardly between rooms or facilities, design clear access paths and transportation:
-
Elevators and Rail Systems: Efficient, fast vertical and horizontal transit saves a ton of wasted travel time, with elevators or powered rail carts providing convenience especially in large-scale or multi-level bases.
-
Dedicated Beam-Down Spots: Positioning teleporters or landing pads thoughtfully cuts tedious walking significantly. If your crafting hub is located deep underground or at the basement of your base, consider installing teleporters nearby for one-click fast travel from outside.
-
Strategic Light Placement: Bright, clear lighting in all passages, hallways, and rooms reduces confusion at night or underground. This small measure makes exploring and using facilities smoother, easier, and much less annoying.
Expandability: Leave Yourself Room to Grow
Don't underestimate how quickly your base's needs might change. Future-proof designs offer easy growth without constant rebuilding headaches:
-
Modular designs: Keep things flexible by designing base components (workshops, storage sections, farms) to be easily rearrangeable or rearranged later on without massive teardown.
-
Empty Spaces: When plotting out your base, leave open spots between major zones or along the perimeter that allow future additions without massive reconstruction efforts.
-
Scalable Infrastructure: Larger wiring pipes, extra storage agglomerates, and expandable power setups (like adding additional solar arrays or power cells to existing infrastructure) save tons of annoyance down the line.
There you have it--a straightforward, down-to-earth checklist that helps you build efficient, practical bases instead of confusing clutter. Taking a bit more planning into your base designs saves hours later while freeing your attention to enjoy Starbound to its fullest. Remember, a strong home in the universe pairs convenience with security, letting you tackle adventures head-on without constant base management frustrations. Happy building!
Advanced Crafting Stations: The Key to Unlocking Starbound's Best Gear
Once you've set up basic crafting and built a cozy base, it's time to level up your workshop. Advanced crafting stations in Starbound aren't just cooler versions of basic benches--they open up entirely new recipes, powerful gear, and essential upgrades to survive harsher environments. Let's break down the main advanced stations worth investing your resources into, how to build them, and, most importantly, why you need them.
Atomic Furnace: Craft Metal Ingots Like a Pro
Your regular furnace is fine for quick iron or copper smelting, but mid-to-late-game materials demand a beefier option. Enter the Atomic Furnace. This high-temp beast makes refined alloys needed for advanced tech, armor, and weapons.
How to Craft an Atomic Furnace
- Inventor's Table Upgrade: Upgrade your Inventor's Table into an Engineer's Table first.
- Materials Needed: Durasteel Bars (10), Glass (4), and Volatile Powder (20).
- Process: Craft it at your Engineer’s Table after gathering the materials or trade them from merchants in high-tier settlements.
Why It’s Worth Building
- Unlocks alloys like Durasteel, Titanium Bars, Aegisalt, Violium, and Ferozium.
- Crucial for crafting top-tier armor sets and powerful endgame weapons.
- Essential if you're aiming to progress into dangerous high-level planetary environments.
Replicator Station: Your Gateway to Legendary Equipment
Got the Atomic Furnace covered? The Replicator Station is your next must-have. It transforms refined metals into specialized weapons, armor, and backpack upgrades tailored to your preferred playstyle.
How to Get a Replicator
- Requirements: Crafted at the upgraded Engineer’s Table using Durasteel Bars (20). Easy enough after you have the Atomic Furnace going.
- Upgrade Paths Available:
- Manipulator’s Table: For staff and wand users (think mage-like gear).
- Accelerator’s Table: For ranged fighters, crafting armors and guns that significantly boost damage output.
- Separator’s Table: For melee lovers seeking highly protective armor and damage-dealing swords, axes, and hammers.
Why You Need It ASAP
- Essential crafting table to access class-specific gear.
- Lets your character specialize heavily into ranged, melee, or magic-like weapons.
- Without one, high-tier weapons and specialized armor are out of reach, tying your hands behind your back when tackling endgame planets.
Pet Station: Improve and Equip Your Adorable Allies
Why fight alone? Pets and captured creatures have tons of potential to help during battles or provide cozy companionship between adventures. The Pet Station takes your furry (or scaly, feathery, buggy) friends to their full fighting strength by crafting special armor and collars.
Building Your Pet Station
- Craftable at the Engineer’s Table.
- Requires Durasteel Bars (20), Titanium Bars (20), and Silver Bars (5).
- Straightforward to build, though materials may require some planetary exploration.
Upgrade Your Pets’ Performance
- Develop stronger pet collars for speed, healing, defense, or combat boosts.
- Provide your combat companions actual armor to survive tougher fights.
- Increases pet survivability drastically, making them far more reliable for tough planetary expeditions.
Agricultural Station: From Farm to High-Tech Feasts
Food isn't just survival--well-fed characters gain buffs and regeneration, giving you a substantial advantage. The Agricultural Station elevates your farming from basic salads and canned foods to robust, buff-filled meals.
How to Build One
- Crafted through your upgraded Engineer’s Table.
- Materials are attainable mid-to-late game: Durasteel Bars (15), Copper Bars (5), and Timber (20).
- Sets up smoothly once your Durasteel production runs steadily.
Benefits in Your Gameplay
- Creates nutrient-rich foods that boost movement speed, health regeneration, and combat effectiveness.
- Lets you cultivate advanced seeds and fertilizers to increase harvest speeds and yields.
- Food buffs amplify survivability during challenging dungeons or boss fights--a substantial tactical advantage.
Pixel Compressor and Refinery: Manage Your Wealth Effectively
Late-game Starbound gives you plenty of pixels--the universal currency--but also plenty of ways to accidentally lose them. Crafting the Pixel Compressor and Refinery helps manage your wealth by turning loose pixels and surplus ores into convenient tradeable storage blocks or more pixels.
Setting Them Up
- Built at an Engineer's Table after your Atomic Furnace is functioning.
- Materials are mid-tier materials like Durasteel (15), Gold Bars (10), and Silver Bars (5).
Smart Pixel Economy
- Pixels in a safe form: No risk losing thousands of pixels during exploration deaths or failed missions.
- Refine surplus ores: Convert extra copper, silver, or gold ores into pixels, making them meaningful assets rather than inventory clutter.
Sewing Machine and Spinning Wheel: Fashion and Functionality in One
Advanced doesn't always mean combat--sometimes you just need a fresh look with practical benefits. With the Sewing Machine (crafted from the upgraded Spinning Wheel), craft durable clothing and environmental protection gear.
Crafting Steps
- First, craft a Spinning Wheel through your Engineer’s Table (Timber, Plant Fibre, and String--easy enough).
- Upgrade this Wheel to a Sewing Machine using Durasteel (10) and Cotton Wool (5), quickly expanding your wardrobe.
Gear Benefits
- Produces specialized clothing providing cold, heat, radiation, and poison resistance early on.
- Easier planetary exploration across risky environments without relying solely on armor.
- Offers aesthetic diversity through heaps of decorative clothing, beddings, flags, and even lovable stuffed animals.
Advanced crafting stations take your Starbound base from mere survival shelter to fully equipped HQ civilizations dream of. Invest in these tables and workstations early. They significantly streamline your progression, prep you to survive and thrive on high-tier planets, and let you craft the right gear--no matter your style. A more capable, resilient, and stylish pixel persona awaits!
Base Defense Mechanisms: Protecting What's Yours
Building your home base in Starbound can take hours of sweat, tears, and pixel-crunched fingers. Watching it get shredded by mobs or raided by bandits can be frustrating, to say the least. Keeping your base safe means installing the right defensive tools and strategies. Let's talk about some key methods you can put to immediate use, ensuring your space home stays intact and secure.
Crafting and Installing Defensive Turrets
Think of turrets like your automatic bodyguards--always on alert, ready to blast away intruders. They're essential, especially if your base sits on high-threat planets packed with aggressive enemies.
Where and How to Craft Turrets
- Wiring Station: Turrets require crafting via a Wiring Station, built from your Engineer's Table. Using 10 Durasteel Bars, 1 Battery, and 1 Circuit Board per turret, they're not too expensive once your workshop gets up and running.
- Battery and Circuit Board: Batteries are crafted using Poison and Copper Wire, while Circuit Boards need Copper Wire and Silicon Boards (from sand-smelted silicon). Have an extraction run or two ready to collect ample silicon-bearing sand.
Placement and Wiring
Getting your turrets positioned smartly makes all the difference. Put these automated defenders at choke points--near entrances, on rooftop corners, or where enemies often spawn and approach. After placement, wire them up to a stable power source (solar arrays or generators), turning them online permanently.
Ensure each turret has a clear firing line. You don't want friendly fire incidents (yes, they can damage you!) or wasted bullets, so keep them unobstructed and facing enemy entry points.
Setting Up Traps: Pitfalls, Electric Panels, and More
Turrets handle threats at range, but some mobs slip through or overpower your initial line of defense. That's where traps shine.
Spikes and Lava Pits
Traps don't have to get high-tech: a simple, deep pit lined with spikes or filled with lava stops unsuspecting mobs in their tracks. Place spikes crafted from iron bars or titanium bars via your standard crafting table. Lava buckets, gathered from volcanic planets, create natural, long-lasting defensive barriers below your walkways or base entrances. Just install a retractable bridge or doors above it to pass safely.
Electric Panels
More high-end? Power up electric spike traps or Tesla Panels. Crafted via your Wiring Station with Durasteel and Silicon Boards, Tesla Spike panels electrify intruders, dealing steady damage. Couple them with turrets for maximum effect--electric stuns slow down enemy progress while your turrets finish them off.
Again, wiring comes into play here--route power cleverly to toggle traps on and off safely before you walk over them. Accidental electrocutions at your doorstep aren't fun!
Doors and Gates: Choosing Defensively-Minded Entryways
Doorways represent vulnerability, clear paths enemies exploit consistently. Reinforce your base entrances with sturdy doors like Durasteel Doors or Large Airlocks to keep threats at bay longer, giving yourself time to react.
Secure Door Crafting
- Durasteel Doors: Made at your crafting table, these doors require Durasteel Bars (4) and are tough--they take longer to break down, buying you precious moments.
- Airlocks and Large Doors: Larger structures benefit from even sturdier airlocks--crafted using Durasteel (10), Copper Wire (20), and Glass (5). Airlocks are thicker, slower-opening, giving you added survival layers between you and attacking mobs.
Wiring Alerts and Sensors: Know What's Coming
Forewarned is forearmed, as they say. Wiring up sensors adds extra intelligence by triggering alarms when hostile or unwanted visitors approach your base perimeter.
Matter Sensors and Alarms
- Crafted with your Wiring Station using Silicon Boards (1), Laser Diodes (1), and Gold Bars (2), Matter Sensors detect mobs when they come close.
- Connecting sensors to wired alarms or lights sends immediate warnings about approaching threats, letting you rush back from farming sessions or crafting projects to defend your base effectively.
Strategically placed sensors around edges of your encampment give early warning capability--you'll feel better taking extended explorations when knowing you'll get alerted to hostile visitors.
NPC Guards & Crew Members: Your Personal Army
The ultimate defense layer is, well, people. Recruiting NPC Guards or crew members gives your base active defenders that fight back, deterring invasions seamlessly.
Recruiting and Housing NPC Guards
Guards appear when you build specialized rooms, complete with armor and weapon storage. Use Colony Deeds (crafted using the Colony Station via Engineer's Table) alongside weapon and armor-themed furniture to summon guards. These NPC wardens actively patrol and confront mobs, substantially reducing workload from other automated defenses.
Crew Members, recruited from missions or towns, also defend your home base enthusiastically. Stationing them near entrances ensures aggressive mobs never have easy access, providing defense round-the-clock.
Terraforming and Terrain Manipulation: Defense Shaped by Environment
Using planet terrain itself gives creative and natural protection against mobs.
Artificial Mountains and Moats
Carve out steep cliffs around your base or construct artificial moats--pools filled with water, lava, or dangerous materials--to keep most non-flying threats from ever approaching physically.
Positioning turrets and ranged defenders atop cliffs or behind moats grants clear lines of sight, making enemy approaches risky. Environmental fortifications can drastically reduce the number of enemies that must be handled personally, saving you from constant security checks and energy expenditures.
Smart, efficient defenses make gaming life simpler--minimizing unwanted interruptions, frustration, and setbacks from destroyed bases. Mixing automated tools like turrets and traps, better fortifications through doors and terrain management, and recruiting trustworthy NPCs offers balanced, layered defenses you won't regret setting up. Take time early, invest in defenses wisely, and have fewer worries exploring Starbound's deepest planetary challenges.
Expansion and Optimization Techniques
Once you've established solid defenses and a secure perimeter for your base, you'll eventually feel the need to enlarge and improve your structure. After all, in Starbound, your space-bound lifestyle rapidly demands more specialized rooms, ample storage, farms, and even small colonies. Here we'll highlight some effective methods for efficiently expanding your base and optimizing your layout to save both space and resources.
Verticality: Build Upwards, Not Just Outwards
Your first instinct might be to expand horizontally--claiming vast swaths of planetary terrain to grow crops, build storage, and house settlers. But horizontal growth has drawbacks. It can lead to sprawling bases taking too long to walk through, becoming vulnerable as defenses thin out over large areas.
Instead, think vertical--stack structures over one another:
- Multi-level structures use space efficiently. Stack crafting rooms above storage chambers, residential housing atop recreational areas, and your farms suspended above workshops to reduce backtracking. With platforms, stairways, or even elevators (vertical rails powered by Wire Stations) crafted from Durasteel and Copper Wire, climbing levels remains easy and painless.
- Watchtower Constructs: Slim vertical towers work great for storing less-used items. Isolated watchtowers connected via short horizontal walkways protect your main complex by keeping turrets and NPC sentries out of enemy melee range and high up where they can do their job effectively.
Vertical construction conserves terrain for natural defenses, traps, and aesthetic purposes without sacrificing vital functions or safety.
Dedicated Specialty Rooms: Saving Time Through Organization
The bigger your base, the easier it becomes to misplace items and waste time searching chests or wandering confusing corridors. Clear organizational methods and specialized rooms can eliminate these frustrations entirely.
- Crafting Rooms: Centralize refining and crafting stations (Anvils, Furnaces, Inventor’s Tables, Atomic Furnaces, Wiring Stations) into one area. Also include categorized chests holding crafting essentials like metals, ores, and electronic components. A well-structured crafting center significantly speeds up equipment production.
- Farming Hubs: Plant crops under glass domes or light-emitting LED rods (wired to renewable solar or generator power)--this ensures optimal plant growth day and night. Storage bins placed at farm boundaries handle harvested goods centrally and make resource management a quick, convenient task.
- Armories and Weapon Safes: Store armor, weapons, and ammunition neatly inside specialized armory rooms. Keeping weapon chests near main entrances makes restocking defenses simpler, while armor stations near your spawn point let you gear up instantly upon returning from expeditions.
Thoughtful, strategic placements ensure organized storage, reducing downtime and confusion during urgent moments.
Efficient Wiring: Optimizing Energy Consumption and Network Complexity
As you expand your defenses, lighting, and technology, your wiring system inevitably grows complex. But tangled wiring can get confusing, making troubleshooting issues time-consuming. Smart wiring organization matters:
- Using Logic Gates: AND gates, OR gates, timers, and switches reduce power waste by smartly distributing power only when you need it. Want lights to only trigger when you're nearby? Wire proximity sensors into AND gates connected to overhead lights, conserving electricity when rooms are inactive.
- Separate Power Networks: Consider splitting large bases into smaller power grids. Power-critical items--like defense systems, refrigerators, and life-support systems--on a stable renewable grid of solar panels and large batteries. Lights, doors, non-critical wiring stay on secondary generators or wind turbines. This prevents catastrophic failures affecting essential base components in power loss events.
- Keep Wiring Paths Neat: Minimize long wire routes by setting power generators centrally or using junction boxes. Shorter wire paths simplify future maintenance or expansion, letting you visually follow circuits faster when modifications arise.
Neat, flexible wiring reduces frustration, saves power, and keeps more advanced technologies working reliably.
Colonies and Modular Housing: Expand Quickly and Sustainably
Adding colonies of NPC merchants, crew, and settlers help gather resources passively and defend your ever-growing home turf. Modular designs simplify constructing housing quickly to scale your colonies smoothly:
- Prefabricated Modules: Create standardized module patterns for bedrooms, shops, and storage units. Use your Matter Manipulator to copy and paste blocks easily when replicating them across colonies or base sectors. This cuts building times dramatically, getting productive settlers housed faster.
- Compact Apartment Blocks: NPC housing doesn't demand giant spaces--efficient small apartments stacked together vertically in manageable buildings fit more settlers per square foot than scattered cabins. Placing these near colonies' trading hubs or lounges increases resident comforts and efficiency in exchanges.
- Centralized Infrastructure Hubs: Keep shared facilities like hospitals, merchant kiosks, and Crew Stations nearby. Central hubs support NPC happiness while increasing efficiency of activities and avoiding resources scattered around the colony randomly.
Modular accommodation helps you scale your bases and colonies efficiently, letting you tap into passive income generation and benefiting from more NPC defenders quickly and easily.
Teleporters and Transportation: Traveling Efficiently Within Expanding Bases
Once your base spans great distances vertically or horizontally, mobility matters tremendously. Running from your crafting station to your farmland repeatedly wastes huge chunks of gameplay time. Thankfully, Starbound gives you some elegant solutions:
- Teleporters: Craft teleporters at your Wiring Station (with Core Fragments, Gold, and Durasteel bars) to quickly jump between separate bases, remote outposts, or key internal locations. Save considerable travel time by installing a primary central teleportation hub that quickly connects distant base sections with ease.
- Rail Systems: Place Rail Platforms and Elevator Rails vertically or horizontally to create fast transportation lines between essential base areas. Rail-based transport saves you from repeatedly hopping stairs or crossing entire biomes by foot. Crafted at a Rail Crafting Table, these systems turn distant storage facilities, housing, or watchtowers into quick arrivals instead of dreaded long travels.
Efficient transportation isn't just convenient--it transforms your expanded base from a cumbersome den into a streamlined haven of productivity and defense.
With thoughtful techniques, expanding and optimizing your Starbound base becomes straightforward and sustainable--no more confused item searches or tedious long walks between different areas. Build vertically, craft specialized rooms, optimize wiring systems, recruit helpful colonists, and invest in teleportation or railways. Follow these tips and you'll confidently create a well-managed, spacious fortress that makes interplanetary exploration a genuine joy.