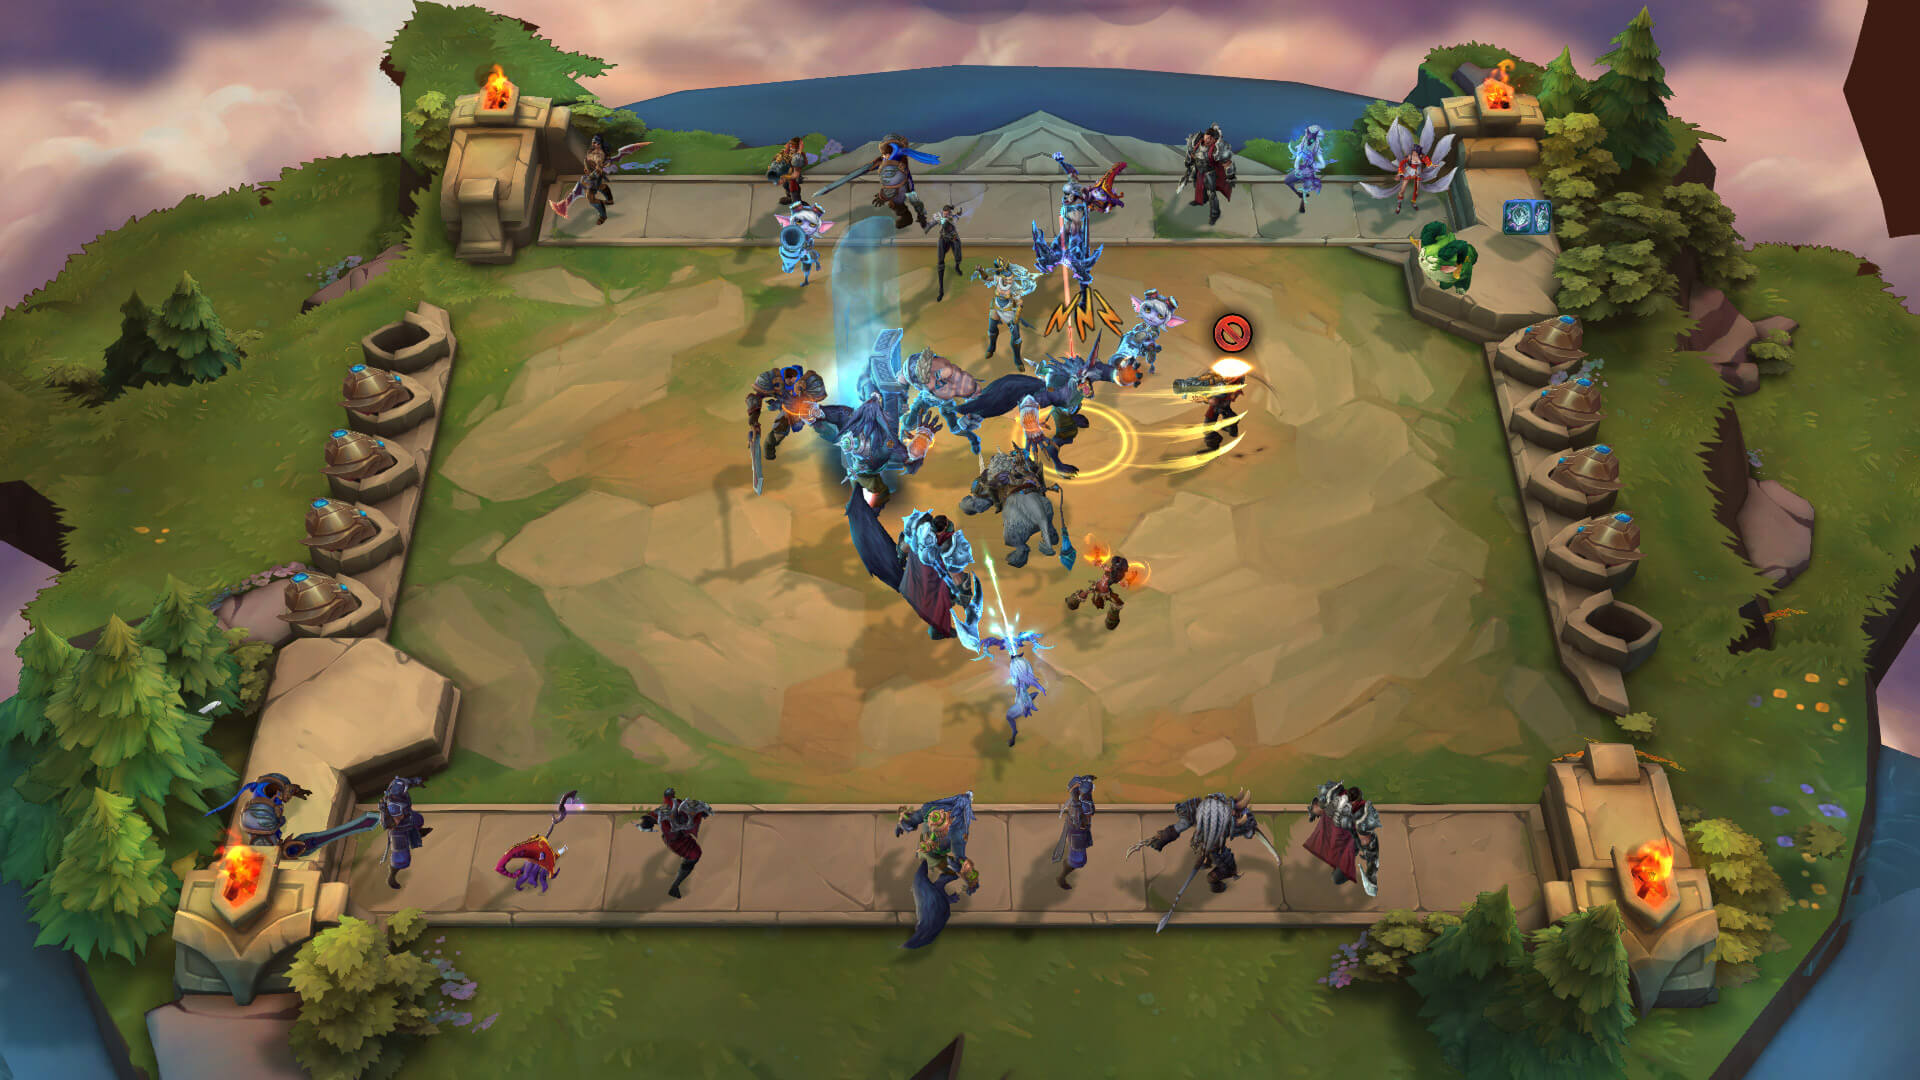
Teamfight Tactics Champion Synergies and Strategies Guide
Master Teamfight Tactics with tips on champion synergies, team comps, items, economy, and positioning for a winning edge in every match!
If you’ve spent any time with Teamfight Tactics, you’ve probably noticed that assembling a winning lineup is about a lot more than just picking your favorite champions. Each game is a puzzle where champion traits and synergies shape everything from your early gameplay decisions to your endgame composition. Figuring out how these combinations work—and how to adapt your strategy when things don’t go according to plan—is a big part of what makes TFT so addictive. For anyone looking to sharpen their skills, getting a deeper understanding of how to build around synergies and when to shift gears can make the difference between a lucky top-four finish and consistently edging out the competition.
What Are Champion Traits?
Champion traits are core descriptors that define each character in Teamfight Tactics. Every unit in TFT has at least one (often two) defining traits—think of these as affiliations or specialties. Traits might refer to their role (like Bruiser or Sorcerer), their origin (like Noxian or Piltover), or even special tags unique to the current set. These labels aren’t just for flavor. When you field multiple champions sharing the same trait, you activate powerful bonuses. It’s these bonuses—automatic, often game-changing effects—that drive most team strategies.
For example, if you field several Slayers, your team gains bonus stats or extra abilities based on the Slayer trait’s tiered effects. Stack enough, and the bonus becomes much stronger. The whole system encourages you to mix, match, and focus your team building.
How Trait Bonuses Work
Each trait has a breakpoint or a set of breakpoints. Breakpoints are just the number of units needed to get a certain bonus. For instance, you might need three Challengers for a basic bonus, and six for a stronger one. When you hit a breakpoint, all champions with that trait benefit—greater attack speed, more shields, extra spell power, whatever the trait description says.
These effects always stack up; getting more of a trait means always more, never less. The game highlights these active traits with colored icons, so you don’t have to memorize them all mid-match.
Example: Duelists
- 2 Duelists: Gain minor attack speed.
- 4 Duelists: Gain more attack speed.
- 6 Duelists: Attack speed jumps again—you get the idea.
So, the more Duelists you have, the faster your Duelists attack.
Origins vs. Classes: The Two Types of Traits
TFT splits traits into two categories: origin and class. Think of origins as the champion’s background or faction, while classes describe what a fighter actually does in combat.
- Origin traits: Piltover, Noxus, Zaun, etc.
- Class traits: Sorcerer, Bruiser, Slayer, and so on.
Most champions will have one of each. Some might even have two origins or unique hybrid traits, especially during special events or mid-set updates.
Trait Synergy and Team Building
Building around traits is more than just stacking as many as you can. Some traits are stronger in the early game but fall off later, while others are the opposite. The trick is knowing when to lean into a certain trait, and when to pivot. Let’s break down some key approaches:
Focus on One Trait
If you get lucky early and find a bunch of champions from the same trait (like 3 Sorcerers), you might want to stick with that synergy. This helps you win early rounds, saving health and gold.
Mix Traits for Wider Coverage
Some of the best teams aren’t just one trait but blend strong frontliners with powerful backline damage. For example, pairing Bruisers (who soak damage) with Sorcerers (who deal magic damage) gives you both durability and offense, instead of all-in on one style.
Pivoting
Maybe you’re aiming for a Sniper team, but you keep getting Duelists. Sometimes, it’s better to switch your build around the pieces you actually find. Flexibility is a big deal in TFT—adapting to your board and what the shop offers.
Teching In Smaller Traits
Some traits offer decent bonuses even at the smallest breakpoint. Tossing a stray Alchemist or Paragon into your team might boost your whole squad even if their synergy doesn’t become your core.
How Traits Impact the Game
Traits shape your plan round by round. Hitting a strong trait synergy early might let you win streak and make more gold. Missing the breakpoint? Your team could fall behind on raw power compared to other players.
Traits also set up bigger combos. Some traits directly benefit each other—think Duelists that work with Challengers, or Sorcerers with Invokers. Keep an eye out for traits that naturally fit together, and you’ll uncover hidden power in less obvious team builds.
Adapting to Patch Updates
Every TFT set adds new traits and tweaks existing ones. Patch updates can boost or nerf traits, directly affecting which compositions are strong. Staying up to date with the patch notes and leaderboard meta will give you a real edge. Traits that were mediocre one week could take over the meta after some buffs.
Key Terms to Know
- Synergy: The bonus effect gained by having multiples of the same trait.
- Breakpoint: The number of units needed to activate or upgrade a synergy.
- Trait: The class or origin that defines a champion's special properties.
Understanding how champion traits work isn’t just the first step—it’s an ongoing process as new sets drop and the rules change up. Staying sharp with traits will always give you a leg up in putting together those top-tier boards.
Team Composition Strategies
Success in Teamfight Tactics isn’t just about collecting your favorite champions and praying for a good roll. The best players think several turns ahead, mixing short-term gains with long-term goals, and constantly reassessing their board. This section is all about putting those champion traits to work in an actual team comp, from start to finish.
Drafting Your Comp: From Opening to Late Game
Your opening choices can lock you into a plan—or give you flexibility. Early on, you’ll pick up whatever’s strongest, but pay close attention to pairs, early trait bonuses, and useful items. Don’t force a comp just because you saw a streamer pull it off yesterday. Playing “open” for the first few rounds means you can switch to whatever the shop hands you.
Later in the game, you’ll want to start focusing your roster. Start selling off champions that don’t align with your main traits, using your gold to level up and add higher-impact units. The earlier you pivot toward your core comp, the more health you can save and the better your spot in the lobby.
Balancing Offense and Defense
It’s easy to go all-in on one idea—stacking a ton of carries or slapping together as many defensive traits as possible. The reality is, most winning comps need a mix. You want enough damage to eliminate enemy teams before they run through yours, but also enough frontline to protect your squishier units.
Key concepts
- Frontline units (like Bruisers, Guardians, and Vanguards) soak up hits and buy time.
- Backline carries (like Sorcerers, Sharpshooters, and Snipers) deal most of your actual damage but need to stay out of harm’s way.
- Supporting units can be tech picks like Mystics for magic resist, or Aegis for armor. Sometimes adding one is enough to swing a fight.
When planning your comp, try for at least two tanky champions up front and a couple powerful backliners. Avoid stacking your team with only glass cannons or only beefy tanks.
Building Around Core Champions
Every strong team is built around one or two core champions—these are your main carries. Your items, gold, and leveling decisions often revolve around getting these units to 2-star (or 3-star) and giving them the right gear. A comp built around a 3-star Jhin will look very different from one built around a 2-star Sona.
Know which pieces are essential, and which are just “nice-to-haves.” If your core champion is extremely contested (meaning, many players are fighting for that unit), consider a backup plan.
Flex Comps and Pivoting
Flex compositions are faves among high-skill players—they work with several different traits and can smoothly switch between core carries depending on what the shop offers. If your first plan isn’t coming together (for example, you can’t find enough Duelists), look for overlapping synergies and shared items. If you already have a bunch of Spellcaster gear, switching to a Sorcerer comp mid-game might be your best move.
Key signals for when to pivot:
- You have few or no copies of your desired core unit by stage 3-2.
- Multiple players are forcing the same comp.
- Strong upgrades for another synergy or trait are showing up repeatedly in your shop.
Don’t marry yourself to one idea—adapt and use what you’re given.
Managing Your Bench
Real pros don’t let their benches pile up with random half-baked champs. Keep only what’s useful for rerolling or pivoting. If you’re holding too many traits that won’t play into your endgame comp, sell for gold or swap them out to make room for upgrades. Every extra gold helps hit key levels or complete your team.
Recognizing Power Spikes
Some team comps have natural “power spikes” where they become much stronger. For example:
- Early-Mid Game: You can 2-star cheap units and activate an easy 3-unit trait bonus.
- Level 7-8: Time to find 4-cost and 5-cost champions for a big jump in board power.
- Hitting a Breakpoint: If adding one more Brawler brings you to 6 Brawlers, your frontline instantly becomes way beefier.
If you know when your comp will spike, plan your economy and spends around those turns. This lets you win streak, push for top 4, or close out the lobby.
Adjusting to Opponents and the Meta
Sometimes everyone in your lobby is chasing the same S-tier team. If eight players go for Duelists, most won’t finish high. Keep tabs on what others are building, especially if you’re slow to find your core pieces.
It pays to scout other boards mid-match—identify which synergies are being heavily played and consider less contested, but still strong, alternatives. With each new patch, “meta” comps can change. Stay flexible after every update, and never be afraid to test something new if your usual picks feel weak.
Positioning: The Final Touch
A good team comp falls apart if units are standing in the wrong place. Always check your positioning before a fight:
- Put tanks or crowd control units up front where they’ll soak attacks.
- Hide damage dealers in the back corners or behind tanks to keep them alive longer.
- Move units away from likely threats like Assassins (who jump to the backline) or Blitzcrank hooks.
A well-positioned comp can sometimes win even if it’s a little weaker on paper.
Wrapping Up Team Comp Strategies
TFT’s best team compositions blend focused core synergies with situational flexibility. Learning when to stick to your plan, when to switch directions, and how to read the flow of the match is what sets strong players apart. Keep an open mind, use your gold wisely, and remember—it’s rarely just about copying what’s “meta.” Mastering these strategies will help you find much more success, no matter which set or patch you’re playing.
Itemization Guide
In Teamfight Tactics (TFT), item choices can make or break your comp. Good items turn an average champion into a win condition, while poor choices can leave your powerhouses getting melted before they do anything. This section covers how item crafting works, which items to prioritize, tips for distributing your loot, and how to deal with less-than-perfect components.
Understanding Item Components and Full Items
Every game, you’ll collect basic components: items like B.F. Sword, Chain Vest, Giant’s Belt, and so on. Combining two components creates a complete item with unique effects. For example, putting a B.F. Sword with a Recurve Bow creates a Giant Slayer, while a Negatron Cloak and Tear of the Goddess will result in a Chalice of Power.
Knowing your components is step one. Some basic items you’ll see:
- B.F. Sword: Gives bonus attack damage.
- Recurve Bow: Extra attack speed.
- Needlessly Large Rod: Ability power.
- Tear of the Goddess: Starting mana.
- Chain Vest: Armor.
- Negatron Cloak: Magic resist.
- Giant’s Belt: Bonus health.
- Sparring Gloves: Crit chance or dodge.
Two of any component (except spatulas) mixes into a set full item. Unique effects vary, so always check the in-game item preview for specifics.
The Most Impactful Core Items
Some full items are reliable game-changers almost every patch. While these sometimes get tweaked, the following are often safe bets:
- Bloodthirster: Lifesteal on attacks. Best for durable carries (like Duelists or Melee DPS).
- Giant Slayer: Bonus damage to high-health targets. Good for dealing with tanks.
- Infinity Edge: Heavy crit damage. Staple for champions whose abilities can crit (like Jhin or Ezreal).
- Blue Buff: Tons of mana every ability cast. Key for champs with low-mana, spammable spells (think Ahri, Syndra, or Twisted Fate).
- Ionic Spark: Standard for melting backlines. Nearby enemies lose magic resistance.
- Warmog’s Armor: Vast health pool—great for beefy tanks.
- Sunfire Cape: Burns enemies nearby, ideal for frontliners.
Items like Redemption, Zephyr, and Morellonomicon remain underrated but can sometimes swing a fight.
Tailoring Items to Your Carriers
Each carry has a “dream” item or build. Here’s a quick cheat sheet for common archetypes:
- Physical DPS (e.g., Kai’Sa, Yone): Giant Slayer, Infinity Edge, Last Whisper.
- Magic DPS (e.g., Ahri, Vel’Koz): Blue Buff, Jeweled Gauntlet, Rabadon’s Deathcap.
- Frontline Tanks (e.g., Nautilus, Rell): Bramble Vest, Warmog’s Armor, Dragon’s Claw.
- Utility/Support (e.g., Sona, Soraka): Chalice of Power, Shroud of Stillness, Locket of the Iron Solari.
If you’re not sure, check popular builds or see which items the top players in your lobby use. Flexibility is valuable — sometimes just slapping a Bloodthirster or Sunfire Cape on an upgraded tank can carry you through several rounds.
Item Priority: Carousel, PvE Rounds, and Orbs
Carousels let you grab a specific item component, but priority is key:
- Early carousels, fight for versatile pieces like Bow, Sword, or Rod.
- Later, target “missing pieces” for your main carry’s best item.
- If what you need isn’t available, pick defensive items for your frontline, or even a Spatula if it synergizes with your comp.
- Pick up a Tear or Belt if you have several flexible options.
Adapt your item build on the fly. If Raptors toss you a Nat’s Belt and you’re overloaded with defensive parts, commit to tank gear for your frontline and plan your comp accordingly.
Dealing With “Bad” Item Drops
It’s not always Christmas in PvE rounds. What if you get stuck with awkward components?
- Combine “weird” parts into universal items like Redemption or Zephyr, which any comp can use.
- Stack tank items on any upgraded frontline champ if you’re missing a damage item.
- Don’t force meme builds. Patch together second-best choices if it gets your best champ online faster.
Remember: It’s almost always stronger to have finished items on upgraded champions than to “hoard” components waiting for the perfect combo.
The Power of Spatula Items
Spatulas are wildcard items. If you get one, you can transform the recipient into a new trait—like making a random unit into a Bruiser, Sorcerer, or Duelist. These are super powerful in high-roll games when you’re short one piece for a big synergy. Always check in-game or community guides for the latest spatula recipes, as they switch up with each set.
Spreading Items Across Your Team
Don’t dump everything onto a single unit unless you’re all-in on one carry. Full items boost main damage dealers best, but secondary items can help your support champs, backup damage, or key tanks. Spreading items increases both your flexibility and your odds of surviving niche fights.
Key tips:
- Two item tanks are usually enough; extra gear is better spent powering up a secondary carry.
- Try to space out threat—don’t put all your eggs in one basket, especially if assassins or Zephyrs are popular that patch.
Making Decisions in the Heat of Battle
When a fight’s about to break out, you don’t have time to overthink. Snap judgment calls happen:
- Is your main carry still 1-star, but another strong unit is 2-star? Gear the 2-star for a stronger board now.
- Know you’re about to lose streak or get knocked out? Drop extra items, even awkward ones, on upgraded units just to push out a win and keep your HP up.
React to the stage of the game. Early, prioritize offense to win streak and save HP. Mid to late, bulk up your front lines or shore up weaknesses as they show up.
Quick Reference Chart: Key Components
| Component | Most Common Uses | Tips | |-----------------------|----------------------------|--------------------------------------------------| | B.F. Sword | Damage, lifesteal | Great for almost any early carry | | Recurve Bow | Speed, on-hit items | Core for on-hit/attack speed carries | | Needlessly Large Rod | Spell Power | Priority for spell-slinger or caster teams | | Tear of the Goddess | Mana, spell spam | Ideal for quick-casting mages | | Chain Vest | Armor, tank items | Holds value for late-game frontlines | | Negatron Cloak | Magic resist, tank items | Turns into anti-mage pieces, flexible late-game | | Giant’s Belt | Health, Sunfire, Warmog’s | Good to have for chunky frontliners | | Sparring Gloves | Crit, dodge, utility items | Useful for both DPS and trickster combos | ## Conclusion
Good itemization is more than just copying builds—it’s about reading every game’s unique drop pattern, what your shop is offering, and your competition. Focus on completing useful items rather than chasing theoretical “best in slot” sets. Prioritize your main carries, shore up your front lines, and never let components rot on your bench too long. Play to your strengths each round, adjust to what you’re given, and smart item use will be one of the biggest boosts to your TFT climb.
Economy Management
Controlling your gold in Teamfight Tactics is one of the most important skills for getting top finishes. Whether you’re gunning for a win streak, picking up key units, or prepping for late-game power spikes, a well-managed economy can make or break your game. This section breaks down the essentials: how to earn, save, and spend gold so you always have options.
Understanding Gold Income
You’ll start every round with a certain amount of gold, and you earn more in several ways:
- Base Income: Everyone gets a flat amount of gold every round, starting at 2 and ramping up gradually.
- Interest: For every 10 gold you have at the end of a round, you get +1 extra gold, up to a max of +5 for 50 gold.
- Win Streaks and Lose Streaks: String together wins or losses and you’ll get up to + gold per round. Win streaks are usually safer since they keep your HP high.
- Player Kills and Stages: You’ll get bonus gold for beating monster camps (Krugs, Raptors, etc.) or knocking out other players.
Getting the most out of your gold comes from balancing all these income sources, especially interest.
Playing for Interest
The 10, 20, 0, 40, and 50 gold breakpoints are key. Whenever possible, keep your gold at a multiple of 10 by the end of the round to get maximum interest.
Example
If you end a round with 27 gold, you’ll only get +2 interest. Selling a weak unit (or waiting a round to hit 0) nets you + instead.
If you’re not sure whether to buy that extra upgrade, check if dropping below a breakpoint is worth the immediate power boost, or if you’re okay sitting tight for a round.
Win and Lose Streaks
Streaking is a reliable way to get ahead early:
- Win Streak: Focus on building a strong board and spend gold for crucial early unit upgrades or items. You’ll often want to level up on earlier stages to hold this streak, even if it means having a bit less gold.
- Lose Streak: Sometimes a weak board at the start can be a blessing (as long as you don't drop to super low HP). Losing 5+ rounds on purpose nets streak bonus gold, plus you get earlier carousel priority for item choice. Just make sure you plan when to pivot and stabilize before things get too dangerous.
Never let a streak (win or lose) break accidentally. Avoid spending in the middle unless you know it’ll flip the result and you’re ready to switch strategies.
When to Level Up
Leveling increases your odds of seeing higher-cost units in your shop, and lets you fit more units on the board. Typical leveling patterns are:
- Aggressive: Level up earlier, especially if you’re win streaking. Hitting Level 5 or 6 early increases your power to keep streaking.
- Economical: Slow-level and build interest, only leveling when you absolutely need to stabilize (usually Stage -2 or -5).
If you’re aiming for a specific high-cost champion or late-game synergy, start banking gold early so you can rapidly level up during Stage 4 and beyond.
When to Roll
Rolling (spending gold to refresh your shop) is a late-stage decision. Ideally, you want to hit interest cap (50 gold), then “slow roll” or “hyper roll” depending on your comp:
- Slow Roll: For comps that want 1-cost or 2-cost -stars, hold 50 gold and only spend excess gold above 50 each round refreshing your shop for upgrades.
- Hyper Roll: For fast -star strategies, spend down to 0 gold at Level 4 or 5 right after Krugs/PvE round, grabbing as many upgrades as possible.
- Standard Roll-Down: At a specific stage (usually Level 7/8, Stage 4-1 or 5-1) roll all your gold to hit as many upgrades or 4/5-cost units as your comp relies on.
Rolling too early or too late can set you back; try to match your rolls with power spikes (when you need to stabilize or push for a comp-changing unit).
Managing Health vs. Gold
Players often tunnel on gold savings, only to get knocked out by streakers with strong boards. Don’t become so obsessed with economy that you fall to dangerously low HP. Usually, spending gold to upgrade your board before dropping below 40 HP is a safe move.
When you notice you’re losing heavily, it’s worth giving up interest for power, especially if you’ll get eliminated soon otherwise. Sometimes, one round’s investment means making it to the top four instead of a bottom four finish.
Tips for Beginning Economists
- Sell weak units early if holding them costs you interest gold. Temporary power is rarely worth the compounding reward of interest.
- If a round will break a streak but your health is high, sometimes it’s fine to let it happen and collect your interest!
- Flexible comps let you keep high gold while scouting and waiting for the right shop, so try not to hard-commit too early unless you're about to complete a triple-upgrade power spike.
Quick Reference: Economy Milestones
| Stage | Gold Goal | Common Moves | |---------------|-------------|-----------------------------| | Early (1-2) | 10-20 | Build basic board, streak | | Mid (2- / -2) | 0-50 | Push level, save for rolls | | After Krugs | 40-50 | Shop for upgrades or power | | Stage 4/5 | 0-50+ | Decide to roll, level, or both | Try to always look ahead 2- rounds. If you see a loss streak coming, stockpile for stabilization. If you’ve got a strong board, keep banking and only spend to level up for major spikes.
Summary
Strong economy management means knowing when to be greedy and when to cash out. Hit those interest breakpoints, keep an eye on the status of your board, and adapt your game plan if your health dips or your streak breaks. The best TFT players balance gold, board strength, and leveling like a pro manager—practice will help you spot the right time to push for wins, and when to hold until the late game. Positioning Guide
Getting your champion synergies and gold management down is key, but if your units aren’t placed smartly, you’ll still end up falling short. In Teamfight Tactics, positioning decides whether your carries actually get their damage off, if your tanks survive long enough, and whether you can counter those annoying enemy threats. Let’s break down the basics and some advanced tricks to keep your team standing longer and hitting harder.
Why Positioning Matters
Your units move and attack based on where you put them before a round starts. Even if you have the strongest team, a poorly placed carry might get deleted in seconds by assassins or AoE spells. Good positioning helps you:
- Keep damage dealers safe.
- Make tanks soak up as much damage as possible.
- Counter enemy threats like Assassins and Blitzcrank hooks.
- Get maximum value from your champion abilities, especially those with area effects.
Think of the prep phase like a chessboard—your setup can mean the difference between a first-place finish or a quick knockout.
Basic Positioning Concepts
The Frontline and Backline
- Frontline: Tanks and bruisers up front take the first hits. Place your highest armor, health, and defensive trait units in the first two rows.
- Backline: Damage dealers, healers, and other squishy champions hang out behind your tank wall. They need protection for as long as possible.
Here’s a classic example:
`` [ T T T ] [ D D ]
T = Tank | D = Damage Dealer
The tanks soak up initial damage, giving your carries enough time to do their job.
Cornering Carries
Positioning your best ranged damage dealer (carry) in the far back corner keeps them away from most threats. This “corner” setup forces units like Assassins or Blitzcrank to walk a long way (or hook a tank if you shield the carry).
For example:
[ - - - C ] [ - - - T ] ``
C = Carry | T = Tank or Bodyguard
Put a disposable or tanky champion next to your carry to “body block” potential hooks or assassin jumps.
Adapting to Opponents
You’re not playing alone! Always check your biggest rivals’ boards (use Tab or mouse wheel). Each lobby will have its own set of threats, and you should shift your formation to address them.
Dealing with Assassins
Assassins target the farthest enemy when a round begins. If you see players using Akali, Qiyana, or similar units:
- Put your damage dealers in a corner.
- Ring your carry with 2-3 tanky champions or even cheap 1-cost bodies.
- Consider putting a strong tank in the opposite corner to bait assassin jumps (this “decoy” can save your real carry).
Dodging Blitzcrank Hooks or Similar Abilities
Champions like Blitzcrank pull the “farthest” unit in the same row. Don’t give them an easy carry grab:
- Place a sacrificial tank or weak unit as bait in the hook row.
- Never leave your most important champion alone in a vulnerable spot.
Spreading Out to Avoid AoE
Against boards with lots of area-of-effect (AoE) spells (think Aurelion Sol, Vel'Koz, or large Sona ultimates):
- Don’t clump every unit in one corner.
- Spread champions out in a staggered pattern so enemy spells don’t wipe your whole lineup.
Convergence and Splash Damage
Some champion spells jump or hit in a line (e.g., Shaco, Miss Fortune, Jhin). Place your squishies slightly off-center so that these skills only hit one or two targets at most.
Adjusting for Item and Trait Effects
Guinsoo’s Rageblade and Attack Speed
Units with Guinsoo’s or attack speed bonuses—like Twisted Fate or Aphelios—should survive long enough for the effect to ramp up. Place them as far away from immediate danger as possible and give them babysitters.
Zephyr, Shroud, and Crowd Control
Zephyr and Shroud of Stillness are items that disrupt your front row by disabling the unit directly opposite where they're equipped in enemy formation. If you see these items, move your main tank or carry before the round starts to “dodge” their effect.
3-Row Formation Basics
Early on, stick to simple two-row setups. In late game, start filling out all three rows for maximum tactical options.
- Front: Tanks and CC (crowd control) champions.
- Middle: Secondary tanks, melee carries, or supports.
- Back: Main carries and any units left to defend them.
This makes your formation much more versatile and unpredictable for opponents trying to “snipe” your key pieces.
Positioning Tips by Comp Type
Here are a few quick setups depending on your comp:
- Reroll/Low-Cost Brawler/Defender: Thick frontline, clumped backline.
- Assassin or Duelist: Spread out your backline, bait corners if possible.
- Sniper or Fabled: Corner your champion, full wall of tanks up front.
- Legend or Juggler Comps: Mix midline support and front-heavy tanks to shield critical units.
Remember, adjust every other round if you see players targeting your board!
Scouting: The Secret Sauce
The top players check other boards before locking in their placement every round. A quick scroll will help:
- Counter main assassin players by beefing up your corners.
- Move between two setups if Blitzcrank players are nearby.
- Spot Zephyr and adjust your tank position.
Making snap decisions to move just one or two champions can swing a fight in your favor.
Common Mistakes to Avoid
- Leaving carries exposed: Never let your main damage dealer sit in a row alone or in a predictable spot.
- Neglecting to scout: Early game? It’s less important. Mid and late game? Check your lobby constantly!
- Ignoring AoE threats: Clumped formations are asking to get wiped by big spells.
Quick Reference: Positioning Checklist
- Who are your main threats? (Assassins, Blitz, AoE)
- Is your carry protected by bodies?
- Are your tanks soaking first hits?
- Did you scout before locking in your final positioning?
- Did you adjust if someone just Zephyred or Shrouded your front line?
Wrapping Up
Positioning can mean the difference between a clutch win and a fast exit. Check boards, adapt your layout, and always shield your crucial champions. With a bit of practice, you’ll know when to clump, when to spread, and how to stay one step ahead. Every round is a new puzzle—solving it starts at the placement screen.