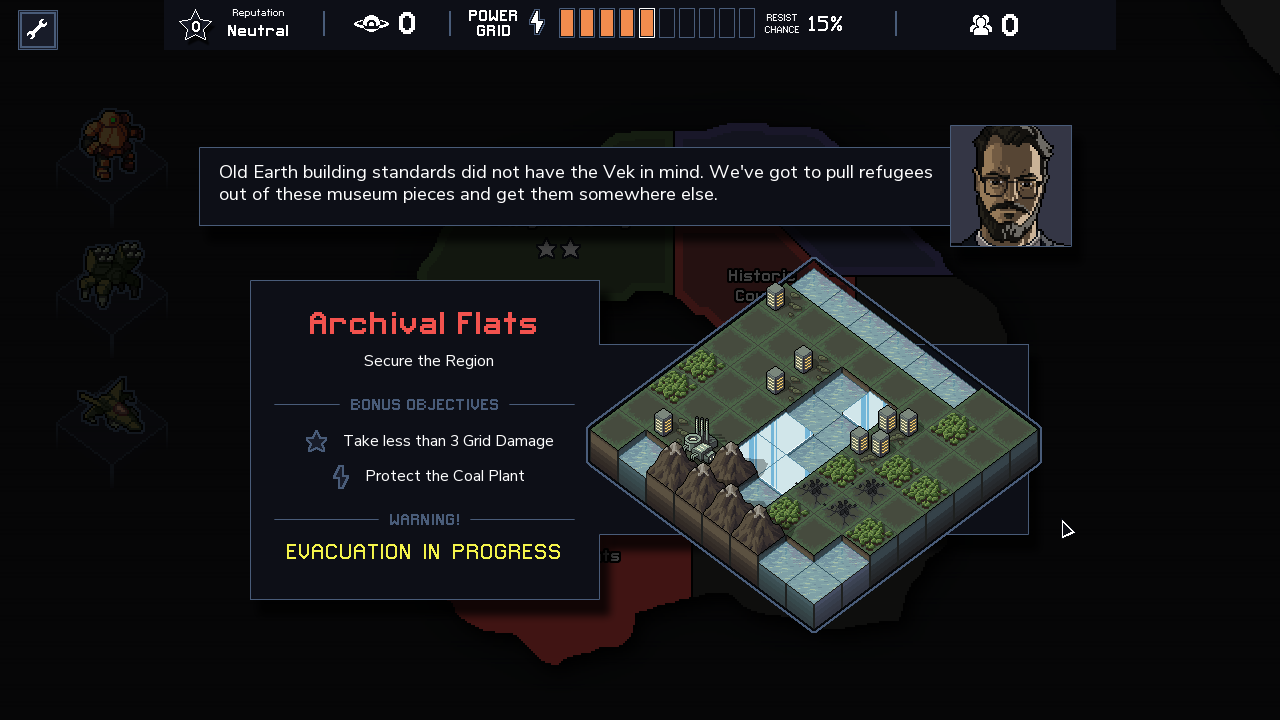
Into the Breach: Advanced Tactics Guide
Master victory in Into the Breach with expert tips on mech positioning, Vek control, terrain use, pilots, and grid defense.
When you first start playing Into the Breach, it’s easy to focus on the basics—moving your mechs, swatting Vek, and trying not to let any buildings get stomped flat. But after a few campaigns, those fundamental strategies only take you so far. The game’s real challenge lies in reading enemy patterns, anticipating how a single push or block can change the entire tide of battle, and squeezing the most out of every squad’s quirks. With a little time, what seemed like a relentless onslaught starts to look like a puzzle with countless clever solutions. Sharpening those advanced tactics isn’t just about survival—it’s about turning the tide and making each victory feel earned, no matter how impossible things look.
Mech Positioning
Getting the hang of mech positioning is where Into the Breach starts to really click. Every move counts. Where you end your turn changes how enemies behave, how much damage you take, and even whether entire buildings survive. Treat each mech like a chess piece: following a plan but always ready to adapt on the fly.
Reading Enemy Intent
Enemy telegraphs are the backbone of good positioning. Every Vek shows where it’s about to strike during the enemy turn preview. Before you even think about attacking, check these attack icons. Use this information to plan your moves—sometimes, simply standing in the right spot can neutralize a threat without using any firepower.
Blocking Spawns
Placing a mech on a spawn tile will prevent a Vek from coming through the ground there next turn. It's a classic tactic, but remember: your mech takes 1 damage when it blocks a spawn, and that adds up. The trick is to use blocking when you can afford to tank the hit or when the alternative would be even worse, like losing a critical building. Fast, armored, or self-repairing mechs are best suited for blocking duties. Mechs with push weapons can also nudge each other onto spawns to save movement or keep fragile pilots safe.
Threat Prevention
It’s not just about stopping spawns. Stand in the way of certain Vek attacks, and you can outright block damage to a city tile, though you’ll usually take the hit instead. This is risky if your mech is nearly out of health but can prevent permanent grid loss. Consider the trade-off: sometimes losing a mech (temporarily, as it’s only out until the next battle) is better than losing the game.
Using Terrain to Your Advantage
Almost every map is full of terrain features—water, mountains, acid, forests. Use these to set up stronger positions.
Water & Chasms
Mechs (except flying types) can’t end their turn in water or chasms, but pushing Vek into them destroys enemies instantly. Sometimes, the best use of your mech’s turn is just moving to a spot that sets up an easy kill or block next round. Consider parking near these hazards, ready to launch a push if a Vek closes in.
Defensive High Ground
Mountains and buildings can shield your mechs from specific attack angles. Position your mech with its back to a mountain to guarantee you can’t get pushed off the map or into water. Use buildings as buffers—standing beside them limits the number of directions from which you can be attacked or shoved.
Forests & Acid Pools
Standing in a forest causes your mech to burn if it gets hit by fire or flame attacks—dangerous, unless you’ve got repair tricks or fire immunity. Acid pools lather your mech in acid, making it take double damage, so avoid them unless it sets up a must-have win next turn.
Creating Crossfire and Setting Traps
You want to funnel Vek into spots where their attacks can be used against each other. Try to position mechs so that pushes will not just save a city but also redirect damage onto other Vek. It’s a good habit to ask: if I move here, can I set up a double kill or trigger enemies to accidentally hurt each other? Lining your mechs up for crossfire allows for combo turns you won’t get by spacing them out.
Covering Weaknesses
Not every mech is built for the front line. Ranged mechs especially need to hang back but not so far that they can’t reach trouble spots. Keep squishier units behind tanks or in spots where only a single Vek can reach them. Sometimes, simply nudging a ranged mech behind a mountain, or clustering your team together, can prevent a fragile unit from being picked off.
Planning for Next Turn
Always leave room for tomorrow’s chaos. Consider: If I move here now, will I box myself in or block a potential escape route? Will my position let me react to a double spawn next round? Try not to set your mechs so close together that they can’t help each other, but don’t spread them so thin that you can’t focus fire when it matters.
Final Thoughts on Mech Positioning
Mastering positioning is the heart of higher-level play. Think a turn ahead, weigh the costs and consequences, and don’t be afraid to sacrifice a little health to save your grid or line up a big play. As you keep experimenting, you'll see how much control you really have over the fight—just by picking the right spot, at the right time.
Vek Threat Management
Understanding how to handle the Vek is what separates okay pilots from pros in Into the Breach. These insectoid enemies won’t stop until your cities are rubble, and on higher hazard islands, you’ll see combos and spawn patterns that seem impossible at first. The trick isn’t just to punch harder—it’s to get smarter about threat priorities, squeezing value from every move, and sometimes letting small threats slide so you can stomp out the big ones.
Identifying Priority Threats
At the start of every turn, first check which Vek are actually threatening something important. Not every enemy can—or should—be wiped out immediately. Pay close attention to:
- Vek targeting buildings or objectives: Protect grid power at all costs. If you have a choice between stopping a Vek from hitting a city or damaging your fragile artillery, always save the grid unless you’re sure you can tank the loss.
- Webbers and Leapers: Units that pin your mechs or restrict movement (like Webbers or Leap Vek) are high on the to-do list—if you let them lock down your squad, the rest of the Vek will dogpile the grid.
- Alpha and Boss Vek: Larger Vek hit harder and tend to have splash or multi-tile attacks. If possible, neutralize or redirect these first, especially on late islands where their hits can snowball.
Ask yourself: If I do nothing about this Vek, what’s the worst-case result? Start with whatever threat could take out the grid, block you from acting, or wipe a mech off the board.
Mitigating Swarm Pressure
The longer you stay on the board, the more Vek will spawn. You can’t kill or block them all. Instead, you want to manage their numbers and the angles they can attack from:
- Blocking Spawns (as covered in the last section): Each blocked spawn gives you breathing room for the next turn, and reduces the odds of getting overwhelmed.
- Herding Vek: Use pushes, pulls, or even body-blocking to funnel Vek into tight spaces, away from high-value targets. Move enemies so their attacks line up with each other, or push them onto tiles that make their next turn awkward.
- Delaying Kills: Sometimes, knocking a Vek out isn’t always the best move. If killing one will open up a spawn, or free up another enemy to attack a city, consider disabling it with status effects (like smoke, freeze, or fire), or throw it into a spot where it’s forced to waste a turn climbing out of water or blocking its own buddy.
Crowd Control Tricks
Not every squad is great at direct damage, but almost every group has ways to reduce the number of real threats each turn.
Using Status Effects
- Smoke: Shuts down most Vek attacks completely. If you can cover buildings or Vek in smoke, you’ve neutralized those threats for the round.
- Freeze: Completely disables a Vek until another effect thaws it out. Top-tier for locking down an Alpha or boss for a few rounds.
- Fire: Vek will take 1 damage at the start of their turn, often finishing them off if they just need a push over the edge. It also forces certain Vek to change priorities (they sometimes stop attacking if burning).
- Acid: Not a threat reducer by itself, but with the right setup you can ‘mark’ Alphas for extra damage to finish them off quickly.
Just remember—status effects are the perfect answer when simple repositioning isn’t enough.
Push, Pull, and Redirect
- Push Vek off attack trajectories: This will cancel or redirect their attacks. Sometimes this means bumping one Vek into another, causing collateral, or just shoving a bug so its attack now whiffs into a mountain.
- Use Chokepoints: Push or pull Vek so they end up in tight clusters, making it easier for AoE or combined attacks to score multi-kills or disables next round.
Calculating Acceptable Losses
You can’t stop every single attack, especially on later islands or with certain squad loadouts. Sometimes, letting a building eat a hit (if you have spare grid) or sacrificing a mech is smarter than burning all your resources early:
- Track your grid power. If you’re sitting on extra, soaking a hit might be fine so you can deal with a nastier wave in the following turn.
- Pilot abilities like “Resist” can buy you a lucky save—factor these odds in, but don’t rely on them every time.
Adapting to Vek Mutations and Boss Mechanics
Special hazards like Vek mutations (extra armor, regeneration, massive size) call for adjusted tactics:
- Armored Vek: Try pushing them into water, hazards, or lining them up for two-hit combos. Some squads may need to use acid splash or status first.
- Regenerators: Prioritize killing or disabling the regeneration Vek—otherwise, every other bug gets stronger each round.
- Bosses: Focus on removing building threats first—but keep an eye on the boss’s range, as their area attacks can mess up everything at once. Plan to either neutralize their big attack (disabling, redirecting, or pushing) or use status as a soft lock until the mission ends.
Turn-by-Turn Threat Assessment
Develop the habit of scanning for “must-stop” threats right at the start of every turn, then working backward:
- Check enemy targets for city and mission objectives.
- Look for mechs at risk of dying or getting pinned.
- Identify new spawns—predict where the next big swarm surge will come from.
- Plan pushes, disables, and attacks that cover the most danger with the least effort.
Stay flexible. The Vek will surprise you, but with practice, you’ll start to see the rhythms in their attacks—and find ways to break the chain before things spiral.
Wrapping Up Vek Threat Management
Handling Vek pressure is all about keeping cool and working the numbers. Don’t waste resources on bugs that are just posturing—aim for the ones ready to do real damage to your grid, your mechs, or your mission. Use pushes, disables, and clever blocking to keep threats at a manageable level. Remember, you can’t save everything, but smart prioritization keeps you in the fight longer and ups your odds on every island you clear. Stay sharp, plan ahead, and don’t be afraid to take a hit—sometimes, the stylish win is the one built from messy turns you just barely scraped through.
Terrain Manipulation
Changing the landscape is one of the most effective ways to control the chaos in Into the Breach. Unlike in most tactics games, you aren’t just dealing with unit positions—here, almost every tile matters, and messing with terrain can tip the scales far beyond raw firepower. If you know how and when to shift the ground, hazards, water, and obstacles in your favor, even overwhelming odds start to look a lot more manageable.
Understanding the Board
The game’s arenas are made up of very specific tile types, each with their own quirks. Here’s a quick rundown:
- Normal Ground: Passable by anyone, no special effects.
- Mountains: Impassable unless destroyed, block movement and line of sight.
- Water: Instantly kills anything that can’t fly or swim, but buildings and some tough bugs are safe.
- Holes: Created when certain tiles are destroyed; basically bottomless pits with the same effect as water.
- Building Tiles: Usually mission objectives. Damaged by attacks, but otherwise act like ground.
- Hazards: Lava, acid pools, fire and more—damage or apply status effects to units that stand on them.
Know what every tile does, not just for planning attacks, but because the board will be your hidden weapon.
Uses for Terrain Manipulation
Terrain effects let you solve problems without even firing a shot. These tricks are at the heart of advanced play:
Drowning Enemies
One of the most efficient ways to remove Vek. Push or pull ground-based Vek into water or holes, and they’re done, no matter how much health or armor they have. It’s especially juicy with Alphas or armored bosses who would otherwise take multiple turns to kill.
Crushing with Mountains
Mountains are barriers until someone (you, the Vek, or environmental effects) destroys them. Blowing up a mountain clears a path for movement or shots, but it also turns that space into a hole—any push attack can send enemies tumbling in for instant elimination.
Using Hazards
Some islands feature special tiles: lava on volcanic maps, acid pools in hazardous zones, or fire spread from forest tiles. Vek aren’t immune to these. If you can push or drop a bug into a tile on fire, it’ll take burning damage and might stop attacking. Acid pools deal two damage on the first contact. Think of hazards as extra tools in your kit.
Pinning and Blocking
Walls, mountains, and buildings aren’t just obstacles—they’re tools for controlling enemy movement. You can:
- Pin Vek: Trap them against an impassable tile so they can’t move except along one axis.
- Use Body Blocking: Park mechs or even other Vek in tight alleys to funnel the action.
Creating Chokepoints
With a couple well-timed pushes, you can block off narrow areas, funneling Vek where they’re easiest to control. Shove a rock into a mountain gap, or destroy terrain to make impassable zones that restrict how many Vek can get to their targets each turn.
Mastering Terrain with Weapons & Abilities
Every squad has at least one tool for affecting the board, but some squads specialize in it. Here’s how to get the most out of them:
Earth Movers: Rock Throwers and Terrain Shapers
Some mechs can create rocks or even mountains on the field. These are incredibly useful for:
- Blocking Spawns: Drop rocks on spawn points to prevent Vek from entering there next turn.
- Directed Pushes: Use rocks as landing pads—push a Vek into a rock to stop both their attack and their movement.
- Sacrifice Plays: Rocks can act as disposable shields for buildings and mechs, absorbing a hit instead.
Destruction and Environmental Kills
Weapons that break terrain—artillery blasts, earthquakes, or chain lightning—can:
- Open up holes for drowning
- Remove line-of-sight problems for your ranged attacks
- Set up devastating chain reactions with hazards
Fire Starters
Techs that set terrain ablaze (like burning forests) can create whole new kill zones and force Vek to reroute or suffer steady damage over a few turns.
Tactics: Seeing the Full Picture
In any given turn, review the board’s terrain and ask:
- Can I remove this Vek permanently by pushing it into water or a hole?
- Is it worth breaking a mountain to make a kill, or do I want it left as a blocker?
- Where will hazards or environmental events (like the tidal wave, earthquakes, or the volcano’s eruption) hurt most, and how can I funnel Vek there?
- Should I use a rock or smoke grenade to create a new barrier this round?
Experienced players rarely go for a straight-up damage race. Instead, they wiggle the chessboard, shift the tiles, and use terrain manipulation for kills, blocks, and even “soft disables” that force Vek to waste their next move.
Risks, Costs, and Timing
Not every terrain shift is worth it. Blowing up mountains might open up a city to attacks. Making a hole could backfire if you get pushed in next round. Weigh the long-term ripple effects before going wild with destructible tiles. Remember, terrain doesn’t just affect the current turn, but sets up future positioning—especially since Vek target the nearest thing on their path.
Island-Specific Knowledge
Each island has signature terrain features:
- Archive: Forests, tidal waves—burn and push for fun environmental kills.
- R.S.T.: Deserts with emerging sand, fire hazards abounding, and dry ground that ignites.
- Pinnacle: Ice and chasms; freeze tiles for safety or smash thawed enemies in.
- Detritus: A lot more water and acid. Makes pushing Vek in for quick KOs a regular tactic.
Learn the tile set of each Environment, and map reading will become second nature.
Conclusion
Terrain manipulation sits at the core of Into the Breach strategy. Control the board and you control the fight. Make the landscape work for you: push enemies into hazards, block spawns, shape the battlefield with rocks or destructibles, and watch Vek fall apart even when you’re short on firepower. Always scan for environmental options before committing to direct attacks—smart terrain play often wins rounds without firing a shot.
Pilot Abilities
Every mech in Into the Breach needs a pilot, but pilots are more than just flavor text and portraits. Each pilot brings a special ability to the table, often shaping your entire playstyle and opening up new tactical decisions. Some abilities give direct combat bonuses, while others boost mobility, defense, or resource management. Knowing what each pilot does—and how to use their powers to the max—can make a huge difference, especially on harder difficulties.
What Are Pilot Abilities?
Pilot abilities are unique perks that only apply when that pilot is in the mech. Abilities range from dodge mechanics (like avoiding damage) to making your mech act more than once per turn, or even giving back grid power if a building gets damaged. Most random pilots come with just one perk, but the starting “named” pilots—like Ralph Karl, Gana, and others—have signature abilities that can’t be rolled randomly.
Pilots earn experience each mission, unlocking one or two extra buffs at higher levels (typically extra health, movement, or reactor power). But the core pilot ability never changes—it’s the heart of that character’s playstyle.
Must-Know Core Pilot Abilities
Let’s break down how some of the signature and random pilot skills work and offer strategies on squeezing every bit of value out of them.
Ralph Karl: Extra Mech Damage
Ralph’s ability is simple: +1 damage to all his mech’s attacks. Put him in your hardest hitter for ridiculous results. On squads built around big punches (like the Rift Walkers), this lets you one-shot threats you’d normally need two turns for. He really shines on artillery or weapons with splash effects.
Tips
- Upgrade mechs with multi-target weapons to maximize Ralph’s extra damage each hit.
- Don’t waste him on a non-attacking support mech; put him where he can attack every turn.
Camila Vera: Immune to Webbing and Smoke
Camila shrugs off two of the nastiest status effects in the game: being webbed (pinned in place by spiders/Scorpions) or silenced by smoke. She’s your go-to pilot for high-mobility mechs, especially in squads that rely on repositioning or those with weak direct attacks.
Tips
- Place Camila in the frontline or your most crucial mover.
- Use her to free up other mechs caught in webs.
- On smoke-heavy maps (Pinnacle Island!), she can be a lifesaver for consistency.
Gana: Free Once-Per-Battle Reset Turn
Gana’s ability gives a bonus “reset” of your turn once per battle (in addition to the standard once-per-mission reset everyone gets). This can easily turn a loss into a win if things get messy. Make risky plays, knowing you have a safety net, or try bold puzzles that would otherwise seem too dangerous.
Tips
- Use Gana for clutch missions or squads with lots of chain reactions (Prime class mechs, chain lightning).
- Remember: there’s no penalty for using this pilot’s free reset, but only once per battle.
Henry Kwan: Extra Movement After Attacking
Henry can pick up and move again after making an attack. This makes him a natural fit for hit-and-run tactics and escape plans. On squads like the Zenith Guard or Rusting Hulks—where movement is key to safety and offense—he’s fantastic.
Tips
- Great on artillery or ranged mechs; hit, then scoot out of danger.
- Also works well when you need to adjust for blocking or body-shielding after attacking.
Abe Isamu: Armor-Plated Mech
Abe’s perk gives his mech Armor, which blocks one damage from every hit. This means you can tank hits that would destroy lesser mechs. Use him to block spawns or soak up big hits that would otherwise hit cities.
Tips
- Armor even lets you walk through smoke and fire without taking damage.
- Use Abe for aggressive blocking, especially on early islands.
Random Pilot Abilities
After completing missions, rescue pods drop new pilots with randomized perks. Here are examples and how they might shape your strategy:
- Resourceful: Restores one Grid Power when a building is destroyed (mitigating losses when defenses fail).
- Prospective: Starts with one extra reactor core, allowing early upgrades to weapons or movement.
- Sidestep: Allows the mech to avoid the first damage it would take each battle (a handy “free life”).
- Thorough: Repairs one additional HP when using the repair action, helping support mechs survive longer.
Before swapping pilots, check their ability and think about what your squad actually needs. Don’t just hunt for extra reactor cores—sometimes a movement or defense bonus fits your current mech layout better.
Level-Ups and Skill Synergy
Pilots gain XP for surviving missions and getting kills. As they level up, they grab extra health points, move, or sometimes more reactor power. While these upgrades are always helpful, the original ability is what changes your strategy.
Some ability and mech combos are straight-up broken:
- Henry Kwan in a jet mech lets you fly, attack, and then fly again—great for blocking and escapes.
- Ralph Karl in the Boulder Mech means every thrown rock hits harder and can knock out even alpha Vek.
- Abe’s armor plus a shielded mech can let you block swarm after swarm, almost invulnerable to smaller bugs.
Swapping and Planning Ahead
Swapping pilots between mechs is totally free between missions. Don’t get stuck by tradition—think about who’d get the most value out of a certain perk for the next map, especially if the enemies or terrain call for a specific style. Facing Scorpions? Put Camila in your melee mech. Hazardous maps? Try to get someone with auto-repair or extra health in harm’s way.
You can even move pilots out of commission temporarily and bring them back later if you want to reorganize upgrades and gear for the perfect storm.
Tips for Maximizing Pilot Value
- Always check for new pilots after missions—having a bench with a few options gives you flexibility if someone dies.
- If a pilot with a unique skill dies, that skill is gone. Protect your veterans (sometimes it’s worth risking Grid Power to save a good pilot!).
- Look for combos—don’t double up on similar perks unless you’re heavily specializing.
- Remember that pilotless mechs (AI autopilot) deal -1 damage, so try not to leave any mech without a pilot unless there’s no alternative.
Conclusion
Pilot abilities add a strategic layer on top of the already tactical gameplay in Into the Breach. Knowing what each pilot brings—and adjusting your squad to make the most out of their perks—is key for success, especially as board states get trickier and enemies pile up. Whether you favor aggression, flexibility, or pure defense, the right pilot in the right mech can tip the odds in your favor every run.
Grid Defense
Protecting the power grid isn’t just the main objective in Into the Breach—it’s game over if you drop to zero. Understanding Grid Defense, how it works, what affects it, and the best ways to build it up (or safeguard it) can mean the difference between squeaking out a hard win and watching your timeline collapse. Let’s break down everything you need to know about Grid Defense and how to make the most of it.
What Is Grid Defense?
Grid Defense is a percentage stat representing your civilian buildings’ chance to shrug off attacks from the Vek. Every time a building is targeted and hit, Grid Defense provides a roll: if successful, the building takes no damage and you keep that precious Grid Power. By default, Grid Defense starts at 15%, but various islands, pilots, and upgrades can increase this.
It’s important to remember: Grid Defense is chance-based, never guaranteed. Even with a 40% rate, bad luck can still wreck your grid if you’re counting on it for every attack. Still, over time, high Grid Defense saves you from disaster more often than you’d think.
How Grid Defense Works
Whenever a building is hit, a random roll checks against your total Grid Defense rating. If the roll succeeds, the building takes zero damage from that hit, and an “Evaded” message flashes on screen. If not, you’ll see your grid power meter tick down.
Example
- If you have 18% Grid Defense, each building hit has an 18% chance to just ignore that damage.
- It does not stack or reroll on multi-damage attacks. Each attack counts once, even if it breaks shields or affects multiple tiles.
How to Increase Grid Defense
Increasing your Grid Defense gives you more breathing room, especially on higher difficulties where a few mistakes add up fast. Here’s how to boost it:
Completing Power Grid Objectives
Many missions have bonus objectives labeled as “Reward: +Grid Defense”. Finishing these missions usually bumps your percentage by 2-4%. These are great to focus on early, especially before difficult boss fights.
Corporate Reputation Upgrades
In the shop at the end of each island (after beating a boss), you can spend Corporate Reputation to buy 4% boosts to Grid Defense. These are permanent for the whole run. Weigh your options—sometimes it’s better to buy Grid Power directly, but buying a few Grid Defense boosts early can pay off in later islands.
Certain Pilots and Abilities
Some pilots have skills that directly add to your Grid Defense, usually as a secondary ability from leveling up. These aren’t super common, but keep an eye out and consider if bumping your survival odds is more valuable than raw firepower.
Island Bonuses
Some island events or bonuses after boss fights provide Grid Defense as a reward. If you notice you’re chronically low, prioritize these over other rewards.
Is Grid Defense Worth Focusing On?
This is where things get interesting. Many players ignore Grid Defense upgrades for most of a run, focusing on power and weapons instead. There are pros and cons to both approaches:
Advantages of High Grid Defense
- Free Mistake Protection: Every successful dodge gives you a second chance, especially when unexpected Vek attacks slip through.
- More Forgiveness at Higher Difficulties: On Hard, you’re bound to get hit—the random evasion softens the blow.
Disadvantages
- It’s Always RNG: There’s no guarantee that even a 30% Grid Defense will save you. Relying on luck can sting when the board state is tight.
- Opportunity Cost: Every point upgraded here is a point not spent repairing Grid Power (which is guaranteed to help) or on weapons and upgrades that might prevent damage outright.
Best Grid Defense Strategies
Don’t Rely On It—But Don’t Ignore It
Think of Grid Defense as bonus insurance, not your main plan. Your real goal every map: prevent building damage through clever positioning, enemy manipulation, and blocking shots. But if you’ve got extra reputation or see a chance to complete a Grid Defense bonus objective, it’s solid preventative maintenance.
Grid Power vs. Grid Defense Purchases
If you’re sitting two or more Grid Power away from disaster, buying a Grid Defense upgrade can make sense for future turns. If you’re one hit from game over, direct Grid Power repairs are usually safer. High Grid Defense can’t help if you get 0% rolls at the worst moment.
Stack Early, Benefit Late
Getting Grid Defense up to 20-25% in the first or second island means you’ll see the benefits add up across dozens of battles. If you ignore it until the final island, chances are it won’t save you when it matters.
Pilot Perks Matter
If you have a pilot who adds to Grid Defense, don’t waste them in an unused mech! Make sure they’re active, especially in squads that struggle to protect buildings routinely.
Synergize With Passive Defense
Combine Grid Defense with abilities that shield buildings, environmental hazards that protect the grid, or skills that repair grid power after losses. Even with high Grid Defense, you’ll feel the difference if you’re stacking some of these together.
Common Grid Defense Myths
- “Grid Defense will save bad play.” Not true. Play solid tactics and treat Grid Defense as a nice bonus.
- “It’s useless below 15%.” Not quite. Even a small percentage means an extra building or two might slip by unharmed over a run—sometimes that’s all you need!
- “It stacks every time a building’s hit.” The chance applies to each unique attack, not per point of damage or per tile unless those attacks are truly separate.
Conclusion
Grid Defense is the unsung hero of many late game wins (or heartbreaking losses) in Into the Breach. Buff it when the opportunity fits your squad and current grid health, but never use it as a crutch for sloppy play. Combined with solid tactics and a bit of luck, a strong Grid Defense rating just might keep the lights on when everything else goes wrong.