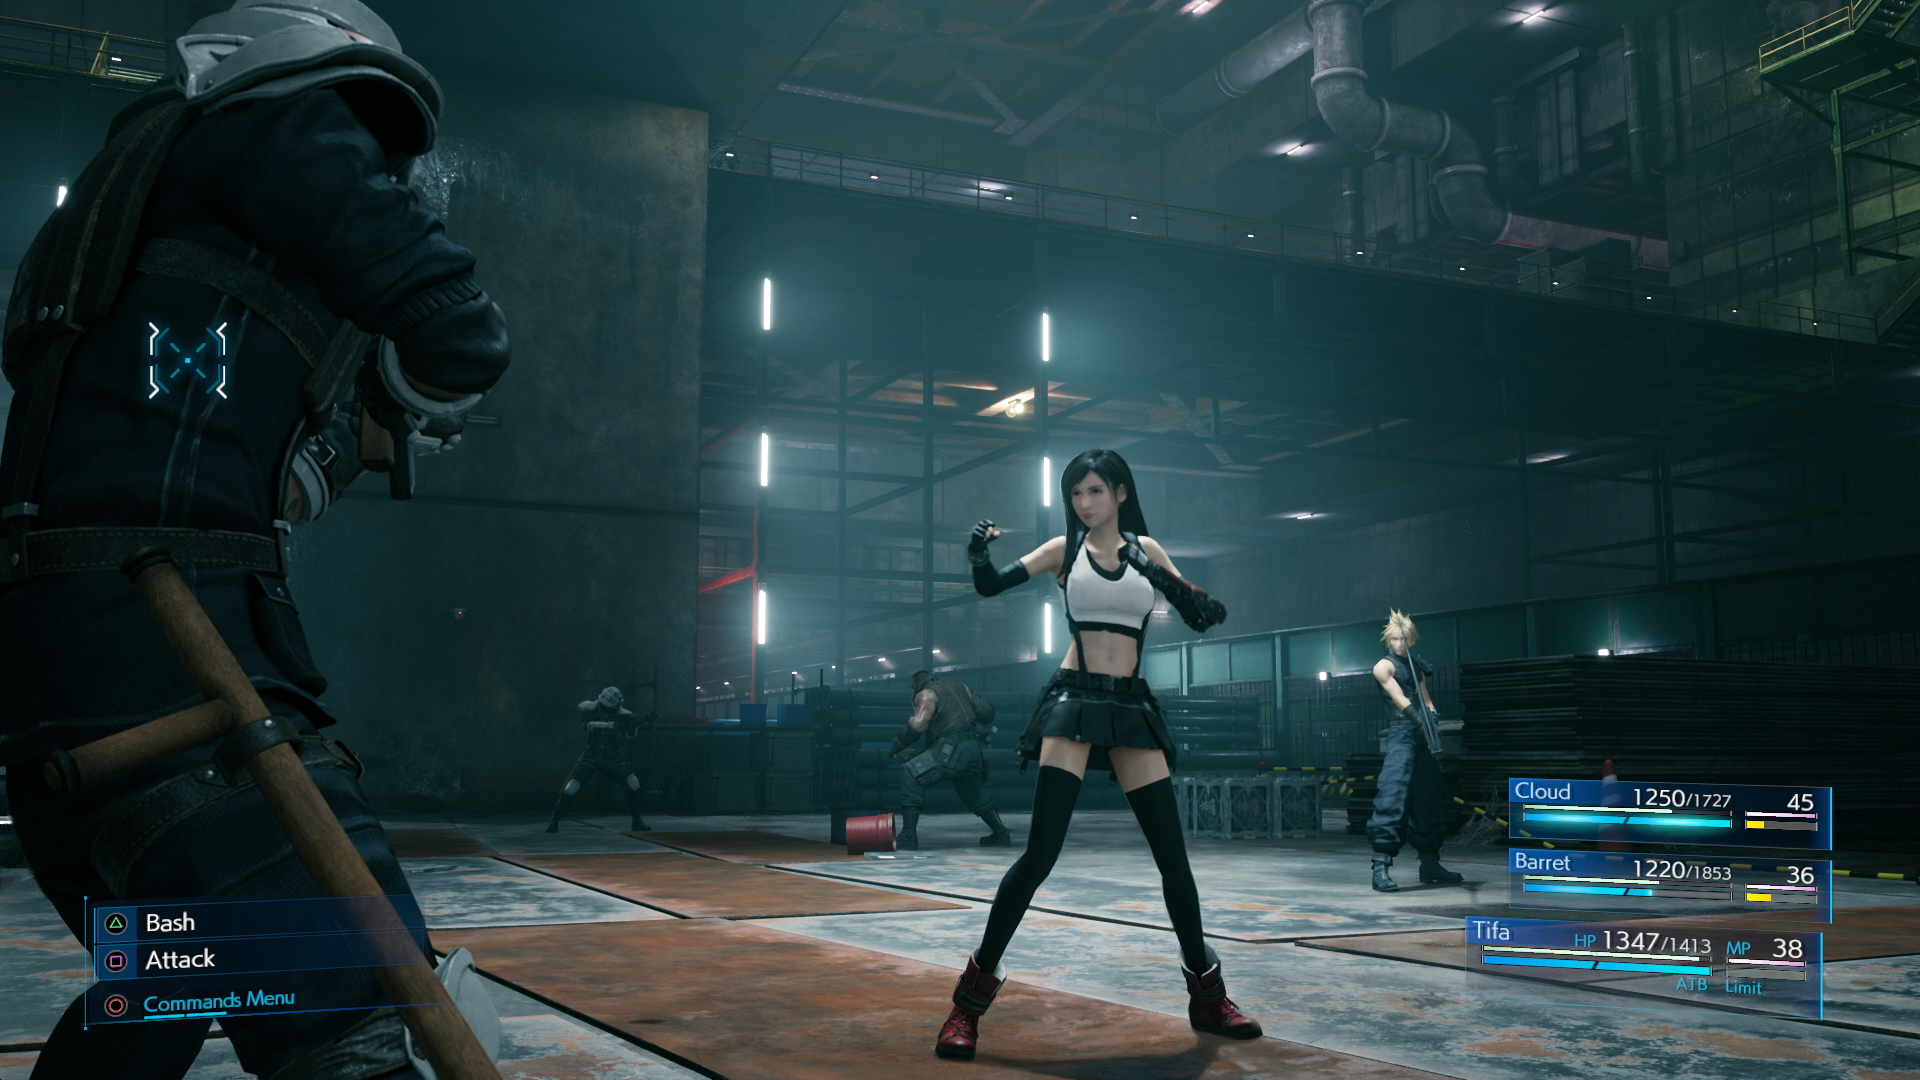
Final Fantasy VII Remake Combat and Tactics Guide
Unlock victory in FFVII Remake! Learn top combat tips: materia, weaknesses, stagger, limit breaks, and key tactics for every character.
Few games demand as much attention and adaptability in battle as Final Fantasy VII Remake. The combat here isn’t just about hammering away at buttons—it’s a satisfying blend of strategy, quick decision-making, and understanding each character’s unique strengths. Whether it’s managing the ATB gauge mid-fight, swapping between party members to exploit enemy weaknesses, or timing those essential dodges and blocks, success often comes down to knowing what each situation calls for. For newcomers, the mix of real-time action and RPG depth can feel intense, while veterans may be curious about the nuances that set Remake apart from the original. Getting comfortable with the game’s combat systems is key to enjoying everything Midgar throws at you, from Shinra’s finest to the city’s most fearsome creatures.
Mastering Materia
Materia is the heartbeat of customization in Final Fantasy VII Remake. These colored orbs slot into your weapons and armor, letting you tweak spells, abilities, and even core stats for every party member. Nailing the right Materia setup can be the difference between scraping by and dominating every fight—so let’s break everything down, from types and leveling up to some smart loadout tips.
Materia: The Basics
Materia comes in a handful of flavors, each color-coded for easy recognition:
- Green (Magic): Lets your party sling spells like Fire or Cure.
- Blue (Support): Pairs with other Materia to boost or alter effects (like letting attacks hit multiple targets).
- Yellow (Command): Unlocks new things your character can do, such as Steal or Assess.
- Purple (Independent): Passively buffs stats or adds traits, such as more HP or resistances.
- Red (Summon): Calls mighty allies onto the field for dramatic, fight-changing attacks (think: Ifrit, Shiva).
Every weapon and most armor have slots for Materia—sometimes linked, sometimes single. Fill them up in the menu, but keep an eye out for synergies, especially with linked slots.
Materia Leveling
Just like your party, Materia earns experience, called AP (Ability Points), whenever you win a battle. As Materia levels up, spells get stronger (Fire becomes Fira, then Firaga), and Independent types offer better stat bonuses. Only equipped Materia actually gain AP, so swap things around often to train up the ones you want.
Some Materia hits a max level and unlocks its full potential, while others (like Summon) don’t level at all. If you're pushing for late-game power, check which pieces need a final upgrade.
Building a Loadout
Balancing Attack and Support
You’ll want a blend of offensive, defensive, and support Materia throughout the party. Assign basic healing (Cure) to at least two party members, in case someone goes down. Use elemental Materia (Fire, Ice, Lightning, Wind) liberally—find out what enemies are weak against using Assess Materia, then capitalize.
Using Linked Slots for Combos
Linked slots open up new tactical layers. Plug a Blue Support Materia like Elemental next to an elemental spell, and suddenly your weapon attacks inflict that type of damage. Put Magnify next to Healing spells to cast Cure on the whole party. These combos let you handle encounters with fewer spellcasts, saving those precious ATB bars.
Passive Boosts
Independent Materia can feel less dramatic, but they add crucial survivability and utility, especially on higher settings. HP Up, MP Up, and Auto-Cure are favorites for a reason. Add these to your party's least tanky members, or anyone running low on bars mid-fight.
Materia for Each Role
Cloud (All-Rounder)
Cloud can wear many hats, but he shines with both elemental attack and defensive Materia. Try Elemental + Lightning or Fire in his sword slots for extra punch, and add Healing or Deadly Dodge for flexibility. Balance out his loadout with the occasional HP Up or Skill cooldown reduction.
Barret (Tank/Support)
Barret’s role is often to soak hits and restore allies. Fill him with Healing, Barrier, and Revival Materia. He handles support and crowd control well, so Magnify + Barrier lets him protect everyone in a pinch. HP Up and Steadfast Block help Barret stay standing in tough fights.
Tifa (DPS)
Tifa’s fast combos mean she charges up ATB quickly—perfect for spamming abilities and magic. Consider Time Materia (Haste) to speed things along, plus Chakra or ATB Boost for even more versatility. Add elemental damage to her fists, and she’ll crack shields with ease.
Aerith (Mage/Healer)
Give Aerith powerful magic like Fira, Blizzara, and Thundara, as her high magic stat supercharges spells. She’s the best at healing—equip both Healing and Revival Materia, maybe with Magnify. Prayer, which restores HP for no MP cost, is another standout for drawn-out boss battles.
Tips for Efficient Materia Management
- AP-Grind Smart: When tackling easy areas, swap in under-leveled Materia to boost AP gain across your inventory.
- Rotate for Flexibility: Boss fights and dungeons can throw curveballs—swap Materia based on enemy weaknesses and hazards.
- Double Growth Weapons: Some weapons double AP gains for equipped Materia. Use these to quickly level new pieces.
- Organize for Speed: Place healing on quick-access characters, and keep key support spells distributed so you’re not left short if someone’s KO’d.
Materia Must-Haves
For any setup, these Materia are clutch:
- Healing: At least two, often with Magnify.
- Revival: Resurrects fallen allies—always helpful.
- Assess: Early intel on enemy weaknesses.
- Elemental: Combine with both attack and defense.
- HP Up: Extra health never hurts, especially on Hard Mode.
Wrapping Up Materia Mastery
Materia’s flexibility keeps combat fresh throughout Final Fantasy VII Remake. Don’t be afraid to experiment—try new combinations and adapt to every challenge Midgar dishes out. Whether you’re a series veteran or picking things up for the first time, getting a feel for Materia builds gives you plenty of ways to feel powerful, creative, and in control when battles heat up. Keep tweaking, keep learning, and soon you’ll have every encounter dialed in just the way you like it.
Exploiting Enemy Weaknesses
Landing big hits and ending fights fast in Final Fantasy VII Remake often comes down to hitting what your foes hate most. Every enemy has particular strengths and soft spots, and knowing how to target them can swing fights in your favor—especially on higher difficulties. Here’s what you need to know to spot weaknesses, use the right tools, and keep the action moving your way.
Understanding Weaknesses
In FF7 Remake, enemies may be weak to certain elements (like fire or ice), weapon types, or even specific tactics. Some mechanical or robotic enemies fry under Lightning spells, while cold-based monsters melt from Fire. There are also enemies who respond badly to ice or wind. You’ll occasionally run into creatures with hidden weak points, but the elemental chart is your first and best tool for quick wins.
Finding Out: Assess is Your Friend
Early in Chapter 3, you’ll get the Assess Materia. Use it! Once equipped, use an ATB bar in battle to “Assess” any new enemy—the readout gives you vital stats, including HP, status effect resists, and most importantly, what they’re weak to.
- Pro tip: Not every new variant of an enemy shares the same weaknesses, so check again if you see a slightly new color or name.
- Assess only needs to be used once per enemy type—the info will stick and can be reviewed in the Enemy Intel menu anytime.
Matching Materia and Weapons to the Weakness
After identifying a weakness, swap your Materia and gear as needed. Here’s how you can capitalize:
Elemental Weaknesses
- Elemental Materia: Pair this blue Materia with Fire, Ice, Lightning, or Wind on your weapon for bonus elemental damage. On armor, it lets you resist or even absorb that type.
- Spellcasting: Use the specific elemental magic (Fira, Blizzara, Thundara, Aerora) corresponding to the enemy’s weakness. Upgrading these spells with higher-level Materia packs a bigger punch.
Physical Weaknesses
Some enemies like sweepers or shieldbearers are more susceptible to ranged or magical attacks. Barret’s guns and Aerith’s magic bypass many enemy shields.
Status Ailments
Occasionally, enemies will falter under certain status effects, like Sleep or Silence. You can use Materia like Poison or Subversion (Breach/Dispel), especially against foes that rely on magical barriers.
Understanding Stagger and Weak Points
Exploiting weaknesses does more than just deal damage; it builds the orange Stagger gauge under an enemy. Once it maxes out, the enemy becomes staggered, taking extra damage for a while.
- Dealing elemental damage an enemy is weak to fills the Stagger gauge faster.
- Certain abilities (like Cloud's Focused Thrust or Tifa's Focused Strike) are specifically designed to boost Stagger buildup, making it easier to press the advantage.
Adaptive Tactics in Boss Fights
Bosses come with layered defenses and changing weaknesses. Sometimes you’ll need to:
- Switch elements mid-fight: Some bosses “change phases,” shifting to a new vulnerability.
- Target specific parts: Many larger bosses can be weakened faster by attacking arms, appendages, or generator units. Assess will clue you in on which parts can be broken.
- Take advantage of pressure: When prompted with “Pressured,” use abilities that build Stagger or exploit elements they’re currently weak to.
Party Composition and On-the-Fly Adjustments
Don’t hesitate to swap to another character to maximize exploitation:
- Aerith can rain down spells without needing to get close, good for flying or fire-weak foes.
- Barret keeps pressure on enemies hard to reach with melee.
- Cloud and Tifa can equip Elemental-linked Materia for physical attacks that also hit elemental weak points.
Keep Materia distribution flexible. Sometimes swapping Lightning off Barret to another party member between encounters (or even in the menu right before a boss) pays off, especially if you expect to face machines then fiery foes right after.
Key Enemy Weakness Quick Reference
- Robotics (Drones, Sweepers, Shock Troopers): Weak to Lightning.
- Ice-types (Sahagin, Frosty variants): Weak to Fire.
- Flame-based (Bomb, Hell House certain forms): Weak to Ice.
- Flying pests (Grashtrike Queen, Cutter): Weak to Wind.
- Humanoids (Enemies in Shinra gear): Often susceptible to physical damage and sometimes Fire.
- Ghosts/Spirits: Many are weak to Fire and can sometimes be inflicted with Silence.
Smart Use of Items and Summons
- Certain items mimic spells for free (e.g., Fire Materia not ready? Use a Fire Bomb).
- Summons like Ifrit, Shiva, or Ramuh pack substantial elemental punch. Time their use for when enemies are staggered or most vulnerable for maximum damage.
Keeping Up the Pressure
Switch characters frequently to unleash abilities targeting the enemy’s weak spots. Don’t just stick with basic attacks; a burst of Fire into a fire-weak foe staggers them faster and shortens the fight. Use those ATB bars for more than healing—fill the gauge, drop the correct spell or ability, and reap the rewards.
Exploiting weaknesses makes every fight more manageable—sometimes even trivializing threats that could otherwise wipe your team. Keep using Assess, stay flexible with your Materia, and attack with purpose. The higher the difficulty, the more this approach pays dividends. Good luck, and good hunting!
Stagger System Mastery
The Stagger system in Final Fantasy VII Remake is the secret sauce behind explosive damage and fast victories. Understanding how to fill and unleash the Stagger gauge unlocks way more than just higher numbers; it leads to cleaner fights, shorter boss battles, and a lot less flailing around while enemies do whatever they want. Here’s how to truly make the most of it.
Stagger Gauge Basics
Every enemy in FF7 Remake (except some bosses or un-staggerable side mobs) has an orange Stagger bar just below their HP. Land enough attacks—especially the right ones—and you’ll fill this bar. Empty it, and the target is staggered: they freeze, get launched, or otherwise can’t act, all while taking increased damage.
- Staggered Damage Bonus: At the bare minimum, enemies take 160% damage when staggered. That’s a massive increase right out of the gate.
- Stagger Percentage: Some abilities—most notably Tifa’s—can pump this higher, letting you absolutely wreck bosses in those precious few seconds.
How Pressure and Stagger Are Connected
Before you can stagger a lot of enemies, you’ll often need to first trigger the "Pressured" state. You’ll see “Pressured” flash above their head when a certain attack lands, or when you hit a weak point at the right time (sometimes immediately, sometimes only during specific phases).
- While Pressured: Abilities that do high Stagger damage (usually listed in the ability description) fill the Stagger bar much faster.
- Use the Assess Materia to learn how to pressure each enemy type. Some require magic, some need you to break a part, and others want a perfectly timed block or dodge counter.
Key Abilities for Building Stagger
Almost every character has a couple of moves designed to pile on Stagger. Here are the big ones:
- Cloud
- Focused Thrust (Punisher Mode): Straightforward thrust that rapidly builds stagger.
- Focused Blade: Later option for focusing the gauge.
- Tifa
- Focused Strike: Fantastic for wearing down the Stagger meter.
- Unbridled Strength buffs let her multiply her capability—each tier gives access to stronger finishers and a spike in Stagger build.
- Barret
- Focused Shot: Great for tagged enemies or bosses at range.
- Aerith
- Ray of Judgment: Smashes the Stagger bar when it hits.
Hybrid Techniques
Certain enemy actions or environmental triggers can also fill the bar. For bosses, attacking limbs or using the environment (stunning with a crashed elevator, for instance) often pressures or staggers more quickly.
Maximizing Damage During Stagger
Timing is everything. Dumping your ATB meter right as Stagger starts (instead of before) is a game-changer. Here’s a quick battle rhythm for most fights:
- Fill the Stagger bar with well-timed Focused attacks and elemental weaknesses.
- Hold back on your big hitters and limit breaks as the bar gets close to full.
- Trigger Stagger, then immediately unleash your hardest hitting stuff—Limit Breaks, Summon attacks, high-level spells, and any ability you’ve queued up.
- Use Tifa: She’s the queen of increasing the stagger multiplier. Her abilities Rise and Fall, Omnistrike, and Whirling Uppercut each up the damage percent while an enemy is staggered—pop Unbridled Strength as high as you can before Stagger, then chain these together during Stagger time.
- Don’t waste time: The window is short. Command your party to use their best attacks; don’t just rely on AI.
Practical Tips for Consistent Stagger Success
- Always carry an ATB-ready attacker. Sometimes you need to switch to a character and immediately use a Focused ability before the Pressured state ends.
- Mix up elements and physical attacks. Some enemies resist physical damage but stagger fast from magic, and vice versa.
- Interrupt patterns. Many bosses have charge attacks or key moments—countering or stunning right then pressures them instantly, opening the stagger window.
- Don’t ignore Materia. Some (like Steadfast Block) make filling your ATB bar easier, which leads to more stagger-paced abilities.
Bosses and Advanced Stagger Play
Bosses often switch up their attack patterns and weaknesses several times. Here’s how to keep control:
- Change Matched Elements: Don’t be afraid to flip your Elemental Materia to the latest weakness mid-battle if a boss shifts affinities.
- Queue Multiple ATB Attacks: As the Stagger bar nears full, make sure all party members have at least one ATB bar ready. Let the boss have it in a burst.
- Use Debuffs: Spells like Slow or Paralyze rarely cause Stagger, but they can give you more safe time to build the bar.
- Summon Timing: Wait until the Stagger window; summon finishers (like Ifrit’s Hellfire) destroy bosses when they’re in their weakest state.
Closing Thoughts
Mastering the Stagger system transforms combat from a war of attrition into a flashy, controlled blaze. It’s about more than just dealing damage—it lets you dictate the pace of every fight. Get familiar with each character’s stagger-friendly moves, hold back your best spells for those vulnerable moments, and soon, even the toughest fights will start to feel a lot more manageable.
Limit Break Guide
Limit Breaks in Final Fantasy VII Remake are your team’s show-stopping super moves—every character gets one, and it’s the ultimate answer to “How do I hit really hard, right now?” While these finishers should look familiar to fans of the original, their role in battle now leans heavily on timing, resource management, and making the most out of the game’s Stagger mechanics. Let’s break down how Limit Breaks actually work, how to charge them, and how to get the absolute most out of every Limit Bar.
What Is a Limit Break?
A Limit Break is a character’s strongest attack, only available when their Limit Gauge fills up. It doesn’t require ATB, MP, or any special resources—just the gauge. Once available, you can pop it from the Command Menu even if you have zero ATB bars left.
Each party member has their own unique Limit Break:
- Cloud: Cross-Slash (later Ascension)
- Tifa: Somersault (later Dolphin Flurry)
- Barret: Fire in the Hole (later Catastrophe)
- Aerith: Healing Wind (later Planet’s Protection)
You’ll unlock the stronger variations of each Limit Break as you progress through the story and complete Battle Intel challenges.
How to Fill the Limit Gauge
The Limit Gauge builds up two main ways:
- Taking Damage: The more damage a character takes, the faster their Limit Gauge fills.
- Suffering Negative Conditions: Status effects like Poison, Sleep, or Stun speed up the process.
- Special Accessories or Materia: Items like the Fury Ring or the Chakra Materia can help you take more damage intentionally (Fury status doubles gauge gain), but this is usually a risky play.
There’s no way to fill the Limit Gauge from attacks or dealing damage—only by putting yourself at risk. And the gauge doesn’t carry over between fights, so don’t save it for later!
When to Use Limit Breaks
Limit Breaks hit hard, but they’re not just about damage numbers. Here’s when you want to use them for max impact:
- During Stagger Windows: This is the golden rule. If possible, always try to use your Limit Break when an enemy is staggered. You’ll get that fat 160% (or more with Tifa’s boosts) damage multiplier, multiplying the carnage.
- Going for the KO: If an enemy is nearly finished and you can’t stagger it quickly, it’s fine to unload your Limit Break to clinch the win—especially in boss fights with multiple phases.
- Group vs. Single Target: Most Limit Breaks are single-target (except Aerith’s, which support the party), so line it up for when you need to smash a boss or troublesome elite.
Character Limit Break Details
Cloud: Cross-Slash and Ascension
- Cross-Slash: Strong, reliable, and can briefly paralyze some enemies. Perfect against single foes right after a stagger lands.
- Ascension: Unlocked later; hits even harder and racks up multiple hits. Best saved for bosses or chunky staggered enemies.
Tifa: Somersault and Dolphin Flurry
- Somersault: Fast, direct, adds Stagger percentage. After a combat challenge, you’ll get Dolphin Flurry—which increases Stagger damage even more.
- Combo Bonus: Tifa can pump up Stagger damage before using her Limit; the higher the % when she fires it off, the more it dishes out.
Barret: Fire in the Hole and Catastrophe
- Fire in the Hole: Big explosive AOE around a target. Useful for smacking bosses or packs of dangerous enemies at once.
- Catastrophe: Even bigger AOE, more damage, better against giant enemies or screen-filling mobs.
Aerith: Healing Wind and Planet’s Protection
- Healing Wind: A massive group heal, restoring a chunk of HP to the whole party—even revives downed members. Use when you’re hurting, not for pure offense.
- Planet’s Protection: Grants a barrier negating all damage for a short period. Perfect for boss phases with huge attacks.
Tips for Mastering Limit Breaks
Always Look for the Stagger Window
Your Limit Break does at least 60% more damage if timed on a staggered enemy, and Tifa can make that go even higher. That’s a bigger difference than any other attack in your arsenal.
Don’t Hoard Your Gauge
Because the Limit Bar resets between battles, don’t finish fights with an unused Limit—especially not random trash encounters. Use it or lose it.
Command Your Team
You don’t have to be controlling a character directly to use their Limit Break. Pause the action, swap to Command Mode, and trigger someone else’s finisher for optimal positioning or timing.
Stack with Debuffs and Weaknesses
Landing your Limit after using Defense Down debuffs or exploiting an elemental weakness dials up the pain. Barret with Magnify-Subversion (Defense Down), then Cloud’s Cross-Slash on a staggered weakness? It’s one of the highest one-two punches you can pull off.
Prepare for Multi-Phase Fights
Some bosses bring a second phase right after you “finish” them. Try to gauge if it’s worth holding the Limit for a nastier, staggerable form, or if you should just unload it to escape a dangerous phase.
Limit Break Upgrades and Unlocking More
Each character starts with their basic Limit Break, but you’ll get their level 2 Limit by:
- Cloud & Tifa: Completing Corneo Colosseum and VR Missions.
- Barret: Similar late-game battle challenges.
- Aerith: Main story progression.
Don’t forget to switch your limit before tough missions—only one can be used at a time.
Conclusion
Limit Breaks are a key part of turning tough fights into highlight-reel moments. Fill your Limit as fights get dicey, aim for that perfect Stagger window, and unleash each character’s finisher for maximum effect. Combine this with the right Materia and combat strategies, and you’ll stylishly bulldoze any challenge Final Fantasy VII Remake throws your way.
Character-Specific Tactics
Every party member in Final Fantasy VII Remake feels different to play, and understanding how to use their unique skills can make any fight smoother. Swapping between characters at the right moment and letting each shine in their specialty is where the combat system really pops. Here’s a closer look at what makes each character tick, plus practical tips for boss fights, trash mobs, and everything in between.
Cloud Strife: Versatile Frontliner
Cloud is your default leader and the most flexible party member. His Basic Attack is quick, and switching between his Punisher and Operator stances gives you serious options.
- Operator Mode: Fast attacks. Good for crowd control, dodging, and mobility.
- Punisher Mode: Slower, hits harder, and auto-counters melee attackers if you hold the stance.
Tactics
- Operator for mobility, Punisher when enemies get close.
- Use Counters: Bait out melee attacks, lock yourself in Punisher, and swing away as counters land.
- Focus Thrust and Braver fill Cloud’s ATB fast, letting you rotate through abilities. Save these for stagger building and single-target damage.
Boss Fights
- Cloud shines at pressuring and staggering bosses. Get in close, switch to Punisher, and keep up the assault.
- Mix in elemental spells when you spot a weakness.
Tifa Lockhart: Stagger and Pressure Queen
Tifa’s role is high-pressure, high-reward. She’s fast and her combos stack, ramping up Stagger percentage. Her Unbridled Strength ability lets her combo into even more powerful finishers.
- Unbridled Strength: Use it once to unlock the stronger Rise and Fall combo, use it again for Omnistrike, and a third time for Whirling Uppercut. The more you stack, the stronger your kit becomes.
Tactics
- Build ATB and keep Unbridled Strength maxed.
- When an enemy is staggered, Tifa lifts the damage cap: Hit with basic attacks, then use her unique moves (Rise and Fall, Omnistrike, Whirling Uppercut) during Stagger for bonus percent.
- Her triangle attacks (depending on Unbridled Strength) are the best way to maximize Stagger bonus.
Boss Fights
- Tifa is essential against bosses with Stagger mechanics. Let her ramp up the Stagger meter, then unleash her combo in a flurry on the Staggered boss.
- Focus on staying mobile—dodge frequently, as Tifa is less durable than Cloud or Barret.
Barret Wallace: Tank and Ranged Disruptor
Barret is your heavy gunner and tank. He can absorb hits, and while he’s not as speedy, his ranged attacks make him invaluable against flying or distant foes.
- Basic Attack: Long-range, great for picking off enemies you can’t easily reach.
- Overcharge (Triangle): Barret’s super shot. It packs a punch and recharges faster if you press triangle after.
Tactics
- Always alternate between basic shots and Overcharge.
- Barret’s Steelskin ability reduces incoming damage and helps him tank for the party.
- Use him to draw aggro from dangerous enemies with Lifesaver, sharing HP among the squad.
Boss Fights
- Barret is key for fights where distance matters. He can keep up pressure on airborne or shielded enemies while others dodge and heal.
- Use Maximum Fury on staggered targets to burn them down quickly.
Aerith Gainsborough: Magical Support
Aerith isn’t about raw damage up close. Instead, she’s your main spellcaster and support powerhouse.
- Tempest (Triangle): It’s a charge attack. Holding releases a wide AOE spell attack for free.
- Arcane Ward (Ability): Doubles the next offensive spell for anyone standing inside it.
Tactics
- Set up Arcane Ward, then drop high-level spells like Fire or Blizzaga for double impact.
- Use this combo with Magnify Materia to unleash wide-range magic.
- Keep Aerith at distance—her defenses are weak, but her healing is best-in-class.
Boss Fights
- Aerith can heal, support with barriers, and tear down bosses with magic.
- Buff and cure the party, toss out double-cast spells on Stagger, and use Pray or Healing Wind for emergency recovery.
Synergy and Swapping On The Fly
The remake’s combat engine expects you to swap characters mid-fight. AI-controlled allies stick to basic attacks and limited abilities—taking direct control lets you unleash each character’s full toolset. Here’s how to maximize your squad’s teamwork:
- Build ATB with everyone: Pop abilities regularly. Charging in and switching lets you fire off more specials per fight.
- Chain Abilities: Use Tifa and Cloud’s stagger abilities back-to-back to maximize damage windows.
- Cover Weaknesses: Barret can hit distant or unreachable targets; Aerith clears groups with magic; Cloud and Tifa handle face-to-face action.
Adapt to Enemy Types
Every enemy in FF7R has a weakness—some are airborne and hard to reach (Barret shines here), others immune to magic or tough to stagger (Cloud/Tifa combo works best). Here’s a cheatsheet:
- Flying/High Targets: Barret, Aerith’s magic.
- Stagger-Heavy: Tifa and Cloud combine for fast pressure and finishers.
- Lots of Adds: Aerith’s Magnify spells or Barret’s AOE abilities.
- Tanky Bosses: Save hard-hitting attacks for stagger! Stack debuffs and chain Limit Breaks.
Materia and Equipment Tips
- Slap Magnify on Aerith for party-wide buffs or offensive spells.
- ATB Assist Materia fires off an extra ATB charge if the other characters use two actions in quick succession—helpful for big boss rushes.
- Elemental Materia in weapons/armor lets you counter boss affinities.
- Chakra & Prayer let Tifa and Aerith go longer without burning MP on healing.
Wrapping Up This Section
Mastering each character’s personal playstyle and swapping smartly in combat can turn even the hardest boss fights into manageable encounters. Practice stringing abilities together and let each hero exploit their best strength. The more you mix-and-match your tactics, the flashier (and deadlier) your squad becomes.