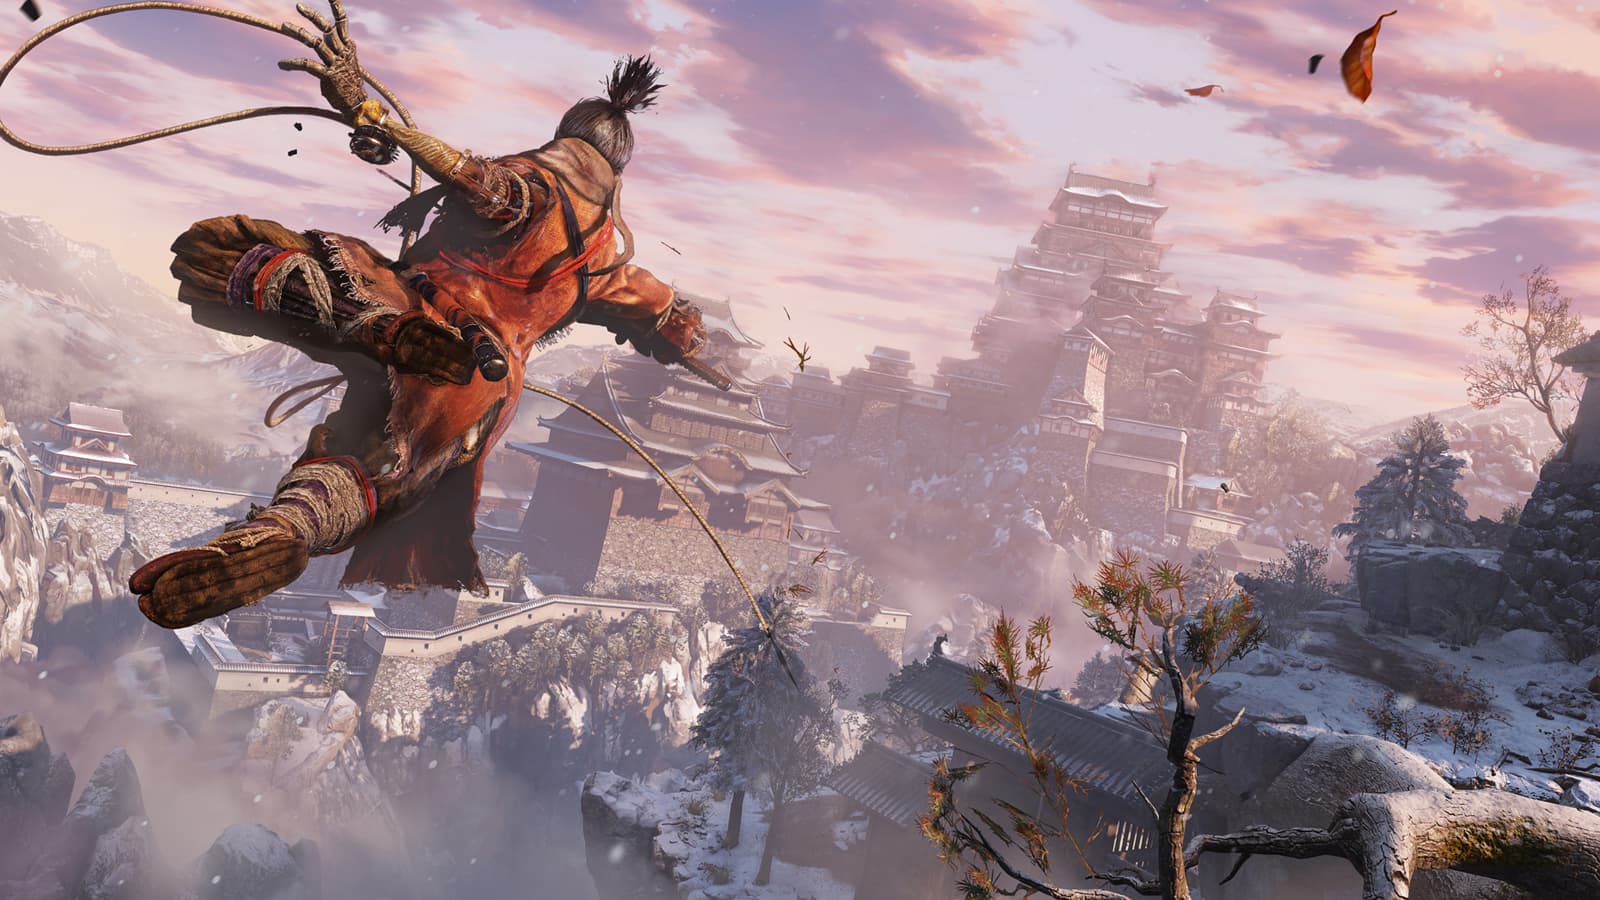
Sekiro: Shadows Die Twice Combat and Strategy Guide
Master Sekiro's combat with posture tips, stealth tactics, prosthetic tools, boss strategies, and skill tree progression to sharpen your skills.
Sekiro: Shadows Die Twice is a challenging game--there's no denying that. From punishing sword duels to carefully-timed deflections, its combat system demands precision, timing, and patience. Mastering Sekiro's combat mechanics isn't simply about memorizing combos or pressing buttons quickly; instead, it requires a thoughtful strategy and careful observation of your opponents' actions. Even if you're familiar with similar action games, Sekiro's distinct approach to stamina management, posture, and stealth tactics will present unique challenges and new frustrations. Getting comfortable with these systems can be daunting at first, but building confidence and consistency is achievable with practice and a clear understanding of the game's rules.
Understanding Posture-- What It Means and Why It Matters
In Sekiro: Shadows Die Twice, health alone isn't your sole concern during a fight. You also need to watch your Posture--and the posture of your enemies. Think of Posture as your balance and stance in combat. Attacks, dodges, and especially blocks and deflections all affect this hugely important stat. Every combatant, including you, carries a Posture meter beneath their health bar, which fills progressively as a fight goes on.
When Posture fills completely, you're thrown off-balance, leaving you open to serious punishment. Similarly, an enemy who loses Posture is susceptible to a Shinobi Deathblow--a special attack guaranteeing massive damage. This means Posture essentially determines your ability to take down tough opponents efficiently. Learning to read and manage Posture keeps small fights brief and boss battles survivable.
Your Posture recovers slowly but becomes quicker when guarding, and fastest if you're able to step back briefly from the fight. Opponent Posture works similarly: gradually rebuilt when left undisturbed, but capable of being quickly broken once you master Sekiro's hallmark mechanic--deflecting.
Learning How Deflection Works and When to Use It
Sekiro doesn't reward endless blocking. You’ll notice quickly that continuous blocking maxes out your Posture meter, leaving you vulnerable. That’s where "deflection" enters the picture. Instead of holding block, pressing guard (default L1/LB) just before your opponent's strike hits turns a standard block into a deflection. These precise timings prevent your Posture from worsening, steadily damaging your foe’s Posture instead.
If performed consistently, successfully deflecting attacks is crucial to tackling stronger enemies like minibosses and bosses. Practice deflecting simple enemy attacks first to get into the habit. From ordinary soldiers to giant generals, timing differs. Pay attention to subtle visual and audible cues--like enemy weapon-flashes and attack animations--to guide the perfect deflection timing.
In tense boss battles, deflections push the fight decisively in your favor. Landing several deflections back-to-back breaks enemy Posture quickly, enabling an early Deathblow and avoiding drawn-out combat that eats away your health and items.
Balancing Attacks, Deflection, and Positioning For Posture Success
While deflecting is crucial, Sekiro’s combat system isn’t just about waiting passively for strikes to block. Offensive tactics like normal attacks, special prosthetic weapon skills, and combat arts actively chip away enemies' health and posture meters. As enemy health shrinks, their Posture recovers slower, making successive deflections far more useful.
Striking a healthy balance between aggression and patience makes the difference. Approach confidently, land hits to weaken enemy health, deflect carefully timed responses, and keep an eye on your own Posture meter. Need to recover quickly? Step back briefly and hold block to replenish faster.
Terrain and movement also massively affect posture management. Being cornered or forced against a wall limits your choices, forcing nonstop blocking. Keep your distance carefully, repositioning regularly to maintain control of the battlefield. Occasionally retreating helps reset your Posture meter and lets the enemy's own gauge build up stress--especially helpful against merciless bosses like Genichiro Ashina.
Handling Perilous Attacks (and Why They Matter)
Not every enemy can be handled solely by regular deflecting. You'll often encounter special, glowing-red perilous attacks that must be countered uniquely. These come in different types-- grabs, sweeps, and thrusts--which demand different responses. Thrust attacks, notably, can get countered by a Mikiri counter (performed by dodging forward directly into the incoming strike), delivering devastating posture damage.
Identifying and reacting to these aggressive moves separates victory from crushing defeat. Misread a perilous attack, and you'll likely lose a significant chunk of health--on top of severe posture damage. Learning patterns quickly, noting icons, and sound effects indicating perilous moves gives you a huge edge in combat. Over time, they’ll become perfect opportunities to deal significant posture damage, opening foes up to decisive Shinobi Deathblows.
Final Tips For Mastering Your Posture and Deflection Techniques
Here's a short-and-sweet list of tips to practice your posture and deflection skills efficiently:
- Practice with caution: Seek out lower-level enemies to build reliable deflection timing and confidence.
- Learn enemy animations: Bosses often have recognizable attack patterns; know which ones need deflections and when to reposition.
- Balance offense and defense: Continuously engage with enemy health. More wounded opponents rebuild Posture slowly.
- Watch Your terrain position: Don't stay pinned. Safely reposition and recover your posture meter constantly.
- Perilous moves matter: Identify quickly, learn Mikiri counter, and stay calm. These red-signaled attacks are often golden opportunities.
When mastered, Sekiro's elegant dance of deflections, positioning, and posture distances it from other action games. You won't just become proficient; you’ll gain a deeply rewarding learning curve, becoming skilled enough to dispatch enemies with the grace of a true Shinobi warrior.
Prosthetic Tool Usage
Sekiro's Shinobi Prosthetic isn't just a cool replacement arm--it’s your utility belt, Swiss-army knife, and tactical advantage rolled into one. While swordplay and deflections form Sekiro's combat foundation, understanding and using your prosthetic attachments strategically can change entire fights. Each tool provides distinct effects--offensive bursts, valuable counters, or clever distractions--that make tough battles manageable and your opponents vulnerable.
Here's a practical rundown of your essential prosthetic tools, when they're most useful, and how they complement the rest of your fighting skills.
Shuriken: For Speedy, Long-Range Interruptions
The Loaded Shuriken is probably the first prosthetic tool you'll encounter, and it's versatile from start to finish. These lightweight projectiles are ideal for disrupting fast or airborne foes. Enemy leaping your way? Throw a quick shuriken mid-air, knocking them down for follow-up attacks. Agile, elusive enemies or annoying ranged fighters like archers? Chuck a shuriken their way to quickly stagger and gap-close directly afterward.
Remember, though--shurikens won't dish out game-changing damage by themselves. They're about positioning, tempo control, and creating offensive opportunities. Combine them with aggressive play to capitalize on your foes' brief windows of weakness.
Firecracker: Battle Control, Crowd Management, and Beast Taming
Robert’s Firecrackers aren't lethal--they simply blind and disorient--but don't overlook their value because of lacking raw damage. Using them throws humans into chaos, temporarily halting aggressive foes and crowd control. Swarmed by multiple lesser enemies? Pop firecrackers, stagger everything around, and relocate or thin numbers safely.
More importantly, beasts and animals suffer extended stun from firecrackers, turning nightmare foes into manageable opponents. Tough beast minibosses--like the Chained Ogre or Blazing Bull--recover far slower, providing generous windows to unleash heavy attacks safely. Be aware: Firecrackers have limited use before restocking. Save them for the right timing, or emergency escapes when overwhelmed.
Flame Vent: Damage and Vulnerability Through Fire
Quick bursts from your Flame Vent prosthetic deal instant fire damage up-close, often igniting opponents altogether. Ignited enemies panic, flailing helplessly as continuous vitality loss eats away their health quickly. Additionally, certain foes--especially those wrapped in red-eyed rage or coated in oil--take additional punishment from fire: ignite first, then follow with rapid melee combos to finish fights swiftly.
For maximum effectiveness, carry Oil to toss at enemies beforehand. Once doused, your Flame Vent’s effects amplify dramatically, scorching tough creatures like the annoying red-eyed brutes rapidly, shortening painfully difficult encounters.
Loaded Axe: Smashing through Shields and Heavy Armor
Nothing ruins a ninja's cool factor like an enemy shield blocking all your best moves, leaving standard slashes ineffective. That's where your Loaded Axe excels. It brutally breaks wooden shields and armor plates, leaving foes staggered and exposed. Slow but heavy-hitting, every swing deals massive posture damage, punching through commony defended targets.
Its usefulness isn't limited to grunts. Even minibosses that hide behind heavy coverings or armored samurai have vulnerabilities against a loaded axe--one solid strike sets them stumbling preemptively, opening generously toward decisive deathblows. Timing is key, though--landing a clean, heavy swing takes time, so catch your opponents off-guard to land it safely.
Shinobi Firecrackers Upgrade (Long Spark and Spring-load): Expanded Effectiveness
Eventually, you'll upgrade prosthetics at the Sculptor’s Idol, enhancing effectiveness significantly. Shinobi Firecracker’s upgrades--Long Spark and Spring-load--give even better battlefield control and tactical flexibility.
The Long Spark offers bigger, longer-lasting flash bursts, giving additional breathing room or openings to attack when swarmed. Spring-load upgrades provide more uses during each rest, meaning fewer trips back to restock mid-adventure. Investing resources here greatly improves overall efficiency, letting you confidently use prosthetics frequently instead of hoarding items stingily.
Loaded Spear: Creating Distance and Ripping Armor
The Loaded Spear is underrated yet invaluable tactical hardware. It serves dual purposes: range-extension combined with the ability to hook into and tear off enemy armor. Heavy armor wearing samurai and monks lose defensive plates permanently when hooked, significantly reducing their defense, making follow-up blade slashes devastatingly powerful.
The spear can yank smaller foes toward you or clear immediate surroundings thanks to its crowd-control capabilities. Timing is everything. Set opponents up, spear at distance to strip away defense, then chain attacks as enemies stagger forward toward you, helplessly exposed.
Mist Raven: Emergency Evasion and Ambush Opportunities
The Mist Raven attachment operates differently, filling the role of evasive maneuver rather than direct offensive tool. Activating immediately before receiving a hit teleports Sekiro a short distance safely away from danger--crucial in close battles against unpredictable enemies or bosses with powerful, unavoidable attacks.
Despite its seemingly straightforward evasion purpose, creative use provides fantastic ambush potential. Mist Raven positions you behind enemies instantly after their missed swing, allowing you ample time to get free hits from an undefended rear. Effective mastery adds defensive depth alongside precise deflection and regular dodging.
Sabimaru: Poisoning Foes Quickly
Sabimaru, a swift, poison-coated short sword housed within your prosthetic, carves through enemy defenses more discreetly. As Sabimaru slices opponents, poison rapidly builds, draining enemy health passively once inflicted. It's especially helpful against tough human foes vulnerable to poison effects, weakening even skilled samurai and persistent shinobi hunters.
Use rapid-strikes combos to maximize poison buildup quickly, severely reducing enemy vitality without riskily overcommitting. Combining Sabimaru strikes and regular sword combos hasten health depletion, leaving foes erased before they realize what poisoned them.
Final Thoughts and Prosthetic Tool Strategy
Each prosthetic is valuable in specific contexts, complementing normal swordplay beautifully. While powerful, prosthetics aren't limitless--your ammo (Spirit Emblems) is finite. Learn enemy types and environments thoroughly before spending precious resources too recklessly. Adapt carefully, and prosthetics become essential lifelines, counters, and battlefield equalizers that turn overwhelming danger into smooth victories.
Get comfortable experimenting--mixing prosthetics smartly provides satisfyingly versatile combat opportunities while keeping your battles fresh. When regular strikes and deflections alone won't cut it, draw courage regularly from these trusty Shinobi tools. They’ll not only help you win the toughest matches but also reinforce the feeling of being a versatile, efficient, and lethal warrior Shinobi.
Stealth Techniques: Taking Down Your Foes Silently
As much fun as leaping head-on into fights can be, Sekiro favors smart, silent moves over noisy battles. While the sword duels are flashy and satisfying, mastering stealth techniques is equally essential. Staying hidden not only allows you to thin enemy ranks easily--saving precious health and healing items--but also grants opportunities to eliminate tougher targets without a taxing fight.
Let's break down some easy tips to sharpen your shinobi stealth skills:
Staying Undetected: Crouch and Cover are Your Best Friends
Keeping enemies unaware gives you control over the battlefield. To stay quiet, use your crouch constantly--moving upright makes noise, drawing unwanted attention. Hug walls closely to reduce your visibility, hiding carefully around corners until guards move past. Bushes, long grass, and rooftops provide helpful cover. The vertical space Sekiro provides is an assassin's playground. Use rooftops frequently--they put you out of enemy sightlines, giving you perfect vantage points to plan attacks.
Watch your alert meter--which appears as a slowly filling triangle above enemies' heads. Yellow means they're cautious; red means you've been spotted. If enemies start noticing you, quickly reposition--even just a moment of hiding again lets their suspicions fade. Remember, time is your ally, not your enemy. Be patient and let suspicion drain before circling back for another strike.
Deathblows from Above and Below
Stealth is not just slow and quiet sneaking around--attacking from unexpected angles makes you dangerous. Jumping from rooftops or trees onto enemies below instantly triggers aerial deathblows, completely removing unsuspecting enemies. You don't have to fall directly atop enemies; even a quick mid-air strike prompt will appear, guaranteeing the kill.
Similarly, Sekiro can also execute attacks from ledges--these hanging deathblows let you silently dispose of foes standing near cliff edges and building sides. These stealth executions are quick, safe, and extremely useful for thinning enemy ranks without drawing attention.
Backstab and Cornering Techniques
Enemies naively facing away from Sekiro always offer easy assassination opportunities. Just move carefully behind them and trigger the takedown prompt. Close in slowly if they’re particularly sensitive to sound. Pay close attention to patrol paths--you'll find plenty of guards who pause briefly to leave an opening behind. Wait until their backs are turned, then slip in swiftly for the kill.
Another neat trick: Guards often move in predictable patterns, making them vulnerable to ambushes around corners or doorways. Using ceramic shards or other distraction items draws curious guards to carefully placed positions for easy, silent kills. Staying aware of constantly shifting enemy locations helps you pick off enemies methodically, one by one.
Gachiin's Sugar and Suppress Sound: Items for Better Stealth
Your prosthetic tools are fantastic, but certain consumable items greatly boost stealth. The most effective option here? Gachiin's Sugar. Eat it to cloak Sekiro, drastically reducing visibility and muffling noise. Walking by guards undetected gets much easier with this buff active--perfect for sneaking past dangerously overcrowded sections or reaching safe deathblow positions secretly.
An upgrade, the Suppress Sound skill, further reduces your footsteps' noise, allowing quicker stealth movements without enemy attention. Pick this up quickly from your skill tree. Combining Suppress Sound with Gachiin's Sugar means you can infiltrate enemy positions, dispatch key targets, and reposition safely before anyone notices.
Puppeteer Ninjutsu: Turning Enemies into Allies
One incredible late-game stealth advantage is the Puppeteer Ninjutsu technique. Instead of a normal deathblow, perform a second, quick button press to control fallen enemies briefly. Turning your downed opponents into puppets means they fight for you, distracting their comrades effectively. Suddenly, patrol units that seemed difficult become much easier to handle.
Strategically employing this skill mid-combat offers astonishing results. Taking control of beefy soldiers, powerful enemies, or even rifle-wielding foes creates chaos enemies can’t ignore. Puppeteer is particularly handy for tough stealth sections involving multiple strong foes. Make use of this technique regularly once learned; the advantage is incredibly valuable.
When Stealth Fails: Escaping and Repositioning
No stealth run is flawless. If caught out accidentally, don't panic--run quickly toward grappling points above or terrain that offers new hiding spots. Escape enemies' line-of-sight long enough and their awareness eventually resets. Enemies will yell and chase briefly, but they return to normal patrol routes once you remain hidden for some time.
Using walls, rooftops, tall grass, or water lets you vanish from sight, giving you a chance for another stealth attempt. Always remember circles and loops are powerful--kite chasing patrols away, then quickly double back, reposition, and attack quietly again. Patience and intelligent repositioning turn tense chases into successful ambushes.
Stealth Equals Survival
In Sekiro: Shadows Die Twice, careful stealth strategies let you safely bypass punishing sections or eliminate threats quietly, conserving resources and health. Effective shinobi humiliation frequently comes in the quietest moments when enemies least expect it. Learning this valuable approach makes your time smoother and more enjoyable as you gradually become a stealthy predator.
By combining patient observation, methodical movement, clever item usage, and creative techniques, stealth elevates Sekiro’s combat into thrilling territory. Whether you're silently paring down dangerous groups or ending stressful encounters prematurely, becoming a shinobi relies heavily on exploiting your foes' weaknesses from the shadows.
Boss Weaknesses in Sekiro: Shadows Die Twice
Taking out bosses in Sekiro isn't just button-mashing chaos; it's about reading your opponent and exploiting their weak points. Knowing each boss's vulnerabilities gives a major advantage. Here's a detailed breakdown of the big baddies' weaknesses so you can get the upper hand and keep your frustration levels down.
Gyoubu Oniwa: Shinobi Firecracker and Grappling Hook
Your first big clash, horseback warrior Gyoubu Oniwa, seems intimidating. Fortunately, he's highly susceptible to the Shinobi Firecracker prosthetic. Timing firecrackers with his charges spooks his horse and sets him up perfectly for a few quick swipes. You can stagger Gyoubu multiple times in each phase, letting you pile on posture damage fast.
Don't forget the numerous grappling points in the arena. Swinging toward him provides extra hits, as you quickly close gaps and launch surprise aerial attacks. Combining grapple attacks and Firecracker stuns makes a tough opponent much easier.
Lady Butterfly: Shuriken Prosthetic and Snap Seeds
Lady Butterfly is a fast and tricky boss with plenty of illusions messing you up. She relies heavily on acrobatic leaps and midair attacks, but you can counter these predictably. Use your Loaded Shuriken prosthetic midair whenever she leaps or floats--this instantly interrupts her momentum, dropping her down for your attack.
When those ghostly illusions swarm in phase two, crack out Snap Seeds (picked up before the fight) to dispel them immediately. With her defense illusions gone, you can concentrate once again on timing your shuriken to interrupt her acrobatics. She doesn't boast high endurance, so staying aggressive after breaking her momentum tips the scales in your favor.
Genichiro Ashina: Lightning Reversal and Mikiri Counter
Genichiro Ashina provides the first big skill check many players face early in Sekiro. He's fast, relentless, and hits insanely hard with unblockable sword sweeps and thrust attacks. The secret? His ultimate moves are countered by Sekiro’s own techniques.
Genichiro’s thrust attacks are prime Mikiri Counter opportunities. Quickly stepping into these attacks instead of away shatters his posture faster. In his later form, when Genichiro unleashes lightning strikes, execute Sekiro’s Lightning Reversal (jump into the air, absorb lightning, and fire it back). Doing so stuns Genichiro completely, making him incredibly vulnerable. Mastering these two counters dramatically simplifies this major battle.
Guardian Ape: Firecrackers, Flame Vent, and Loaded Spear
The Guardian Ape fight is arguably Sekiro’s most intense (and memorable) fight. This intimidating beast struggles against Firecrackers--especially in the first phase. Toss firecrackers between its rampages, and the ape panics briefly, offering large attack windows. The Flame Vent tool is also useful; its fiery blasts deal decent vitality damage and further terrify the ape.
Later, in its eerie, headless form, employ your Loaded Spear. Successfully launching the prosthetic spear into its exposed neck (after certain heavy attacks) lets you yank out the centipede inside, causing massive posture damage and staggering it reliably. Master these prosthetic timings to make a tough fight manageable.
Corrupted Monk: Divine Confetti and Snap Seeds
The ghostly Corrupted Monk enemy appears in a spectral illusion variant first, then again later as a tougher true form. Fortunately, both forms have clear vulnerabilities. Snap Seeds instantly dispel its illusion form, leaving it open to major damage before attacks resume.
When facing the true version, use Divine Confetti to increase your damage dramatically. The enhanced hits chip away strongly at both health and posture bars. Between Confetti buffs, maintain pressure to keep posture from regenerating. Add in Firecrackers between its wide swings for easy posture buildup and simple damage opportunities.
Owl (Father and Great Shinobi Owl versions): Ichimonji double and Firecrackers
Both forms of Owl give Sekiro universally difficult fights. One way to simplify these punishing duels is Ichimonji Double, which dishes significant posture damage while recovering your own posture. Owl is aggressive and doesn't leave many openings, but Ichimonji Double perfectly punishes his longer combo recoveries.
Firecrackers also briefly startle Owl, interrupting his momentum to land crucial hits. Don't overuse it though--Owl grows accustomed to prosthetics quickly. Switch up your tactics frequently to keep him guessing, combining counters, Ichimonji strikes, and short firecracker disruptions to consistently pressure Owl.
Demon of Hatred: Malcontent Prosthetic and Loaded Umbrella
The monstrous Demon of Hatred battle serves as a harsh test at Sekiro’s endgame, but using two specific tools drastically simplifies the fight. Malcontent (a unique whistle prosthetic upgrade) stuns the Demon significantly, letting you land huge damage safely. This tool is limited, so time it carefully to interrupt his most devastating attacks and guarantee bursts of free damage.
Equip your Loaded Umbrella prosthetic to safely absorb powerful explosions and sweeping fire arcs, letting you counterattack after deflecting major damage. Mixing these strategies reduces risk and speeds up an otherwise brutal fight.
Isshin, the Sword Saint: Mikiri Counter, Lighting Reversal, and Firecrackers
Isshin is Sekiro’s ultimate final challenge, punishing any mistake ruthlessly. Thankfully, he's vulnerable to the mechanics you've learned. Isshin relies on thrusts--Mikiri Counter them consistently to quickly build posture damage. Once Isshin transitions to wielding his spear, the Mikiri Counter remains your best friend.
In Isshin's final form, he unleashes devastating lightning attacks, which you counter with Lightning Reversal. Successfully performing reversals deals enormous damage and provides safe attack openings. No lightning appearing yet? Buy attack time safely by stunning him with well-timed Firecrackers. Combining these simple tools and techniques ensures Isshin’s defeat.
Simple Weaknesses Bring Huge Advantages
In Sekiro, every boss has monster damage and punishing moves. But knowing each opponent's secret weaknesses reduces intimidating fights into manageable learning curves. Using prosthetic tools, special items, and counter moves tailored individually makes troublesome boss encounters simpler and dramatically boosts your chances in otherwise discouraging battles. Arm yourself with this knowledge to confidently dominate each boss waiting ahead.
Understanding Skill Trees in Sekiro
In Sekiro: Shadows Die Twice, mastering combat isn't solely about quick reflexes or memorizing attack patterns. Your character progression and abilities also come from skill trees--a robust upgrade system that gives you new attack techniques, passive enhancements, and combat styles as you advance. Sekiro splits these skill upgrades into multiple categories, each with its own purpose and focus. Knowing which skills are worthwhile early in the game and how to structure your upgrades can significantly ease your time navigating the challenging confrontations that lie ahead.
Let's break down each skill tree clearly, dissect essential abilities to prioritize, and explore how each tree directly impacts your playstyle.
Shinobi Arts Skill Tree
You'll unlock the Shinobi Arts Skill Tree very early, after obtaining your first skill point and talking to the Sculptor back at the Dilapidated Temple. This skill tree covers the fundamentals--a mix of combat techniques and stealth-based moves emphasizing mobility and surprise attacks.
Key Shinobi Skills
-
Mikiri Counter: This is essential--arguably the most valuable single upgrade in Sekiro. It allows you to easily counter and heavily punish enemy thrust attacks. Prioritize learning Mikiri Counter immediately to simplify your early encounters.
-
Suppress Presence: This passive ability reduces enemy perception, allowing you improved stealth and fewer unwanted engagements. Grabbing this early makes sneaking much easier, especially when positioned alongside tougher enemies like minibosses surrounded by guards.
-
Run and Slide: This move lets Sekiro perform a quick slide after sprinting, aiding in mobility and dodging larger-scale enemy attacks. It isn't critical, but it's affordable and highly helpful for aggressive hit-and-run tactics.
As your first skill tree, Shinobi Arts provides a strong foundation focused on precision and stealth--both necessary for overall success in Sekiro.
Prosthetic Arts Skill Tree
Once you acquire multiple shinobi prosthetics, the Sculptor introduces you to another set of upgrades--Prosthetic Arts. This skill tree enhances your prosthetic tools and unlocks powerful prosthetic-based combo moves, valuable in various combat scenarios.
Key Prosthetic Skills
-
Chasing Slice: An early standout, Chasing Slice allows Sekiro to close distance immediately after throwing a shuriken, guaranteeing a follow-up hit. Perfect for interrupting fleeing or evasive targets, it's practical and intuitive.
-
Emma's Medicine (Potency and Aroma): These passive upgrades boost your healing gourd's effectiveness, restoring more health per use. They might seem subtle, but they're game-changers against punishing late-game bosses.
-
Projected Force: This skill allows you to execute additional special attacks after activating certain prosthetics. With Projected Force, the Loaded Spear, Flame Vent, Loaded Axe, and Loaded Umbrella prosthetics expand significantly, each gaining a devastating new combo attack.
Invest wisely in Prosthetic Arts, selectively focusing on skills tied closely to your favorite prosthetic tools. Avoid wasting points on prosthetic upgrades for tools you rarely touch.
Ashina Arts Skill Tree
This skill branch becomes accessible upon earning the "Ashina Esoteric Text," obtainable by conquering the Tengu's rat-clearing task in Ashina Outskirts. Ashina Arts emphasizes aggressive swordplay and punishing moves optimized for directly wearing down enemy posture.
Key Ashina Skills
-
Ichimonji (and Ichimonji Double): This posture-crushing heavy attack serves multiple purposes. Not only does Ichimonji land heavy punishment, but it actively recovers your posture while dealing massive posture damage to foes. Ichimonji Double adds an immediate follow-up strike, doubling the effect. Both skills greatly simplify many combat encounters, particularly against bosses and enemies using aggressive combos.
-
Ascending and Descending Carp: These complementary passive skills increase your posture damage when deflecting attacks, prioritizing stronger counterattacks. Mixed with skilled deflect timing, these dramatically slash enemy posture bars.
Ashina Arts reward a more skill-intensive and aggressive approach. If your preference leans toward direct combat over stealth, investing heavily here significantly improves your fights.
Temple Arts Skill Tree
Accessible mid-game upon visiting Senpou Temple and finding the "Senpou Esoteric Text," the Temple Arts tree grants unarmed martial arts moves. Though unique, these monk-inspired skills mostly complement existing swordplay instead of replacing it entirely.
Key Temple Arts Skills
-
Praying Strikes: Quick, rapid punches that land multiple blows, effectively removing enemy posture faster. Handy in tight situations but limited alone--best mixed with other sword tactics.
-
Senpou Leaping Kicks: A striking mid-air attack great for mobility, allowing Sekiro to quickly close distance or get out of tight spots. Useful but more niche compared to other straightforward sword upgrades.
While Temple Arts offer stylish moves for mixing things up slightly, these skills tend toward situational practicality rather than core functionality--invest as supplements rather than priority upgrades.
Mushin Arts Skill Tree: Ultimate Techniques
Mushin Arts serves as the ultimate skill tree, reserved only after mastering key abilities from other trees. Unlocking Mushin-style moves requires dedicated investments in other branches first, which heightens the late-game focus.
Highlight Mushin Skills
-
Shadowrush: A powerful forward thrust with immense range and damage, excellent at quickly closing gaps and delivering significant posture hits.
-
Empowered Mortal Draw: An upgraded Mortal Blade strike releasing a larger slash wave that's devastating for both posture and vitality. Late-game bosses particularly feel the sting here--worth the investment for tougher enemies.
Mushin Arts are costly and demand heavy prior commitment but pay off significantly, giving Sekiro incredibly powerful techniques versatile enough to dominate late-game bosses.
Prioritizing Skill Investments Wisely
Sekiro doesn’t reward spreading yourself thin. Skill points come slowly, and you can't easily respec or reclaim spent points. Strategically plan your skill tree investments around your personal playstyle and the game’s timing. Early on, focus heavily on Mikiri Counter and Shinobi Arts basics. As you obtain more prosthetics mid-game, cautiously upgrade Prosthetic Arts that match your favorite prosthetic tools. Later, dedicate more toward Ashina Arts and eventually Mushin Arts for powerful late-game rewards.
Every investment you make impacts your progression directly. Choose wisely, don't rush allocations, and always keep practical utility over flashy appearances. Master your path through Sekiro by letting your chosen skills work effectively together, paving your progress toward the game's toughest trials.