Monster Hunter Rise Advanced Combat Guide
Master advanced combat in Monster Hunter Rise with expert tips on Wirebugs, Switch Skills, Palamutes, monster weaknesses, and Rampage Mode.
Getting comfortable in Monster Hunter Rise is one thing, but mastering its hunting grounds takes a bit more finesse. Once you’ve got the basics of dodging, swinging, and sharpening down, there’s a whole other layer of depth waiting to be explored. The game rewards good timing and awareness, but its real charm comes through when you start putting together combos, reading monster tells, and making smart use of every tool in your kit. Taking your hunts to the next level isn’t just about hitting harder—it’s about thinking on your feet, understanding your weapon inside and out, and making the most of all the options the game throws at you.
Wirebug Mastery
Monster Hunter Rise flips the script on traditional monster hunting by introducing the Wirebug—a versatile tool that changes how you move, attack, and recover on the field. Whether you’re scaling cliffs in seconds, dodging a Rathalos tail swipe, or pulling off a flashy aerial combo, mastering the Wirebug is key to keeping your hunts quick and stylish.
What is the Wirebug?
The Wirebug is a glowing insect you carry around that lets you zip through the air using special silk threads. You start out with two by default (up to three with temporary pickups called Great Wirebugs), each one on its own cooldown. Think of them as fast-charging grappling hooks strapped right to your hip.
Wirebugs are used for:
- Movement: Air dashes, wall running, quick recovery after big hits.
- Silkbind Attacks: Unique weapon-specific moves that cost Wirebugs but often provide huge payoffs.
- Mounted Punishers: Triggering and controlling Wyvern Riding (mounting and steering monsters).
Every Wirebug action chews up one or more charges, so planning is important if you don’t want to be stranded.
Movement: The Basics and Beyond
The core of Wirebug use is movement—not just staying mobile, but changing how you approach monsters and the battlefield.
Basic Wirebug Moves
- Wire Dash (ZR + X/A): Pressing ZR + X (forward) slings you forward, while ZR + A (up) sends you straight upward. You can do this midair or on the ground.
- Aim Mode (L2 + R3 / ZL + ZR): Lets you manually target where you fire your Wirebug silk thread with a reticle.
- Midair Recovery (ZR + B): If you’re knocked flying, tap this to get back on your feet much faster—sometimes saving you from a follow-up attack.
Advanced Movement Tricks
- Wall-Running: After a dash into a wall, keep holding forward to scramble right up it—or sidestep on the surface by pressing the dodge button.
- Silk Glide: Chaining two dashes (forward/up) launches you huge distances, helping with map traversal or setting up a dramatic airborne attack.
- Dodging: Use a Wirebug dash to instantly dodge dangerous attacks, especially from monsters with massive AOE moves.
Running out of Wirebugs feels bad, so pay attention to their cooldown, and always leave one ready in case you need a clutch escape.
Silkbind Attacks: Weapon-Specific Power Plays
Every weapon type has its own specialized Silkbind Attacks—unique moves using the Wirebug’s energy, mapped to combinations like ZR + X/A with your weapon drawn. These techniques often trade a fast Wirebug cooldown for big offense, buffs, or heightened mobility.
Here are a few standout examples:
- Long Sword: Serene Pose – Parries attacks and counterattacks.
- Hammer: Silkbind Spinning Bludgeon – A spinning midair strike for closing gaps and breaking parts.
- Bow: Aerial Aim – Launches upward and fires off arrows while airborne.
Choosing which Silkbind Attack to equip lets you adapt to your hunting style. Some attacks give you openings for huge combos, while others help control monsters or buff your character. You unlock different Silkbind Attacks as you progress, and experimenting with each is vital (check the Buddy Plaza’s Smithy to adjust your loadout).
Wyvern Riding: Mount and Punish
The Wirebug system is tied directly to Wyvern Riding—a flashy upgrade over traditional monster mounting.
Here’s how it works:
- Use Silkbind Attacks or environmental interactions to fill up the Wyvern Riding gauge on a monster.
- Once it’s full, press the on-screen prompt to jump aboard.
- Steer the monster, ram it into walls, or attack other creatures for big damage and knockdowns.
Wirebugs control how often you can perform Wyvern Riding actions (like dodging with the mounted monster), so always keep an eye on your Wirebug gauge while riding.
Managing Your Wirebug Meter
Wirebugs naturally recharge over time—about 10-20 seconds each depending on the move used. Some Silkbind Attacks take longer to recharge their Wirebug slot than movement actions.
Handy tips:
- Don’t blow all your Wirebugs at once. Leave at least one for recovery or dodging.
- Look for temporary Wirebug pickups on the map. These grant a third Wirebug for a short duration, dramatically increasing your options.
- Switch up your Silkbind Attacks if you find yourself needing more defensive or offensive options on certain monsters.
Tips for Wirebug Practice
- Practice in the Training Area. The dummies and open space are perfect for working on muscle memory for new Silkbind moves or air dashes.
- Watch the monster’s patterns. Save a Wirebug when it winds up for a big hit, then counter right after dodging.
- String movement together. Dash up a wall, jump off, then angle a second air dash for creative routes across the map or dramatic fight entrances.
Wrap-up
Mastering the Wirebug lets you dictate the pace of every hunt. Zip circles around rampaging monsters, land air combos, or recover from near-misses with style. Keep an eye on your Wirebug gauge, slot in your favorite Silkbind Attacks, and you’ll start seeing just how much depth and freedom Monster Hunter Rise offers when you make Wirebugs your best hunting partner. Switch Skills give you an extra layer of customization for your weapon’s moveset in Monster Hunter Rise. These unlock as you progress, letting you swap out certain attacks or movement options for others that better match your playstyle. With the right combo of Switch Skills, you can completely change how your favorite weapon handles or give yourself a much-needed edge against specific monsters.
What Are Switch Skills?
Switch Skills let you pick between two or three alternate moves for each main action slot on a weapon. For example, one Sword & Shield user might prefer a spinning slash for quick crowd control, while someone else picks a forward lunging attack to close gaps. These changes aren’t just cosmetic—they have unique timings, effects, and can even impact Wirebug move choices.
Once a Switch Skill slot unlocks, visit the Item Box either at your tent or in Kamura Village to adjust your loadout. You can’t swap Switch Skills in the field, so plan ahead before accepting a hunt.
How to Unlock Switch Skills
Most Switch Skills unlock as you complete Village and Hub (multiplayer) quests. Typically, your first two unlock by finishing Key Quests and talking to Master Utsushi in the Gathering Hub. Some require defeating certain monsters, while higher-end Switch Skills might need Progress through the Rampage mode or story milestones.
- First Switch Skill: Usually unlocked by clearing early Village quests.
- Second Switch Skill: Earned a bit later via specific questlines or requests.
- Third Switch Skill: Only for some weapons, typically late game or post-story.
Check the Hunter’s Notes for clues if you’re missing one, or talk to Utsushi after every big quest.
How to Equip and Change Switch Skills
- Go to any Item Box.
- Select “Manage Equipment.”
- Choose “Change Switch Skills.”
- Pick the weapon you want to modify.
- Select the move you want for each available slot.
Each weapon will usually have three or more swappable skills, some replacing normal attacks, some switching out combos, and others swapping out Silkbind Attacks.
Switch Skill Slots and Examples
Every weapon uses Switch Skills a bit differently, so learning what works for your main is important. Here’s a quick breakdown of how some weapons use Switch Skills:
Great Sword
- Tackle Slot: Swap Standard Tackle for Guard Tackle or Shoulder Tackle, each changing how you power through attacks during a charge.
- Charged Slash Slot: Replace your True Charged Slash with Rage Slash for a faster, more aggressive swing.
Dual Blades
- Demon Mode Slot: Choose between Demon Flurry Rush or Demon Flight. One hugs the ground for rapid cuts; the other propels you into the air for fancy combos.
- Spinning Slash Slot: Switch Circle Slash for Piercing Bind, tweaking your finisher options.
Bow
- Power Shot Slot: Pick between Focus Shot (quick recovery backstep) or Dodgebolt (spin through attacks for repositioning).
- Silkbind Slot: Select between Aerial Aim or Herculean Draw for mobility versus power.
Each option can shift your role—whether you’re focused on keeping up pressure, controlling space, or surviving tough monsters.
Tips for Choosing the Right Switch Skills
- Learn enemy patterns: Bring high-mobility Switch Skills for fast monsters, or defensive ones for heavy hitters.
- Practice in the Training Area: Try out Switch Skills against the dummy to get a feel for their reach, timing, and flow in combos.
- Match your build: Some armor skills or talismans synergize with certain Switch Skills. For instance, increased guard effects pair well with defensive Switch options on weapons like Gunlance or Great Sword.
Swapping Silkbind Attacks
Some weapons have more than one Silkbind Switch Skill slot, letting you choose alternate Wirebug moves. These often dramatically change how you use the Wirebug for offense, defense, or support. Experiment with these combinations to tailor your hunts.
- Sword & Shield: Metsu Shoryugeki is a counterattack Silkbind, while Windmill is a spinning multi-hit—you might prefer one over the other based on your current monster.
- Hammer: Switch from Impact Crater (burst damage) to Dash Breaker (mobility) depending on fight needs.
Switch Skills in Sunbreak (DLC Extension)
The Sunbreak expansion expanded the Switch Skill system with the Switch Skill Swap feature. This lets you create two full sets of Switch Skill loadouts and swap between them mid-hunt using a special input (default: L2+Y/B or similar).
- Red Set / Blue Set: Set up different playstyles for each slot—swap defensively when monsters hit harder, then swap back for offense on an opening.
- Swap Evade: Escape while swapping, giving a little invulnerable dodge.
If you own Sunbreak, this system opens up a ton of versatility, letting you answer changing battle conditions on the fly. Practice swapping in the Training Area so you don’t get caught fumbling when it matters.
Conclusion
Switch Skills power up your weapon, letting you sharpen your playstyle for each hunt. Try out new combos, tailor your attacks to the monster, and make sure to revisit your loadout whenever you unlock a new move. If you pair your skills with smart Wirebug management, you’ll find yourself ready for anything Monster Hunter Rise throws at you.
Palamute Tactics
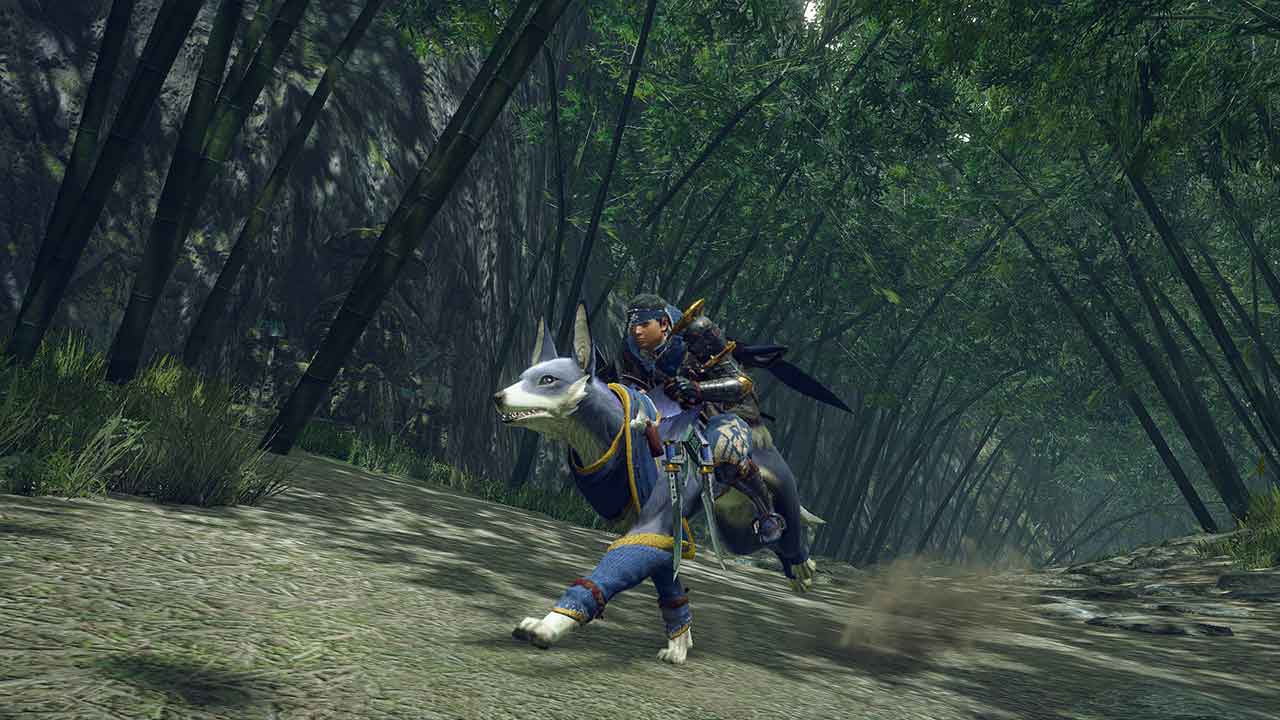
Palamutes are more than just speedy mounts in Monster Hunter Rise—they’re fully-fledged hunting companions with customizable gear and skills. When you bring a Palamute into the field, you’re gaining a partner that helps with movement, combat, and even gathering. Let’s break down the most effective tactics for getting the most out of your Palamute, covering everything from movement tricks to clever uses in a hunt.
Picking the Right Palamute
Choosing a Palamute that fits your playstyle is step one. Every Palamute has different stats and can be taught various Support Moves, much like Palicos. Some have slightly higher attack, others a bit more defense, but all can be leveled and improved at the Buddy Plaza.
- Focus on Skills: Offensive skills push out steady chip damage, while healing or buffing Support Moves help you stay in the fight longer.
- Cosmetic Options: Palamutes can be groomed and dressed up at the Buddy Smithy, but these changes are purely visual.
Mounting and Traversal
One of the Palamute’s biggest perks is fast travel without using stamina. Here’s how to make the most of it:
- Hold A to Ride: You can mount up nearly instantly, even mid-sprint or during tense moments with an angry monster nearby.
- Item Use on the Move: While riding, hold L and use the D-Pad to pick items—chug a Potion, heal with Rations, or sharpen your weapon without stopping.
- Dash and Drift: Press R to sprint. Tap the drift button (ZL on Switch) while turning to get a strong speed boost. Perfect for reaching monsters first or running from danger.
- Scaling Walls: Palamutes can run up walls just like hunters. Use this trick to reach hard-to-access areas, collect wirebugs, or chase a fleeing monster without burning through your own Wirebugs.
Commanding Your Palamute
While your Palamute attacks by default, you can fine-tune their behavior using the Command menu. Open the menu by holding ZR and use the right stick (or the dedicated Palamute Command wheel):
- Attack Mode: Palamute attacks nearby monsters or the monster you’re targeting.
- Wait Mode: Palamute hangs back, useful if you want to avoid waking up a sleeping monster or triggering a trap early.
- Come Mode: Calls the Palamute directly to your side—great for regrouping or setting up for a mount.
Mastering these commands makes it easier to coordinate knockdowns, mount monsters, or avoid friendly fire situations in multiplayer.
Combat Support
Palamutes contribute to battles in several subtle but helpful ways:
- Continuous Attacks: They nip at monsters, dealing lite damage and sometimes causing status effects if equipped with Scrolls or elemental weapons.
- Status Ailments: Equip your Palamute with special weapons (e.g., Paralysis, Sleep, or Poison) to help trigger free openings or extra damage phases.
- Silkbind Jump: Call your Palamute and hit the jump command to launch yourself high up—handy for mounting monsters, dodging attacks, or reaching high ledges.
Gear and Customization
Outfit your Palamute for your hunting strategy:
- Weapons: Choose between standard blades, elemental types, or those causing status effects. Test different options—something like Paralysis Blades adds a surprising amount of utility.
- Armor: Dress your Palamute in armor for extra bulk when facing tougher monsters. Palamute armor is generally for show after a certain point, but every bit helps early on.
- Barding and Layered Armor: Just like with hunters, you can mix and match stylish looks for your canine companion.
Palamute Skills and Scrolls
As your Palamute levels up, they unlock Skill Scroll slots. These Scrolls offer passive boosts:
- Attack Up: Increases damage output.
- Defense Up: Takes more hits to KO.
- Status Attack: Raises status effect application rate.
- Element Attack: Adds a little fire, water, thunder, etc, depending on equipped weapon.
Look for buddies with scrolls that complement your own build. For example, pair a status-heavy Palamute with a Paralyze or Sleep weapon if your team's playstyle loves big, free openings.
Gathering and Utility
Palamutes can sniff out gathering points, collect loot, and even help with Egg or Plushie quests:
- Buddy Gathering: Send your Palamute to gather with a single button press (blue paw print icons on the map). This is especially useful for speedrunning or collecting rare bugs and plants.
- Carrying Items: Mounting your Palamute while holding a delivery item (like an egg) lets you move vastly faster and barely drop speed if you get bumped.
Multiplayer Considerations
In multiplayer hunts, you can bring either a Palamute or a Palico, not both. Everyone’s dog brings a little extra damage and utility to the party, but keep these tips in mind:
- Stacking Effects: Multiple Palamutes landing status effects adds up, but try different combinations. Two sleep Palamutes can accidentally overlap and reduce effect—mix in attack, poison, or defense types for balance.
- Communication: Use commands to pull your Palamute off the monster if you’re trying to time traps, bombs, or sleep setups.
Advanced Tactics
- Silkbind Jump Combos: Use your Palamute’s jump as a platform for Silkbind aerial attacks or easy mounting.
- Trap Coordination: Set traps as your Palamute distracts or lures a monster; then, pop a command to have them lay off, so the trap goes off at the perfect moment.
- Mobility Loops: In certain large maps, switch between traversing on foot for close-quarters fighting, then jump back on for resets, chases, or repositioning.
In Summary
Mastering your Palamute opens up new options both in and out of fights. Use them for rapid movement, mid-hunt healing, extra damage, or that crucial clutch jump over a monster attack. The more you customize and command your Palamute, the smoother your hunts go—leaving you to focus on the real challenge: reading the monster and landing those big combos. Experiment with different setups, and let your Palamute fill in the gaps while you handle the rest. Welcome to the Monster Weakness Guide section. Each monster in Monster Hunter Rise comes with its own unique resistances and soft spots, and knowing these details can be the difference between a breezy hunt and a frustrating cart. Here’s how to read the game’s weakness charts, along with an at-a-glance element and ailment breakdown for all the main Large Monsters. Use this knowledge to sharpen your strategy, maximize your damage, and speed up those clears.
Understanding Monster Weaknesses
Every monster in Monster Hunter Rise reacts differently to various types of weapon damage (slashing, blunt, and shot), elements (fire, water, thunder, ice, dragon), and status ailments (poison, sleep, paralysis, blast, stun). Figuring out what a monster is weak to involves knowing a few key things:
- Physical Weakness: Slashing, blunt, or shot attacks might hit harder depending on the monster’s hide and where you hit.
- Elemental Weakness: Each monster has at least one element it takes extra damage from and often one it resists.
- Status Weakness: Things like poison or sleep work better or worse depending on the monster’s natural tolerance and how many times you apply it in a hunt.
Reading the Monster Hunter Weakness Chart
The in-game Hunter’s Notes gives you a detailed breakdown:
- Stars (★): More stars mean more vulnerability. Three stars is as weak as it gets.
- Body Parts: Not all areas are equal. A headshot with the right element is always better than swiping at a tough tail.
- Breakable Parts: Some weaknesses change once you break horns, claws, or armor plates.
- Ailment Buildup: Status effects generally become harder to trigger the more times you inflict them per hunt.
Physical Weaknesses: Cutting, Blunt, and Shot
Monsters respond differently depending on your weapon type. Here’s a quick refresher:
- Cutting (Slashing): Longswords, Great Swords, Dual Blades, etc. Best for tails and exposed flesh.
- Blunt: Hammers, Hunting Horns. Most effective on heads and for stunning monsters.
- Shot: Bowguns and Bow. Good for hitting soft spots from a distance.
Some monsters, like Mizutsune, take heavy cutting damage to the tail but shrug off hammers there, while others, like Khezu, have soft heads ideal for hammers and horn users.
Tip: Bring tools that suit the monster’s weakest spots (and your playstyle).
Elemental Weakness Chart
Below is a quick reference to the primary elemental weaknesses for the main monsters in Monster Hunter Rise. Bring matching elemental weapons for faster hunts.
| Monster | Fire | Water | Thunder | Ice | Dragon | |----------------|------|-------|---------|-----|--------| | Great Izuchi | ★ | ★★ | ★★★ | ★ | - | | Aknosom | ★★ | ★★ | ★★★ | ★★ | - | | Royal Ludroth | ★★ | ★★★ | ★★ | ★ | - | | Barroth | ★★★ | ★ | ★ | ★★ | - | | Bishaten | ★★ | ★★ | ★★★ | ★ | - | | Rathian | ★★ | ★★ | ★★ | ★ | ★★★ | | Magnamalo | ★★ | ★ | ★★ | ★★★ | ★ | | Mizutsune | ★ | ★★ | ★★ | ★★★ | - | | Zinogre | ★ | ★★ | ★ | ★★★ | ★ | | Khezu | ★ | ★★ | ★ | ★★ | ★★★ | | Lagombi | ★★★ | ★ | ★★★ | ★ | - |
(★ = weak, empty = resistant or no effect. Bolded = strongest element.)
Note: This table covers a sample—unique monsters and Apex variants have special resistances. Always check the Hunter’s Notes for every hunt!
Common Status Ailment Weaknesses
Some monsters are easy to put to sleep or paralyze, while others barely flinch from status builds.
- Poison: Most flying wyverns (Rathian, Rathalos) are highly susceptible.
- Paralysis: Good for monsters with constant movement (Great Izuchi, Tetranadon).
- Sleep: Works well for slow, large monsters (Somnacanth, Khezu).
- Blast: Decent across the board with Apex monsters and most wyverns.
- Stun/KO: A hammer to the head works wonders on monsters with large, exposed skulls.
Status Pro Tips
- Ailment resistance goes up after each proc during a hunt.
- Pairing different status effects across the team gives better results than stacking the same one.
Using Weaknesses in Battle
Here’s how to put this knowledge into action:
- Prep Your Gear: Check a monster’s weaknesses before the hunt and swap weapons or augment with elemental decorations.
- Target Weak Spots: Arms, heads, tails—learn the spots with highest weakness values.
- Mix It Up: In multiplayer, don’t all bring the same element. Status weapons and elemental combos can stack effects rapidly.
- Adjust on the Fly: If a part breaks or the monster gets enraged, its weaknesses might shift. Don’t be afraid to change tactics—like swapping to bombs or traps.
Example: Thunder on Mizutsune
Mizutsune’s weakest point is thunder, especially on the head and tail. Dual Blade users should aim for these parts for stagger chances, while Bow users can hit the tail from range with thunder shots for big numbers.
Conclusion
Understanding a monster’s weaknesses in Monster Hunter Rise isn’t just about bringing the right element. It’s about hitting the right part at the right time, coordinating with teammates who bring status, and swapping tactics when the monster changes or the fight drags on. Take a minute to check those Hunter’s Notes and pick gear that matches the hunt—a little extra planning means more broken parts, fast KOs, and cleaner clears every time.
Rampage Mode Guide
Rampage Mode in Monster Hunter Rise shakes up the usual monster hunt with wild, large-scale defense battles you won’t find in other quests. This mode places you and your team in charge of defending Kamura Village from swarms of invading monsters. If you’ve ever played a tower defense game, you’ll feel right at home—except this time, you’re also bashing monsters right alongside your defenses.
Here’s how Rampage Mode works, what you should know, and the strategies that’ll help you rack up those S+ ranks.
What Is Rampage Mode?
Rampage is a special siege-style quest unlocked as you progress through the Village and Hub quests. Your main goal: keep monsters from breaking through the final gate that protects Kamura Village. Failure means letting the horde storm your home—and missing out on sweet Apex rewards.
You start inside a barricaded zone called a Stronghold. Multiple hordes of monsters arrive in waves, each testing your defenses. You set up installations—like ballistae, cannons, and traps—and take an active part in mowing down anything that moves.
The Layout: Gates, Areas, and Stronghold Levels
The Stronghold is divided into zones, each with its own gate. Monsters attack in waves, and each wave is made of smaller groups. If a gate is destroyed, you fall back to the next area. Lose the last gate, and the Rampage is lost.
- First Area: Initial defensive line, loaded with free setup slots.
- Second/Final Area: Has extra installations, higher-level turrets, and the Village’s “Dragonator” or “Counter Signal Gong” for emergencies.
Each time a gate falls, you lose access to that area’s defenses. The more gates survive at the end, the better your rewards.
Defenses: Automatic, Manual, and Special Installations
There are three types of installations you deploy to hold off the horde:
Automatic Installations
- Auto Ballista: Fires at monsters in range, but can’t target specific parts.
- Auto Cannon: Has a slow fire rate, but deals good AoE damage.
Great for passive chip damage, and they distract monsters for you to finish off.
Manual Installations
- Ballista: Lets you snipe wings and heads, and use “Retreat Shot” to slow or repel monsters.
- Cannon: Delivers high damage to clumped monsters. Charged shots can knock down larger threats.
- Machine Cannon (later levels): Ridiculous fire rate for when things get desperate.
You control these directly, so focus on larger targets, flying monsters, or Apex threats.
Special Installations
- Bamboo Bombs: Explode when trampled. Good for choke points and corridors.
- Dragonbait: Lures monsters for a few seconds—great for making them clump up for a cannon blast.
You’ll also unlock Wyvernfire Artillery, Hunting Installations (which call in Kamura NPCs), and the game-changing Dragonator/ Counter Signal Gong. Save these for boss monsters and final waves.
Key Mechanics: Repelling, Stuns, and Apex Monsters
Repelling Monsters
That’s Rampage talk for knocking monsters out of the Stronghold to “defeat” them. Use installation attacks, your own weapon, or status effects to rack up repels—each one earns you points toward victory and higher ranks.
Crowd Control
Ballista’s Crag Shots and Cannons are clutch for knocking monsters down or stunning them. If you see a group clustering, blast them. Try to coordinate so your installations aren’t all targeting the same solo Jaggi when a Rathian is tearing up the gate.
Apex Monsters
Every Rampage wraps up with an Apex: a hyper-aggressive, giant version of a familiar monster (like Apex Arzuros or Apex Rathalos). Apexes take dramatically reduced damage from installations. This is when you need to be on the ground, using real weapons and those big, one-shot installations like the Dragonator.
Rampage Missions and Rewards
During each Rampage, you’ll see missions pop up, like “Repel 10 monsters with a Ballista” or “Inflict poison status.” Do these as you go—they raise your Stronghold Level, unlocking better defenses and boosting your final reward.
Striving for S or S+ rank means juggling mission objectives with just staying alive, so don’t ignore them. Split duties with teammates and communicate.
- Basic Rewards: Monster parts, Rampage tickets, and unique upgrade materials.
- Extra: More and better rewards for completing bonus objectives, keeping gates intact, and clearing Apexes fast.
Team Roles and Strategy Tips
Rampage battles get hectic, but assigning roles makes the chaos way easier to manage.
Suggested Roles
- Installer: Drops and upgrades new installations as soon as slots open. Prioritizes heavies and special tools.
- Manual Gunner: Hops on Ballista and Cannons to take out flying or “Boss” monsters.
- Runner: Floats between frontline duties and repairing (yes, you can fix installations mid-fight).
- Hunter: Drops down for Apexes and cleans up anything the installations miss.
Top Tips
- Always keep spare installations ready—replace destroyed ballistae fast.
- Don’t use every Special Installation at once.
- Save the “Counter Signal Gong” for Apexes or when overrun. It boosts hunter weapon attack for a short burst, letting you shred monsters by hand.
- Use healing and supply boxes between waves—they refill after each horde.
Unlocks and Progression
Rampage Mode isn’t just for novelty; it’s key to boosting your gear. Rampage Tickets, Apex monster materials, and Defender weapon upgrades come almost exclusively from Rampage runs. New installations open up as your Hunter Rank climbs.
Stick with it, and you’ll be kitted out for the toughest quests in the game.
Conclusion
Rampage Mode brings something different to Monster Hunter Rise: a layered, action-packed defense mode that blends chaotic combat and strategic planning. With the right setup, good teamwork, and smart use of installations, holding back the horde turns from a panic into a power trip. Rack up S-rank clears, break those Apexes, and treat those Rampage tickets as your reward—Kamura Village is counting on you!