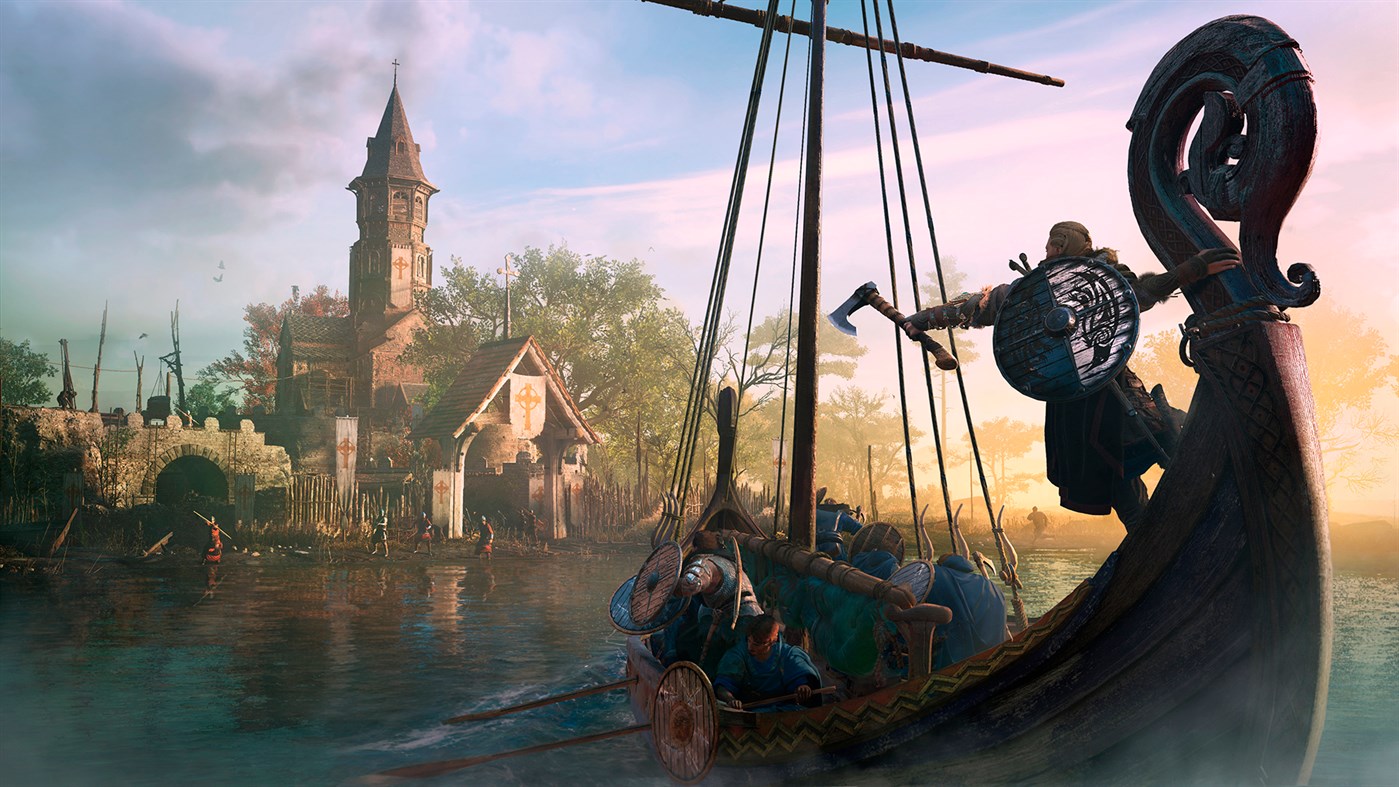
Assassin's Creed Valhalla Gear and Equipment Guide
Unlock powerful gear with this essential Assassin's Creed Valhalla guide to weapons, armor, runes, mythical items, and Hidden Ones rewards.
Eivor’s journey through the rugged landscapes of England isn’t just about alliances and conquest—it’s also about finding the right gear to survive and thrive. The weapons and armor you collect along the way can make a real difference, whether you’re taking on a fortified outpost or facing off against a legendary beast. Valhalla gives players a huge variety of equipment to experiment with, from sturdy shields and brutal axes to flashy cloaks and mythical gear sets. Choosing the right loadout isn’t just about firepower; it also shapes how you approach combat and exploration. Knowing what’s available and how to get your hands on it can help you make the most of your Viking adventure.
Weapon Tier List
Assassin’s Creed Valhalla has dozens of weapons, each with a unique feel and set of perks. Picking the right axe, blade, or hammer can make Eivor’s path smoother—or a lot tougher. Not every weapon is a winner, and some are far more effective than others whether you prefer a heavy two-hander, swift dual-wielding, or a more classic sword-and-shield combo. Below, we’ve organized top weapons into tiers, breaking down what makes each stand out and how they fit into different playstyles.
S-Tier Weapons: Absolute Best Choices
These weapons offer massive damage, useful perks, and reliability in just about every fight. If you find one, upgrade it early.
-
Varin’s Axe Type: Bearded Axe (One-Handed) You pick up Varin’s Axe right at the start, but don’t dismiss it. Fast attacks and bonus heavy combo damage make it a great mainstay, especially upgraded.
-
Mjolnir Type: Hammer (Two-Handed) Wielded by Thor himself, Mjolnir stuns enemies with each blow. Its perk? On-hit lightning strikes obliterate groups and single targets alike. Getting it takes time, but it’s rewardingly strong.
-
Gungnir Type: Spear (Two-Handed) Odin’s spear has extended reach, letting you poke enemies from a safe distance. It also dishes out big damage and comes with a built-in force field effect during attacks.
-
Excalibur Type: Greatsword (Two-Handed) This legendary sword isn’t just for show. It’s fast for its size, with heavy hits and a perk that staggers mobs with charged heavy attacks.
A-Tier Weapons: Reliable and Powerful
These weapons aren’t quite mythic, but they’ll get most jobs done with style. They’re easy to obtain earlier than S-tier, so they’re a solid step up from the basics.
-
Sepulcher Axe Type: Dane Axe (Two-Handed) Its burning perk can ignite enemies on critical hits, turning fights in your favor during tough raids.
-
Carolingan Pike Type: Spear (Two-Handed) Light, long, and quick, this pike lets you keep enemies at arm’s length while dishing out consistent jabs.
-
The Morrigan’s Guard Type: Shield (Light) Technically not a weapon, but dual-wielding shields is an option! This shield grants a nice attack boost after blocking, fitting aggressive defenders.
-
Hunbeorth’s Bow Type: Light Bow High rate of fire, accuracy, and a perk that boosts critical hits—great for taking out squishier targets at medium range.
B-Tier Weapons: Useful with the Right Build
B-tier weapons can shine with specific skills or playstyles, but may feel underwhelming for general use.
-
Fyrd Axe Type: One-Handed Axe The perk increases attack speed after hitting with finishers. Great for fast, aggressive builds.
-
Iron-Star Flail Type: Flail (One-Handed) Sweeping attacks and broad reach keep crowds in check, but the spinning animation can leave you open.
-
Sarclisa Type: Two-Handed Sword Solid reach and damage, but lags a bit compared to Excalibur and can feel slow.
-
Moonlight Type: Bearded Axe Boosts light damage during nighttime fights. Decent, but situational.
C-Tier Weapons: Niche Picks
C-tier weapons aren’t necessarily bad, but they’re outclassed quickly and can limit your potential if you stick with them too long.
-
Common Raider Axes and Short Swords Basic weapons good for the opening hours, but lacking special perks or high stat scaling.
-
Spinning Death Flail Fun and unique, but unreliable in boss fights and versus armored foes.
-
Hrafn Guard Shield Serviceable for early game, but limited offensive options and no standout perks.
Dual Wielding and Playstyle Tips
- Dual Axes: Fast and relentless—great for piling on damage, but weak against armored enemies without skills that bypass blocks.
- Axe + Shield: Balanced, offers both blocking and counter-attacks.
- Dual Shields: Yes, it’s possible! Mostly for fun and show.
- Two-Handed Weapons: Slower, but huge damage and wide swings. Heart of every melee brute.
Experiment with combinations as skills and perks change how weapons feel. The “Best” weapon can depend on your preferred approach to combat.
How to Upgrade Your Weapons
Collect ingots (nickel, tungsten, carbon) at locations across the map to enhance your favorites’ stats. Keep upgrading gear as you go so you’re not underpowered for late-game fights. Don’t forget to mix and match runes for extra elemental damage, healing, or basic stat boosts.
Conclusion
Having the right weapon can sharpen Eivor’s edge and open up new ways to tackle Valhalla’s toughest battles. Whether you're swinging Thor’s hammer or raining down arrows, the real trick is pairing your weapons with playstyle and skills. Try different combos and see what feels right—you might be surprised which weapons become your favorites as you progress.
Armor Set Guide
Armor isn’t just about stuffing the highest defense number onto Eivor and hoping for the best—though it does help. In Assassin’s Creed Valhalla, armor sets grant unique perks and shape your Viking style, as well as their survivability and combat approach. There are three main armor “archetypes”: Raven (stealth), Bear (melee/rage), and Wolf (ranged). Each set has five pieces: hood, cloak, torso, bracers, and breeches. Wearing multiple parts of the same set unlocks powerful set bonuses, so collecting complete sets is a smart move.
Let’s break down how armor sets work, what distinguishes them, and which ones are worth tracking down.
Armor Set Types and Bonuses
Each set is tied to a “way”:
- Raven (stealthy, assassin-focused perks)
- Bear (heavy, brute force-oriented perks)
- Wolf (ranged, cunning and speed perks)
Mixing and matching is possible, but you unlock the true strength of a set by equipping multiple or all pieces. Each set has two unique bonuses:
- The first bonus triggers with 2 pieces equipped.
- The second, stronger bonus unlocks with 5 pieces on.
Notable Raven Sets
Mentor’s Set
Style: Assassin, focus on speed and stealth
- Set Bonuses:
- Increase attack after critical hits (2 pieces)
- Further boost speed (5 pieces)
- How to Get: Loot chests in southern England (Winchester, Canterbury, etc.).
- When to Use: Perfect for sneaky players who go all-in on assassinations and quick escapes.
The Hidden Ones Set
Style: Stealth and crit-based
- Set Bonuses:
- Increased assassination damage (2 pieces)
- Faster movement after assassinating (5 pieces)
- How to Get: Found in the Assassin Bureaus scattered through England.
- When to Use: Best early for players focusing on quiet takedowns.
Top Bear Armor Sets
Brigandine Set
Style: Tanky and aggressive
- Set Bonuses:
- More armor when surrounded by enemies (2 pieces)
- Restores health on successful hits (5 pieces)
- How to Get: Found in Cent, Essexe, Sciropescire, and other mid-game regions.
- When to Use: If you’re always in the middle of a brawl, this is a sturdy go-to.
Thor’s Set
Style: Absolute powerhouse, endgame armor
- Set Bonuses:
- Increased stun damage (2 pieces)
- Big bonus to speed after stunning (5 pieces)
- How to Get: Beat all three Daughters of Lerion, collect Thor’s hammer.
- When to Use: For players who mash heavy attacks and care more about breaking faces than blending in.
Key Wolf Armor Sets
Huntsman Set
Style: Ranged and mobility-focused
- Set Bonuses:
- Additional range damage for distant enemies (2 pieces)
- Headshots have a chance to restore health (5 pieces)
- How to Get: Early England regions, often Lincolnscire and Grantebridgescire chests.
- When to Use: Go for this if you clear camps with a bow first.
Magister’s Set
Style: Skill-hybrid, both ranged and stealthy
- Set Bonuses:
- Increase ability damage (2 pieces)
- Extra melee damage after a kill (5 pieces)
- How to Get: Mostly in East Anglia and Oxenefordscire.
- When to Use: Great for those making regular use of abilities, both close and at range.
Set Collection Tips
1. Upgrade Strategically
Don’t sink rare resources into every new piece you find. Save ingots for armor sets that match your preferred combat style.
2. Mix for Utility
Feel free to combine sets, like wearing a heavy Bear chestplate and light Raven bracers, especially early on. Later, though, the bonuses for a full set often outweigh the custom mix.
3. Keep Upgrading
All armor pieces, once found, can be upgraded at Gunnar’s blacksmith with carbon, nickel, and tungsten ingots. Upgrades unlock extra rune slots for further customization.
4. Prioritize Perks Over Numbers
Some sets with lower base armor perform better because of their bonuses, like restoring health, extra speed, or massive crits. Focus on your playstyle perks.
5. Don’t Ignore Runes
Pop in rune stones for small stat bonuses—damage, poison, stealth, even health regen. They stack up, especially in long fights or big raids.
Special & Mythical Sets
Besides the main sets found in England, Valhalla is packed with special and mythical armors tied to side quests, legendary hunts, or tucked deep in endgame areas.
- Thor’s Set: Endgame only, ultra-powerful but requires taking down three “boss” enemies.
- Druidic and Celtic Sets: Available in DLCs, offer unique perks for elemental or ability-heavy playstyles.
- Valhalla and Niflheim Sets: Cosmetic with some gameplay perks, often tied to Ubisoft Connect or store packs.
Pro Tip: If you snag a mythical (gold-colored) set, it allows full stat and rune upgrades—these are among the best gear in the game.
Closing Thoughts on Armor Sets
Your chosen armor set shapes your fights as much as weapons do. Whether you channel an unstoppable raid leader with Bear sets, sneak around legendary monasteries in Raven gear, or headshot your way through the countryside in Wolf kit, make sure your armor fits how you want to fight. Try out different sets as you collect them, and don’t be afraid to swap for bosses or raids. A well-chosen armor loadout can make the toughest battles in Assassin’s Creed Valhalla feel like a true Viking saga.
Rune Guide
Runes add an extra layer of customization to your weapons and armor in Assassin’s Creed Valhalla. These socketable stones let you tweak Eivor’s performance in everything from head-to-head battles to assassination runs. Knowing how runes work—and how to pick the right ones—can make a real difference as you take on bosses, raid strongholds, or just want to experiment with different playstyles.
What Are Runes?
In Valhalla, runes are special items you slot into your gear for passive bonuses. Each weapon and armor piece has a certain number of rune slots that unlock as you upgrade them at the blacksmith. Basic gear starts with one or zero, but as you invest resources and improve rarity (up to Mythical), more slots open up. These slots come in two main types:
- Standard Rune Slots: Accept regular runes (small boosts, common effects).
- Diamond-Shaped (Major) Rune Slots: Found only on fully-upgraded, mythical gear. These allow for more powerful, rare runes that give bigger bonuses or secondary effects.
Runes are interchangeable at any time, so you’re free to swap and experiment as much as you want without penalty.
Types of Runes
Runes generally break down into offensive and defensive categories, along with runes that target your playstyle (stealth, ranged, melee, resistance, and so on).
Weapon Runes
These runes target raw damage or trigger special effects when you attack. Here are some common weapon rune bonuses:
- Attack: Flat boosts to your weapon’s damage.
- Critical Chance: Increases your chances of landing crits.
- Stun: Raises stun damage—great for knocking enemies down.
- Elemental Effects: Add fire, poison, or frost effects to your attacks.
- Heavy/Light Attack Boosts: Tailor specific weapons, like axes for heavy or daggers for light attacks.
Armor Runes
Armor runes focus on resilience, survivability, and special actions. Key bonuses include:
- Health: Extra health points.
- Armor: More protection against incoming damage.
- Resistances: Reduces fire, poison, or melee/ranged damage.
- Stealth: Lower detection or increased assassination damage (Raven playstyle).
- Regeneration: Minor health recovery when conditions are met (on kill, low health, etc.).
Finding Runes
Runes come from several places throughout your journey:
- Looting World Chests: Minor chests and major wealth chests scatter runes everywhere. Explore and keep an eye out.
- Raids: Smash open monasteries and settlements and runes are a common spoil.
- Vendors: The shopkeepers in the major towns offer a rotating selection of runes—mainly common ones.
- Quests & Side Activities: Some story quests and world events reward rare runes.
- Helix Store & Ubisoft Connect: Occasionally, you’ll stash exclusive or premium runes in digital store packs.
Collect every rune you find—duplicates can be sold for silver, and certain late-game builds come together only after a bit of collecting and experimenting.
Slotting and Swapping Runes
To slot or swap a rune, open your inventory, select a weapon or armor piece, and look for the available rune slots. Pick any owned rune and socket it instantly. No cost, no cooldown, and you can switch them out whenever you feel like adjusting your build.
Quick Tips for Slotting Runes
- Match runes to gear perks. If your axe does bonus fire damage, pair it with a fire rune.
- Stack similar runes for big payoff. Running three attack runes can rack up considerable boost.
- Don’t forget about defense. Stick resistance or health runes in your torso or helmet, especially for tough boss fights.
Major vs. Standard Runes
Major Runes get their own slot (the diamond shape) and always deliver bigger effects than their standard cousins. For example, a Major Rune of Rage might grant both +4 attack and bonus crit chance in one go. Save these for your favorite or most-used weapons, since they're harder to come by.
Standard Runes are everywhere and safe to experiment with. Don’t hesitate to stack a few together if you want to push a certain stat or effect.
Best Runes for Each Playstyle
For Stealth Players
- Rune of Assassination: Boosts assassination damage—great for one-hit silent kills.
- Rune of Shadow: Lowers detection risk, letting you sneak right by guards.
- Rune of Evasion: Increases dodge or roll distance—useful for slipping away.
For Brawlers
- Rune of Fury: Adds heavy attack power—ideal for slow, strong weapons.
- Rune of Strength: Basic attack boost, always useful.
- Rune of Guard: Extra armor for surviving in the thick of combat.
For Archers
- Rune of Precision: Boosts ranged damage.
- Rune of Agility: Help with stamina management—useful for constant backpedaling and shooting.
- Rune of Headshot: Offers a bonus when you land a shot square to the noggin.
For Survivability
- Rune of Regeneration: Restores a trickle of health under certain conditions (on kill, at low health).
- Rune of Fortitude: Adds maximum health or provides small healing perks under specific actions.
- Resistance Runes: Cuts damage from fire, poison, or melee/ranged attacks.
Smart Rune Strategies
- Adapt before boss fights or tough enemies. If you’re up against poison users, slot in resistance runes.
- For long raids, combine several healing or regeneration runes to last the distance.
- After gaining Mythical gear, focus rare runes on those pieces for maximum effect.
- Sell off duplicates—silver stays tight, especially early on.
Conclusion: Runes Make the Difference
Paying attention to your rune setup can turn ordinary gear into legendary kit. Swapping runes depending on your target or challenge keeps your build flexible and lets you punch above your weight class. Collect, experiment, and mix runes you find throughout England and beyond—you’ll feel the difference in every raid, duel, or stealth mission. In Valhalla, runes are the secret spice that let you tailor Eivor’s journey to your style.
Mythical Gear Guide
Mythical gear sits at the top tier of Assassin’s Creed Valhalla equipment—think of it as the ultimate chase rewards for players who love tweaking builds or want to feel overpowered in Ravensthorpe and beyond. These weapons and armor pieces carry not just the highest stats but also the most slots for upgrading, infusing, and personalizing with runes. Here’s everything you need to know about finding, upgrading, and using Mythical gear.
What is Mythical Gear?
Mythical gear is the best quality gear rating in the game. It’s color-coded gold and comes with more rune slots and higher upgrade potential than Fine (gray), Superior (blue), or Flawless (purple) items. Mythical gear usually starts with at least two rune slots and, after upgrades, gets even more.
Why Upgrade to Mythical?
- Stat Increases: Next level boosts in armor, attack, crit, and resistance stats on each upgrade.
- Rune Slots: Gain extra major and standard rune slots, opening up deeper build possibilities.
- Unique Perks: Some Mythical items offer powerful perks, like healing on kill, elemental boosts, or damage buffs after dodging.
How to Get Mythical Gear
There are three main ways to add Mythical gear to your arsenal:
1. Upgrading Existing Gear
You can turn most blue (Superior) or purple (Flawless) gear into Mythical at the blacksmith in Ravensthorpe, provided you have enough materials:
- Nickel Ingots upgrade from Superior to Flawless.
- Tungsten Ingots elevate Flawless to Mythical.
- Leather & Iron Ore are needed along the way.
Upgrading keeps the runes and perks on your trusted favorites, and unlocks new rune slots.
2. Finding Mythical Gear
Some weapons and armor drop already at Mythical quality. You’ll usually grab these from:
- Wealth Chests: Especially in high-level regions like Hamtunscire or Jotunheim.
- Legendary Bosses: Defeating certain Zealots or powerful animals sometimes drops unique Mythical pieces.
- Quest Rewards: Specific epic storylines or world events pay out rare Mythical items.
- The Helix Store & Event Rewards: Some limited gear (like the Draugr Set or Moonlight Sword) comes mythic right out of the box.
3. Buying from Merchants
Late-game merchants sometimes offer fully-upgraded Mythical gear for large sums of silver or unique resources. Reda’s Opal store rotates mythic-quality cosmetics, mounts, and weapons.
The Most Wanted Mythical Sets and Weapons
Top Armor Sets
- Thor’s Set: Epic melee set, with the legendary Mjolnir hammer (fully unlocked only after collecting all pieces and defeating the three Daughters of Lerion).
- Mentor’s Set: All about speed and crit chance, ideal for assassins and flanking specialists.
- Brigandine Set: Defense-focused, perfect for players who like to tank damage during raid-heavy runs.
- Druidic/Hel's Damnation Sets: These appear through DLCs and events, often paired with elemental or magical perks.
Standout Mythical Weapons
- Mjolnir: Lightning storms, high stun, and visual flair—requires the full Thor set and a bit of hunting.
- Excalibur: Massive sword with blinding attacks, nabbed after collecting all standing stones.
- Gungnir: Odin’s spear, long reach, and a legendary look—hidden in Norway after finishing the main story.
- Gae Bolg: Only in the Wrath of the Druids expansion, packs a wicked punch and a shockwave after-charge.
Upgrading and Customizing Mythical Gear
Rune Management
Every upgrade tier drops a new slot. By the time you hit Mythical, many armor and weapon pieces can hold both major and regular runes. Slot runes matching your playstyle—fire/poison runes on Mjolnir, crit runes on Mentor’s blades, resistance runes on Brigandine.
Perk Synergy
Mythical gear perks stack. For example, wearing the full Mentor’s set can turn you into a crit machine, especially if you boost it with runes that add crit damage or speed on kill.
Visual Customization
Once you reach Ravensthorpe Level 3, armor Visual Customization (transmog) unlocks at the blacksmith. You can make any Mythical gear look the way you want—rock Thor’s stats but roll up looking like basic Raven Clan if that’s your thing.
Tips for Using Mythical Gear
- Mix & Match: If you lack a full set, mixing pieces (like two Mentor’s and three Brigandine) still grants decent bonuses, but set effects usually kick in at 3 and 5 pieces.
- Prioritize Upgrades: Tungsten is rare—save those ingots for gear you actually use.
- Keep Swapping Runes: Change up your runes when bosses or enemy types change focus; Mythical gear handles swapping with no penalty.
- Don’t Ignore Lower Sets: Sometimes lower-quality sets deliver unique perks that suit specific playstyles even better than Mythical. Don’t toss them until you’re certain.
Mythical vs. Mastery Levels
Mythical gear stats cap out faster than lower-level gear, but you can keep boosting your power with Mastery Points after the main story. Focus on upgrading gear you’re comfortable with, then pivot to unlocking abilities with your extra XP.
Legendary Cosmetic Sets
Remember, some Mythical sets (like Hunbeorth’s or the Einherjar Set) are only available as cosmetic packs from the Helix Store. These are mainly for looks and don’t bring extra stat boosts beyond normal Mythical perks, but they let you flex during multiplayer or River Raids.
Conclusion
Mythical gear isn’t just about numbers—it’s about build potential, unique perks, and a look that can intimidate, inspire, or celebrate your journey as Eivor. Hunt down sets, upgrade your favorites, experiment with runes, and tweak visuals until you’ve got both power and style for every kind of challenge ahead. Don’t rush—each piece has a story and makes blasting through England, Asgard, or Ireland feel even more rewarding. The Hidden Ones Bureau is one of Assassin’s Creed Valhalla’s purest callbacks to the series’ stealthy roots. These ancient Assassin enclaves scattered around England hold deep secrets, powerful rewards, and a slice of lore that brings Eivor closer to the Hidden Ones (the earliest Assassins) and their shadowy war with the Order of the Ancients. Here’s a full rundown on how the Bureaus work, what you get for digging through their ruins, and the steps to rebuild them in Ravensthorpe.
What are Hidden Ones Bureaus?
Hidden Ones Bureaus are secret outposts dating back to the early Assassin Brotherhood. Most have fallen into disrepair and are tucked away in larger cities. Each Bureau is a mini-dungeon with light parkour puzzles, a glimpse at old Brotherhood operations, and—most importantly—exclusive armor and codex pages.
There are Bureaus in the following cities:
- London
- Lunden
- Jorvik
- Winchester
- Glowecestre
- Colcestre
Finding and clearing these locations will help you piece together both the history of the Hidden Ones in England and unlock some unique gear.
Hidden Ones Bureau Rewards
Every Bureau has three main draws:
1. Codex Pages
These fragmentary notes are part of a larger puzzle. Collecting all six pages and returning them to Hytham in Ravensthorpe unlocks unique dialogue, insights into the Assassins’ history, and a very special weapon—the Hidden Ones’ Armor Set.
2. Unique Gear
Each Bureau contains a piece of the Hidden Ones armor set or a unique cosmetic item. This set is designed for stealth:
- Increased assassination damage
- Boosts for sneak speed
- Synergy with stealth runes
It's one of the slickest-looking lightweight armors in the game, ideal for players focusing on silent takedowns.
3. Lore and Secrets
Inside every Bureau, you’ll find written lore tablets and environmental storytelling—old letters, journals, and paraphernalia that flesh out the early Assassin presence in England.
How to Find and Complete Each Bureau
Each Bureau is a bit of a puzzle. You’ll need to locate an entrance (sometimes underwater, sometimes behind breakable walls), solve a parkour or climbing challenge, and hunt down the loot and codex page. Here are some quick tips:
Locating Entrances
- Bureaus are marked as “Wealth” on the map, but only after you’re close
- Most entrances are hidden—look for piles of junk to clear, submerged tunnels, or destroyed rooftops
- Synin, your raven, can help by highlighting secrets from above
Clearing the Bureaus
- Bring a torch: Some are pitch dark until you light the place up
- Blast walls are usually clearable with oil jars found nearby, or by igniting flammable surfaces
- Move bookcases, climb beams, and look for hidden ladders to reach the inner sanctum
Collecting Codex Pages
Each location awards one codex page. Pick up everything that glows gold; it will always be in a “scroll” or “book” on a pedestal, desk, or shelf. Once you have a page, don’t forget to loot the chest for armor.
What to Do With Codex Pages
Once you have all six codex pages:
- Return to Hytham in Ravensthorpe (he’s usually outside the Longhouse or at the “Assassin's Bungalow” near the docks).
- Hand in the pages to complete the quest.
- You’ll get a cool historical cutscene and unlock the legendary Assassin's Bureau Wall Decoration, plus the full Hidden Ones set if you haven’t completed it already.
Bonus Tip: Finishing the Hidden Ones Bureau questline brings extra insight into the true “lore” ending of the game.
Upgrading the Bureau in Ravensthorpe
You can construct the Hidden Ones Bureau early in your settlement (after you unlock the first few buildings). Doing this:
- Unlocks Hytham as a full quest-giver
- Gives you the ability to hunt Order of the Ancients targets via the “Order” menu
- Lets you turn in Medallions for extra abilities and lore notes
Building the Bureau costs a normal ration of raw materials and supplies. Prioritizing this structure opens up some of the best early stealth mechanics in the game and starts the legendary “Assassin's Questline.”
Hidden Ones Armor Set: Is It Worth the Work?
The Hidden Ones set boosts your assassination damage, gives you easier time blending in, and looks super sleek. It helps a lot early in the game, especially for infiltration-heavy missions or if you lean on stealth. Later outfits might outclass it for stats, but for fans of the series or silent approaches, it’s a must-have.
Quick Tips for Bureau-Hunting
- Always check your inventory after clearing a Bureau—you don’t want to miss grabbing the codex page or armor before leaving.
- Bring oil jars or line up fire arrows if you get stuck at a walled-off entrance.
- If you're lost, walk the perimeter of the Bureau location—some entrances are off to the side or underground.
- Don’t ignore the environmental notes; small details here hint at old Assassin and Templar activities vital for Valhalla’s lore.
Final Thoughts
Hidden Ones Bureaus are more than just loot caves—they’re slices of Assassin’s Creed history, nostalgia shots for fans, and one of the cleanest ways to earn meaningful rewards outside of main story missions. Completing all six will net armor, lore, and a taste of the old Brotherhood that started it all. If you’re aiming for a completionist run, tackling the Bureaus early pays off all the way through your time as Eivor.