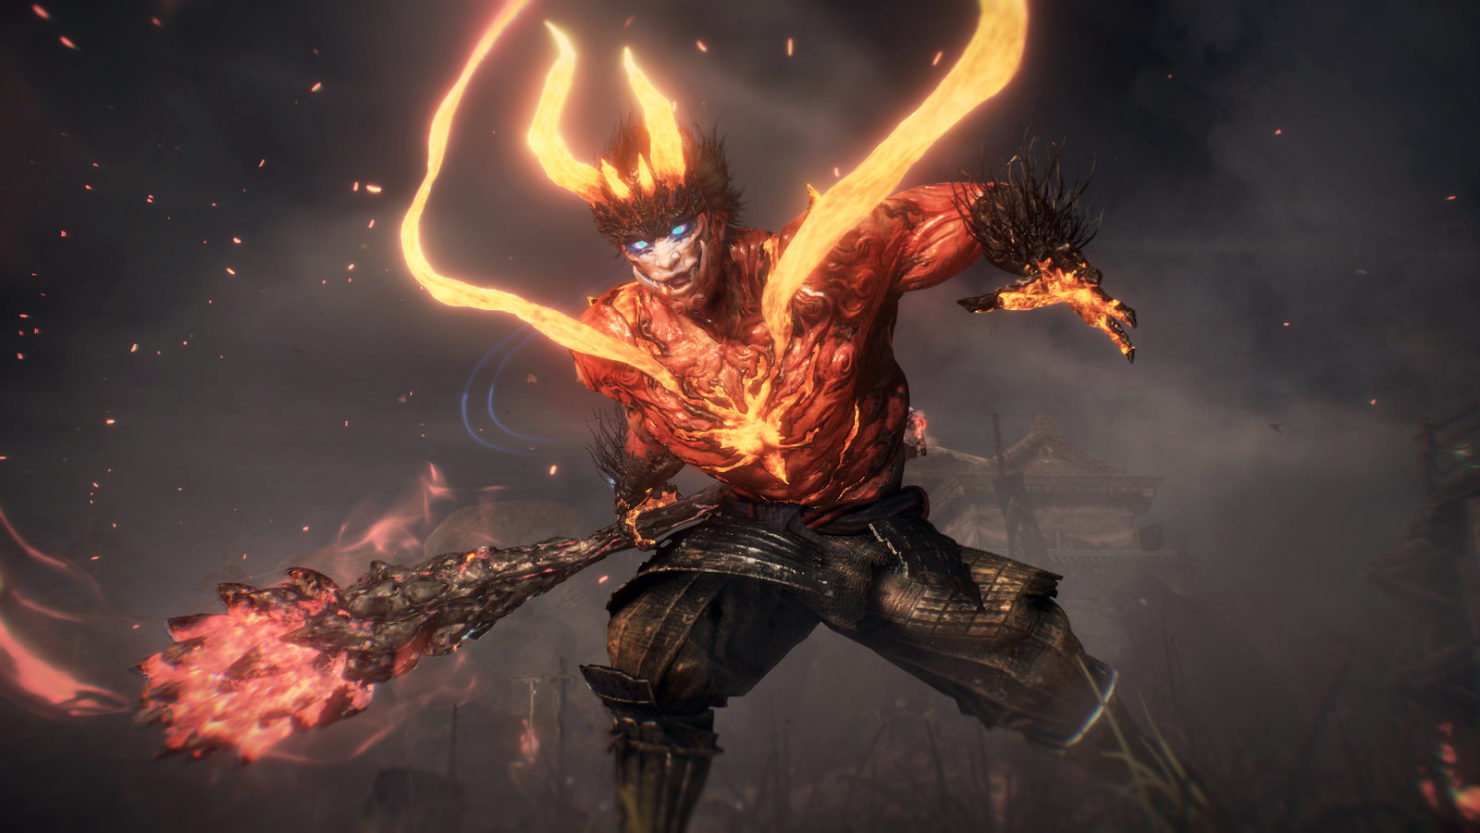
Nioh 2 Advanced Combat Techniques Guide
Master Nioh 2’s combat with expert tips on Ki Pulse, Yokai Shift, Stance Switching, Burst Counter, and weapon skills.
Mastering the basics in Nioh 2 is just the beginning; it’s the deeper combat mechanics that really set skilled players apart. With its fast-paced battles and demanding enemies, Nioh 2’s system rewards those who pay close attention to timing, positioning, and resource management. Once you start exploring these advanced techniques—like perfecting your Ki pulses, stance switching under pressure, or squeezing the most out of your Yokai abilities—the flow of combat shifts dramatically. Suddenly, tricky bosses and relentless mobs become less intimidating, and each encounter turns into an opportunity to push your skills even further. Understanding these nuances isn’t just about survival; it can make every fight feel uniquely satisfying.
Ki Pulse Mastery
Ki management is the backbone of every fight in Nioh 2. When your Ki (stamina) runs dry, you’re left open and sluggish—a dangerous spot with aggressive Yokai all around. The Ki Pulse system lets you instantly recover lost stamina after attacks, keeping you agile and relentless. Learning to use Ki Pulse well transforms your combat style, boosting both aggression and defense.
What is Ki Pulse?
After you attack, a portion of your Ki slowly recharges over a brief window. The Ki Pulse is a timed button press (R1 by default) that instantly restores this regenerating Ki portion, allowing you to keep attacking without running out of breath. Think of it as a rhythm game: with every attack, you’re looking for the moment the white Ki aura flows into your character. Nailing the timing keeps you in control while letting you maintain pressure on the enemy.
Why Use Ki Pulse?
If you don’t recover Ki effectively, you risk getting stuck with no stamina, leaving you wide open for punishment. Proper Ki Pulse usage means:
- Maintaining Offensive Momentum: You can maintain longer combos and keep foes on the back foot.
- Defending Smoothly: A steady Ki pool lets you block or dodge follow-up attacks with ease.
- Yokai Realm Counter: Certain environments and enemies create Yokai Pools that slow your Ki recovery; Ki Pulse helps purge these debuffs.
It isn’t just a nice bonus—it’s what separates formless button-mashing from sharp, satisfying combat.
Timing the Ki Pulse
The visual cue—a white, glowing ring around your character—shows when the Ki Pulse is ready. Press R1 as the ring closes in for a perfect pulse. You don’t have to land it perfectly every time, but hitting the sweet spot maximizes your Ki recovery.
- Early Pulse: Too early means you miss out on full Ki recovery.
- Late Pulse: Too late, and the bonus fades away.
- Perfect Pulse: Right as the ring converges restores the most Ki and triggers any gear or skill perks tied to a "timed pulse."
Practice after every attack to build the rhythm into your muscle memory.
Ki Pulse in the Heat of Battle
You rarely have downtime to focus solely on your Ki bar. Bosses hammer away, smaller foes swarm—you need to pulse on the move. Luckily, Nioh 2 lets you Ki Pulse while dodging or switching stances. Try weaving in a dodge and pulsing at the same time. Not only can this get you out of tight spots, but certain skills give bonuses for pulsing during a dodge or stance change.
Tips for On-the-Go Pulsing
- After Combos: Get in the habit of pulsing after every string of attacks.
- During Dodges: If things get spicy, pulse mid-dodge. It can feel awkward at first, but it’s a lifesaver.
- Stance Switches: Higher-level play involves switching stances to adapt to different enemies or attack types—and you can pulse at the same moment for maximum efficiency.
Advanced Perks: Skills and Gear Synergy
Ki Pulse isn’t just about regaining stamina. Various skills and set bonuses make a successful pulse even more rewarding.
- Yokai Skills: Some skills buff you after a pulse, letting you resist debuffs or hit harder.
- Stamina Efficiency: Armor and weapons sometimes come with perks that grant temporary bonuses when you nail a perfect pulse—think faster movement or a burst of Ki regeneration.
- Purification: When fighting in a Yokai Realm, a well-timed pulse doesn’t just restore your Ki; it cleanses the ground around you of dangerous slow effects.
Common Mistakes and How to Fix Them
- Ignoring the Visual Cue: Relying on guesswork leads to failed pulses. Focus on the white ring, not just the rhythm of your attacks.
- Panicking When Out of Ki: If you’re low, pause for a quick pulse rather than spamming attacks.
- Forgetting About Pulsing During Movement: You can pulse during a dash or roll, so keep this in mind during hectic moments.
Practice Drills
If the timing still feels rough, practice with slower weapons like axes or spears. Their lengthy swings make it easier to spot the pulse window. Once it clicks, move up to faster weapons and see how far you’ve come.
Mastering Ki Pulse makes every fight smoother, faster, and more rewarding. As you get better with pulsing, you’ll notice your confidence soar in longer battles and against the trickiest bosses. Keep an eye on that glowing ring, learn the rhythm, and let your Ki fuel your path forward.
Yokai Shift Guide
The Yokai Shift mechanic in Nioh 2 is your ace in the hole—an ultimate transformation that temporarily turns you into a powerful demon. Knowing when to shift, which form to use, and how to keep your momentum going can turn tough encounters into cakewalks. This section breaks down everything you need to confidently wield Yokai Shift, from the activation basics to nuanced tips for staying in control.
What Is Yokai Shift?
Yokai Shift is Nioh 2’s special transformation mode. During a shift, you become a mighty Yokai with boosted stats, unique moves, and a separate health bar called the Amrita Gauge. Shifting not only changes your appearance but also gives you access to new attacks and temporary invulnerability. You can activate Yokai Shift once your Amrita Gauge is full.
How to Trigger Yokai Shift
First, fill your Amrita Gauge. This happens as you deal or take damage, collect Amrita, or pick up certain items. Once full, hit Triangle + Circle (PlayStation controls) to unleash your transformation. Watch your timing: activating at the right moment can cancel out damage or pull you out of danger.
While in Yokai Shift:
- You don’t use Ki. You have an Amrita bar instead.
- If the Amrita bar empties, or you take too many hits, Yokai Shift ends.
- All enemies will be staggered if you activate near them.
- You’re immune to many status effects.
Types of Yokai Forms
There are three Yokai Shift forms—Brute, Feral, and Phantom—determined by your choice of Guardian Spirit at character creation or later. Each form handles differently and is suited for distinct playstyles.
Brute
- Style: Aggressive brawler
- Special (L2+Square by default): Unblockable charge attack
- Strengths: High raw damage, strong poise
- Best For: Close combat, breaking enemy defenses, and punishing bosses that don’t move much
Feral
- Style: Speedster
- Special: Swift dodge and counterattack
- Strengths: Superior mobility, long dash dodges, easier repositioning mid-fight
- Best For: Dodging projectile attacks, quick strikes, picking off weaker enemies
Phantom
- Style: Ranged magic user
- Special: Throws a spinning projectile or fires energy blasts
- Strengths: Safest distance options, crowd control, zoning enemies from afar
- Best For: Dealing with large clusters, bosses with big attack zones, and maintaining pressure at range
Core Yokai Shift Mechanics
Amrita Gauge and Its Role
During Yokai Shift, your Amrita Gauge is your life. Instead of dying when your regular HP hits zero, your shift simply ends. While shifted, blocking and dodging drain the gauge, as does time passing. Taking hits makes it drop more quickly, so you’ll want to stay aggressive and avoid getting cornered.
Yokai Shift Attacks
Each form has a mix of light, heavy, and special attacks. These are mapped to your normal attack buttons, but execute flashy, powerful moves with extended range and big area effects.
- Light Attack (Square): Fast, quick hits.
- Heavy Attack (Triangle): Slower, big damage, often area-of-effect.
- Special Attack (L2+Square/Triangle): Unique to each form, burns a chunk of your Amrita Gauge, but can break enemies’ defenses or clear a crowd.
Mix up attacks to keep your momentum; combos often deal much more damage and stagger enemies.
Burst Counter
One of the flashiest tools you get in Yokai Shift is the Burst Counter. Each form has a variant, but all have the same goal: punish enemies’ red-glowing “burst” attacks.
- Activate (R2 + Circle): Time it when you see the red flash to counter hard-hitting boss moves.
- Brute: Charges forward, interrupting even stationary enemies.
- Feral: Dodges through and then slashes from behind.
- Phantom: Parries from a distance, safe for ranged users.
Proper Burst Counter timing can swing the flow of battle, so practice recognizing the tells for bosses.
How to Get the Most Out of Yokai Shift
Timing Is Everything
- Don’t pop Yokai Shift at full health if you can help it. Save it for when you’re in a tough spot or facing a boss phase.
- Try to trigger after an enemy commits to a tough attack you want to counter or after you get knocked down. You’ll get a breathing room thanks to the stagger and i-frames.
Aggression Keeps You Shifted Longer
While you’re in Yokai Shift, pushing the offense will slightly refill your Amrita Gauge. Landing hits, especially on groups, can help keep your transformation going. If you play too cautiously and back away, the gauge drains quickly, ending your shift early.
Use the Environment
Remember, you can’t heal while shifted, so make the most of buffs (like Sloth Talismans or quickening rounds) before transforming. Also, if there are lots of weaker enemies nearby, shift to quickly clear them for extra hits instead of just chipping away at a boss.
Don’t Forget Soul Cores
You can use powerful Yokai Skills with Soul Cores during your shift. These cost a chunk of the Amrita Gauge but can deal serious damage. Map your favorite Soul Cores to suit your form—high DPS for Brute, quick strikes for Feral, crowd control for Phantom.
Cancel Shift When Needed
If you sense your shift will end soon, and you're fighting a tough boss, consider retreating briefly. You want to avoid your standard HP being chipped away the instant you revert, so play it safe as your Amrita Gauge falls low.
Common Mistakes (and How to Avoid Them)
- Starting Shift Too Early: Wait until you really need to turn the tide, or are low on health, to bust out your transformation.
- Ignoring Burst Counter Opportunities: Burst Counters can do big stagger damage—don’t waste your shift just mashing attacks.
- Forgetting Specialized Skills: Experiment with different Soul Cores and learn which combine best with each form.
Practice Makes Perfect
Mastering Yokai Shift isn’t just about mashing buttons in demon mode. It’s learning the nuances of each form, practicing Burst Counters, and understanding timing. Try each form out extensively, and play with the Guardian Spirits and Soul Cores that fit your style.
Summary: Shaping the Battle With Yokai Power
Yokai Shift hands you a power trip, but it lasts only a short time. To use it well, build your gauge patiently, practice form-specific attacks, and read the fight for those perfect moments to transform, counter, and dominate. Getting comfortable with Shift mechanics isn’t just a bonus—it’s the mark of a player ready for Nioh 2’s toughest challenges. Switching stances on the fly gives you real control over the flow of combat in Nioh 2. Each weapon type comes with three stances—High, Mid, and Low—each with their own move sets, strengths, and weaknesses. Mastering when and how to swap between them is what separates seasoned samurai from button-mashers.
Stance Switching
Stance switching is about responding to threats, maximizing your Ki, and squeezing every drop of effectiveness out of your weapon. Rather than picking a favorite and sticking with it, the best players treat each stance as a tool in their toolkit—ready to swap as the situation changes.
The Three Stances: Quick Refresher
Before breaking down switching techniques, here’s a short reminder:
- High Stance (△ / Triangle): Deals the highest damage with bigger swings, but takes longer and burns more Ki. Great for slow, heavy attacks—best used when you have a big opening or want to break guards.
- Mid Stance (□ / Square): Well-rounded, solid guard, medium speed and damage. The most balanced for defense and counter-attacking.
- Low Stance (X / Cross): Fastest, least damaging, uses less Ki per attack. Ideal for dodging, quick pokes, and Ki recovery. Useful for fighting smaller, quicker demons or when you need to conserve stamina.
You switch by holding R1 and pressing one of Triangle (High), Square (Mid), or X (Low) on PlayStation controls. Get used to the quick finger movements—Nioh 2’s enemies won’t wait for you to think.
Why Switch Stances?
Adapting to Enemy Types
Enemies in Nioh 2 can punish predictable play. For instance, tough armored foes often eat High Stance attacks for breakfast, so you’re better off poking them with Mid Stance, or circling with Low Stance for quick hits and safe dodges. In contrast, large yokai with slow windups give you windows to swap to High Stance and smash through their guard.
Managing Ki Effectively
Each stance burns and recovers Ki at a different rate. Low Stance attacks use little Ki and also let you Ki Pulse more easily. If you’re running low, a quick switch down can help you stay in the fight rather than fishing for space to recover. Likewise, after a flurry of attacks in High Stance, drop to Low Stance and Ki Pulse to stay aggressive.
Handling Multiple Foes
Mob groups can overwhelm if you just swing for the fences with heavy attacks. Mid or Low Stance lets you chain between targets rapidly and reposition between swings. Certain combos, especially with weapons like dual swords or kusarigama, have wide arcs in Low Stance for crowd control, while High Stance singles out big threats.
Stance Switch Combos and Canceling
A big part of Nioh 2’s advanced play is using stance switches mid-combo—sometimes called “stance canceling.” You can change stance during attack animations, right after a combo finisher, or right before a Ki Pulse. This lets you do things like:
- Combo extension: Start a string in Low, switch to High mid-way, and dump a big finisher before the enemy can react.
- Safer recovery: Finish with a powerful move, then immediately switch to Low and dodge, limiting your vulnerability frames.
- Ki Pulse mastery: Switch stances during a Ki Pulse (R1 after an attack) for bonus Ki (the “Perfect Ki Pulse” with switch bonus) if you time it well. It’s both flashy and practical!
Learning to weave stance changes into your flow feels tricky at first but pays off fast—especially for more complex boss encounters where staying fluid is key.
Practical Examples by Weapon
Every weapon has unique moves and combos for each stance. Here are a couple of examples to bring it together:
Sword
- High Stance: Overhead swings and heavy finishers. Good for guard breaks.
- Mid Stance: Reliable blocks and mid-range slashes—works well for countering.
- Low Stance: Quick thrusts and slashes; weave in and out, punish whiffs, and Ki Pulse-switch to reload for another round.
A common trick: Start with a Mid Stance basic combo, switch to High for the finisher, then drop to Low directly after to Ki Pulse and dodge away.
Spear
- High Stance: Giant pokes with great reach—punish large yokai.
- Mid Stance: Sweeping horizontal attacks, nice for mob control.
- Low Stance: Short, quick stabs—kite and conserve Ki.
Mixing stances during the charge attacks can surprise opponents and keep your pressure up without getting stuck in recovery.
Reading the Battlefield
The time to switch isn't always obvious. Keep an eye on enemy tells, your Ki, and your positioning. If you see a boss winding up, preemptively drop to Mid for a better block, or Low for faster dodges. If you stagger an enemy, snap to High and land some serious punishment. Use stance switching not just as a reaction, but as a prediction—be proactive rather than reactive.
Pro Tips for Mastering Stance Switching
- Don’t panic mash: Deliberate switches in moments of opportunity are best; panic swapping can leave you exposed.
- Combo into finishes: High Stance finishers hit hard, but only if you’ve got a safe opening.
- Train in the Dojo: Use training modes to get comfy switching mid-combo—practice until it's muscle memory.
- Mix attack and defense: Mid Stance blocks, Low Stance dodges. Don’t stay locked in High unless you’re sure of the kill.
Wrapping Up: Stance Switching is Your Secret Weapon
Switching stances is much more than a gimmick; it’s a way to add creative layers to every fight. Mastery doesn't mean memorizing combos, but learning to read threats and respond intuitively. Practice stance changes until they become second nature, and you’ll see your survivability and damage skyrocket—even against Nioh 2’s nastiest bosses.
Burst Counter Guide
The Burst Counter is one of Nioh 2’s signature defensive moves, sitting right at the heart of yokai combat. It’s a high-risk, high-reward technique that allows you to slam the brakes on some of the game’s trickiest attacks. In this section, we’ll break down how Burst Counters work, the types you get, what to watch for, and how to integrate them for maximum impact.
What Is a Burst Counter?
A Burst Counter is a special move that lets you interrupt and punish certain enemy attacks—specifically, "Burst Attacks." Burst Attacks are powerful, usually red-glowing moves that can delete your health bar if you try to block or dodge as usual. If you spot a red aura flaring up around an enemy, it's your cue: a Burst Attack is incoming.
To pull off a Burst Counter, press R2 and Circle (or the equivalent on your controls) just as the enemy’s attack is about to land. If your timing is right, you’ll counter the move, staggering the enemy and opening them up to a flurry of blows. If your timing is off, though, you eat the attack—or worse, get punished during the animation.
Types of Burst Counters
Burst Counters tie directly into your selected Guardian Spirit. There are three fundamental types, each offering its own style and defensive utility:
1. Feral (Red Wolf)
- Activation: R2 + Circle
- Animation: A swift dodge followed by a counterstrike.
- Strengths: Grants maximum mobility. If you’re good with timing and like to chase down foes or avoid attacks entirely, this one’s for you.
- Weaknesses: Slightly less forgiving if you’re right up close—the dodge can overshoot if the timing isn’t exact.
2. Brute (Blue Bull)
- Activation: R2 + Circle
- Animation: A big, super-armor shoulder bash.
- Strengths: Bulldozes through attacks, especially if you mistime a little. You don’t get interrupted easily mid-animation.
- Weaknesses: Shorter reach. Not so great against long-range Burst Attacks or big yokai swings unless you’re right in their face.
3. Phantom (White Bird)
- Activation: R2 + Circle
- Animation: A timed energy parry at range.
- Strengths: The safest option if you like keeping space between you and the enemy. You can time it just as the attack connects and get a clean counter.
- Weaknesses: Requires sharper timing, with a slightly slower startup than the others. Won’t save you if you just mash and hope.
How to Spot a Burst Attack
Learn the enemy "tells." Burst Attacks are always signposted by a red aura or flash right before the move fires off. Bosses and yokai love to mix these in after telegraphed combos or when you’re low on health. Listen for the audio cue—a dramatic sound often accompanies the visual sign.
Some common tells:
- A boss pauses, red light radiates, then lunges or swipes.
- Floating yokai glow and zoom at you.
- Oni slam their weapons down, bathing the ground in red.
Pulling Off the Burst Counter
Success is mostly about practice and memory. Here’s what helps:
- Stay Calm: Don’t spam R2 + Circle. Wait until just before the hit lands. Early counters fizzle without effect, and late ones get you splattered.
- Positioning: Each Burst Counter type covers different ranges. For example, Brute wants you close, Feral works best if you’re slightly to the side, Phantom lets you backstep more.
- Watch for Multi-Hits: Some Burst Attacks are fake-outs or two-parters. Hold off until the true strike.
If you counter successfully, you’ll see a shockwave and the enemy will stagger. This is your golden window—lay into them with your most powerful combo, recover Ki, or set up for other advanced moves.
Integrating Burst Counters into Combat
- Boss Fights: Nearly every boss has at least one or two Burst Attacks. Mastering the counter opens up their weak spots and can decide tight battles.
- Enemy Variety: Regular yokai—especially types like Enki, Mezuki, or human mini-bosses—mix Burst Attacks into their movesets. Chain counters to burn down their Ki faster, or prevent crazy combos.
- Pressure Relief: If you’re boxed in, a Burst Counter can swing the momentum, breaking out of deadly stuns or animation locks.
Training Tips
- Practice on Early Enemies: The game’s first Enki and Gozuki offer predictable Burst Attacks. Use these to practice timing with all three Guardian Spirits if you want.
- Mix With Ki Pulse: Smashing out a Burst Counter often clears a little space—combine it with a Ki Pulse to reset your stamina and keep pressure up.
- Don’t Neglect Stance: Low Stance lets you recover quicker after a failed counter; High Stance makes your punishment hits even deadlier if you succeed.
When Not to Burst Counter
Don’t get greedy. Some attacks look like Burst Attacks but don’t trigger the counter properly, or have weird timing—especially multi-phase boss patterns. Know when to just dodge or block instead. Rely on memorizing the attack patterns, and only go for the counter when you’re sure.
Quick Reference: Burst Counter Keys
| Guardian Spirit Type | Counter Name (“Color”) | Style | Best Range | Forgiveness | |---------------------|------------------------|-----------------|-----------------|---------------| | Feral (Red) | Slash/Dodge | Mobility dodge | Medium | Medium | | Brute (Blue) | Shoulder charge | Armor/Interrupt | Close | High | | Phantom (Purple) | Energy burst/parry | Projectile | Far | Low/Medium |
Wrapping Up: Burst Counter Mastery
The Burst Counter makes or breaks high-level Nioh 2 combat. It flips fearsome boss attacks into big opportunities, but only if you’re reading enemy patterns and reacting with confidence. Start in easier encounters, get the timing down, pick the Guardian style that suits you, and soon you’ll be smacking yokai out of their flashiest moves—turning dangerous moments into pure power plays.
Weapon Skill Trees
In Nioh 2, each weapon isn’t just about how it swings—there’s a whole layer of growth tied to skill trees. Weapon skill trees let you unlock new moves, buffs, and even special parries. Your choices here shape your entire fighting style, from light, agile pokes to heavy, floor-shaking smashes. Getting the most out of your gear means understanding these systems and using them to suit your playstyle preferences.
How Skill Trees Work
Each weapon type—sword, dual swords, spear, axe, kusarigama, tonfa, odachi, switchglaive, splitstaff, fists, and hatchets—has its own unique tree. These skill trees expand as you use the weapon: the more you fight with it, the more proficiency you earn, which nets you skill points for that weapon. Investing those points unlocks new combos, finisher moves, stances, and passives.
To access the tree, hit the menu button, then tap over to the Skill screen. From there, every weapon you’ve played with will display its tree. Highlight a node to see what it gives—some unlock a move, others improve stats with that weapon or even offer Ki pulse bonuses.
Understanding Weapon Skill Types
Weapon skills break down into a few broad categories:
- Active Skills: These are the bread and butter—special attacks or combos you perform by pressing a sequence, such as Square -> Triangle.
- Passive Bonuses: These are “invisible” improvements. For example, increasing Ki recovery, boosting damage in certain stances, or reducing the Ki cost of blocking.
- Stance-Specific Skills: Many weapons let you pick between High, Mid, and Low stance, with skills that are only available or stronger in that specific stance.
Let’s break down what these look like in action.
Active Skills
Active skills are unlocked nodes that add new moves, charge-up attacks, grapples, or parries to your arsenal. Each skill describes how to use it (like “Mid stance only: Strong attack, then Triangle for a unique finisher”). Most can be chained out of regular attacks or stances, opening up new mix-ups.
Some standouts:
- Sword’s Iai Quickdraw: Quick, massive damage when drawn from the sheath.
- Axe’s Mad Spinner: Hold Square to turn your axe into a deadly whirlwind.
- Kusarigama’s Reaper: A wide, low sweep to destroy crowds or stagger tough foes.
Take note: some skills can be remapped. Head to the “Active Skills Customization” menu to put your favorites on the input sequence that feels right.
Passive Bonuses
Passives upgrade your baseline efficiency, and you'll feel their effect even if you never press extra buttons. Some grant benefits when you land certain attacks or successfully pull off a Ki Pulse, others simply make your life easier (faster Ki regen, increased guard break resistance, etc.). These are great early investments as they “always work,” no matter your combo or stance.
Stance-Specific Skills
Every weapon in Nioh 2 works with three stances:
- High Stance: Slow, hard-hitting, largest reach.
- Mid Stance: Balanced speed and defense.
- Low Stance: Fastest recovery and movement, but less damage.
Many skill tree nodes mention they work only in a certain stance—like the spear’s “Twisting Spear,” which needs Mid stance, or sword’s “Water Shadow” in Low stance. Building your skill set around your preferred stance amplifies your effectiveness.
Earning and Spending Skill Points
You get skill points for each weapon type by using that weapon in combat—landing hits, blocking, and performing skills all count. It’s worthwhile to stick with a weapon for a while to rack these up and open more of the skill tree. If you want to switch, just use a new weapon and it’ll start tracking points for that one separately.
There's also a "Samurai Skill" tree (universal moves, not tied to any weapon) and "Onmyo" and "Ninjutsu" for magic and ninja skills, but these aren't weapon-specific.
Respeccing: Don’t Sweat Mistakes
Worried you picked the wrong skill? You can respect your skill points with "Book of Reincarnation" from the blacksmith or Kodama Bazaar. This resets all your allocated points (across all skill trees and stats) so you can try different builds until you find what clicks.
Tips for Planning Your Skill Tree Route
- Unlock Passives Early: These have no input requirements and give you reliable benefits from the get-go.
- Combo Skills: Focus on active skills that build into each other. A string of moves that flows well often feels better than a few scattered standalones.
- Stance Synergy: If you find you’re always in High stance, target skills that offer bonuses or attacks there. Don’t feel you must unlock everything—stick to what suits your rhythm.
- Check Requirements: Some advanced skills need you to unlock earlier nodes in the branch or hit weapon proficiency milestones. Plan your route with this in mind.
Skill Customization and Hot Swapping
Don’t overlook the customization menu for active skills. Many weapons let you swap in different moves for a certain input (like different Triangle follow-ups after successive Squares). Test various options in the dojo or against easy enemies to find a flow that feels satisfying. If a move isn’t working for you, swap it out.
Sword Skill Tree Example
To illustrate, here’s a quick breakdown of what a typical sword skill tree looks like early on:
- Passives: Ki Pulse: Increase (improves stamina recovery), Damage Up (if you follow a successful Ki Pulse).
- Basic Moves: Kick (Mid stance finisher that reduces enemy Ki), Iai Quickdraw.
- Blocking Improvements: Reduced Ki usage when blocking, improved guard break resistance.
- Fancier Combos: Finishers like Morning Moon (High stance combo ender).
This pattern repeats for other weapons, but with their own flavor and signature techniques.
Mastering Weapon Skill Trees for late-game Play
Late in the game, especially on higher difficulties, mixing in advanced moves from your tree—“just guard” parries, unique grapples, or chain finishers—can mean the difference between a decent run and a highlight reel. Try to unlock at least one top-tier move in your main weapon; these are designed to really change how you approach tough fights.
Final Thoughts
Understanding and using weapon skill trees adds depth to every swing in Nioh 2. They empower you to shape your build, customize combos, and keep things fresh. Experiment with skill routes, swap out moves you don’t like, and pick passives that play to your strengths. Before long, you’ll feel your skill tree choices pay off as you outmaneuver enemies with flashier, stronger techniques.