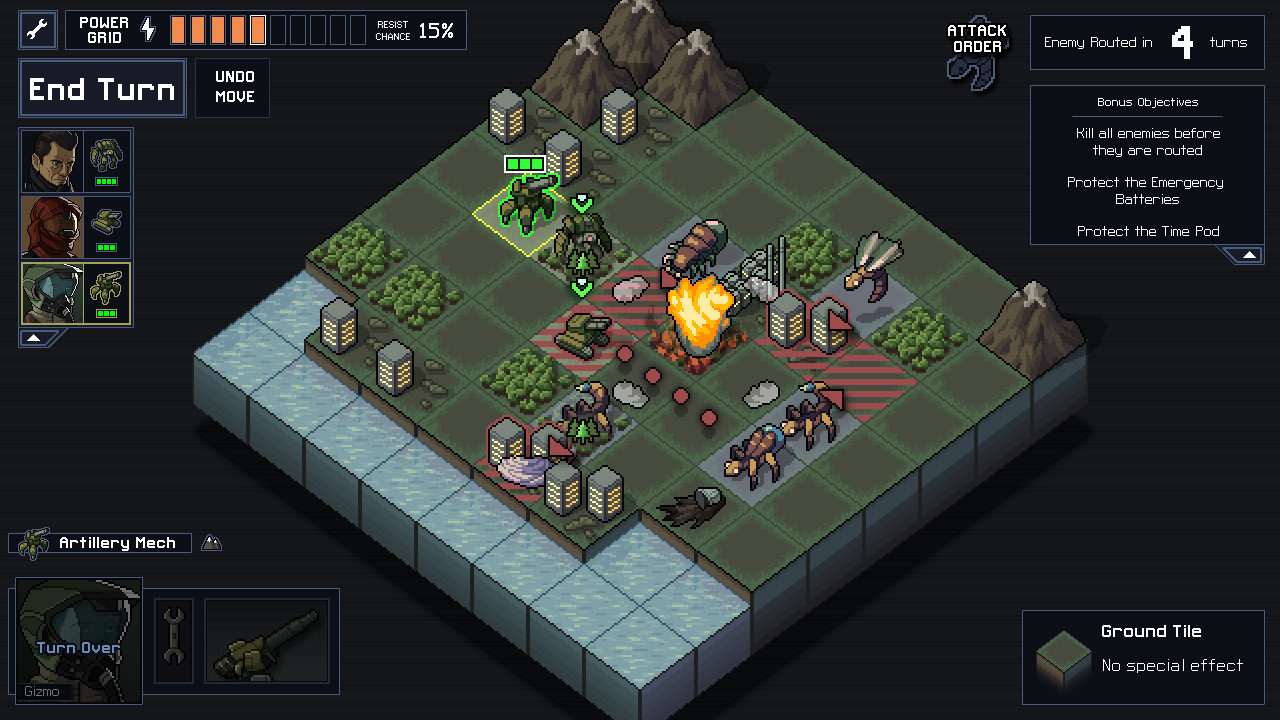
Into the Breach: Advanced Squad and Strategy Guide
Master every squad, mech, and pilot in Into the Breach with expert strategies, synergy tips, and flawless run guides.
Ever since its release, Into the Breach has stood out as one of those rare strategy games that balances tight, puzzle-like tactics with just enough chaos to keep every run feeling fresh. For players who’ve wrapped their heads around the basics—learning the core enemy types, understanding how grid damage works, and maybe even securing a few tentative victories—the real depth starts to show once you experiment with the advanced squads. Each unique team pushes you to rethink how you approach the battlefield, demanding new tactics and sharper decision-making. Whether you're looking to push your win-rate higher or just want to see the chaos that comes with less conventional squads, there’s a lot to explore in the game’s deep strategic systems.
Squad Synergies
Once you've put the starting Rift Walkers through their paces and fooled around with a few custom teams, you’ll find that squad composition in Into the Breach isn’t just about strong individual mechs—it’s all about how those mechs mesh together. A squad’s true power shows up when their skills complement each other, turning every civilian building and mountain into a resource for creative play. Let’s look at what makes a squad’s chemistry work, what to watch for, and some of the ways veteran players wring the most value out of advanced squad setups.
Why Synergy Matters
On paper, any mech can beat a Vek with a well-placed attack. In practice, the later islands and final missions quickly reveal how much you need teamwork—whether that means pushing, pulling, freezing, or helping each other out of tight spots. The best squads cover for each other's weak sides and combine effects for maximum impact.
Here are the core reasons squad synergies pay off:
- Action Economy: Synergistic squads spread out their impact, using combos to handle threats without needing three perfect attacks each turn.
- Board Control: Pushing and environmental effects multiply in value when the squad can manipulate the board from multiple angles.
- Resilience: Teams that help each other stall, reposition, or repair take less grid damage over time.
Recognizing Key Synergy Types
Not every synergy is about massive combos or brutal power. Some just make every turn easier. Here are common ones seen across advanced squads:
Push/Pull + High Damage
Combining positional attacks with hard hitters allows for easy cleanup. Shove a Vek into line, then take it out before its attack lands. Think Zenith Guard: their Jet Mech’s push lines up Vek for the Laser Mech.
Chain Reactions
Some squads create setups where one mech’s attack powers up the rest. Rusting Hulks, for example, leave smoke across the battlefield, letting their Rocket Mech’s missiles block spawns and the Pulse Mech shove or kill suffocating Vek.
Status Effects and Traps
Pods like the Hazardous Mechs or Frozen Titans layer status effects (fire, acid, freeze) to control enemy movement and open up vulnerable Vek to direct attack or blocking spawns.
Healing/Repair Loops
While outright healing is limited, repair synergies like that of the Zenith Guard’s Shield Mech or the use of dedicated pilot skills can let teams shrug off damage and stay active longer.
Grid Defense Interaction
Some squads excel at using buildings for more than just passive defense. Science Mechs with shield tech, for instance, can protect cities while also supporting attacks.
Notable Advanced Squads & How Their Synergies Work
Rusting Hulks
Their smoke clouds suffocate Vek and disable attacks, while the Jet Mech pushes enemies right into those clouds or even onto spawn points. The result: crowd control and enemy neutralization, with each mech amplifying the others’ reach.
Zenit Guard
Shields keep crucial mechs safe so that high-profile attacks (the Laser Mech especially) can focus on offense. Together, shields and pushes allow the team to take risks that other squads avoid.
Blitzkrieg
The Lightning Mech sends arcs through enemies and terrain, and the Rock Mech can toss massive boulders to connect or disrupt, setting up multi-kills. The Exalted Mech often needs help positioning for big attacks, and the team's chain-capable skills leverage every tile.
Frozen Titans
A personal favorite for puzzle-solvers. Their freezing attacks can lock down Vek indefinitely, while the Mirror Mech bounces damage between targets. Commitments are high—accidentally freezing buildings or mechs means wasted power, but careful synergy means you’re freezing the right threat every time.
Custom/Secret Squads
Advanced players often pull off wild combos with custom teams. Double-push mechanics, widespread fire or acid from pilots, or triple-pilot squads built for grid defense reveal just how deep the rabbit hole goes.
Building Your Own Synergy
Making a custom squad? Focus on diverse attack types (direct, area, positional), some status or support (smoke, shields, freeze), and at least one environmental manipulation tool. Avoid overlapping weaknesses—three low-damage mechs or squads that can't handle many enemies at once can be rough.
Keep an eye on:
- Turn order: Which mechs should move first to maximize setup?
- Map coverage: Can your team reach opposite ends quickly?
- Enemy patterns: Are you ready for blobbers, burrowers, or flying threats?
Quick Tips for Mastering Teamwork
- Don’t treat each mech as an island. Stack effects—push into acid pools, pull into fire, freeze after shoving.
- Weapons with side effects (acid, smoke, fire) generally boost a squad’s flexibility.
- Lean into pilot abilities that help fill gaps (e.g., grid defense for fragile squads, repair for hazard-heavy maps).
- Practice setting up multi-turn plays: block a spawn this turn, then set up a mass kill turn next round.
Conclusion
Synergy lifts an average squad to greatness in Into the Breach. By combining effects, supporting each other, and planning ahead, you can handle late-game chaos and even experiment with custom squads for fresh victories. Mix, match, and tune your team until each run feels not just winnable, but uniquely satisfying.
Mech Abilities Guide
Getting the most out of your squad hinges on understanding what each mech can do. Every squad features three distinct mechs, and each has a primary weapon or ability that defines its battlefield role. Knowing the ins and outs—not just the raw numbers—of these abilities helps you avoid costly mistakes and squeeze out extra value from every turn.
Below, we’ll break down the different categories of mech abilities, how they work, common upgrades, and a few standout examples. By the end, you’ll recognize the potential (and pitfalls) in even the weirdest weapons Into the Breach throws at you.
Core Mech Roles and What Their Abilities Do
Most squads (including customs) follow a pattern: one mech focuses on damage, another on control/status, and a third on support or disruption. The trick isn’t just having three mechs with different attacks, but knowing how those attacks interact.
1. Direct Damage
These weapons hit hard and usually strike a single square or in a straight line. Their job is simple: take out Vek before they attack or multiply. Examples:
- Cannon Mech (Rift Walkers): The punchy, bread-and-butter artillery. Fires straight and deals 2 damage after upgrades.
- Laser Mech (Zenith Guard): Blasts a line across the map, damaging everything in its path—but beware, you'll also hit allies and buildings if they block the beam.
- Charge Mech (Blitzkrieg): Rushing punch that knocks enemies back (or chunks them for big damage after upgrades).
Tips: Great for cleaning up, but can get stuck if blocked or surrounded. Positioning is crucial; always check for friendly fire risks.
2. Area and Environmental Attacks
Some mechs hit multiple tiles or manipulate the terrain. These mechs can push Vek into hazards—or hazards into Vek.
- Aegis Mech (Zenith Guard): Shields a target and nearby buildings, adding an extra line of defense.
- Rock Artillery (Blitzkrieg): Chucks a boulder, blocking a spawn or pinning down a Vek. The rock itself can be used for blocking lines of sight.
- Ice Mech (Frozen Titans): Freezes itself and any adjacent tile; risky, but locks up threats fast.
Tips: These mechs shine when you can set off chain reactions—like pushing one Vek into another, off a cliff, or into water/lava. Sometimes, the terrain is a deadlier weapon than the mech attack itself.
3. Push, Pull, and Positional Control
Combat in Into the Breach isn’t just about damage. Moving enemies, allies, or even yourself is often better than dealing straight hits.
- Jet Mech (Rusting Hulks): Flies over enemies, dropping smoke and shoving Vek sideways.
- Gravwell Mech (Secret Squad, Science Class): Yanks a Vek from across the map into a new location—perfect for interrupting attacks or shoving an enemy into its own ally's shot.
- Swap Mech (Custom/Secret): Switches places with any unit, even through obstacles. Wildly flexible if you plan ahead.
Tips: Practice finding non-lethal solutions—it's often more effective to push a Vek's attack away from a building than to kill it outright. Moves like swapping can also bail an endangered ally out of trouble.
4. Status Effects (Acid, Fire, Smoke, Freeze)
These are the battlefield "multipliers." They create lasting threats or disable Vek abilities for a turn (or more).
- Rocket Mech (Rusting Hulks): Leaves a trail of smoke with every shot, disabling Vek attacks in that cloud.
- Acid Mech (Hazardous Mechs): Douses enemies in acid, making them take double damage from subsequent hits.
- Flame Mech (Flame Behemoths): Lights everything in its path on fire, chipping away at enemy health even if you can’t finish them in one turn.
- Mirror Mech (Frozen Titans): Bounces damage/status effects between targets.
Tips: Status effects can act as "soft kills" (a smoked Vek can’t attack, a frozen Vek acts as a wall). Combining these (like acid + damage) leads to huge turns.
5. Repair and Defensive Tech
While not as flashy, some mechs bring shields, self-repair, or grid defense to the table.
- Shield Mech (Zenith Guard): Adds barriers to allies or buildings.
- Nano Mech (Secret Squad): Heals allies in a small area.
- Repair skills (Pilots): Sometimes a pilot’s ability grants passive heals or resets.
Tips: Defensive mechs keep the team alive during messy turns or when facing heavy enemies. Try to time shields or healing bursts for before or after big Vek attacks.
Weapon Upgrades and Secondary Skills
Across all mech classes, weapon upgrades let you tailor each unit for the fight ahead. Most weapons can be upgraded for:
- Extra Damage: Straightforward but sometimes overkill if your squad’s synergy is more about control than kills.
- Extra Movement: Key for slow mechs, letting them reach key spots or reposition for next turn.
- New Effects: Many upgrades enable added push, side damage, or status—these can change how the mech fits into your team’s puzzle.
Sample Upgrades
- Rocket Artillery: Add smoke to adjacent tiles, covering cities in one move.
- Charge Attack: Pierce through enemies, letting you line up double-kills or reposition past obstacles.
- Laser Improvements: Ignore friendly fire or add push to reduce collateral damage risk.
Tips for Mixing and Matching Mech Abilities
- Check for overlap, not just gaps. Two mechs that only push may struggle to finish enemies off.
- Always look one turn ahead: does your attack set up a kill, block a spawn, or put a teammate in danger?
- Upgrades that add status/push/move often open up more options than just raw damage buffs.
- Don't sleep on weak-looking weapons—sometimes a science mech that only smokes, shields, or swaps can win games.
Squad Spotlight: Unique Powers That Change the Game
Some squads and custom combos break the mold. A few wild abilities that explode the standard “damage + push” formula:
- Camila’s Immunity (pilot skill): Ignores smoke, web, and fire—suddenly, smoke-based squads run wild.
- Archimedes’ Bonus Action: Can act again if it doesn't move first—enables creative double kills with certain mechs.
- The Abe Cannon (custom squad): Friendly fire knockback that launches your own mechs—dangerous, but if mastered, lets you set up epic combos.
Final Thoughts
Each mech in Into the Breach offers tools for solving problems in multiple ways. Understanding how these abilities fit together is just as important as raw stats or kill count. Mix up how you use each weapon, experiment with upgrades, and lean into both subtle and bold plays. With practice, you’ll find new tricks that take your squad from simply surviving to truly thriving.
Pilot Skills Guide
Pilots in Into the Breach aren't just flavor—they’re some of the most influential “equipment” you can slot into a mech. The right pilot skill can single-handedly solve certain fight patterns, shift your squad’s weak zone, or even break core rules of the game. Knowing what each skill does (and how to best use it) can squeeze out wins even on the hardest islands.
How Pilot Skills Work
Each pilot starts with one special ability and gains more passive skills as they level up. Their starting skill is unique and fixed—level-up perks are random, picked from a pool that includes extra health, movement, repair bonuses, and more.
You can swap any pilot into any mech between missions, so you’re rarely locked into one setup. Dead pilots are replaced by generic ones without cool abilities, so keeping your favorites alive matters a lot.
Unique Pilot Skills: Who’s Who and Why They Stand Out
Let’s highlight some of the most impactful unique pilot skills:
-
Ralph Karlsson – “+1 Reactor Core” Arguably the best all-round starter. Gives a flat +1 Reactor Core to his mech—no conditions, no drawbacks. Instantly enables early weapon upgrades or movement boosts.
-
Bethany Jones – “Shields at Battle Start” Every mission, the mech she pilots gets an automatic shield at the start. This absorbs one hit (all damage/status effects), which is especially good for fragile or front-line mechs.
-
Prospero – “Flying” The only “pilot skill” that lets any mech ignore terrain and obstacles as if it’s a jet. Turns slower, ground-locked combat frames into nimble problem solvers.
-
Henry Kwan – “Bonus Move After Action” After attacking or repairing, Henry’s mech gets a free move. This is perfect for repositioning after a push, escaping danger, or blocking a Vek spawn post-action.
-
Archimedes – “Bonus Action If No Move” If his mech doesn’t move first, it can act a second time. Enormous for science/mechs with area disables, as it lets you, for example, pull two enemies or drop two clouds of smoke in a single turn.
-
Camila Vera – “Immune to Web, Smoke, Fire” A flexible pick. She can’t be trapped, and terrain hazards that might lock down other mechs don’t slow her. Perfect for hazardous islands or when running Rusting Hulks, which use lots of smoke.
-
Abe Isamu – “Immunity to Friendly Fire” His mech can’t be damaged by allies. Useful for squadrons with explosive or area-effect attacks where collateral damage is a constant risk.
-
Chen Rong – “Resists Damage (25%)” Each time her mech takes a hit, there’s a flat chance to shrug it off and ignore all damage from that attack. While unreliable, this can clutch-save a grid or her own life.
Standard Level-Up Perks: What to Hope For
Leveling up a pilot during your campaign grants random extra skills:
-
+1 Mech Health Basic, but helps a paper-thin mech survive stray shots.
-
+1 Mech Movement Movement boosts are more valuable than they look—position is everything in this game.
-
+2 Grid Defense Helps protect the power grid, though this one only matters if that specific pilot is alive and in a mech.
-
+1 Mech Reactor The “jackpot” for flexibility—you can power extra weapons or mods earlier.
-
Once per Battle: Repair Removes Status Effects Lets you instantly shed fire, acid, or freeze on that pilot’s mech, and you can do it every encounter.
Each level-up can shape your long-term strategy. Don’t sleep on +1 movement for a science/mech, and always cheer when you hit a lucky +1 reactor.
Pilots and Squad Synergy
Some pilot skills match certain squads or mech tactics nearly perfectly.
- Bethany Jones is best in glass-cannon squads or squads taking early fire, like Flame Behemoths.
- Prospero on a brute or artillery mech lets you park in impossible spots.
- Camila shines with Rusting Hulks; that immunity lets her ignore the smoke covering the battlefield.
- Archimedes is busted with special weapons or the Zenith Guard’s Charge Mech, allowing double KO turns.
Random generics don’t offer unique skills but can still random into great stat combos. Don’t hesitate to swap pilots around to get the best mix for upcoming islands.
Tips for Picking and Leveling Pilots
- Protect your best pilots—assign mechs carefully if one pilot is overloaded with upgrades.
- If new pilots drop from time pods, evaluate: will their ability patch a squad weakness or open up fresh tricks?
- Some abilities sound boring (+1 move, +1 health) but may save more campaigns than flashier effects.
- Pair risky mechs (like phase tanks or charge attacks) with pilots who can absorb mistakes (Abe’s immunity, Bethany’s shields).
Wrapping Up: Pilot Power Wins Campaigns
A single great pilot, matched to the right mech and supported with good stat upgrades, can change how every battle flows. Watch for time pods, check pilot abilities after every mission, and don’t be afraid to shuffle your team’s seating chart as challenges change.
A solid grasp of pilot skills unlocks new tactics and can help you push even the toughest timelines to a perfect island bonus. Choose wisely, level smart, and combine pilot skills with your mech builds to outsmart even the nastiest Vek waves.
Island Strategy Guide
Each island in Into the Breach comes with its own distinct hazards, enemies, and mission objectives. Knowing what to expect and how to adjust your squad's approach is key to handling the increasing difficulty and unpredictability as you progress. Here's a deep look at how to handle each island, pick priority missions, and maximize rewards while keeping your grid and squad alive.
The Order of Islands: Does It Matter?
Yes, the sequence you tackle islands can make a huge difference. Enemy types, terrain challenges, and available rewards all change depending on your choices. Each run gives you access to only two out of the four corporate islands at first—you’ll unlock more as you complete them. Here’s what to weigh:
- First Island: Pick one your squad can handle well. Science and smoke-heavy squads try Pinnacle or Archive, flame users go Detritus or R.S.T., and versatile squads roll with comfort.
- Later Islands: Leave the trickiest, most punishing islands for last after you’ve leveled up, bought gear, and upgraded mechs.
General Recommendations
- First Time? Archive Inc. is beginner-friendly—open terrain, manageable Vek types, and less surprise bullcrap.
- Seasoned Player? Try R.S.T. or Detritus early for more Reactor rewards, if your squad can handle status effects or hazardous environments.
Mission Types: What to Prioritize
Objectives differ from mission to mission, but a few rules of thumb help keep the campaign moving:
- Power Grid Missions: Always check for grid power rewards if you’re running low. They’re rare and can keep you alive.
- Reactor Core Missions: Reactor Cores let you upgrade weapons or abilities. Most valuable in the early game—prioritize them if your loadout is weak.
- Time Pods: Never skip these icons on the map. They offer pilots, gear, or extra Reactor Cores with zero risk.
- Protect the Train/Civilian Buildings: Missions that require babysitting moving targets or several structures stack the odds against you. Take them only if your squad excels at movement or area control.
Individual Island Strategies
Each island comes with its own threats and tricks. Here’s a breakdown:
Archive Inc
A great intro island. The threats are basic—nothing a standard squad can’t manage.
- Hazard: Occasional airstrikes and falling rocks.
- Best Tactics: Use obstacles for Vek kills. Blocking spawns with mechs is often safe compared to hazard-heavy islands.
R.S.T. Corporation
Water pools and acid rain everywhere. Many Vek here apply status effects.
- Hazard: Acid (makes things take double damage) and dust storms.
- Best Tactics: Use push-and-pull abilities to drop Vek into water or acid pools. Keep your team spaced to avoid multiple mechs getting slimed or dunked.
Pinnacle Robotics
Frozen wastes filled with robots and climate disasters.
- Hazard: Chasms, ice, and high-health robotic allies you sometimes have to keep alive.
- Best Tactics: Take out robotic minions early if they threaten buildings. Watch out for freeze missions—if your weapons can’t break ice, rescue duties become frustrating.
Detritus Disposal
Trash everywhere—folks here love conveyor belts and power-generating machines.
- Hazard: Conveyor belts, trash, and power pylons that can both help and hurt.
- Best Tactics: Plan your turns ahead—conveyor belts move mechs (and enemies) at round’s end. Knock Vek onto hazards or pylons for mega-damage, but don’t set traps you’ll fall into yourself.
Dealing With Vek Enemy Types
Each island introduces tougher Vek variants. Here are some must-know strategies:
- Burrowers (R.S.T. and Detritus): These attack from underground. Blocking their spawn with a mech or predicting where they’ll surface is key.
- Psions: Buff all Vek on the board until they’re destroyed. Always prioritize these over regular bugs, especially in later islands.
- Alpha Vek: These high-damage versions arrive more often in islands 3 or 4. Map-wide pushes or disables trump single-target focus by this stage.
Winning Islands: Reputation and Rewards
End-of-island corporate reputation lets you shop for gear, pilots, and power grid refills. Plan ahead:
- Weapons: Buy those that match your squad's needs—crowd control, push, or raw damage.
- Pilots: Consider only if abilities fill a gap in your line-up. If you’re happy, skip.
- Grid Power: Only snap up if you’re close to losing—Reactor Cores stretch your team’s capacity more.
The bonus objective (Perfect Island) nets you a free core or weapon if you complete all missions and special goals—worth striving for.
Building Toward the Final Island
Your island order, mission choices, and upgrade path all lead up to the hardest island (usually Corporate HQ). Here, you’ll deal with the nastiest Vek combos and disaster hazards at once. Stock up on Reactor Cores, fix grid power, and make sure each mech is properly kitted out for boss battles and swarm control.
Summary
Good island strategy in Into the Breach isn’t just about winning fights. It’s about picking the right battles, prepping your mechs for upcoming threats, and knowing how to handle unique Vek and map hazards. Use early islands for upgrades, tackle side objectives if your team is strong, and patch over weak points between battles. Master this, and no bug-infested map will stand a chance.
Perfect Run Strategies
Securing a “perfect run” in Into the Breach—completing all islands without losing grid power or pilots—is a major accomplishment. Pulling this off requires more than just tight tactics. It means playing with flexibility, anticipating threats, squeezing efficiency from every move, and making hard calls about upgrades and priorities. Here’s a breakdown of the methods and mindsets that separate perfect pilots from the rest.
Resetting Turns: Maximize Your Mulligan
Each mission grants a single turn reset. This is your safety net for lapses in attention, minor misclicks, or misreading Vek intentions. But a perfect run means you rarely need them. Use the threat forecast—those handy red tiles—to plan ahead every turn, cycling through all possible outcomes mentally before you commit. Reserve the reset for honest mistakes rather than bad positioning.
Grid Defense: The First and Last Line
Grid Power is life. Every lost grid block is one less shot at a clean run. A few ways to keep civil structures standing:
-
Prioritize Building Defense Over Vek Kills
- If you have to choose, redirect damage or block attacks—even if it means letting a mech get hit or using up a repair turn next round. It’s almost always better to take a mech hit than a building hit.
-
Upgrade Grid Defense Stat
- Buffing Grid Defense at the reputation shop isn’t flashy, but it’s cheap insurance. Even a 10% increase in the first two islands can save you from the unlucky 1-damage blip.
-
Chain Pushes and Movement Abilities
- Stack pilots and upgrades that enhance pushes, warps, or movement. These let you juggle more Vek threats at once. Moving an enemy away is just as good as killing it if it prevents a hit.
Pilot Safety: No Heroes, No Losses
Keeping every pilot alive for a perfect run keeps squad abilities strong and lets you win bonus reputation for flawless islands. Play it safe:
-
Use Sacrificial Mechs (Empty or Auto-Piloted)
- If you must block a shot or spawn with a body, throw an empty or non-vital mech on the line—not your ace pilot.
-
Avoid Risky Repositioning
- Don’t YOLO into the middle of a Vek cluster unless you have a guaranteed escape or shield. Time your movement upgrades and boosts for when you truly need them.
Reactor Core Efficiency: Smart Upgrades, Not Max Power
A perfect run usually comes down to making the most out of meager resources. Splash out early on the most pivotal upgrades:
-
Prioritize Movement Before Damage
- Missed damage can usually be fixed next turn, while missed positioning lets buildings get hit now. Spend first cores on +Move or mobility boosts.
-
Enhance Control Abilities
- Core-powered shields, smoke, freezing, and pushes prevent problems before they start. These universally help with every Vek type and mission.
-
Only Commit to Damage Boosts Once Safe
- When you’re consistently able to cover all objectives and block attacks, feel free to amplify power for clean-up. Before then, don’t fall for the temptation of big numbers over reliable control.
Choosing the Right Objectives
Pick missions and bonus challenges you can guarantee with your squad’s toolkit. Risky objectives (like protecting a train with a sluggish squad) are best left undone unless you’re totally in control. Don’t jeopardize your perfect run chasing one more star if it means a real shot at grid damage.
-
Time Pods First
- Securing every Time Pod gives free resources with no drawbacks. Resolve their rescue before focusing on Vek-killing turns.
-
Low-Stakes Bonus Challenges
- “Block Vek Spawns” or “Kill 7 Enemies” are easier than “Keep A Tank Alive.” Stack objectives that fit your squad’s strengths.
Controlling Escalation: How to Prevent Snowballs
The further into an island you go, the more Vek spawn each turn. Choking off their numbers early keeps missions more manageable in rounds 4 and 5.
-
Spawn Blocking on Early Rounds
- Use mechs to block new Vek when possible—especially in rounds 2 and 3, when bugs start outnumbering your team. Count spawn patterns and anticipate backup arrivals.
-
Target Psions
- Killing buffing enemies first means all subsequent Vek go down easier, so you can mop up swarms instead of watching them snowball.
Perfect Island Bonus: Calculated Risk
Getting the “Perfect Island” by hitting every bonus objective on all maps is nice—but not at the expense of a grid loss. Only chase the perfect bonus if you’re in command of all threats and have safe plays every turn. Sometimes, letting a bonus slip is the right play to keep your run clean.
Mental Playbook: Zoom Out, Think Ahead
So much of a perfect run is about awareness. Pause between turns, think through the possible outcomes, and don’t rush. Develop a ritual: always review attack markers, check objectives, consider turn resets, and scan for new pods or hazards before you make a move. Treat every map as a puzzle to be solved instead of a brawl to be won.
Adapt When Things Go Sideways
No strategy survives the first acid blob. If something goes wrong—an unexpected Vek spawn, weather hazard, or misread move—don’t panic. Recalculating your plans and minimizing extra losses is the real difference-maker in keeping the run perfect.
In Short
Perfect runs in Into the Breach demand focus, patience, and the willingness to take the boring-but-smart play often. Save your risky maneuvers for when you’ve stacked the odds. Protect the grid, value positioning over brute force, and only chase bonuses when the path is safe. With these methods, you'll turn tense bug battles into smooth victories, one island at a time.