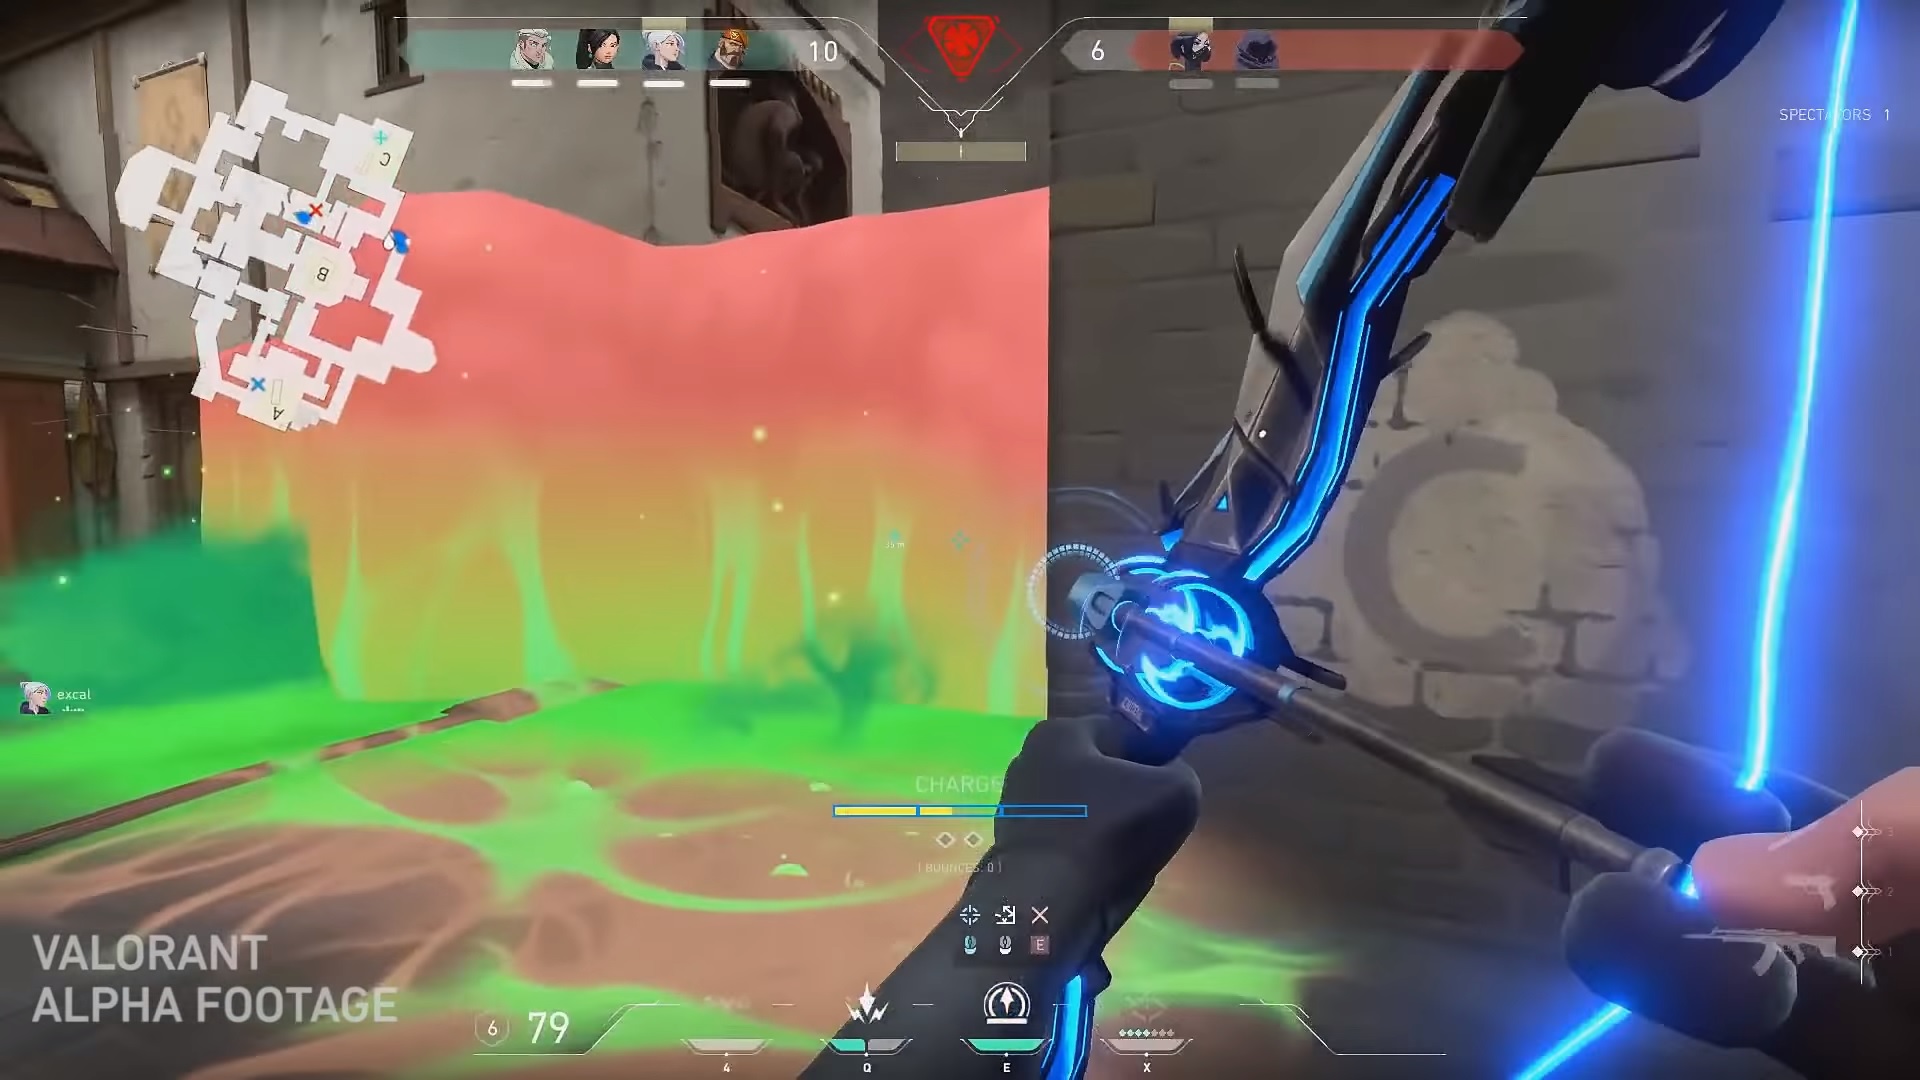
Valorant Agent and Strategy Guide
Master Valorant with expert tips on agents, map control, aiming, economy, and team play to elevate your competitive game.
Every match of Valorant can feel like a different game, depending on which agents are in play and how your team approaches each round. Whether you're queueing with friends or jumping into solo ranked, having a good grasp of how agents' abilities fit together and adapting your strategy on the fly can make all the difference. With so many unique agents and countless ways to approach each map, figuring out what works best can be a challenge—even for experienced players. A bit of extra insight into agent roles, team comps, and round-by-round decision-making can help turn those close losses into satisfying wins.
Understanding Agent Abilities
Valorant isn’t just about precise aiming and snappy flicks—knowing your agent’s abilities, what they actually do, and how to use them with your team is just as important. Each agent brings something unique, whether it’s locking down a site, gathering info, or supporting teammates. Let’s break down how abilities actually work, what the common terms mean, and how you can get the most out of your toolkit.
The Basics of Agent Abilities
Every agent in Valorant comes with a set of four abilities:
- One Signature Ability (free or on a cooldown)
- Two Purchasing Abilities (bought at the start of each round)
- One Ultimate Ability (earned by getting kills, completing objectives, or collecting orbs)
No two agents have the same combination, and these powers are what give Valorant its signature tactical twist.
Ability Types: What Do They Do?
Abilities generally fall into these categories:
- Vision Control: They block or break lines of sight (think smokes or walls).
- Intel Gathering: These reveal enemy locations (like Sova’s Recon Bolt or Cypher's Spycam).
- Area Denial: They make certain spots unsafe or slow down pushes (Molotovs, traps, slows).
- Healing or Support: Some boost teammates' HP or offer other buffs (Sage’s heal, Skye’s Regrowth).
- Movement: A few help with mobility (Jett’s dash, Omen’s teleport).
Strategically stacking or timing these moves often makes the difference between a round win and getting swept.
Breaking Down Each Ability Slot
Let’s get specific about what makes up an agent’s toolkit.
Signature Abilities
- What It Is: Your main tool. Usually free once per round, sometimes on a cooldown.
- Examples:
- Sage’s Healing Orb (team heal, cooldown)
- Phoenix’s Hot Hands (self-heal/molotov, cooldown)
- Sova’s Recon Bolt (reveals enemies, cooldown)
Signature abilities define how you’re meant to help your team. Learning when to use—and when to hold—these abilities is key.
Purchasing Abilities
- What They Are: Two unique skills bought in the pre-round buy phase.
- Examples:
- Jett’s Cloudburst (short smokes)
- Raze’s Boom Bot (explosive recon)
- Breach’s Flashpoint (blinding flashes through walls)
Managing your credits isn’t just for weapons/shields. Choose what you buy based on your game plan, map, and economy. Sometimes you’ll save a charge for a surprise; other times, you’ll want to use it early to pressure your opponents.
Ultimate Abilities
- What They Are: Your trump card, earned by collecting ‘Ultimate Points.’
- Examples:
- Killjoy’s Lockdown (site clearing lockdown field)
- Reyna’s Empress (self-buff for stringing kills together)
- Sova’s Hunter’s Fury (multi-shot wall-piercing beams)
Ultimates can change the course of a round or even the whole match. Watch how teams build around them: some rounds are spent just looking for a quick orb to speed their ult charge.
Common Terminology
If you watch guides or listen to teammates, you’ll hear terms like these:
- CD (Cooldown): How long until you can use an ability again.
- Charges: Number of times you can use a purchasable ability per round.
- Utl (Utility): A blanket term for all agent abilities (e.g., “Save your utl for the retake!”).
Understanding what these mean helps with team comms and strategizing.
Synergy and Counterplay
No ability is designed in a vacuum. Some work perfectly together—imagine a Breach flash right as Raze’s Showstopper explodes, or Omen’s smoke paired with a friendly Jett diving through.
On the flip side: Learn how to counter. For example, Sage’s wall can be destroyed or bypassed, and Cypher’s traps can be pre-fired if you know the spot. Communication and timing often make the biggest difference.
When to Use Abilities
- Early Round: Deny rushes, scout for info, or go for a risky early pick.
- Mid Round: Slow down rotations, set up executes, heal teammates.
- Late Round: Clutch out with ults, secure site retakes, block defuses/plants.
Don’t fall into the trap of hoarding abilities “just in case.” Sometimes aggressive utility use puts enemies on the back foot—or saves your own.
Tips for Getting Better With Abilities
- Practice Off-Server: Use custom games to learn lineups for smoke, flashes, or arrows.
- Watch Pros: Notice how top players layer utility or trade off abilities.
- Ask Teammates: More comms means better combos—like syncing flashes or clears.
- Adapt Per Map: Some abilities change value based on map layout—Cypher on Split vs. Haven, for instance.
Wrapping Up
Mastering agent abilities means knowing the “how” and “why”—not just what a skill does, but when and where it’s most useful. Getting comfortable with your agent’s tools (and your teammates’) can be as impactful as your headshots. Try new combinations, communicate, and don’t be afraid to experiment. Finding your own style—and learning how it supports your squad—makes every round more memorable.
Map Control Strategies
Getting a grip on map control is one of the most important skills in Valorant. It's not all about landing crisp headshots—good teams win rounds by gaining, holding, and trading space smartly across the map. Understanding why and how to control certain parts of each map can make your play sharper, no matter which role you fill.
Why Map Control Matters
Controlling parts of the map gives your team options. It keeps defenders guessing, opens up sightlines for attackers, and gives you more info on where the enemy might push or rotate. Here’s what solid map control brings to the table:
- Info Gathering: Knowing which areas are clear (or stacked) shifts how your team moves and sets up plays.
- Rotation Power: The more ground you have, the easier it is to rotate to different sights without running blindly into a crossfire.
- Pressure: Keeping opponents worried about flanks or mid pushes slows them down and baits out their utility.
- Denial: You can force enemies to play on your terms, cutting off common attack or defense routes.
Gaining Early Map Control
Most rounds in Valorant start with a fight over key areas—whether it’s Mid on Ascent, B Main on Split, or Hookah on Bind. Here’s how teams take that ground fast and safely:
Use Utility Smartly
- Smokes: Block enemy sightlines to cross open spaces or cut off early aggression. Agents like Brimstone and Omen shine here.
- Flashes: Pop a flash before swinging into a contested spot, forcing defenders off angles or grabbing a pick.
- Recon: Abilities like Sova’s darts or Skye’s dog sniff out where enemies might be hiding and scare them back.
Time Your Pushes
Map control isn’t just a sprint. Aggressive teams might try to snatch an area with a 5-stack rush, but a well-timed, coordinated push—maybe with one or two players lurking elsewhere—often works better. Keeping the enemy uncertain about your intentions is just as valuable as brute force.
Holding and Trading Space
Controlling a spot doesn’t mean you have to hold it forever. Sometimes you just want to force out enemy utility or get info, then fall back and let them waste time or run into your traps.
Anchor vs. Flex
- Anchoring: Holding a spot late into the round, often with an agent like Killjoy, Chamber, or Cypher who can lock down an area alone.
- Flexing: Taking early space, then giving it up purposely, drawing the enemy forward for a crossfire or trap.
Playing Off Utility
Drop a Killjoy Nanoswarm or leave a Cypher wire behind when giving up ground. The enemy might think it's free—until they run into your backup plan.
Flanking and Lurking
Once you’ve pushed into enemy territory, send someone on a flank or keep a lurker in mid/lane areas. Here’s what these roles do:
- Flankers: Attack from behind while your team hits the site, splitting the defenders’ attention.
- Lurkers: Hold weird angles behind enemy lines, catch rotating foes, or create pressure with footsteps and fake utility.
Timing is key—too early and you’ll get picked off; too late and your team might already be wiped.
Mid Control: The Decider
Most maps are designed so that controlling "mid" opens up rotations and sightlines. Here’s why mid holds are so important:
- Split: Mid is the gateway to both sites; whoever takes it first gets to pick their attack or cut off defender rotates.
- Ascent: A team that owns mid can threaten B Link or Market, making it hard for defenders to stack sites.
- Haven: Mid window gives a fast route to both A and C, while Garage control can split defenders.
Teams usually invest smokes, flashes, and recon utility to grab mid early. Don’t send everyone—have a buddy watch for flanks and keep eyes on other choke points.
Adapting Your Control by Side
Attackers
- Default Spreads: Send teammates to contest multiple spots at once—this pulls defenders around the map.
- Map Pinches: Once you have info or a pick, collapse with multiple angles. Example: push B main and mid together.
- Leaving Lurkers: Let one agent hold ground while the rest pivot for a site hit, cutting off rotations or getting a free kill.
Defenders
- Early Challenges: Contest tight spots with a flash or double-tap setup, then fall off and let them stew in uncertainty.
- Fight for Info: Don’t just let attackers walk up every round. Force them to spend utility for every inch.
- Planned Retakes: Give up a site if it looks lost, and fall back for a coordinated retake with teammates and abilities stacked.
Playing for Late-Round Control
As the clock ticks down, map control lets you set up smart post-plants or clutches. Make sure someone’s watching your flank and don’t be afraid to give up unnecessary space to group for a retake or save if the odds look grim.
Agent Picks and Map Control
Certain agents absolutely shine when it comes to dominating sections of the map:
- Sentinels (Cypher, Killjoy, Chamber): Great at locking down or watching flanks alone.
- Controllers (Viper, Omen, Astra): Smokes and walls break up sightlines, letting your team grab space safer.
- Duelists (Jett, Raze, Reyna): Push forward, win aim duels, and keep pressure on the enemy.
- Initiators (Sova, Skye, Breach): Gather info and clear corners so your squad can claim risky areas.
Mix up compositions based on what works for your team and which map you’re playing; not every setup fits every strategy.
Final Thoughts on Map Control
Learning the ins and outs of map control takes practice and teamwork, but it’s one of the best ways to improve your impact in Valorant. Don’t just run it down—use your abilities together, take space wisely, and stay unpredictable. Good map control often stops a risky push before it even starts and gives you more room to make plays when it really counts. Keep experimenting with different styles, keep your comms clear, and watch how the pros move… it might just change how you see every round.
Aiming Techniques
Success in Valorant often boils down to who lands the first shot. Good utility use and smart rotations mean little if your aim can’t back it up. Whether you’re swinging for an Operator flick or tapping away with a Phantom, getting your crosshair on target—fast and accurately—matters. Let’s break down aiming techniques that separate top-fraggers from the bottom of the scoreboard.
Understanding Crosshair Placement
Before you start practicing flicks and sprays, nail down your crosshair placement. This means keeping your sights aimed at where an enemy’s head is most likely to appear—not at the ground, not at the sky, but about head height near the edge of cover.
Why It Matters
- Shorter Adjustments: If your crosshair is already close, you won’t need to jerk your mouse as far.
- Faster Reaction: Shrinks the time it takes to line up your shot.
- Consistency: Muscle memory grows for those common angles and head levels.
Train yourself to always keep your crosshair at the right height and aimed at corners or doorways where someone might peek out.
Pre-Aiming and Counterstrafing
As you move around the map, don’t just whip your mouse to every single angle. Pre-aim by moving your crosshair ahead of time, so it’s ready before you turn that corner.
- Pre-aim: Put your crosshair where you expect an enemy’s head to be before you peek.
- Counter-strafing: Stop your movement instantly for perfect accuracy by tapping the opposite direction key. If moving left (
A), tap right (D) to halt. You’ll stop dead and your first bullet will be spot-on.
Practicing Pre-Aim
- Walk around maps in custom games, lining up your crosshair before every corner.
- Watch where enemies typically hold; high-level players tend to pick the same common spots.
The Art of Flicking
A flick is a quick snap of your crosshair onto a target, often used when reacting fast or clearing multiple enemies. It’s flashy, but practical too.
Improving Flick Shots
- Aim Trainers: Use third-party aim trainers like Aim Lab or KovaaK's for muscle memory.
- Range Practice: Go to the shooting range in Valorant, set up bots, and try flicking from one to another.
- Go Slow to Go Fast: Accuracy matters more than speed at first. As you get consistent, speed it up.
Tracking Targets
Spraying down a moving opponent or following a Viper slithering behind her wall calls for smooth tracking. Unlike flicking, tracking means keeping your crosshair on a moving enemy as you adjust for their movement.
How to Work on Tracking
- Tracking Drills: Programs like Aim Lab and the in-game shooting range allow you to practice following moving targets.
- Spray Control: Test with a Phantom or Vandal. Shoot while moving your crosshair along with moving targets for real-game feel.
Tapping, Bursting, and Spraying
Every gun in Valorant has its own recoil pattern and optimal firing method.
- Tapping: Fire one bullet at a time for precise, controlled shots—best at long range.
- Bursting: Fire 2-4 bullets in quick succession, good for mid-range when you need follow-up shots.
- Spraying: Hold down the mouse for continued fire, most effective up close. Always practice pulling your aim down to counteract the weapon’s upward kick.
Learn Each Weapon
- Try out different weapons in the practice range.
- Spray at walls to see where the pattern goes.
- Get comfortable with the Vandal’s first 5 shots and the Phantom’s longer spray.
Sensitivity and Mouse Setup
Your mouse settings can help or hurt your aim more than you might realize.
- Low Sensitivity: Most Valorant pros use a lower sensitivity (lower DPI, larger mouse movements for big on-screen motions) for precise aim adjustments.
- Consistent Setup: Pick what feels comfortable and stick with it—don’t keep changing DPI or sensitivity every week.
- Mousepad Space: Be sure you have enough space to swipe your mouse, especially with low sensitivity.
Try using the “360/180 method” to gauge your sensitivity: Set your mouse so you do a 180° turn with a comfortable wrist movement across your pad.
Warm-Up Routines
Before you queue up for ranked, spend a few minutes warming up.
- Shooting Range: Headshot-only bots, practice flicking, bursting, and tracking.
- Deathmatch: Play a round or two focusing just on your crosshair placement and reactions.
- Aim Trainers (optional): Run quick routines for flick and tracking practice.
Consistency is the main goal. Your aim will always be sharper if you build the habit of warming up.
Mindset and Staying Sharp
Aiming isn’t just physical—it’s mental too.
- Stay Calm: Don’t panic in gunfights. Take a breath, trust your practice, and click heads.
- Don’t Tilt: A few missed shots shouldn’t throw you off. Everyone whiffs; pros keep their cool and refocus.
Aim Training Tools and Resources
You don’t have to go it alone—there are lots of great ways to improve outside of matches.
- Aim Lab / KovaaK's: Widely used aim trainers, with custom routines.
- Valorant Custom Games: Load into Empty maps and run your own drills.
- YouTube Guides: Tons of creators break down pro aiming techniques and routines.
- Community Guides: Forums, Reddit threads, and Discord communities can offer challenges and suggestions.
Wrapping Up Aiming Techniques
Landing that crispy headshot is as much about preparation and smart habits as it is about raw skill. Focus on crosshair placement, get comfortable with your sensitivity, and make aim training a routine part of your Valorant experience. When you spend time practicing intentionally, you’ll see those round-winning frags come faster—and you might just become the teammate everyone’s counting on during clutch moments.
Economy Management in Valorant
Good aim sets you up for kills, but without smart economy play, rounds can slip away before you even draw your crosshair. The economy system in Valorant is shaped by money earned (or lost) every round, and your team's decisions can be the difference between a full-buy standoff and getting stuck with pistols against rifles. Grasping the basics of when to spend, when to save, and how to call eco rounds can be the secret behind a steady climb up the ranks.
Understanding Credits: The Currency of Valorant
Each player starts a game with 800 credits and earns more based on factors like round outcome, kills, and spike plants. Here are the key ways credits flow:
- Round Win: 3,000 credits per player.
- Round Loss: 1st loss = 1,900, 2nd consecutive loss = 2,400, 3rd+ consecutive loss = 2,900.
- Kills: 200 credits per elimination.
- Spike Plant: 300 credits to each attacker if the spike is planted—win or lose.
- Survival Bonus: No additional credits for living through the round.
- Saving Weapons: If you save a weapon without spending extra credits, you keep what you have for the next.
How you and your team spend or save these credits sets the tone for your entire game.
Buy Phases: To Buy or Not To Buy
The "buy phase" is that brief window at the start of each round where you decide what guns, shields, and abilities to pick up. There are several types of buys:
- Full Buy: Spend for rifles (Vandal/Phantom), full shields, and abilities. Usually happens after a win, or when everyone can afford solid gear.
- Force Buy: Spend all your current credits, even if it's not enough for top-tier gear. Teams force when trying to break the enemy's momentum or secure an unexpected round with cheaper weapons.
- Eco (Economic) Round: Spend almost nothing, maybe just pistols. Save credits for a full buy next round.
- Light Buy (Half Buy): Spend for pistols, SMGs, or some abilities, but leave enough for a full buy next round.
Smart teams coordinate their buys. It's better if everyone saves and buys rifles together than if half the squad has Vandals and the rest limp in with Sheriffs.
When to Save
Sometimes the greatest play is stashing your gear for the next fight. Saving means hiding out and keeping your tools if you can't win the current round or if bringing your gear into the next round will give your team a better chance. Save when:
- You're outnumbered and retaking is impossible.
- Money is tight and that Phantom or Operator could flip the next round.
- The enemy is hunting to kill remaining players, and losing your gun would cripple your next buy.
Economy and Losing Streaks
Losing doesn't just sting—it changes your economy. The game grants more credits for consecutive losses (up to 2,900 after three in a row), helping losing teams bounce back. Chaining tactical eco rounds during a losing streak allows your team to save up for a strong comeback. Don't burn all your credits every loss. Sometimes, it's smarter to stack rounds, eat the short-term pain, then swing back full-force when losses max out the bonus.
Ability and Utility Spending
Weapons get the spotlight, but abilities often swing rounds even harder. Never blow your entire bank on a gun if you can't afford your agent's core tools. Keep enough in the bank for smokes, flashes, or healing—those 200-300 credit abilities can decide close rounds. If your kit is essential for the team’s strategy, factor its cost into buy decisions.
Dropping Weapons for Teammates
A carry is only as strong as their weakest teammate. If you've saved up, consider dropping a rifle for a teammate who might otherwise be stuck on a pistol. Use the buy menu (“right click” on a weapon to purchase it for a teammate) or toss your own gun on the ground.
This keeps everyone on a level playing field, allowing the team to run coordinated attacks or defenses with matching firepower.
Ultimate Points and Economy
Ultimates recharge not just through kills and spike plants, but also by collecting orbs. Sometimes, planting the spike in a round you know you can't win nets your team 300 credits each and those vital ult points—not wasting an eco attempt.
Some rounds are almost “ult farming,” where a team pushes for spike plants and orb control, happy to bank credits and charge up those game-changing abilities.
Common Economy Mistakes
- Uneven Buys: Half a team on rifles, half on pistols—asking to get mowed down.
- Over-Buying on Lost Rounds: Burning all your credits after a loss, then forced into another poor buy.
- Ignoring Abilities: Going rifle + full armor but skipping key utility.
- Greedy 1vX Retakes: Trying to clutch a round with no hope, losing weaponry you could’ve saved.
Tips for Better Economy Calls
- Communicate Buys: “Let’s eco, full save”—it’s on voice or in chat before every buy phase.
- Play for Loss Bonus: Sacrifice a couple of rounds with pistols to hit max loss credits and full buy as a squad.
- Track Enemy Economy: If they’re low, expect a force buy or eco—play more cautious angles.
- Check Team Credits: Buy for others (drop guns) if you’re rich, so everyone is equipped.
Final Thoughts on Valorant Economy
Winning in Valorant isn’t just about sharp aim or good callouts. Treat money as another resource to control. Make sure your team’s spending is on the same page and don’t be afraid to take a save for long-term gain. The teams that manage their credits well find themselves running coordinated buys and clutching out rounds, even when the scoreboard looks grim. Play the economy, and you’ll give your aim—and your team—the best shot at victory.
Team Communication
Team communication sets apart good Valorant teams from great ones. No matter how sharp your aim or how clever your utility, most rounds are won or lost on how well you and your squad talk to each other. Crisp comms make plays cleaner, rotations faster, and clutches possible. Let's break down why communication matters, what works, and how to level up your team's chatter.
Why Communication Matters
Valorant isn't a solo shooter. Each round, five players pool their agent abilities, map knowledge, and timing. Good comms connect all these pieces. Whether it's calling enemy locations, sharing your plan to use ult, or simply saying where you hear footsteps, talking gives your team more information and better options.
Silent squads get caught off guard, run into stacked sites, or double up on the same angle. The difference comes down to talking—clear, quick, and often.
Essentials of Good Comms
Not all communication is created equal. Useful info is short, accurate, and comes at the right time. Here are the basics to focus on:
Location Callouts
Every map has names for areas: Garage, Hookah, Heaven, Rafters, Elbow, etc. Use these names so everyone knows exactly where action's happening. If an enemy peeks you on Bind's A Short, say, "A Short, two pushing!" instead of just "They're here!" Specifics let teammates react faster.
Enemy Count
Numbers make a difference. Did you see one push or their whole squad? Try to call out:
- Number of enemies: "Three A Main."
- Weapons spotted: "Two rifles, one Judge."
- Utility used: "Phoenix flashed U-Haul."
The more details you add, the smarter your team can play.
Utilities and Abilities
Announcing your own abilities helps avoid overlap and waste. Let teammates know:
- When you’re smoking or flashing: "Smoking Heaven," "Flashing site."
- When you’re using your ult: "Using Sova ult, don’t peek yet."
- If important enemy utility is seen: "Cypher cage A main."
Share what you have left, too. "No more smokes," "Only one flash left," "Heal ready."
Status Updates
Your health, economy, or situation can flip a round. Stuff like:
- "I'm low, 12 HP."
- "Spike down, B Long."
- "I can't buy next round."
- "I'm saving in spawn."
Short updates keep everyone synced on what’s possible.
Voice vs. Text Chat
Voice chat is usually faster and easier to use during firefights. Try to keep messages brief; every second counts. If comms are crowded, use text for less urgent info—like planning buys or saying "AFK" between rounds.
If your mic breaks or you can't talk, at least ping the map (Alt-click) or drop a text call with "They’re pushing B" or "Rotate A?".
Keeping It Positive and Focused
Comms go off the rails fast if people rage or start cluttering airspace. Aim for:
- No yelling or blaming. Tilt spreads fast. Keep things chill.
- Avoid spamming info after death. Quick calls, then mute.
- Limit non-game chatter mid-round. Joking is fine, but save stories for half-time.
- Let the in-game leader (IGL) or shot-caller direct the team during chaos.
A stressed team falls apart. Even small phrases like "Nice try," "Good job," or "We got this" keep morale up.
Shotcalling and Roles
If your squad is coordinated, consider having a main voice or IGL. This player sets the plan for each round—choosing sites, calling rotations, and making split-second decisions. Everyone should add quick info, but final calls follow the IGL to avoid confusion (“Stack B this round,” “Go for retake, play slow.”).
Even if you’re not the IGL, calling what you see is still vital. Don’t wait for someone else.
Example Round: Clean Team Comms
Here’s a quick scenario to show ideal comms:
- Sova: “Multiple B Long, at least three, Omen smoked Hookah.”
- Phoenix: “One still mid—heard footsteps. Flanking to B window.”
- Sage: “I’ll wall off B garden. Save slow for post-plant.”
- Neon: “Rotating from A now.”
- Sova: “Pushing site—Phoenix flash ready?”
- Phoenix: “Yes, flashing now!”
- Sova: “One elbow, two on site, planting back corner.”
- (Calm communication continues as players trade info, call remaining numbers, and win or lose together.)
Every player keeps calls short and clear, only sharing what matters.
Common Communication Mistakes
- Over-calling: Announcing every random thought clogs up team ears.
- Under-calling: Staying silent with important info.
- Late calls: Waiting too long to announce a push means it's too late.
- Dead comms: Too much chatter after you die drowns out live teammates.
- Accusations and arguments: These drop focus and morale, leading to lost rounds.
Improving Your Team's Communication
- Watch pro streams, listen to how teams work together.
- Practice calling out in aim trainers or lower-pressure games.
- If someone’s new, help them learn map callouts in custom games.
- Keep callouts up-to-date as the meta or agent pool shifts.
The more you talk, the more your team plays as one. Don’t focus on sounding “pro”—clarity and timing matter more than fancy words.
Takeaway
In Valorant, you rarely see a quiet team win consistently. Good communication means sharing the key details, supporting each other, and choosing your moments. Whether it’s just passing along enemy locations or shotcalling entire site hits, nailing your comms will win you more rounds. Set up your mic, learn those map names, and keep it cool. Your next win might just come from a single, well-timed call.