Frostpunk: City Survival Guide
Master Frostpunk with expert tips on heat, resources, laws, morale, and smart strategies to keep your city thriving against the cold.
Surviving in Frostpunk is never just about keeping the heaters running—it’s a constant scramble to manage scarce resources, balance morale, and make tough choices that could decide the fate of your entire settlement. The frozen world outside is relentless, and even the most confident leaders can find themselves in over their heads when food supplies run low or the generator sputters dangerously close to shutdown. Navigating these challenges takes more than luck; it’s about understanding the systems at play, planning several steps ahead, and sometimes making decisions that won’t please everyone. Getting a grip on the essentials can mean the difference between a city that endures and one buried beneath the snow.
Heat Management
Life in Frostpunk revolves around one thing: keeping your people warm. When temperatures drop and storms roll in, it doesn’t matter how many resources you’ve stockpiled—if your city turns into a deep freeze, people will get sick, amputations will spike, and hope will plummet. Mastering heat management isn’t just helpful; it’s the difference between survival and collapse.
Understanding the Generator
The generator sits at the heart of your city, acting as both the beating heart and the main heater. Everything you build radiates around it in concentric circles called heat zones. The closer a building is to the center, the warmer it stays.
- Heat Levels: Buildings closer to the generator are in a hotter zone. Move further out, and temperatures drop. Always check the colored overlay with the thermometer button (bottom right) to see at a glance which buildings are freezing and which are comfortable.
- Generator Settings: You can crank up the generator to increase its heat output by raising its power setting or overdriving it for temporary boosts. Higher settings burn coal faster, so only ramp up when absolutely necessary. Use overdrive sparingly; if you leave it on for too long, the generator risks exploding.
Coal: The Lifeblood of Warmth
Every bit of warmth in your city depends on coal. Run out, and frost creeps in almost instantly. Here’s how to keep a steady supply:
- Early Game: Assign your first workers to coal piles. Build gathering posts nearby to boost efficiency and protect workers from the cold.
- Mid to Late Game: Upgrade to coal thumpers and coal mines as soon as you can. Add gathering posts or automatons to handle the output. Research coal optimization techs in the Workshop for better yields.
- Coal Consumption: Keep track of your daily coal usage versus your production rate. Don’t let storage fill to capacity; if the city stops mining because storages are full, you’ll fall behind fast when a cold snap hits.
Building Placement and Insulation
Where you place your buildings makes a massive difference. Putting medical posts and houses near the generator, for example, keeps your most vulnerable citizens safe.
- Homes and Critical Facilities: Prioritize placing homes, medical posts, and cookhouses in the inner rings. Cold care homes and medical facilities can quickly fill with frostbitten survivors if they’re too far out.
- Workplaces: If you can spare the space, try to cluster workplaces near steam hubs or the generator, especially as temperatures drop.
- Insulation Upgrades: Use research to upgrade buildings’ insulation. This doesn’t just increase their base heat level; it literally buys you time during cold snaps.
Heat Upgrade Technologies
Your Workshop tech tree is your best friend. Prioritize early research on ways to squeeze more heat from your generator and reduce coal consumption:
- Generator Power Upgrade: Each level lets you expand the warmth radius or increase heat in each zone. Super important as your city gets larger.
- Generator Efficiency Upgrade: Lets you crank out more heat with less coal. Handy during early shortages.
- Heater Research: Heaters can be switched on in individual workplaces far from city heat sources. They burn extra coal per building but prevent frostbite in isolated posts.
- Steam Hubs: Build these to create warmth “satellites” in far-flung corners. They also use coal, so stagger their timers (or link their activity to work hours) to save fuel.
Adapting to Weather Swings
Pay attention to the forecast at the top of your screen. Sudden temperature drops can wreck an unprepared city.
- Prepare Before the Cold: When you see a cold front coming, check coal supplies, stoke the generator, and turn on heaters in remote buildings.
- Emergency Measures: If you run dangerously low on coal during a deep freeze, prioritize core survival: keep houses and medical posts warm at all costs, even if it means letting some workshops or outlying gathering posts go cold temporarily.
Managing Illness and Discontent
Cold immediately makes people sick, which can quickly spin out of control. Monitor the Health and Discontent meters:
- Health: Keep sick time minimal by maintaining warm houses and clinics. If necessary, use the heating overlay to shuffle buildings around so the most critical are always the warmest.
- Discontent: Cold workplaces and homes drive discontent through the roof. When morale starts dipping, check for any unheated shelters and respond before unrest grows.
Final Thoughts on Winter Survival
Heat management in Frostpunk isn’t just a city builder system—it’s a survival puzzle, constantly challenging you to stretch every lump of coal and bit of heat as far as possible. Staying on top of heating means fewer sick days, higher hope, and a fighting chance when the polar winds howl. Plan your expansions methodically, invest in research for longer-term gains, and keep one eye on the generator at all times. Stay warm, and your city just might last through the storm.
Resource Gathering
No matter how perfectly you micromanage heat, your city in Frostpunk is only as strong as its resources. From the first day, every piece of coal, wood, steel, and food matters. Mismanage resource flow, and people go hungry, buildings remain unfinished, and the city spirals. Building your survival city starts with strong resource gathering habits.
Primary Resources and Their Role
Frostpunk relies on four main raw materials: coal, wood, steel, and food. Each one has a unique impact:
- Coal keeps the generator and heaters running. No coal, no heat, no city.
- Wood serves as your initial building material and is needed for most structures and research.
- Steel is required for advanced buildings, upgrades, and late-game tech.
- Food keeps your citizens healthy and working. Rations are processed from raw food in cookhouses.
Your city’s balance depends on collecting enough of all four, even as demands increase. Running low on any one resource can create a domino effect, so always keep an eye on your daily gain and usage levels.
Gathering Methods: The Early Game
Manual Gathering
When the game starts, resource piles—marked by blue (coal), brown (wood), and gray (steel)—dot the map. Assign workers or engineers directly to these piles by clicking the resources or through the icon on the lower left. Early on, it’s tempting to spread your manpower everywhere, but focusing on coal and wood first gives the best footing.
Gathering Posts
A quick boost to efficiency comes from gathering posts. Build them near clusters of resource piles; each post lets up to 10 workers gather multiple piles nearby while staying protected from the cold. This matters, because unprotected workers tend to get sick fast.
- Tip: Try to overlap posts to cover as many piles as possible, but don’t build more than you have available workers.
Automatons
Automatons, once unlocked, automate resource gathering without concern for cold or shift times. Assigning one automaton to a gathering post or extraction building frees up people for other tasks, especially crucial as weather worsens. They’re expensive, but paying that price early pays off when human workers become scarce.
Advancing Your Production: Midgame Shift
Soon, surface deposits run dry—and you must switch to buildings that produce resources reliably:
Coal
- Coal Thumper: Produces unlimited coal piles that must be manually gathered from adjacent squares. Great with gathering posts; not so efficient without them.
- Coal Mine: Placed on a coal deposit, these use workers or automatons for steady production. Coal mines excel for late-game, providing high output.
- Optimization: Invest in tech upgrades (found in the Workshop) to increase efficiency. Monitor your coal reserve—never rest easy, as demand spikes rapidly during storms.
Wood
- Sawmill: Extracts wood from trees within its radius. Placement matters! Maximize coverage by dropping sawmills where tree clumps are the thickest.
- Wall Drill: Set up on rocky outcrops, providing a steady, unending stream of wood. Wall drills work even after trees run out and become your late-game backbone.
Steel
- Steelworks: Harvests steel from specific steel wreckage areas marked on the map. As with coal mines, these keep supplies stable when surface piles are depleted.
- Later Tech: Research upgrades to boost steel output. You’ll need much more in the late game for advanced structures.
Food
- Hunter’s Hut: Sends 15 hunters out every night; they bring back raw food, which must be cooked in cookhouses. Hunters are less efficient but flexible, especially when you have idle workers at night.
- Hothouse: Grows raw food during the day, regardless of the weather (assuming heat is sufficient). Hothouses require steam cores and consume coal but crank out consistent food.
- Optional Gather: Sometimes you’ll find frozen bodies and raw food; send workers for a one-time boost, but this is only a stopgap.
Resource Management Tips
Avoiding Bottlenecks
- Storage Depots: Build extra depots to keep surplus safe, especially before storms hit. Choose which resource each depot will store.
- Balance Your Workforce: Assign according to need—pull extra labor off an overstocked resource and shift to what’s running low.
- Tech Priorities: Boost gathering speed and output with upgrades. “Gathering Efficiency” and “Faster Gathering” techs make a big difference early on.
Keeping Track
Monitor daily “Net Gain/Loss” numbers. The resource bar at the top tells you what you’re using versus what you’re bringing in. Red numbers mean loss; fix the gap before it snowballs.
Overcoming Resource Shortages
- Overdrive existing miners or posts if desperate, but know that overworking drives discontent.
- Redeploy Automatons to fill workforce gaps as sickness rises.
- Trade off non-essential construction—pause building new houses if you lack steel for a critical facility.
- Scouts and Outposts: Send scouts to snowy outposts via the beacon; they return with rare resources and sometimes send back steady shipments if you establish an outpost depot.
Late Game Adjustments
As temperatures drop, focus on consolidating resource gathering in safe, heated zones and automating what you can. Workers become less efficient and prone to illness when frost bites, and automation helps you outlast storms.
Specialize your late-game labor: assign people to medical posts and critical care, let automatons handle mines and the coldest jobs, and keep food flowing, or hunger will riot.
Summary
Efficient resource gathering is as much about flexibility as it is about raw numbers. Adapt as deposits run dry, shift workers as your city grows, and always weigh daily usage against what you take in. Master these basics, and you’ll always have the supplies to keep both the generator roaring and your people fed—no matter how bitter the storm.
Law and Order
Managing the temperature is challenging, but keeping your city from collapsing due to internal strife is a different kind of test. In Frostpunk, Law and Order isn't just flavor—it's the spine holding your last hope together. Every choice shapes the way people behave, how they feel about your leadership, and whether society manages to survive the coming ice or tears itself apart.
The Purpose of the Book of Laws
The Book of Laws is a key system for shaping your society. Early on, you’ll be prompted to sign new laws, each offering unique advantages and consequences. This is where you balance the well-being of your people against the hard decisions survival demands.
Signing a law unlocks its effect for the rest of your run. Some laws add new buildings or actions, while others permanently alter the way your city handles crisis.
Law Categories
Laws fall into several broad trees:
- Adaptation: Early-game laws that provide short-term solutions and boost survival, like radical food options or basic care.
- Purpose: Later-game laws that give shape to your society. You choose either the "Order" path (focusing on discipline and security) or the "Faith" path (using spiritual reassurance and community).
Managing Discontent and Hope
Two vital meters track the mood in your city: Discontent and Hope.
- Discontent rises when you make unpopular choices (like harsh work schedules, child labor, or body disposals), neglect necessities (food, warmth, health), or fail in your duties. Too much, and people could start to protest, rebel, or outright depose you.
- Hope grows when you meet basic needs, provide security, care for the sick, and give people something to believe in. Let it drop to zero, and expect a swift end to your leadership.
Most laws nudge these meters. For example: Signing Corpse Disposal lowers Discontent because you deal with disease risk but may also slightly reduce Hope due to the grim circumstances.
The Adaptation Law Tree
This is your first arena for lawmaking. Here, you manage things like food rationing, health choices, workers, and death. Choices in this tree tend to be double-edged; they solve one problem while creating new ones down the line.
Some highlights:
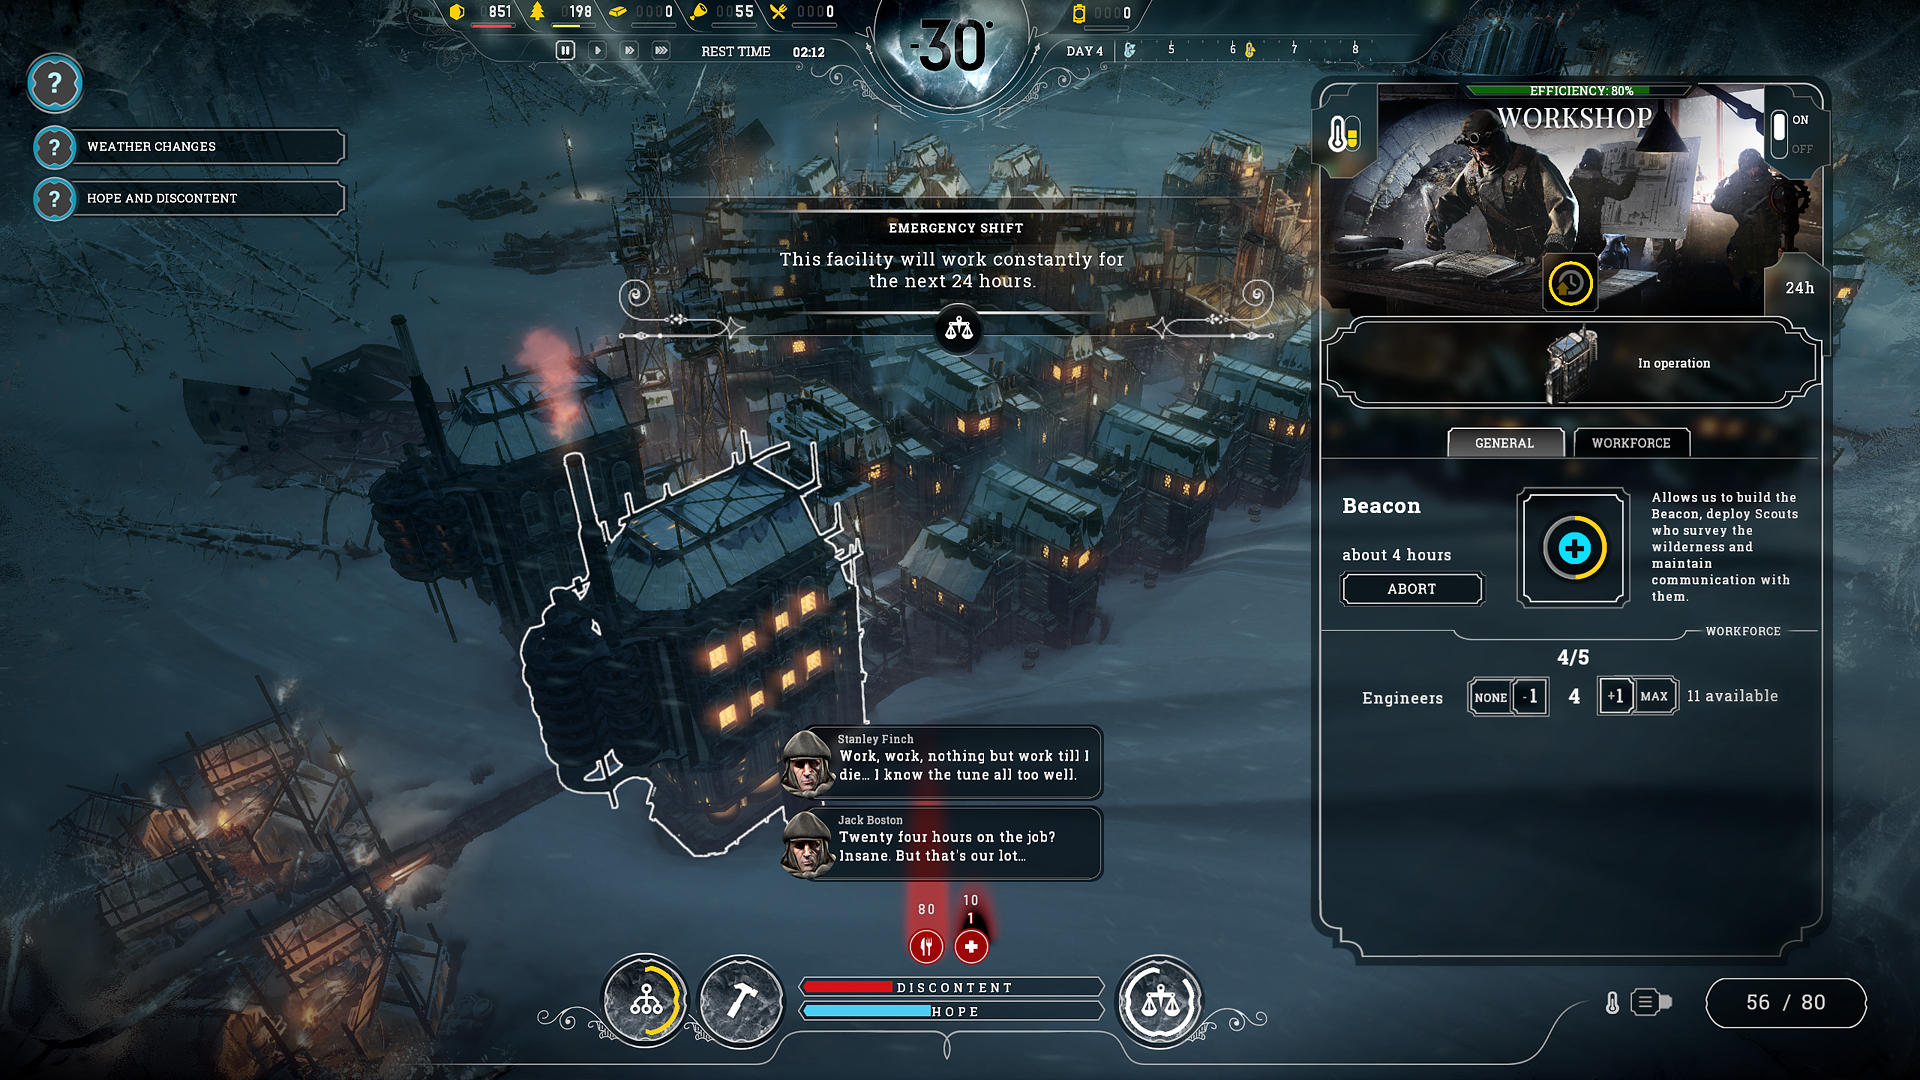
- Emergency Shift: Pushes workers beyond their limits for a big productivity boost, but sharply increases Discontent and can cause accidents.
- Soup or Food Additives: Stretch your rations at the cost of making people upset. Critical in food shortages, but sustained use wears people down.
- Child Labor vs. Shelters: Children can be put to work in safe jobs, or given dedicated shelters and healthier prospects. Labor provides extra workers but at a steep hope penalty.
Most laws in Adaptation are about short-term survival. Don’t overlook how much they impact morale and the long run. Taking too many harsh measures back-to-back might keep you alive today, but it risks city-wide collapse tomorrow.
Order vs. Faith: Choosing Your City’s Foundation
At a certain point, you have to choose a direction: Order or Faith. This split in law trees radically changes how you control your society.
The Order Path
Order emphasizes discipline, routine, and law enforcement. Signing these laws unlocks powerful tools to keep Discontent down, sometimes by force.
Key buildings and features unlocked:
- Neighborhood Watch: Patrolling guards lower Discontent.
- Guard Stations and Watchtowers: Give you eyes (and fists, if needed) in the streets.
- Propaganda Centre: Keeps Hope higher through controlled messaging and social pressure.
- Prison and Forceful Persuasion (late-game): Used for direct control—a sure way to clamp down on dissenters.
Order naturally leads toward more authoritative methods. You can even crown yourself as "Captain of New London," effectively ruling as a benevolent dictator. The cost, however, is rising resentment if you lean too hard on suppression.
The Faith Path
This path leans on unity, warmth, and hope through shared belief. Faith-based laws unlock tools for healing, community, and spiritual comfort.
Key buildings and features unlocked:
- House of Prayer: Boosts Hope and reduces Discontent nearby.
- Shrines: Small hope boosts across the city.
- Faith Keepers: Respond to social unrest and emergencies without the threat of violence.
- Temple, Evening Prayers, Ceremonies: Regular events that inspire people to endure hardships without losing heart.
The Faith path won’t command the same iron grip as Order, but it creates a city that feels less repressive. In hard times, ceremonies and sermons can lift people’s spirits before sickness, hunger, or the cold threatens to break them entirely.
Managing Law Cooldowns and Cascading Effects
After you sign a law, there's a cooldown before you can sign another. Consider each decision carefully—rush a series of controversial laws and you could ignite a crisis you can’t put out.
Sometimes, the effects of laws compound in unexpected ways. Allowing soup AND signing extended shifts will keep people working and fed, but their patience will wear thin much faster. Positives stack, too: combining child shelters with extra care can build a strong base of Hope.
Handling Unrest and Riots
Every difficult choice carries the risk of backlash. If Discontent gets too high—or Hope too low—your city can spiral:
- Protests and Demands: People will confront you, asking for changes. Sometimes they’ll want specific laws; other times, they might threaten to leave.
- Strikes: Refuse to address a crisis, and workplaces can shut down.
- Riots: Push people too far, and you’ll face outright rebellion. The Order path lets you stamp these out… for a price. Faith, on the other hand, can sometimes talk people down.
Your ability to respond depends on both your law tree and how well you've balanced the day-to-day needs of your population.
Tips for Good Governance
- Keep an eye on both meters (Hope, Discontent!)—and don’t wait for them to spike before acting.
- Stagger tough decisions with morale boosters. Just did something awful? Maybe follow up with ceremonial events or rations to soften the blow.
- Communicate with regular meetings or sermons to preempt unrest.
- Tailor your approach: There’s no single correct path—lean into what your city needs most, whether discipline or inspiration.
Conclusion
Law and Order in Frostpunk isn’t about being “nice” or “wicked”—it’s about controlling the wild swings of mood and outbreak, keeping your community steady even when the temperature and morale plummet. Whether you choose hard security or shared faith, smart use of the Book of Laws can tip the scales between a city united—and a frozen legacy of regret.
Hope and Discontent
A city’s fate in Frostpunk rides on two meters at the bottom of the screen: Hope and Discontent. They’re not just numbers—they’re the heart rate and blood pressure of your people. If you don't keep them in check, even the best-laid survival plans can topple. Let’s break down how these mechanics work, what influences them, and how you can use them to your advantage.
How Hope and Discontent Work
Think of Hope as your people’s belief that brighter days might come, even in the never-ending blizzard. Discontent measures how fed up or angry everyone is with your decisions. When Hope is high and Discontent low, your city runs smoothly—even during the harshest storms. Let either meter slip too far in the wrong direction, though, and you’re flirting with disaster.
- If Hope hits zero: Game over. Citizens lose faith, and you’re exiled.
- If Discontent fills up: People rebel, your authority crumbles, and you’re out.
Most daily events, building placements, and law choices nudge these bars. Keeping them balanced means walking a tightrope, especially as the weather turns and resources run dry.
What Increases or Decreases Hope?
Ways to Raise Hope
- Build Comfortable Housing: Make sure everyone has at least a tent, but aim for bunkhouses or houses as soon as possible. Upgrades (and heating) keep people feeling secure.
- Pass “Feel Good” Laws: Child shelters, evening prayers, or neighborhood watches ease anxiety.
- Meet Promises: When citizens ask you to heat homes, lower discontent, or build a cemetery, follow through. Each fulfilled promise makes people trust your leadership more.
- Faith-Based Buildings and Events: Houses of Prayer, shrines, and temples (on the Faith path) spark city-wide Hope surges.
- Address Critical Needs: Prevent widespread illness, starvation, or homelessness—nothing saps Hope faster than basic needs going unmet.
Things That Drop Hope
- Deaths and Corpses: High fatality rates, cold snaps, accidental deaths, or bodies piling up all make Hope plunge.
- Harsh Laws: Radical acts (like child labor, organ transplants, or public executions) offer solutions but sap Hope. The hit might seem small at first, but stacking them up can sink you.
- Broken Promises: Tell people you’ll fix something and fail? That betrayal stings more than not promising at all.
- Mass Banishments and Other Extremes: Kicking out a lot of people or making horrifying choices will push Hope into the danger zone.
What Increases or Decreases Discontent?
Ways to Lower Discontent
- Satisfy Needs: Feed people, treat the sick, keep homes warm. Discontent rises fastest when something vital is missing.
- Build Law and Order Structures: Guard posts from the Order path keep trouble down through patrols. On the Faith path, faith keepers gently defuse tension.
- Address Complaints Quickly: If workers go on strike or citizens protest, take action. Even a partial fix softens their anger.
- Boost Rations Temporarily: Throwing out extra meals after a traumatic event helps everyone calm down.
What Raises Discontent
- Workplace Overdrive: Emergency shifts and extended hours save the city but breed resentment, especially if accidents happen.
- Food Shortages: “Soup” law keeps you fed but, if used too long, piles on Discontent.
- Cold Homes: If you let homes freeze, get ready for an angry mob.
- Unaddressed Illness: Overflowing medical posts or mass amputations make people mad—and afraid.
- Unfair or Brutal Laws: Prisons, patrols, and forceful persuasion suppress riots, but seeing neighbors dragged off only stirs the pot in the long run.
The Tug-of-War: Balancing Hope and Discontent
No decision is isolated. Bumping up Hope can sometimes cost Discontent, and the reverse is true too. For instance, signing an unpopular law might lower Hope and raise Discontent overnight, but the extra soup means no one starves later, which helps Hope recover.
The real trick? Breadcrumbing your choices. When you need to make something unpopular happen, sandwich it between two positive moves. Build a child shelter or throw a city-wide ceremony before or after a grisly law—your people will be upset, but their mood can recover.
Coping With Crisis Events
Major events—like the Londoners threatening to leave, or an incoming superstorm—cause massive swings in Hope and Discontent. You can’t prevent all of them, but you can prep:
- Stockpile Resources: Make sure you can respond with food, coal, and medicine.
- Ramp Up Morale Boosts: Time ceremonial laws or guard patrols to coincide with major threats.
- Accept Temporary Spikes: Sometimes you NEED to push people for a few days. If you’ve banked enough Hope, they’ll survive the dip.
Final Thoughts
Managing Hope and Discontent is the real art of Frostpunk. New laws and buildings will always give you more tools, but nothing replaces steady, thoughtful leadership at the heart of the storm. Keep people fed, don’t let homes go cold, stagger the tough calls, and reward your city’s patience whenever you can. These meters might just look like bars, but they’re as real as any blizzard outside your Generator walls.
Scenario Strategies
Frostpunk’s replayability hinges on its challenging scenarios, each demanding a fresh mindset and precise leadership. While basic survival skills carry over, unique objectives, starting conditions, and key choices push you out of your comfort zone. Let’s break down successful approaches for each main scenario, including what makes them different and standout tips to keep your city alive when the rules change.
A New Home
“A New Home” sets the standard for most players—build a city, survive the last winter, and deal with threats like the Londoners and brutal temperature drops.
Core Objectives
- Build a functional city around the Generator.
- Keep Hope high enough to prevent mass exodus with the Londoners.
- Survive until the ultimate cold snap at the end.
Key Strategies
- Scout Early, Often, and Everywhere: Expeditions net you critical survivors, resources, and tech. Don’t wait until you’re desperate.
- Efficient Expansion: Use Gathering Posts for coal and basic resources first. Don’t overextend and leave homes cold; start compact, then spread when heating tech is in reach.
- Monitor Laws Carefully: Early laws can dig holes for later. For example, passing “Soup” and “Emergency Shift” can be lifesavers short-term, but ramp up Discontent. Make sure to provide positive laws that also bump Hope.
- Prep for the Final Storm: Several days before the ultimate cold snap, ramp up raw food, coal, and medical kits. Convert workshops to infirmaries, assign automatons, and accept a short-term Hope dip if it means people stay alive during the blizzard.
The Arks
You’re tasked with keeping precious seedling arks safe, rather than saving people en masse.
Core Objectives
- Preserve the four seedling arks—if they all freeze, you fail.
- Manage a skeleton crew: you start with only engineers.
Key Strategies
- Preserve Heat Above All: Prioritize heating for arks. It’s often better to allow a few engineers to suffer cold than risk the arks.
- Automatons are Lifesavers: Rush to develop automatons; they don’t get sick from working in low temperatures.
- Limit Expansion: With fewer mouths to feed, don’t waste resources on unnecessary growth. Food isn’t your real worry—keeping things running is.
- Scout, But Don’t Overcommit: Gathering extra engineers from expeditions is useful, but never risk the arks by spreading too thin back home.
The Refugees
This scenario turns the usual survival equation on its head: refugees pour in, resources start thin, and class tension simmers beneath the surface.
Core Objectives
- Welcome and support an ever-increasing wave of refugees.
- Satisfy the upper-class group’s demands or risk being overthrown.
Key Strategies
- Preempt Overcrowding: You need extra homes before each new arrival batch. Prioritize heating, then beds.
- Triaging Needs: When stretched, prioritize food and medical care for incoming groups—even short delays can lead to spiraling deaths.
- Avoid Class Friction: Keep Hope bolstered through visible improvements (upgraded housing/amenities) and delay/hide any draconian laws until you have a reliable city core.
- Handle Dissidents Diplomatically: Upper-class refugees will make demands. Meeting at least some of their requests makes late-game city management much less risky.
The Fall of Winterhome
Thrown into chaos, you step in after a disaster and must rebuild with a battered city and fearful populace.
Core Objectives
- Stabilize after a catastrophic generator explosion.
- Restore order and infrastructure with a city in crisis, keeps Hope from vanishing entirely.
Key Strategies
- Rapid Repair: Start with the Generator. As soon as it’s fixed, redirect manpower to restore essential infrastructure—homes, cookhouses, and medical posts.
- Balance Triage and Restoration: Don’t try to please everyone. Sometimes, amputations and burials are all you’ve got. Just keep Hope from reaching zero.
- Scout Immediately: Outlying survivor groups are vital. Their labor and materials are the only way to regain momentum.
- Balance Order and Faith: Choose your law path to stabilize Hope/Discontent, but avoid radical steps unless you absolutely must—your citizens are already traumatized.
Endless Mode (Endurance, Serenity, Builder, The Rifts)
Endless Mode is less about a specific end goal and more about testing survival skills with custom rulesets.
Standout Strategies
- Adapt to Map Features: In Builder or Rifts, platform placement and space management shape every choice—don’t sprawl without a plan.
- Early Work Automatons: Investing in automatons minimizes sick leave and sustains production long-term, no matter the mode.
- Prioritize Research: Push for heating upgrades, generator efficiency, and food sustainability tech (hothouses/hunters) as soon as your basics are set.
- Manage Burnout: With limited objectives, you set the pace. Monitor citizen health and happiness for the long haul rather than just sprinting for survival.
Universal Scenario Tips
No matter which challenge you pick, these habits will help every time:
- Stockpile essentials: Always have a buffer of coal, wood, steel, and raw food—especially ahead of storms or scripted events.
- One Law at a Time: Stagger harsh legislation and let your city’s mood stabilize between big moves.
- Be Selective With Expeditions: Rescue missions help, but don’t drain manpower to the point your city’s core functions freeze.
- Think Two Steps Ahead: Always anticipate weather dips, new arrivals, or plot twists.
Different scenarios push you to rethink your priorities, but by adapting your core approach and staying flexible with new objectives, you'll thrive—even when the ice gets thicker and the odds look long. Each challenge is a fresh test of your planning (and sometimes your willingness to make tough calls), keeping Frostpunk tense and rewarding from start to finish.