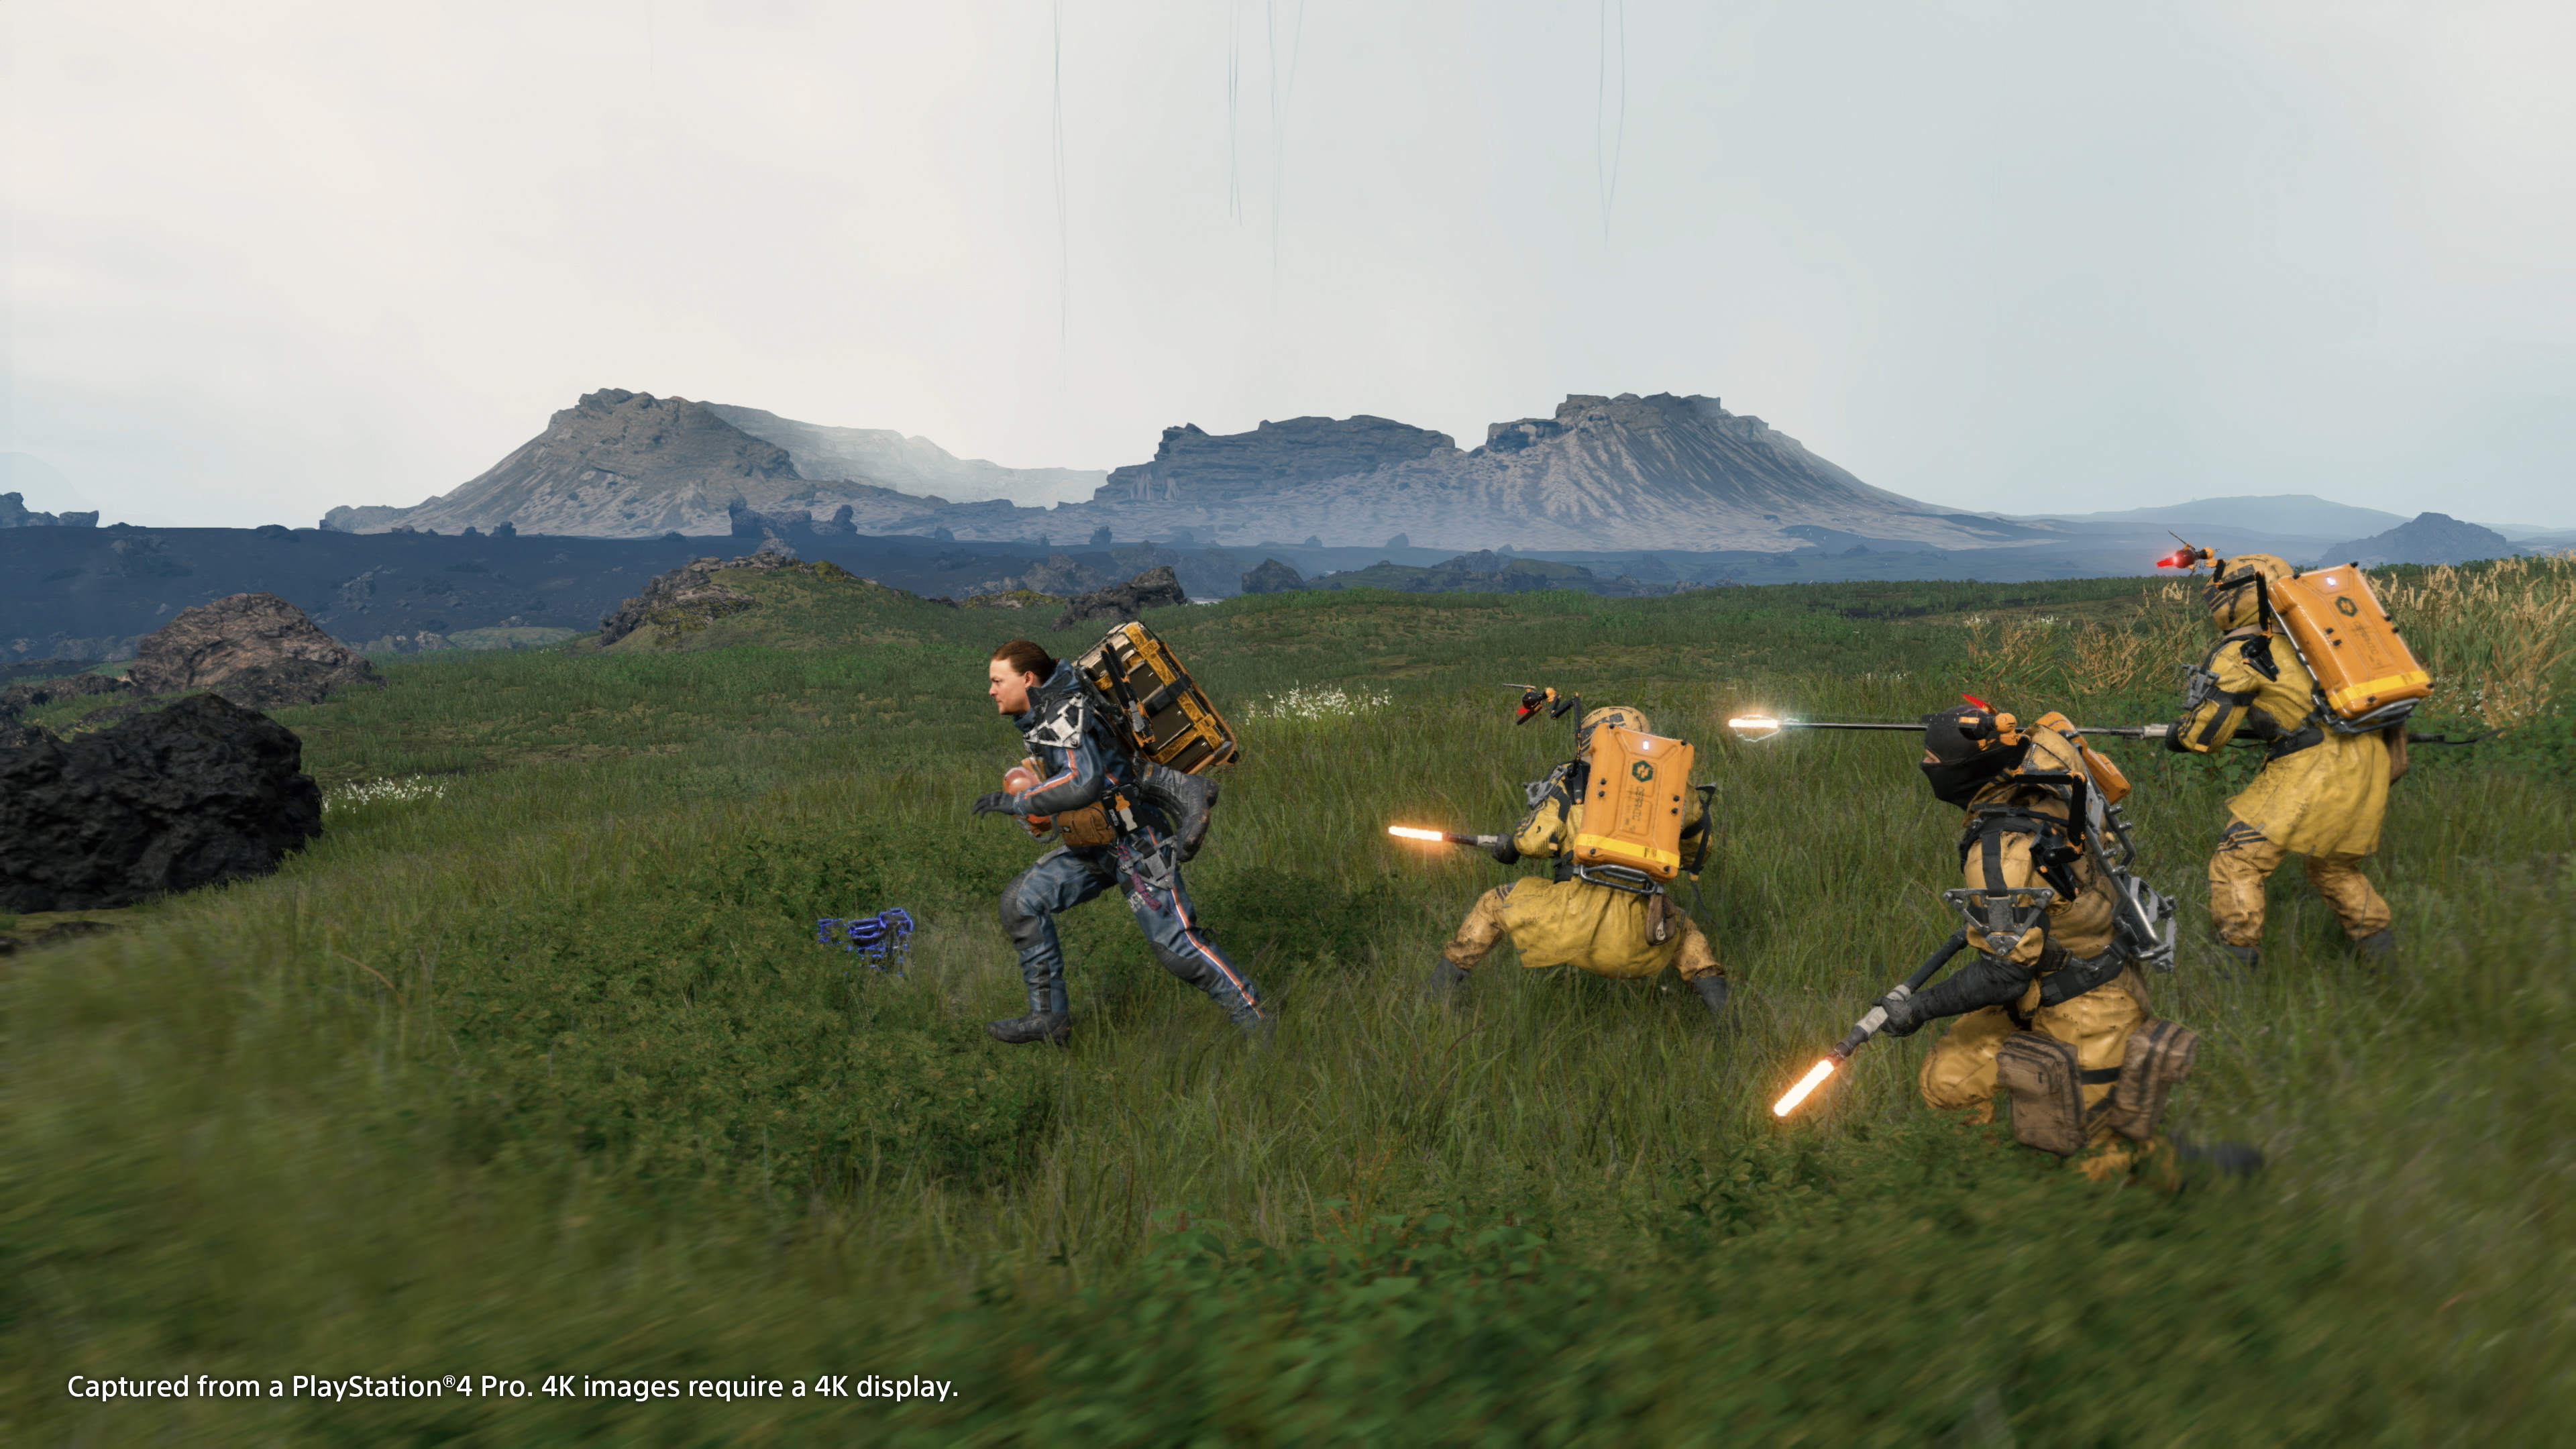
Death Stranding: Porter's Delivery and Survival Guide
Master cargo handling, navigate routes, survive BT encounters, build structures, and maintain balance in Death Stranding with this handy guide.
Death Stranding isn't your typical open-world experience. At its heart, it’s a unique journey through isolated terrain, where careful delivery planning and thoughtful resource management can make all the difference between successful missions and frustrating setbacks. While it's tempting to set out with minimal preparation, seasoned porters know there's more to navigating Death Stranding's rugged landscape than meets the eye--and knowing how to handle cargo properly or cope with unexpected hazards can genuinely shape your experience. Managing your gear, planning your routes, and understanding environmental risks can help smooth out even the toughest deliveries, allowing you to better connect the scattered survivors of this fractured world.
Understanding Your Load Limit
In Death Stranding, carrying too much can severely slow you down, increase the risk of tripping, and even damage your precious cargo. Pay attention to your maximum load indicator--it appears clearly on your cargo screen. The closer you are to this limit, the more Sam struggles to walk steadily or negotiate tricky terrain, making you a walking target for BTs and ground hazards.
As a general rule, avoid pushing your load limit above 80% capacity whenever possible. This gives you breathing room to pick up lost cargo you might find along your route, or gather important supplies from Points of Interest. Traveling lighter also means you can move more swiftly and responsively when faced with unexpected threats like BT encounters or hostile Mule attacks.
Prioritizing Your Cargo
Not all cargo is created equal--some deliveries carry more value, risk, or urgency. Death Stranding clearly labels deliveries with their priority level and their destination, giving you the clues you need to organize each trip accordingly.
On your delivery screen, always consider these designations:
- Standard Orders: Optional deliveries that reward you with resources, gear, or additional reputation.
- Orders for Sam: These main story deliveries directly progress your campaign, unlocking critical upgrades, new equipment, and new areas.
When packing your load, always place special cargo at the center or bottom of your stack. Fragile or urgent items require extra care--avoid placing heavier containers on top. Go to your organizing screen, and select “Auto-Arrange Cargo” regularly. Though this option is quick, make a habit of adjusting manually afterward to ensure the smartest distribution of weight. Automatic sorting is handy but not foolproof--it doesn't always understand the finer details of your next delivery, so always take a second and review.
Smart Cargo Placement & Equipment
Your cargo structure influences balance--the taller and less balanced your cargo stack, the harder time you'll have keeping upright. Thankfully, Death Stranding provides handy tools and equipment to make your deliveries smoother, faster, and a lot less stressful.
Consider these helpful items for efficient deliveries:
Bridges Boots
Always carry an extra pair. Wear and tear from rocky trails and challenging climbs weakens footwear and slows you down over time. Once durability hits zero, your stamina drains fast and you'll trip more often. Replacing your boots at around 20% durability keeps movement smooth.
Container Repair Spray
A perfect tool to maintain cargo health. Harsh rains and BT-infested storms quickly degrade cargo containers, potentially damaging the precious items inside. Briefly spraying containers repairs external damage, keeping them secure and improving your final delivery rating. Pack at least one or two cans for medium-to-long distance trips.
Ladders and Climbing Anchors
Traveling mountain paths or crossing wide chasms becomes manageable with careful tool selection. Carry a couple of ladders and climbing anchors to create new paths or negotiate steep cliffs. Place these tools strategically along areas you frequently pass through--you'll also help other Porters who can thank you with valuable Likes.
Vehicles and Floating Carriers
Motorcycles and trucks can help you speed deliveries across flatter regions. Keep an eye on fuel consumption and terrain type, since rough landscapes can trap or wreck your transport. For tricky terrain, floating carriers help immensely--they hover behind you, carrying a big portion of your burden, and let you stay stealthy and agile.
Handling Cargo in Environmental Hazards
Dangerous environmental effects--particularly Timefall and BT zones--can quickly turn an easy trip into a cargo nightmare.
Planning for Timefall
Timefall rain rapidly accelerates your cargo’s deterioration rate. If you're caught outdoors, immediately throw on your protective hood to shield cargo slightly. Monitor weather forecasts displayed on your cufflinks map, planning your route around anticipated showers. Find or create shelters to outlast heavier downpours, or use Container Repair Spray and shelters placed by other players to protect items already in trouble.
Navigating BT zones
Cargo-heavy Porters move slowly and awkwardly, making survival and evasion in BT areas much tougher. Entering these danger zones overloaded is risky. Using the Odradek scanner allows you to reveal BT positions. Maintain balance carefully, crouch-walk slowly, and pause regularly to scan around you. Lighter loads are safer, as quick escapes become much easier if a BT manages to sense and chase you.
If BTs grab you, carefully timed shaking and controlled stamina use helps you escape without losing cargo. Being grabbed pulls you down into an even more harmful voidout battle, significantly damaging or scattering cargo. Avoid this by traveling lightly, using sneaky routes, and preparing equipment like Hematic Grenades to eliminate threats proactively.
Recovering Lost Cargo
Cargo sometimes slips away--maybe you took a bad tumble or had to drop containers in a pinch during a Mule battle. Fortunately, your dropped cargo doesn't vanish immediately. It stays in place for a short while, marked on your map screen and recoverable before too heavily damaged.
Backtracking briefly for valuable dropped cargo is worthwhile for important or critical orders, greatly improving your rating and connecting you more strongly with the settlements you’ve helped. If revisiting becomes impossible, constructed Lost Cargo delivery terminals or entrusted porters can assist in getting your lost packages where they belong anyway.
Cargo management in Death Stranding shapes how smoothly you travel through every segment you encounter. Thoughtful decisions about your inventory, smart route planning, and careful use of your surroundings prevent frustrating setbacks. By watching your load, prioritizing your gear and cargo properly, and anticipating hazardous areas, you'll become a trusted porter in no time, reliably connecting survivors in a fragile but hopeful world.
Route Planning: Choosing Your Path Wisely
In Death Stranding, plotting the most efficient route makes all the difference between a successful, satisfying delivery and a grueling slog through danger and difficult terrain. Unlike most open-world titles, there's no GPS auto-drive here--mapping your journey is entirely up to you, reinforcing the game's core theme of connection through deliberate choice. Let's break down the smartest approaches to route planning and how you can avoid pitfalls along the way.
Making Good Use of Your Map
Your map is your best friend and most reliable tool when delivering cargo across treacherous landscapes. By accessing your Cufflinks (the map device strapped to your wrist), you can zoom in, rotate, and even tilt it to get a clear perspective of the terrain ahead. Scan closely before setting out, noting elements that'll affect your travel significantly. Look closely for:
- Bodies of water: Rivers vary in width and depth, presenting obstacles that can slow or stop your progress completely.
- Steep slopes and cliffs: Clear elevation lines indicate how steep a slope or cliff face is; this helps you prepare ladders or climbing anchors if necessary.
- Terrain hazards: Complex rocky areas, snowfields, and craters can drain stamina quickly.
- Established Structures and Paths: Remember, Death Stranding connects to other player worlds. Look for shared markers like ladders, ropes, bridges, and even built roads--often the simplest paths are those porters before you have laid out.
A good practice: mark your route with a series of custom waypoints (hold square on PS4 or X on Xbox) that indicate safe crossing points, climbing locations, and areas of rest. As you move forward, your Compass (activated by pressing L1/LB) clearly points toward your next marker, simplifying navigation.
Reading the Weather Forecast
Beyond terrain, understanding the weather patterns means the difference between a smooth delivery and disastrous cargo damage. Death Stranding heavily features the dreaded Timefall--rain that accelerates item deterioration drastically.
Before leaving any facility, check your weather forecast on the map. You can upgrade and progress through the game to increase the accuracy and length of these predictions. Anticipate weather issues by plotting detours around storms, even if it seems longer initially, since traveling through rain-heavy zones quickly results in damaged deliveries.
In a particularly urgent delivery scenario, consider utilizing shelter structures preset by yourself, NPCs, or other players. Shelters protect your cargo and restore stamina during harsh weather, significantly reducing cargo container damage.
Terrain is Key: Know Your Pathfinding Options
Death Stranding offers varied environments--mountains, dense rainforests, rivers, open landscapes, and rocky deserts. Each region brings unique obstacles you'll need to approach with specific strategies:
-
Mountains: These snow-covered areas dramatically drain your stamina and slow you down. Plan routes along gentler slopes instead of attempting direct ascents. Equip climbing anchors, ladders, or floating carriers to ease your burden. Power skeletons and all-terrain skeletons come in handy here, reducing the strain on your stamina.
-
Large Bodies of Water: Crossing wide or deep rivers without proper gear risks falling, drifting cargo, and Sam's stamina. Scout out narrow sections, shallow crossings (lighter-colored blue water), or player-made bridges. Floating carriers significantly increase your river-crossing capabilities.
-
BT Territory: Areas infested by dangerous BTs are a huge risk for losing cargo and even the life of your fearless porter, Sam. Adapt your route to skirt around these zones where feasible, even if the detour feels inconvenient. If unavoidable, proceed slowly and quietly while thoroughly scanning the area with your Odradek. Bringing specialized gear like Hematic Grenades helps you proactively clear threats and create efficient paths in heavily infested zones.
-
Vehicle-Friendly Areas: If your route passes through clear, level terrain, definitely consider vehicles. Trucks and bikes decrease delivery time significantly. Make sure routes taken by trucks are wide enough and free from obstacles--getting wedged or flipped will waste even more time than walking.
Establishing Efficient Shortcuts and Using Zip-Lines
As you progress through Death Stranding, advanced equipment will greatly simplify and streamline your deliveries. Zip-lines are perhaps the most valuable long-term investment in your route-networking strategy. Deployment revolves around building anchor points in strategic locations, creating quick-travel corridors through challenging landscapes. Keep careful stock of your PCC materials so that you always have enough resources handy to extend your zip-line network.
When repeatedly traveling specific routes between delivery points, placing ladders, shelters, or bridges greatly smooths the future pace. These shortcuts become permanent pathways, saving valuable time throughout your playthrough.
Plan Your Return Trip
Never overlook your return journey. Unless it's a special one-way-order, you will likely pick up Lost Cargo or additional packages at your destination that need transport back. Route optimization also matters in reverse, so evaluate your way back even before stepping out. Plan differently for heavy return loads, possibly focusing on a quicker, easier path back, especially if fatigue builds up from your initial trip.
Additionally, strategic points like Distribution Centers and Shelters allow Sam to rest, store cargo, and swap gear, aiding your return route planning. Always know the location of these helpful supply hubs--they ease your burdens significantly.
Route Planning: It's About Balance and Preparation
In Death Stranding, you won't always be following a marked road or clear trail. Instead, you'll forge your own paths through rugged, challenging environments. Careful planning helps you minimize the dangers and hassles, getting your precious cargo safely--and swiftly--where it belongs. Balance your load smartly, anticipate terrain challenges, and consider both safety and efficiency to master the game's complex pathways. Death Stranding is as much about choosing your direction as it is about trekking it, and successful delivery depends on savvy travelers who plan carefully.
Your Guide to Surviving BT Encounters
BTs--short for "Beached Things"--are the eerie, ghostly creatures haunting Death Stranding's apocalyptic landscapes. If you're not careful, these invisible predators can turn an easy delivery into your own personal horror movie. Even seasoned porters find them nerve-wracking, but skillful use of your gadgets, tactics, and a healthy dose of patience can get you safely through BT-infested territory.
Here's exactly how you handle BT encounters, instead of letting them handle you:
How to Know You're in BT Territory
A few clear indicators pop up when entering BT zones. First, notice your surroundings: once the Timefall rain starts pouring down, there's a solid chance those shadowy spirits aren't far behind. A sudden thick fog or gloomy weather shift is another massive red flag for a potential encounter.
Most importantly, your Odradek sensor--the scanner mounted on Sam’s shoulder--responds when BTs are near. Activating automatically in danger zones, the Odradek expands and begins rapidly spinning, facing toward the closest threat. Changing its spin rate and clicking sounds indicate distance and position. Pay close attention to this device: It's your best friend when navigating hazardous BT-infested routes.
One more helpful tip: slow-motion briefly triggers at your initial BT boundary crossing, accompanied by an unsettling musical cue. When those signals kick in, get ready to move quietly and slowly forward.
Moving Quietly and Safely Around BTs
When BT indicators appear, crouch-walking (press circle on PS4, or B on Xbox) is your safest travel option. BTs detect movement through noise, so crawling slowly is critical--even if it's frustrating at first.
Keep a careful eye on your Odradek sensor. Monitor its orientation and spin-speed changes; when the spinning speeds up and flashes quickly, BTs are extremely close and extra caution is necessary. Pause regularly to breathe and reassess the situation--you don't want to accidentally stumble toward a hidden enemy.
Holding down R1 (PS4)/RB (Xbox) activates Sam's breath-holding, but use this sparingly. Holding breath drains stamina rapidly, so only do it when you sense the Odradek spinning fastest, meaning a BT is painfully close. Afterward, retreat slightly and release the button to regain stamina safely before moving forward again.
Hematic Grenades: Your First Line of Defense
Early in your journey, Hematic Grenades become your go-to weapon against these shadowy threats. Crafted from Sam's blood supply, they're super effective but drain your health slowly. Always monitor Sam's blood and equip Blood Bags to replace any lost health and grenade supplies.
Hurl grenades directly into clusters of BTs to clear a safer path forward. A well-thrown grenade can vaporize one or multiple BT creatures at once and silently allows you to continue your smooth passage toward your destination.
If a BT Spots You: Stay Calm and React Quickly
If you're detected, black, oily hands burst from the ground, grabbing at your legs. Your immediate reaction must be a rapid counter: repeatedly press square (PS4) or X (Xbox) when prompted to break free quickly and retreat from the grabbing area.
Failure to escape pulls you into a pool of tar-like liquid, triggering a stressful scenario known as a "catch event." Here, your cargo scatters, and a larger, whale-like monster known as a "Catcher" emerges to finish you off.
Luckily, escape is possible. To survive, immediately sprint toward the nearest solid, unaffected ground. Avoid stopping or getting distracted--your sole priority is reaching safety. Successfully escaping the Catcher restores temporary normalcy, scattering the BT threat as you recollect your precious cargo and move on.
Using Advanced Anti-BT Gear and Weapons
As you progress later in the game, Death Stranding provides advanced options like the Bola Gun and Anti-BT Handgun. Both incorporate Sam's blood, making them fantastic BT-counter weapons. These firearms give greater flexibility and allow for targeted elimination of BTs from safer distances.
Another powerful strategy: using EX grenades crafted from Sam's bodily fluids. These weapons help momentarily stun BTs or reduce the risk of prolonged encounters, giving you additional breathing room to plan your route.
Dealing with Major BT Bosses
Large-scale BT encounters, known as bosses, occasionally block primary mission progress. These bosses appear mainly during important story-centered deliveries. If encountered, prioritize staying distant and maintaining steady attacks using Hematic Grenades, Anti-BT Handguns, or Hematic-equipped assault rifles.
These monumental threats seem overwhelming at first glance, but patience and relentless firepower lead to victories. Focus on high ground or safe structures like trucks and rooftops. Maintaining mobility around bosses is key, enabling strategic attacks and avoidance of their powerful strikes.
BT Areas and Route Planning
Your best option, naturally, is bypassing BT territories altogether by altering your routes. Inspect your map carefully and memorize BT-infested zones. Detours might seem inconvenient initially, but quietly sneaking or battling through BTs presents more substantial risks--damage to precious cargo, loss of supplies, or potential failure of the mission entirely.
If avoiding BT locations proves unrealistic or inefficient, carefully plot your approach. Bring a solid arsenal of anti-BT gear, conserve stamina, progress slowly, and always pay sharp attention to the Odradek sensor.
BT Encounters Don’t Have to Mean Disaster
BT encounters represent tense and risky moments in Death Stranding. But use your tools and tactics the right way, and these encounters become part of your porter's careful plan rather than spontaneous catastrophes. Navigate slowly, monitor your device closely, and meticulously use anti-BT gear, grenades, and tactics.
Stay calm--the spooky things lurking unseen don't have to ruin your next delivery. With proper preparation and confidence, you can successfully manage BT encounters and continue making safe, reliable deliveries all across Death Stranding’s harsh landscapes.
Building Structures: Your Key to Survival and Successful Deliveries
Traversing Death Stranding's harsh landscapes can quickly become exhausting, leaving you vulnerable to enemy threats and catastrophic cargo damage. Fortunately, the game provides players with powerful building mechanics that make life as a porter safer, quicker, and far more enjoyable. Whether you're facing BT-infested valleys, steep mountainsides, or treacherous rivers, building structures will make your routes manageable and your precious deliveries intact. This guide explains everything you need to start constructing key buildings and covers essential tips to streamline your journey.
Essential Building Basics
Early on, Death Stranding introduces you to the Portable Chiral Constructor (PCC). Think of the PCC as a futuristic, automated printer that instantly raises useful structures in strategic locations. You'll find two variants, PCC Lv.1 and PCC Lv.2--each creating separate sets of structures. Choosing which version to carry often depends on your specific delivery mission.
To deploy a PCC, you must first select it from the inventory wheel (by pressing right on your D-pad and cycling to the PCC). Equip it and press L2 (PlayStation) or LT (Xbox), aiming the holographic preview of the building to find a suitable construction spot. Pay close attention to the color of the hologram--blue indicates valid placement, red signals a blocked or otherwise invalid location.
Keep an eye on your stored materials too. Chiral Crystals, metals, resins, special alloys, and ceramics are the currencies of construction. Collect these materials during exploration to accelerate your building projects. A lack of resources can stall progress, so always check your cargo before leaving.
Let's look at some of the most useful structures and when you should raise them.
Bridges and Ladders: Crossing Impossible Terrain
When rough rivers or steep canyons force you off your route, consider building bridges and ladders. Simple ladders require no PCC at all--you can construct (or deploy) these from Sam’s cargo directly for smaller gaps or steep climbs. Always carry a couple, as they're both cheap and immeasurably helpful for climbing or crossing small distances.
Bridges--more permanent solutions built with a PCC--save other porters hassle by safely connecting wider gaps and rivers. Bridges ease cargo transportation dramatically, supporting heavy vehicles and saving huge amounts of travel time. Set these up at popular transit routes to receive likes from your grateful fellow travelers.
Watchtowers: Scout Before You Sprint
Watchtowers provide instant and critical information on nearby terrain, road conditions, and hostile presence. With their powerful sensors and high-altitude views, watchtowers spot cargo, lost packages, BTs, MULE activity, and helpful structures. Pop one down just outside unknown or risky areas. Monitoring these towers grants the intel you need to chart effective delivery strategies and avoids nasty surprises waiting over the hill.
Timefall Shelters: Weather the Storm
Rain in Death Stranding--known ominously as Timefall--is not ordinary rain. It ages and deteriorates both cargo and equipment over time. Timefall shelters not only protect you from exposure but also repair damaged containers carried by Sam, revitalizing cargo health and reducing further harm. Shelters double as safe spots to give Sam--and you--a much-needed timeout to reorganize or rethink deliveries. Placing these along frequently traveled paths or critical mission routes helps manage cargo conditions with minimal hassle.
Generators: Keeping Your Gear Powered
Powered exoskeletons and motorcycles dramatically simplify deliveries, but require regular charging to function effectively. Generators built with a PCC solve this problem efficiently, instantly recharging nearby gear and vehicles. Always construct generators near busy hubs or along long paths requiring considerable battery power. Sam and other porters will thank you as they boost through harsh terrain with fully powered rides.
Zip-lines: Your Personal Express Route
Unlocking PCC level 2 grants you the zip-line system, revolutionizing how quickly you travel. Building zip-line pylons at mountaintops, valleys, and distant sites chains together a network for rapid, hassle-free travel between distant locations. Zip-lines require careful resource collection and thoughtful placement, but your effort yields results, dramatically shortening back-and-forth travel times. Pair multiple zip-lines, placing them within compatible range (approximately 300 meters apart), for efficient and seamless travel through mountains and rough areas. Your cargo will remain undamaged, and you'll quickly complete deliveries previously taking hours.
Shared Structures and Online Connectivity: Helping and Being Helped
Death Stranding uniquely incorporates asynchronous online multiplayer, meaning your buildings potentially aid other players--and vice versa. Structures created by fellow porters populate the landscape once you've connected an area to the Chiral Network. Give likes generously anytime a building radically simplifies your path. Community-built roads, watchtowers, and shelters aren't just convenient--they're communal lifelines enhancing the shared goal of reconnecting America.
Consider contributing resources and maintaining these communal structures regularly. Over time, building durability deteriorates, demanding occasional repairs to keep crucial community paths functioning smoothly. Your repairs help everyone and keep the Chiral Network connected and efficient.
Personalize and Upgrade for Maximum Efficiency
Some buildings even provide customizable walls, signs, holograms, or music, injecting a much-needed touch of home in isolated places. Upgrading structures boosts their durability, range, or additional functionality--valuable upgrades that make every future trip simpler.
Take the time occasionally to improve existing buildings, particularly generators, zip-lines, or shelters frequently utilized along important delivery routes. Upgraded facilities mean fewer breakdowns, quicker healing from Timefall, and smoother future travel regardless of harsh climate and dangerous surroundings.
Build Smart to Deliver Reliably
Smartly constructed structures make life as a porter significantly less frustrating. Learn building mechanics early, and you'll decrease cargo damage, reduce delivery time, and drastically increase your success. Whether establishing convenient charging stations or creating your personal zip-line expressway, careful building in Death Stranding becomes just as vital and rewarding as efficient combat and cargo management. Plan carefully, collect materials regularly, and embrace building as a powerful ally in reconnecting fractured America.
Maintaining Balance: Delivering Without Falling Flat
In Death Stranding, balancing yourself isn't just a casual concern--it's the difference between safely reaching your destination and sprawling face-first into a rocky hillside, scattering precious cargo everywhere. Sam's deliveries revolve around his ability to carry and protect cargo across tricky terrain. Mastering your stability means the packages stay safe, your ratings rise, and you reach that next location without embarrassment. Here's how to stay upright no matter what's stacked on your shoulders.
Understanding Center of Gravity and Cargo Load
Sam can lug around heaps of gear, sometimes stacked comically high, but each box you add changes his overall balance. Pay close attention to weight distribution whenever loading cargo. Place heavier boxes at the bottom or keep them balanced centrally on Sam's backpack.
The auto-arrange cargo feature is incredibly helpful--just press Triangle from the Cargo Management screen, and the game will evenly distribute the weight for ideal balance. Trouble often comes from carrying awkwardly shaped containers like barrels or oversized crates: placing these closer to Sam's spine or using specialized attachments (utility pouches or cargo frames) greatly reduces sway while walking.
Making Use of Your Odradek Scanner for Stability
Your Odradek scanner isn't just handy for spotting lost items and BTs--it also scans terrain and signals potential hazards. Rocks, mud, sharp inclines, or rushing rivers are tricky surfaces where Sam struggles to hold his footing. Scan each new area (press R1) before moving on, identifying troublesome ground in advance.
Once you've spotted dangerous terrain, plan accordingly. Slow down your pace, adjust your cargo placement if needed, or pick a different route altogether. Being proactive with your Odradek means fewer mistakes, steadier footing, and happier deliveries.
Bracing Yourself: Balancing With Shoulder Straps and Button Presses
Sometimes even careful cargo arrangement isn't enough when terrain gets tough. This is why the L2 and R2 buttons exist. These buttons are your lifelines, allowing Sam to grasp backpack straps and stabilize instantly, significantly reducing sway and risk of tripping.
If Sam sways dangerously toward one side, hold the opposite trigger to counterbalance (if he tilts left, press R2, and vice versa). For maximum steadiness, gently hold both L2 and R2 simultaneously as you move through uneven terrain--this significantly slows your speed, yes, but safety is typically more important than sprinting toward disaster.
Know when to run lightly versus cautiously tip-toe. Open, flat terrain allows more speed without massive consequences, but mountainsides, river crossings, and heavily rocky secrets demand slow, deliberate movement. Always prioritize careful footing over total speed.
Mastering Terrain Types: Adapting to the Environment
Every environment in Death Stranding challenges your sense of balance differently. Here are the primary types you'll encounter, along with important tips to avoid spills:
Slippery Slopes and Muddy Ground
Sliding downhill quickly turns disastrous without corrective action. As Sam slips downhill involuntarily, rapidly tap L2/R2 in alternating patterns to regain control. Mud requires similar care: keep your pace slow and measured to prevent toppled cargo.
Rocks and Rough Terrains
Jagged terrain or scattered rocks might look safe enough, but one misplaced step equals cargo disaster. Carefully choose each foot placement and keep both hands ready to grip backpack straps.
Rivers and Water Currents
Navigating rivers represents one of the riskiest situations. Watch the current carefully once you enter water. A strong current--even shallow water--will rapidly drain stamina and unbalance your porter. Approach perpendicular to the riverbank where possible, move slowly, and always brace yourself with L2+R2 simultaneously while crossing.
Using Tools and Gear to Improve Balance
Remember, Sam doesn't have to rely on raw strength alone. Improved gear goes a long way toward making balancing easier:
Exoskeletons
Equip Power Skeletons or All-Terrain Skeletons to considerably improve your stability and help manage heavy loads without constantly bracing. They'll also save stamina and boost acceleration, especially the All-Terrain model designed explicitly for tricky ground.
Floating Carriers
These handy hovering trailers help distribute cargo loads efficiently, floating smoothly behind you. Floating carriers free Sam from staggering under heavy cargo piles and let him safely walk across challenging terrain with less concern.
Boots and Gloves
Don't overlook these accessories. High-quality boots maintain steady footing and prevent slipping, while gloves ensure better grip on luggage and ladders. Change your boots frequently to maintain optimal traction on slippery surfaces.
Stamina Management: Staying Energized and Upright
Balance isn't just about how you carry your load--stamina plays a big role, too. The lower your stamina bar, the higher your chances of tripping or stumbling over mild terrain. Regularly rest at private rooms or Timefall shelters, carry energy-restoring items (e.g., Cryptobiotes, Monster Energy drinks), and take brief breathers. Your incredible cargo stacks mean nothing if Sam constantly collapses from exhaustion.
Balancing While in Combat or Evading Enemies
Sometimes you'll find yourself making frantic escapes from MULEs or cautiously sneaking around BT-infested areas. Panic or distraction makes balance tougher. Focus carefully during high-pressure moments:
- Hold both shoulder buttons lightly to steady yourself when making quick dodges or shocking movements.
- Consider dropping heavy or awkward cargo if things get rough mid-battle--prioritize survival over cargo condition. You can always recover packages afterward.
- During stealth, maintain a steady crouch and careful walking pace. Sudden sprints or jerky motions attract unwanted attention, but they also compromise footing, causing stumbles exactly when you least want them.
Maintaining Balance Means Reliable Deliveries and Higher Rankings
Nothing feels worse than stumbling just before safely delivering cargo at its destination. By keeping balance top-of-mind, arranging cargo smartly, and staying aware of environmental risks and helpful tools, your journeys become smoother, swifter, and safer. Sam and his cargo stay healthier, clients stay satisfied, and your real-world delivery frustrations shrink significantly.