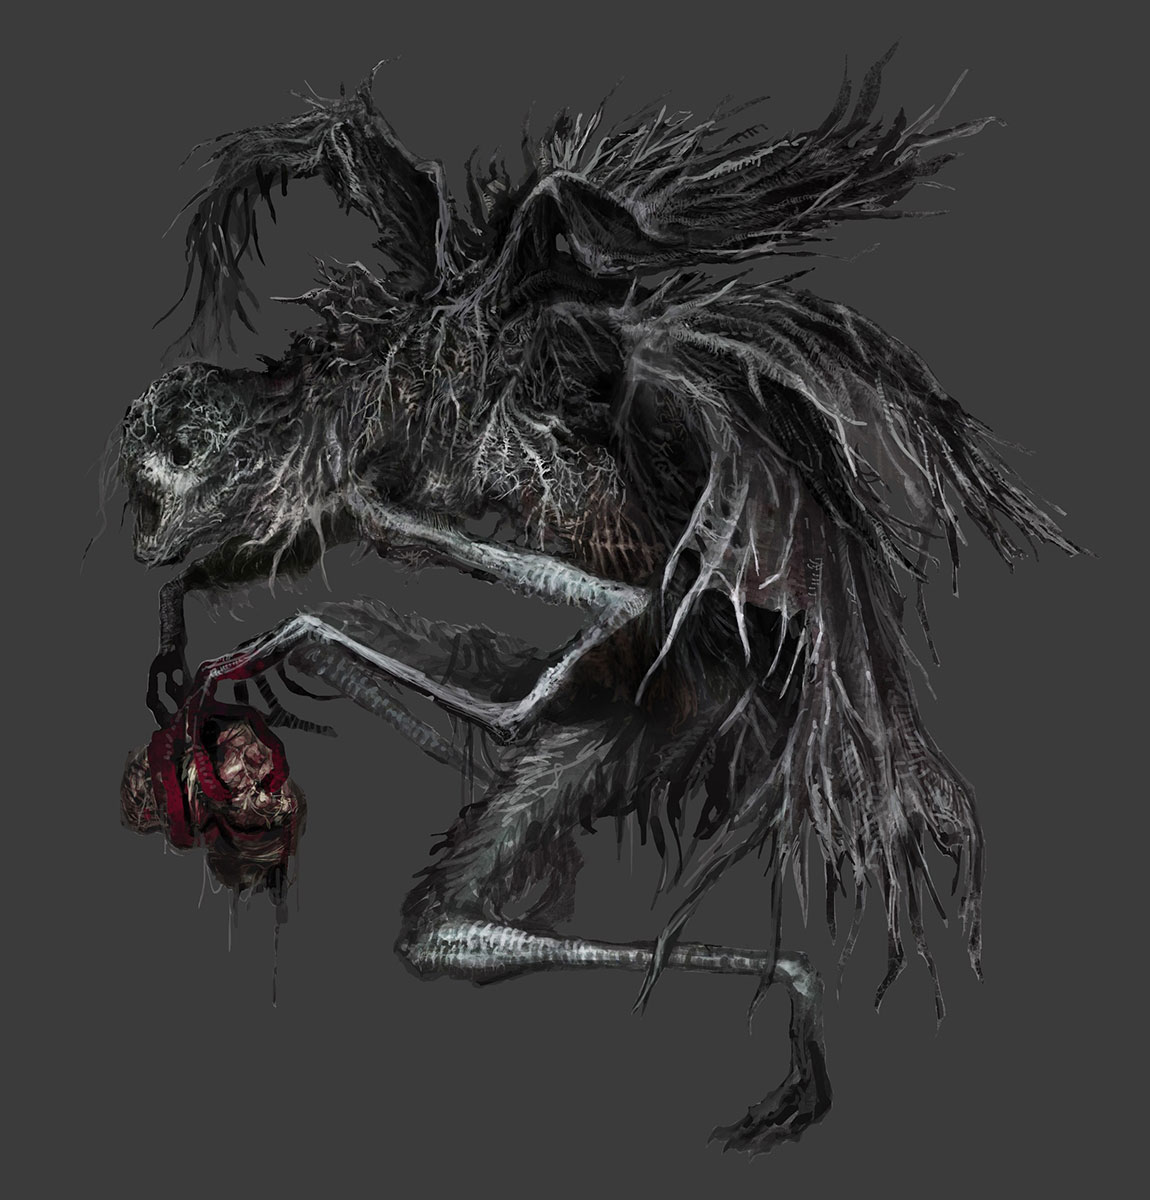
Dark Souls III Combat and Strategy Guide
Master Dark Souls III combat with tips on weapon arts, parrying, magic, stamina control, and exploiting boss weaknesses.
Getting to grips with the combat in Dark Souls III can feel like learning an entirely new language—every swing, dodge, and parry matters, and the consequences for a mistimed move are usually swift and unforgiving. The world is hostile, and every enemy, from lumbering hollows to ferocious bosses, is out to punish impatience. Players quickly realize that brute force rarely wins the day; instead, success comes down to understanding enemy patterns, managing stamina, and making each decision count. For both newcomers hoping to survive their first run and veterans looking to refine their skills, taking the time to understand the game’s mechanics and strategies can mean the difference between endless frustration and those hard-earned moments of triumph.
Weapon Arts Guide
Weapon Arts, also known as Skills, are a standout feature in Dark Souls III and bring a fresh twist to familiar combat. Unlike the static strong attacks from earlier games, Weapon Arts give each weapon class a unique special move or buff, adding tons of depth—if you know how and when to use them. Whether you’re wielding a massive greatsword or a nimble dagger, mastering their Weapon Art can be the key to pushing through some of the game’s toughest encounters.
What Are Weapon Arts?
Weapon Arts are special moves tied to specific weapons and shields. Activated by pressing L2/LT (without two-handing or holding a shield that blocks Weapon Arts), these abilities can be anything from powerful strikes to temporary self-buffs. Each Weapon Art is different—it might unleash a heavy spinning attack, thrust your blade forward for extra reach, or boost your stats for a short time.
Every Weapon Art uses Focus Points (FP), the blue bar under your health; run out, and your Weapon Art either won’t activate or will be replaced by a much weaker attack. Managing your FP is just as essential as keeping an eye on your stamina for regular swings and dodges.
How Weapon Arts Work
Basics of Usage
- Triggering Weapon Arts: Default button is L2/LT for most controllers. When two-handing, you always use the Weapon Art. When one-handing, it depends on your off-hand item. Small shields like Bucklers allow Weapon Arts, regular shields usually trigger parry instead.
- FP Cost: Each Weapon Art drains a set amount of FP, visible in the weapon’s menu. No FP? You’ll get a basic attack or nothing at all.
- Stamina Usage: In addition to FP, Weapon Arts also consume stamina, so make sure you have enough green bar to complete the animation.
Types of Weapon Arts
Weapon Arts vary by weapon type, and some specific weapons have unique skills:
- Straight Swords (e.g., Longsword): Typically feature ‘Stance’, letting you follow up with either a horizontal slash (R1/RB) or a powerful thrust (R2/RT).
- Greatswords (e.g., Claymore): Often have skills like ‘Stomp’, granting super armor (making you harder to stagger) and letting you smash down or sweep enemies away.
- Katanas: Usually bring ‘Hold’, a stance that leads to fast slashes or a strong, lunging attack.
- Ultra Greatswords: Many have ‘Stomp’ or a variation that helps you plow through attacks for major damage.
- Spears and Halberds: Often come with ‘Charge’, sending you dashing forward with a stabbing move—great for closing distance.
- Axes: Generally offer ‘Warcry’, boosting attack power for a short period.
- Daggers: Not just for backstabbing; Weapon Arts here often focus on quick step maneuvers for fast repositioning.
Weapon Arts By Example
Let’s break down a few fan favorites to show how these skills can shape your playstyle:
- Lothric Knight Sword (Stance): Hit L2, then R2 for a long-reaching thrust. Perfect for poking armored foes from a safer distance.
- Claymore (Stomp): L2 anchors you in a bracing stance; follow up with R2 to knock enemies off their feet. The brief “super armor” can save you from being interrupted.
- Uchigatana (Hold): Use L2 to prep, then unleash a fast, strong attack. It can’t be parried, making it useful in PvP.
- Great Club (Warcry): L2 boosts your attack for a bit and changes your strong attack animations to wilder swings.
- Sunlight Straight Sword (Oath of Sunlight): L2 gives you and allies around you an attack and defense buff for 60 seconds—a staple for co-op.
Shields and Their Weapon Arts
It’s not just offensive weapons—some shields come with Skills, too:
- Parry: The classic riposte setup; small and medium shields often have this.
- Weapon Skill: Several light shields (like the Silver Eagle Kite Shield) allow you to use your main-hand Weapon Art instead of parrying. These are great if you want to keep your shield up but still access your weapon’s special ability.
Tips for Using Weapon Arts
- Know Your Moves: Every Weapon Art has a purpose. Test them out in a safe area (like Firelink Shrine) so you’re not caught by surprise.
- Watch Your FP: If you’re relying on Weapon Arts, consider investing in Attunement for more FP or equipping Ashen Estus Flasks.
- Mix It Up: In PvP, Weapon Arts can catch aggressive players off guard, especially moves with hyper armor or unpredictable timing.
- Timing Matters: Many Weapon Arts have long windups. Use them when you can predict enemy movement or after you’ve forced a whiff.
- Buffs Stack: Some Weapon Arts stack with other buffs, but not all. Learn your weapon’s specifics for maximum effect.
When (and When Not) to Use Weapon Arts
Weapon Arts work best as powerful openers, punishes for whiffed enemy attacks, or finishers. That said, don’t spam them blindly—they're often predictable and leave you wide open if blocked or dodged. Also, burning through all your FP can leave you without access to magic or weapon skills at key moments.
Choosing Weapons Based on Weapon Arts
Sometimes, the Weapon Art is what makes a weapon truly shine. When picking your loadout, think about how the Weapon Art meshes with your build. Do you want a defensive buff, a big burst of damage, or a mobility tool? Some skills, like the Oath of Sunlight buff, can even turn the tide in boss battles or co-op.
Conclusion
Weapon Arts add a welcome layer of tactical depth to nearly every playstyle in Dark Souls III. Knowing how they work—and when to use (or avoid) them—will give you an edge in both PvE and PvP. Take the time to learn the ins and outs of your favorite weapons’ skills, and you’ll find new ways to approach every fight.
Parrying and Ripostes
Out of all the advanced combat tools in Dark Souls III, parrying holds a special place. A well-timed parry can instantly flip the script, letting you punish even the toughest foes with a devastating riposte. Mastering these mechanics is a rite of passage for many players. Whether you want to outplay invaders in PvP or confidently counter enemy knights, understanding parries and ripostes can make a massive difference in your journey.
What is Parrying?
Parrying is a defensive maneuver that instantly staggers certain enemy attacks, opening them up for a critical counterattack (riposte). In essence, it’s a high-risk, high-reward move: you swing your shield, weapon, or hand at exactly the right time to deflect an incoming blow. If you're successful, the attacker is knocked off balance and you get a free, super-powerful attack. If you mistime the parry, you're likely to eat the full brunt of the attack—and possibly more.
How to Parry
- Basic Input: Press L2/LT (on most controllers) with a shield, parrying dagger, caestus, or bare hand in your left hand.
- Timing: Hit the parry button just as the enemy’s weapon is about to land; each parry tool has a set number of “startup” frames, so the window varies by equipment.
- Parry-able Attacks: Not every hit can be parried! Standard swings and thrusts from humanoid enemies and players typically can be, but many larger enemies, monsters, and special attacks cannot. Experiment and learn which attacks are safe for parrying.
Parry Tools and Their Differences
Some shields and off-hand weapons are designed specifically for parrying:
- Small Shields (e.g., Buckler, Target Shield): Feature a wider parry window—great for beginners.
- Medium Shields (e.g., Knight Shield): Narrower window, but more of a defensive option.
- Parrying Dagger and Caestus: Even faster parry animations; very popular in PvP thanks to the high speed.
- Bare Fist (with Parry skill): Fastest parry window, but leaves you vulnerable otherwise.
You can’t parry with greatshields or most heavy weapons. Keep in mind: if your off-hand has the “Weapon Skill” skill (seen on some shields), L2 will activate your main-hand Weapon Art, not parry.
Visual and Audio Cues
When you parry successfully, the enemy flashes and staggers with a distinctive metallic clank sound. The easiest enemies to practice on early are Lothric Knights, as their attacks are clear but not too punishing during early game.
Ripostes: The Follow-Up Attack
Landing a parry isn't the end; the real reward is the riposte. After a successful parry, the enemy will slump forward, open to a critical attack.
How to Riposte
- Stand close to the staggered enemy.
- Press the light attack button (R1/RB) with your right-hand weapon.
- You’ll perform a special animation with extra damage, often more than a backstab. This only works within a brief window (about one second after the enemy is parried).
Riposte Damage
Riposte damage is influenced by your weapon’s critical stat. Daggers, rapiers, and some thrust swords have higher critical modifiers, making them ideal for maximum riposte punishment. For example, using a Bandit’s Knife or Estoc for ripostes can obliterate many regular foes and human invaders with a single blow.
Limitations and Risks
- You can't riposte every enemy, but most humanoid enemies and all players are fair game.
- Bosses typically can’t be riposted after a parry, with a few exceptions (like Champion Gundyr).
- Mistimed attempts can leave you open to a heavy hit—so don’t get greedy!
Parrying in PvP vs PvE
PvE (Single-Player/Co-op)
- Most swordsmen, knights, and human enemies are viable parry targets.
- Learn enemy attack patterns; many have obvious windups or “tells” that make parrying easier.
- Some enemies fake attacks to bait out a premature parry—stay patient.
PvP (Player vs Player)
- Human opponents are unpredictable. Players can mix up the timing and delay attacks (“delay swings”) to bait out parries.
- Lightweight parrying tools (parrying dagger, caestus) are popular since speed is key.
- Repeated parry attempts can quickly turn the tide – or leave you wide open.
- Watch for common “parryable” moves: running attacks, predictable combos, and most R1 spam.
Tips for Getting Better at Parrying
- Practice on Slow Enemies: Lothric Knights and hollows are ideal for learning timing.
- Stick to One Parry Tool: Learn the startup frames and get comfortable before experimenting.
- Don’t Mash: Parry windows are short; spamming the button will almost always fail.
- Bait and Punish: In PvP, try baiting with obvious openings, then punish with a fast parry.
- Stay Calm: Panic parries rarely work; wait for that perfect moment.
Common Mistakes
- Parrying everything: Not all attacks can be parried, and some enemies will punish failed attempts harshly.
- Getting greedy: Missing once or twice is fine, but don’t turn it into a pattern. Adapt your strategy if a foe keeps faking you out.
- Standing too far: Ripostes only work up close. After a successful parry, be ready to follow up right away.
Conclusion
Parrying and ripostes provide a risk-versus-reward layer for aggressive defenders. Mastering these moves takes patience, lots of failures, and a good sense of timing, but the payoff is one of the most satisfying feelings in Dark Souls III. With steady practice, you’ll knock aside lethal attacks and turn tense moments into comeback victories. Keep honing that timing, and soon you’ll make parries look easy—even against the toughest rivals. Magic and Miracles in Dark Souls III open up powerful options outside the usual swords and shields. Whether you’re slinging fireballs or calling down lightning, spellcasting can change the flow of battle and expand your build possibilities. Here’s what you need to know about bending reality to your will.
Types of Magic
Magic in Dark Souls III gets split into three main categories—each with its quirks, strengths, and weaknesses.
Sorceries
- Stat requirement: Intelligence (INT)
- Catalyst: Staffs
- Typical spells: Soul Arrows, Crystal spells, magic weapon enchants
Sorceries are all about ranged attacks and utility. They use blue FP (Focus Points) and scale mainly with your Intelligence stat. Great for laying down damage from a distance or buffing your weapons with magic.
Pyromancies
- Stat requirement: Intelligence (smaller scaling), Faith (main scaling)
- Catalyst: Pyromancy Flame
- Typical spells: Fireballs, flame arcs, toxic mists
Pyromancies sit in the middle ground. They use both Intelligence and Faith for higher damage, but you can start with just one and still get results. Pyros often rely on fire attack spells and status effects.
Miracles
- Stat requirement: Faith (FTH)
- Catalyst: Chimes or Talismans
- Typical spells: Healing, buffs, lightning attacks
Miracles are focused on support and lightning damage. Healing, self-buffs, and spear-like bolts all live here. For pure spell support or lightning slinger, Faith is your go-to.
Casting Basics
How to Cast
- Equip a catalyst in your hand—staff for sorceries, flame for pyromancies, chime/talisman for miracles.
- Slot spells at a bonfire. Find the "Attune Spell" option and choose your favorites—the number of slots available depends on your Attunement stat.
- Spend FP. All spells consume FP, so keep an eye on your blue meter.
- Press your cast button (usually R1/RB with catalyst in hand). The spell will launch so long as you have enough FP.
Focus Points and Ashen Estus
Spells drain your FP bar. You recover FP by drinking Ashen Estus Flasks (separate from the regular Estus that heals HP). If you’re planning to cast often, allot more Ashen Estus with the blacksmith or at a bonfire.
Spell Slots
Attunement increases the number of spells you can take into battle. Low Attunement means fewer slots; higher lets you wield a toolkit of spells, buffs, and heals.
Learning New Spells
You’ll find or unlock new spells as you adventure:
- Vendors: Characters like Orbeck of Vinheim (sorcery), Cornyx of the Great Swamp (pyromancy), or Irina of Carim (miracles) sell spells.
- Scrolls/Tomes: These key items expand vendors’ inventories. Give scrolls to Orbeck, tomes to Cornyx or Irina to access advanced spells.
- Pickups: Some spells are hidden as loot in the world or dropped by enemies.
Scaling and Damage
Each type of magic scales with its preferred stat:
- Sorceries: Intelligence boosts spell power. Staff catalysts have an “Int scaling” letter rating.
- Pyromancies: Scale with both Intelligence and Faith, but you’ll see major jumps once both are above 20-25.
- Miracles: Faith increases miracle damage and healing. Chimes/talismans have “Fth scaling.”
Upgrading your catalyst at blacksmiths also improves spell strength, so always invest titanite in your chosen casting tool.
Spell Categories
Here’s a closer look at what each group offers:
Sorceries
- Missile spells: Soul Arrow, Great Soul Arrow, Farron Dart—ranged, fast projectiles.
- Area spells: Soul Greatsword, Crystal Hail, apply pressure on groups or slow foes.
- Buffs: Magic Weapon, Crystal Magic Weapon—coats weapons with magic, boosting damage.
- Utility: Spook (silent walking), Hidden Body (stealth), useful for avoiding enemies or PvP.
Pyromancies
- Fireballs: Standard, great for punishing aggressive enemies.
- Area effects: Firestorm, Chaos Bed Vestiges, roll-catching and crowd clear.
- Status infliction: Poison Mist, Toxic Mist, for wearing down enemies from behind cover.
- Buffs: Iron Flesh or Flash Sweat, temporary defensive perks.
Miracles
- Healing: Heal Aid, Med Heal—for yourself and sometimes co-op buddies.
- Lightning: Lightning Spear, Great Lightning Arrow—excellent range and boss damage.
- Buffs: Sacred Oath, Tears of Denial (second-chance effect, saves from lethal hit).
- Barriers: Magic Barrier, resistance buffs against elemental attacks.
Miracle and Spell Buffing
Certain rings, items, and catalysts boost spell power:
- Young Dragon Ring / Bellowing Dragoncrest Ring: Sorcery damage up.
- Great Swamp Ring / Witch Ring: Pyromancy boost.
- Ring of the Sun’s First Born / Lightning Clutch Ring: Miracle damage up.
- Morion Blade, Crown of Dusk: More niche items for serious spellpower builds.
Applying these to your caster amplifies damage, but keep in mind that some have drawbacks (like lower defenses).
Casting Speed
Casting speed is affected by your Dexterity stat. If you want to fire off spells quicker, bump DEX to 30-40. It won’t make spells instant, but it’s noticeable with longer-cast moves.
Pitfalls and Spellcasting Tips
- FP management matters. Going out of mana mid-fight leaves you in trouble.
- Watch your stamina. Rolling out of casts eats stamina; don’t leave yourself empty.
- Keep backup weapons. Some areas and enemies resist magic. A backup sword or axe helps.
- Mix up spell types. Relying on one spell gets predictable in both PvE and PvP.
- Miracle healing in PvP is risky. Most healing spells are slow—use them when safely hidden.
PvP and PvE: Spell Strategies
PvE
- Control groups: Area spells and fireballs chunk packs of enemies.
- Bosses: Projectile and buff spells can make boss fights less painful—especially if you stay agile.
- Survivability: Miracles’ heals and Tears of Denial add breathing room for newer players.
PvP
- Mix up speed and range: Combine fast spells with heavy hitters to throw off opponents.
- Bait rolls: Slow-cast spells (Great Chaos Fire Orb) prompt dodges; punish with quick follow-ups.
- Never spam one spell: Good players catch on fast in duels.
Conclusion
Magic and Miracles aren’t just an alternative to swords, they’re a full-fledged playstyle. Whether you’re blasting enemies from afar, patching up your wounds, or layering on buffs, spellcasting adds layers to every fight—if you master resource management and timing. Try out some spells early. You might find that the power of the arcane fits your combat style perfectly. Stamina is your ticket to survival in Dark Souls III. It controls every swing, block, roll, and sprint, making good stamina habits the baseline of combat. Poor stamina decisions often mean a quick trip back to the bonfire. Let’s break down how stamina works, what drains it, and smart ways to keep it in the green when it matters most.
What is Stamina and Why Does it Matter?
Your stamina bar—the green meter beneath your health—depletes every time you attack, block, dodge, run, or even kick. Run out, and you can’t perform core actions until it refills. In a game famous for punishing mistakes, swinging recklessly or rolling on empty is an invitation to disaster.
Unlike health, stamina refills on its own after you stop acting. But you’ll want to maximize both your total stamina and how you spend it throughout a fight.
Actions that Drain Stamina
Attacking
- Light attacks: Drain less stamina, but rapid swings add up fast.
- Heavy attacks: Use more stamina, especially with big weapons.
- Dual-wielding or power-stancing: Each hand costs separately.
- Weapon Arts: Most skills eat a chunk of stamina (in addition to FP, if applicable).
Defensive Moves
- Blocking: Holding up your shield drains stamina as you absorb hits. A blocked hit costs stamina based on your shield’s stability and the enemy’s attack power. If stamina hits zero while blocking, your guard breaks, leaving you wide open.
- Rolling/Backstepping: Each evasive move costs stamina, even without carrying heavy gear.
- Parrying: Initiating a parry has a small stamina cost.
Movement
- Sprinting: Even running isn’t free; long sprints slowly chip away at stamina.
- Jumping: Jumping (while sprinting) uses extra stamina.
Factors Affecting Stamina
Several stats and factors affect your green bar:
Endurance
Endurance directly boosts your maximum stamina. Most builds benefit from raising Endurance to 20-25, with melee-focused characters sometimes pushing higher. After 40, stamina gains slow down so consider your weapon and armor choices before pumping any higher.
Equip Load
Your current equip load doesn’t impact stamina directly, but a heavy load makes your rolls slower and longer rolling chains tougher to sustain before emptying your bar.
Armor and Rings
- Ring of Favor: Raises max stamina (along with HP and equip load).
- Chloranthy Ring: Increases stamina recovery speed, making it a favorite for all playstyles.
- Grass Crest Shield: Even on your back, this shield raises stamina recovery.
Buffs like Green Blossom also grant faster stamina recovery for a limited time, handy for tough bosses or PvP.
Tips for Smart Stamina Use
Don’t Go to Zero
Always keep a little stamina in reserve. If you spend everything attacking and a boss attacks, you won’t be able to dodge or block. Get in the habit of leaving a quarter-bar unused so you’re never truly stuck.
Learn Attack Patterns
Many bosses force you to react quickly. Rather than emptying your stamina with a flurry of blows, strike once or twice, then see what your enemy does. Safe habits lead to more consistent victories.
Mind Your Recovery
After attacking, stamina refills faster if you’re not holding block or sprint. Lower your shield between attacks when possible, and avoid unnecessary running. Also, don’t chain rolls unless you truly need the distance—multiple dodges can drain you dangerously low.
Stay Light
A lower equip load (less than 70% of your max) means faster rolls, so your stamina gets you further! If you’re wearing heavy gear, you’ll find yourself unable to roll as often before running dry. Sometimes a lighter armor setup outperforms pure defense.
Use Stamina-Boosting Gear
Before tackling difficult bosses or PvP encounters, equip stamina recovery items and rings. You’ll notice shorter downtime between actions, letting you stay on the offensive or get out of trouble faster.
Common Mistakes
- Over-committing: Button-mashing feels good, but it’s a trap. The best players pace their attacks.
- Blocking everything: Blocking non-stop refills stamina slower. Mix in dodges or lower your guard.
- Neglecting Endurance: Some focus only on strength or dexterity. Without enough Endurance, big weapons or relentless casting will leave you empty mid-battle.
Adapting for Different Builds
- Melee: Higher Endurance is a must. Two-handers need even more stamina for big swings.
- Magic/Hybrid: Don’t ignore stamina. Every spellcast, roll, or melee follow-up costs stamina. Lightweight armor and stamina gear let you reposition quickly while waiting for FP to refill.
- Shield-users: Focus on stability and stamina recovery to avoid guard breaks.
Final Thoughts on Stamina
Good stamina habits separate seasoned Ashen Ones from the undead masses. Mastering when to strike, when to run, and when to hold back turns even the toughest boss into just another hurdle. With some smart management and the right gear, stamina turns from a nagging limitation into your most reliable resource.
Boss Weakness Guide
Bosses in Dark Souls III hit like freight trains, but each one has at least one soft spot you can use to tilt the odds. Knowing these weaknesses—be it elemental, status effect, or a particular weapon type—makes fights smoother and helps set your strategy. Here’s a clear look at how to spot and exploit boss weak points, plus a breakdown of many major bosses and what works best against them.
Types of Boss Weaknesses
Bosses can be susceptible to more than just raw damage. Here are the main categories to consider:
- Elemental Damage: Fire, lightning, magic, and dark each have separate resistances. Infuse weapons or use resins to add extra elemental punch.
- Status Effects: Bleed, poison, frostbite, and toxic effects. These build up through repeated hits and trigger a nasty debuff on most targets—if they aren’t immune.
- Physical Damage Types: Thrust, slash, and strike all do different kinds of physical harm. Some armored enemies hate strike weapons; some fleshy foes are weak to slash.
- Weapon Buffs & Spells: Magic weapon, lightning blade, and similar spells let you tailor your damage to a boss’s weakness on the fly.
- Other: A few have unique vulnerabilities, like to parrying or critical hits after breaking posture.
Major Boss Weaknesses and How to Exploit Them
Below is a rundown of major bosses and solid tips for finding (and hitting) their weak spots.
Iudex Gundyr
- Weakness: Fire, Frostbite
- Tips: Firebombs and fire-infused weapons chunk away his health. Early game frostbite options, like Vordt’s weapon, also work.
- Extra: Can be staggered with sustained heavy attacks.
Vordt of the Boreal Valley
- Weakness: Fire, Bleed, Lightning
- Tips: Firebombs and an infused straight sword help. If you’re running bleed, Vordt can be afflicted with enough quick hits.
- Beware: Don’t stand in front of his charge; circle around and keep pressure.
Curse-rotted Greatwood
- Weakness: Strike, Fire (on exposed limbs)
- Tips: Aim for the sacs/cysts on its arms and body. Clubs, maces, or other strike weapons bust these fast. Fire also burns its weakness points.
- Extra: Try to hit multiple weak spots in one combo when it falls.
Crystal Sage
- Weakness: Physical, Fire
- Tips: Sages are squishy. Get close, use fire spells or a sword, and watch for clones in phase two.
Deacons of the Deep
- Weakness: Fire, Thrust
- Tips: Thrusting weapons pierce their robes; fire spells or a flame-infused weapon clear out groups quickly.
- Trick: Attack the red-glowing Deacon to progress the fight.
Abyss Watchers
- Weakness: Lightning, Bleed, Frostbite
- Tips: Any bleed weapon—like the Bandit Knife—can stack the effect. Lightning also hits hard in both phases.
- Caution: The second phase hits harder.
High Lord Wolnir
- Weakness: Holy, Light (use Blessed weapons or miracles)
- Tips: Hitting the bracelets on his arms deals massive damage; stick with strike weapons for bigger chunks. Holy damage really hurts him.
Pontiff Sulyvahn
- Weakness: Fire, Lightning
- Tips: Firebombs, pyromancies, or fire-infused swords are your friend here. Lightning does good damage as well.
Aldrich, Devourer of Gods
- Weakness: Fire, Lightning
- Tips: Stay close to bait his melee attacks and punish with fire. Lightning also does extra damage but watch out for his projectile spam.
Yhorm the Giant
- Weakness: Storm Ruler sword (special weapon in the boss room)
- Tips: Don’t bother with standard weapons; charge the Storm Ruler and unleash wind slashes while dodging his swings.
Dancer of the Boreal Valley
- Weakness: Dark, Lightning, Bleed (moderately)
- Tips: Infuse weapons with lightning. Dark sorceries or hexes also work, as does consistent bleed buildup—but watch for slow, sweeping attacks.
Dragonslayer Armour
- Weakness: Lightning, Frostbite
- Tips: Irony: dragonslayer hates lightning. Infuse weapons for best results. Frostbite also chips a chunk of his health.
Nameless King & King of the Storm
- Weakness: Lightning (King of Storm), Fire / Dark (Nameless King)
- Tips: Use lightning against the first phase. In phase two, swap to fire or dark weapons.
Soul of Cinder
- Weakness: Lightning, Disease (in phase two)
- Tips: Lightning and bleed work in both phases; poison and toxic are useful for patience players.
- Note: Be ready to adapt, as his attack patterns change rapidly.
Status Effects and Immunities
Not every boss can get poisoned, bled, or frozen. Here’s how common status effects work on most bosses:
- Bleed: Great against living things like Abyss Watchers, Pontiff, and the Dancer. Useless on most skeletons or undead giants.
- Poison/Toxic: Rarely effective, mostly against humanoid bosses.
- Frostbite: Vordt and Dragonslayer Armour are particularly susceptible. Most fire-based or undead enemies shrug it off.
Check your weapon for its innate status build-up and plan accordingly. Bosses resistant to one status usually fall to others—mix up your arsenal if your usual favorites stall out.
How to Find a Boss’s Weakness Yourself
- Watch for Damage Numbers: Red numbers mean weak spots! Experiment with different damage types on your first attempts.
- Lore Hints: Sometimes in-game item descriptions or dialogue will hint at a boss’s background (e.g. fire-hating).
- Summon Signs: Some summon NPCs have items or elements hinting at which weakness to try.
- Online Messages: Community notes often tell the truth. Sometimes.
Quick Reference Boss Weakness Table
| Boss | Weakness | Quick Note | |------------------------|----------------------|---------------------------------------------------| | Iudex Gundyr | Fire, Frostbite | Staggers easily | | Vordt of the Boreal | Fire, Bleed, Lightning| Circling keeps you safe | | Curse-rotted Greatwood | Strike, Fire | Target limb cysts | | Crystal Sage | Fire, Physical | Clones in phase 2 | | Deacons of the Deep | Fire, Thrust | Burn through crowds | | Abyss Watchers | Lightning, Bleed | Bleed is fast | | High Lord Wolnir | Holy, Strike | Destroy bracelets | | Pontiff Sulyvahn | Fire, Lightning | Dual-wield phase | | Aldrich | Fire, Lightning | Watch for arrows | | Yhorm | Storm Ruler only | Only sword matters | | Dancer | Dark, Lightning | Bleed helps | | Dragonslayer Armour | Lightning, Frostbite | Lightning most effective | | Nameless King | Lightning (Phase 1), Fire/Dark (Phase 2) | Switch elements per phase | | Soul of Cinder | Lightning, Bleed | Be versatile |
Final Thoughts: Winning with Boss Weaknesses
Tuning your setup to hit a boss where it hurts can speed up tough encounters and save precious Estus. Stock up on resins, try elemental infusions, and don’t be afraid to swap weapons mid-fight. Most weaknesses don’t make a fight easy—but they give you the edge, and sometimes that’s all Dark Souls III is about. Keep notes as you play, and soon you’ll have your own go-to loadout for every boss, no wiki needed.