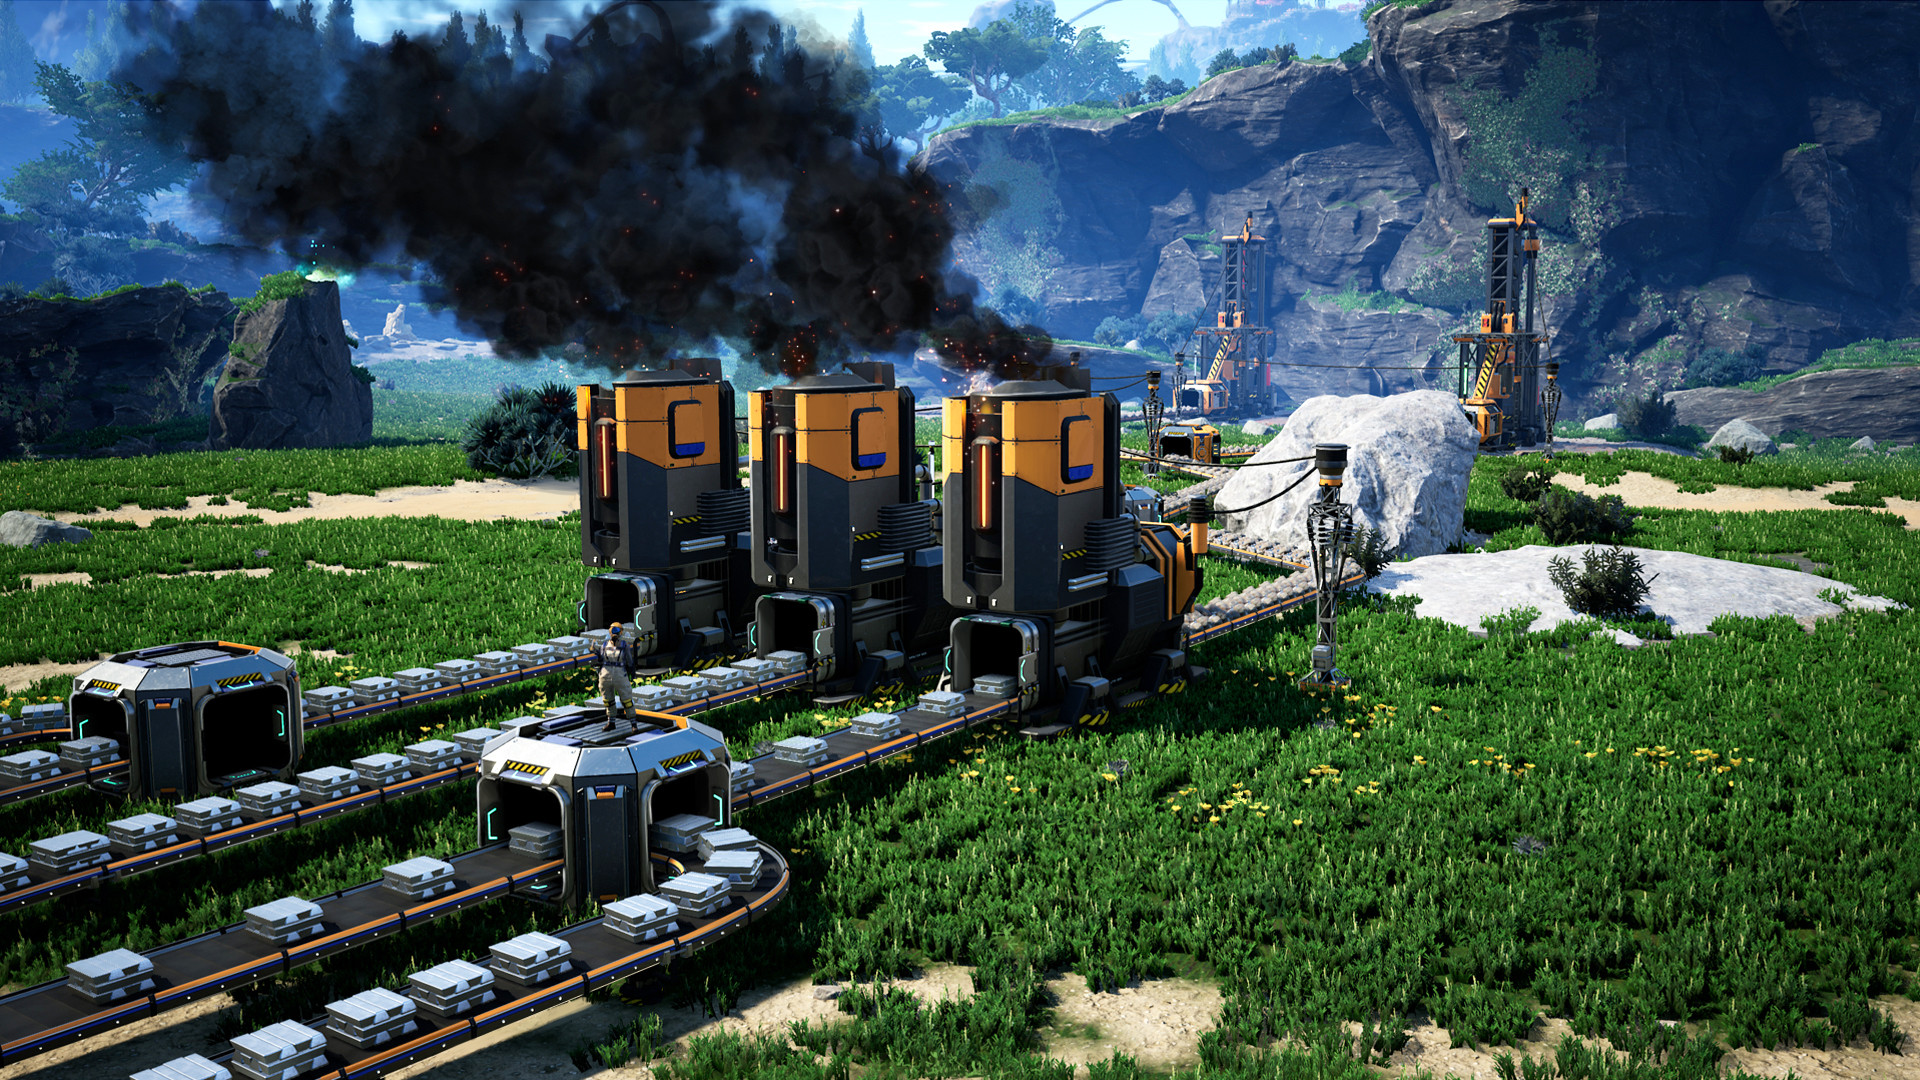
Satisfactory: Advanced Factory Building Guide
Master advanced factory building in Satisfactory: optimize nodes, streamline production, master logistics, manage power, and strategically expand.
Building factories in Satisfactory often starts simple enough, but soon enough, managing supply lines and optimizing efficiency can become surprisingly complex. Once you've moved past basic layouts and mastered the fundamentals, taking the next step to more advanced factory planning means tackling bigger logistical puzzles and smarter design strategies. Advanced building involves not just scaling your factory, but doing it in a way that's neat, practical, and sustainable in the long term. Many players find themselves hitting a point where their sprawling production lines become unwieldy, requiring a thoughtful redesign to move forward. Fortunately, building better factories doesn't require guesswork--just some solid tips and practical experience from folks who've already tackled these challenges.
Understanding Resource Nodes: The Heart of Your Factory
At first glance, resource nodes are just spots where iron, copper, or limestone pop out of the ground. Easy, right? But as your factory expands, these locations become important reference points that shape your factory's entire layout. Advanced players don't just toss down mining machines and conveyor-belts at random--they use the positions of these nodes strategically. Where resources start determines efficiency, ease of expansion, and how many headaches pop up later.
So before slinging down your first miner MK2 or MK3, take some time to map out resource locations around your chosen building area. Sure, it feels slow, but ten minutes spent checking resource locations can save you hours of frustration later.
Nodes and Purity: Not All Resources Are Created Equal
Each resource node you'll find in Satisfactory has its own purity grade: Impure, Normal, and Pure. Here's the quick version of that difference:
- Pure Nodes: High-output nodes that generate resources quickest, great for running multiple production lines.
- Normal Nodes: Standard output--most common type, balancing output speed and ease.
- Impure Nodes: Lowest output speed--usable but might bottleneck quickly as your factory grows.
Your strategy must consider purity carefully. For example, one Pure iron node paired with high-tier miners and conveyor belts can often supply multiple smelters without bottlenecks. Impure nodes, on the other hand, limit your growth. You'll likely need more miners spread across multiple nodes--even if they're far apart--to support production. Planning around purity and location is essential for keeping things running smoothly.
Clustering Nodes: Keep Resources Organized
Once you know what resources you have and their purity, look for clusters. Resource clusters are groups of nodes hanging out near each other, making them ideal building sites. Factories benefit by organizing sections around node groups. A cluster of iron nodes could feed into your steel beam and pipe production, while copper clusters support wiring and circuit production.
Clustering helps control the chaos. As the game progresses, factories become spiderwebs of conveyors crossing over one another--unintentionally creating spaghetti conveyors that take forever to untangle. By laying production out around resource node clusters, you'll reduce overlap, improve clarity of workflow, and simplify your conveyor-belt highway.
Smart Expansion: Build With the Future in Mind
Factories aren't static--you're constantly expanding as you unlock new technologies. Once you've pinpointed resource nodes and clusters, reserve space around them. Seriously, fence it off if you need to. When new recipes come along, you'll thank yourself for having room to add more machines without reorganizing the entire factory layout.
Another great tactic: consider verticality. Iron, copper, limestone, coal--they can all be mined at ground-level, then moved upward into factories positioned above. Stacking vertically, creating elevated network belts or building vertically-oriented factories, frees ground level space, easing congestion around resource nodes. Build with room on all sides--vertically too--so your factory can grow naturally, instead of painfully reorganizing later.
Long-Distance Logistics: Don't Be Afraid to Move Resources
Not every resource node is conveniently placed close to your main factories. Whether you're eyeing bauxite, coal, or quartz--critical materials can be annoyingly far away. Don't worry: lengthy transportation networks can solve this easily if you plan correctly.
For far-flung resources, consider building small outpost factories at the node itself. Pre-processing materials nearby (like refining copper or aluminum further out) reduces loads you'll have to transport home. After refinement, centralized transport methods such as trains or conveyors let you route neatly and efficiently. Spending time figuring out logistics early means less conveyor spaghetti and significantly smoother factory growth.
Choosing the Perfect Location: Environment Matters
Finally--before miners ever crank rumbling drills into the ground--think about your base location's surroundings. Is it flat enough for large-scale expansion? Is there water nearby for power generation and later-stage liquid handling? How difficult is it to navigate and transport through the terrain?
The environment around nodes matters just as much as nodes themselves. Open, flat spaces near nodes let you design beautifully organized factories, keeping everything accessible and tidy. On the other hand, dense forests, steep hills, and cliffs can become logistical nightmares. Be selective around resource nodes--not just for what's in the ground but for how well-suited the spot is to your long-term factory goals.
Wrapping Up: Nodes Matter--Think Ahead
It pays off to think carefully about your resource node placements before you put down a single belt or machine. Node positioning and purity set the stage for everything that comes next. Prioritize clustering, leave plenty of space for future machines and expansions, and be prepared to transport materials if nodes aren't conveniently grouped. A bit of thinking ahead at this stage prevents messy rebuilds later, letting you focus on what really matters--building a factory that's efficient, organized, and a genuine pleasure to run.
Streamlining Production Chains: Keep Your Assemblers Fed
Balancing a production chain is like keeping plates spinning: miss one, and the whole show goes south fast. Machines starved of resources quickly grind your production to a halt, while others overflow and create backups choking your factory. To dodge this frustration, it helps to think in clear, discrete steps: input, production, and output--each stage smoothly flowing into the next without spills or slowdowns.
Start by matching your miner's output rate exactly to what your smelters or constructors need. A quick refresher: check each machine's details panel to find exact input/output rates and tailor your conveyor speeds accordingly. For example, a miner outputting 240 iron ore per minute fits perfectly into eight smelters consuming 30 ore each (giving you 240/minute). Now you've neatly avoided bottleneck problems right from the start.
Always double-check production ratios before building. Websites or tools like the Satisfactory Calculator help you plan chains precisely. Plug in your target product, and you'll quickly see precisely how many machines (and what tiers) to set up. Why do this? Simple--when everything flows without interruption, production clarity improves, belt spaghetti shrinks, and annoying manual corrections disappear.
Splitting and Merging Belts: Achieve Perfect Balance
Belts are lifelines of your entire factory, carrying resources from miners to assemblers. Smart splitting and merging of belts help control exactly how much of each resource flows where.
Splitters evenly divide resources across multiple machines. Let's say you've got 120 copper ore per minute incoming. Use a splitter to divide this into four equal lanes of 30 copper ore per minute to feed four smelters. Pretty straightforward, right? And if you add extra machines later? Simple--extend from extra splitter outlets rather than rebuilding belts completely each time you expand.
Likewise, Mergers combine outputs from multiple machines into one unified stream. Let's take those four smelters again. Each is now outputting 30 copper ingots per minute. Use mergers to recombine these into a single 120-per-minute lane heading toward your next production stage.
The power of splitters and mergers becomes obvious as factories grow more complex. Regularly use these to maintain smooth material flows, evenly share resources, and minimize backups. The result: No more machines idly waiting for ingredients--they continuously hum along at peak efficiency.
Buffer Storage: Handle Overflow Wisely
No matter how precisely you balance your factory, hiccups are inevitable. Temporary shortages or sudden overloads happen. That's why buffer storage containers are so useful--they help manage factory stability.
Place buffer containers strategically between production stages, like between your smelters and constructors. Storage lets excess materials accumulate safely rather than backing up conveyors and stalling your machines. If downstream production briefly slows because you're tweaking assemblers or experimenting with new recipes, buffered storage provides materials instantly when production resumes.
Storage containers also simplify maintenance. While you're rearranging factory segments, your storage buffers protect against shortfalls elsewhere in the factory. Smart positioning means fewer headaches when you change or improve factory setups later on.
Dedicated Production Lines vs. Modular Designs
Efficient factory design comes in two flavors: dedicated production lines or modular setups. Each has strengths, so pick the method matching your style and how easily you want to manage expansions.
Dedicated Lines: Simpler, Specialized
Dedicated lines produce a single product or closely-related group. One clean line converts iron ore into iron plates, and another separate line churns out screws. Dedicated setups make troubleshooting easy--if plates halt production, the culprit will likely be somewhere readily identifiable, like a blocked conveyor or stalled constructor. They're easy for first-time optimization but can be limiting when adding new recipes that may require inputs from multiple sources.
Modular Designs: Flexible, Powerful, Complex
Alternatively, consider modular setups that handle resource refining and intermediate goods separately. One "Iron Refinery" module, for example, might smelt ore and store ingots centrally. Other production modules dedicated to screws, plates, or reinforced iron parts draw from this centralized pool of ingots. Modules offer flexibility--it's easier to integrate new products or recipe combinations because you simply add modules rather than entire production lines from scratch.
Modular designs demand careful planning, belt balancing, and routing, resulting in some complexity upfront. But the payoff is huge later: simplified expansions and new product recipes slot neatly into existing factory frameworks.
Ultimately, choose the style fitting your playstyle: dedicated, modular, or a mix. Just remain consistent--stick to whichever system suits you best to keep your efficiency up and frustrations low.
Production Speed Matching: Tiering Up Smartly
Machines don't upgrade themselves, so as you unlock higher-tier belts, miners, and assemblers, carefully upgrade components gradually throughout your factory.
Rather than upgrading randomly, aim to upgrade entire chains simultaneously--starting from miners through intermediate machines, and finally into assemblers. Why? It's all about maintaining ratios. If you slap a high-speed miner on without updating downstream machines, resource backups instantly sabotage efficiency gains.
Let's say you've unlocked conveyor MK4 belts that handle 480 items per minute, and your miner can now push ore at this pace. Immediately upgrade conveyors and processing machines after the miner to avoid potential downtime or overflow. Check your production calculations each time you switch to a new conveyor or machine tier. Keep upgrading consistently across chains, and you reap the efficiency boosts promised--rather than creating unintended chokepoints and slowdowns.
Managing Power Distribution: Avoid Factory-Wide Blackouts
With expansion comes more power-consuming machines. Running out of power can catastrophically halt your operations until you manually restart the generators. Track your consumption closely by regularly checking power graphs in your power poles or generators.
Splitting your power grid helps minimize risk. Consider independent grids powering separate factory modules or clusters. If one segment overloads, at least it doesn't shut down your entire factory. Backup biomass burners or later-game batteries and power storage buffers also help manage unexpected peaks in usage and keep everything online.
Lastly: build with backup connections. Redundant cabling means a single power pole demolition won't cripple your factory entirely. Always route backup cables--they'll protect against outages and help keep your factory smoothly humming along.
Production Optimization Wrap-Up: Stay Efficient, Reduce Headaches
Factory optimization isn't about fancy designs--it's about letting your machines run without stumbling. Match your production speeds carefully, manage overflow wisely through buffer storages, and keep backups ready for power problems. Most importantly, pick a build style you're comfortable using, because you'll be dealing with expansions and changes frequently. Keep everything smoothly fed and powered--and you'll keep your factory clean, efficient, and hugely satisfying to manage as you grow your Satisfactory empire.
Power Management: Keeping Your Factory Energized and Stable
In Satisfactory, machines live and die by your power grid. Keeping everything humming requires more strategy than simply throwing down generators and powering them on. If you want your factory to grow steadily without dreaded blackout headaches, you'll need smart power management.
Let's break it down simply: first, we'll look at power generation options and how to choose between them; next, we'll cover how to monitor your usage; then we'll discuss balancing supply and demand effectively. Finally, we'll touch on setting contingency systems that prevent frustrated, powerless situations.
Choosing Your Energy Sources: Fueling Your Factory Smart
Early in your game, biomass burners run everything. But these starter generators get old fast. They're manual, consuming biomass you've painstakingly gathered--wood, leaves, alien carapaces--all good for getting established but too much of a chore in long-term play.
As you progress, better power becomes available:
-
Coal Generators: Once unlocked, these are your early-game heroes. Coal offers reliable automation. Paired with dedicated water extractors, coal burners run nonstop without constant babysitting. Be sure to place generators near water sources for easy pipe hookups, and bring coal on conveyors from your miners. Coal setups can easily power mid-tier factories, handling your initial automated production.
-
Fuel Generators: Later, you’ll get access to oil production. Fuel generators provide more energy per machine, but require crude oil extraction and refining first. An advanced setup supplies a ton more energy compared to coal, supporting aggressive expansions of power-hungry machinery.
-
Nuclear Power Plants: Powerful but complex, nuclear energy means a tremendous spike in available energy--but demands careful waste management. Radioactive disposal creates new logistical challenges. Plan storage carefully and never underestimate nuclear waste. Still, a well-designed nuclear system produces vast amounts of energy for late-game, gigantic factories.
Geothermal power--which you unlock through research--is helpful and hands-off. Unfortunately, geysers can be scarce, limiting how far you can depend on it. But each geothermal generator provides significant passive energy, so always plug them into your grid whenever possible.
Understanding Power Consumption: Your Factory’s Appetite
Your power grid must always feed your machines' hunger for watts. Keep your eye on power poles and generators--these have easy-to-read charts showing consumption versus production. If your machines demand more than you're supplying, sudden blackouts will strike and shut down operations instantly.
Check usage regularly as you're expanding factory segments. Power spikes often occur when newly-installed machinery begins running. Avoid hitting your maximum capacity! Keep extra generator capacity ready so new machines don't surprise you by pushing the grid too far--for example, aim for 20-30% spare power "headroom" over your peak use whenever possible.
Balancing Supply and Demand: Smooth sailing
Ideally, your factory runs smoothly because you've balanced generation and consumption tightly. But factories rarely operate perfectly: you add machines, belts stall briefly, you construct new buildings--all this introduces energy spikes and drops.
Use these tips to stabilize your power supply:
-
Maintain Generators in Clusters: Dedicated power plants placed close together simplify power line management. Distance affects pipe and conveyor efficiency, so cluster power generators carefully near necessary fuel and water resources. Shorter conveyors equal fewer headaches.
-
Split Your Grid: Don't power your huge empire with just a single grid. Splitting factories into separate power networks--say, one network dedicated to smelting operations, another handling assembly--can keep catastrophic blackouts isolated. If one grid crashes or overloads, not everything dies at once. The rest remains online, giving you breathing room to recover.
-
Prioritize Spare Capacity: Add new generators sooner rather than later. Sure, building extra machines might cost a few more materials upfront, but it mitigates risk. Would you rather spend a few extra minutes constructing generators, or much more time restarting after total power failure? The answer's clear.
Contingency Systems: When Things Go Wrong, Stay Prepared
In Satisfactory, unexpected spikes aren't abnormal--they’re the norm. Maybe your miners unexpectedly overload your grid, or maybe you accidentally disconnect crucial water pipes. Stuff happens--so prepare backup plans:
-
Storage and Batteries: Late-game options like power storage structures offer short-term insurance. Storing extra energy in battery packs allows brief bursts of extra output if something unexpectedly draws significant power.
-
Emergency Generators: Always consider biomass burners as emergency backups, even mid to late-game. Keep burners around with reserved fuel. Then, when big machine clusters spike demand, quick manual fuel insertions can bridge gaps long enough to stabilize your grid.
-
Redundancy in Connections: Building multiple connections spanning your main generators, power poles, and factory segments reduces the risk of accidentally shutting down huge sections by deleting a single pole during rearrangements. It's tempting to build your cables tidy and minimal--but redundancy pays off if a pole gets accidentally demolished.
Keeping Your Factory Powered: Big Factories, Not Big Messes
Power management isn’t flashy--but it's absolutely essential. Pick your generators carefully, match supply to your consumption rates wisely, keep excess energy actively available, and build redundancies. A factory running smoothly on stable, controlled power is infinitely easier and more satisfying than restarting sections constantly.
Trust me--managing power proactively saves headaches. It's as simple and complex as figuring out needs, then staying just ahead of them at every stage. Done right, your factory smoothly rolls through expansions and bumps in the production process. Keep these principles in place, and you'll feel unstoppable every step of the way in your expanding Satisfactory factory.
Logistics and Transport: Keeping Your Factory Flowing
Your factory's beating heart might be its steady power source, but logistics are the arteries keeping everything pumping smoothly. In Satisfactory, handling transport efficiently is often the difference between a thriving factory and a tangled, resource-starved mess. Thankfully, with practice and patience, logistics become your best ally--not your biggest headache.
Conveyor Belts: The Backbone of Your Network
Conveyor belts are your first and most accessible transportation method in Satisfactory. They're cheap, reliable, and simple--but the trick lies in mastering their setup.
Always balance your belts carefully with your production rates: a tier-1 belt carrying 60 items per minute won't suffice if your machines churn out 120 items per minute. Generally, upgrade conveyor tiers when items start piling up. Belt tiers improve dramatically as you progress:
-
Basic (Mk.1 and Mk.2): Decent for early game metals, concrete, and coal--but rapidly outpaced by your factory's growing hunger.
-
Intermediate (Mk.3 and Mk.4): Your bread and butter. Ideal for mid-game factories as throughput skyrockets. Coal power plants, steel setups, or motors and modular frames start thriving here.
-
Advanced (Mk.5): Endgame territory. Reserved mainly for sprawling complexes, moving large amounts of aluminum products, plastics, or high-tier components swiftly between distant factory modules.
Let's talk belt management. Too often, new players weave spaghetti-like conveyor networks that quickly overwhelm the eyes. Keeping conveyor lines clean and compact saves massive headaches later:
-
Elevators & Stackable Conveyors: Don't sprawl horizontally across wide distances. Vertical conveyors lift products neatly, reducing the chaos of massive belt intersections born early in your layout.
-
Splitting & Merging Wisely: Use splitters carefully--keep balanced feeds into your machines so they're all at maximum efficiency. Split evenly when possible, but don't go wild. Similarly, mergers consolidate finished products and feed efficiently into storage or transport hubs.
Vehicles: Trucks, Tractors, and Automated Routes
Belts aren't the only option--vehicles transport items quickly and force fewer layout restrictions. Unlike belts, trucks and tractors follow player-made paths you record yourself. While these take more initial time to set up, they're fantastic when resources are distant or conveyor belts become tedious to route.
Before you get starry-eyed over trucks, consider their trade-offs:
-
Pros:
- Handle large loads in single trips, great for bulky resources like coal, iron ore, or crude oil.
- Flexible routing over rougher terrain. They cross rivers, climb steep hills, and navigate gaps conveyors can't bridge easily.
- Long-distance hauling efficiency--one road can consolidate resources from multiple deposits spread across long distances.
-
Cons:
- Time-intensive initial setup process (route recording, waypoint positioning).
- Risk occasional crashes and pathing confusion, especially in uneven terrain or dense forests.
- Require regular fueling or recharge. Forgetting fuel means breakdowns along routes, halting resource flow completely.
Maximize vehicle effectiveness by carefully planning routes. Clearly mark paths between resource extraction points and destination warehouses to reduce obstacles and accidents:
- Clear direct paths free of rocks, trees, or factory clutter.
- Plan fuel stations or charging units along routes to maintain steady supply.
- Keep intersections or multiple-vehicle paths minimal to prevent vehicle pileups or confusion.
Train Networks: Your Endgame Transport Backbone
Late-game factories lean heavily on trains--and there's good reason! Rails move cargo quickly, safely, and in large quantities across phenomenal distances with little hassle or cost after initial construction.
Trains become essential once your factories scale up and resources scatter across several kilometers. They're unmatched at reliably moving resources over long-distance supply lines, linking remote outposts smoothly into productive factory hubs.
Trains also demand careful planning and have clear strengths and weaknesses:
-
Pros:
- Highly efficient at long-distance transport--faster than belts, less prone to glitches or mistakes than vehicles.
- Huge capacity to handle industrial volumes far beyond belts or vehicles.
- Minimal ongoing hassle once laid down. Rails stay reliable with no manual fueling or interruptions.
-
Cons:
- Steep resource investment initially--steel beams, concrete, motors--these aren't cheap infrastructure elements.
- Require careful station layouts and track management, especially at busy depots or intersections. Poorly made stations produce severe congestion or long waiting periods.
The key to successful train use lies in clear, dedicated stations per resource type or production category--ores, oil products, electronics, and manufactured items. Keep station approaches spacious and easy to navigate:
- Double-track busy route segments--this allows trains to pass each other freely without congestion.
- Employ well-labeled, dedicated unloading bays. Mix-ups cost productivity when trains offload incorrect resources.
- Keep tracks elevated or use clearly marked crossing points if rails intersect factory pathways or belts. Nobody wants a factory area gridlocked with stopped trains blocking other components!
Hypertubes & Drones: Alternative Movement Methods
Conveyor belts and trains handle mass transport--but don't overlook quicker travel methods.
-
Hypertubes: These pneumatic tubes send you (and friends) zipping around your massive factory at lightning speed. They're fantastic shortcuts or quick routes from your storage warehouses to your distant oil rigs or mining outposts. Don't walk--zoom instead.
-
Drones: Endgame aerial vehicles rapidly ferry lighter, high-value finished products. They're great at quickly redistributing electronics, circuit boards, or packaged fuel across factories needing a swift flow of precision components.
Both hypertubes and drones boost efficiency on smaller scales. However, drones especially come with energy considerations--maintain sufficient power grids nearby to charge drones efficiently, or they'll slow considerably.
Bringing It All Together: Smart Logistics Win the Game
Logistics aren't the flashiest part of Satisfactory, yet they're deeply satisfying to master. Organizing, optimizing, and expanding your network thoughtfully pays endless dividends. Clean, efficient transport translates directly into faster, less frustrating factory growth.
Plan early, group related resources, and always anticipate future growth. Factories evolve--transport systems should adapt easily alongside expansions. Tackling belts, vehicles, and trains strategically offers a satisfying puzzle that's simply enjoyable to solve.
Build smart logistics--and you'll find yourself standing proudly atop a productive mega-factory, not staring down at hopeless conveyor spaghetti.
Factory Expansion: Growing Your Satisfactory Empire
So your logistics network is running smoothly, iron plates and copper wires are flowing neatly, and you've mastered transport basics. Soon, however, your ambitions push beyond those initial factory lines--it's time to scale things up. Let's talk about growing your factory smartly and handling expansion without chaos overtaking order.
Mentally Mapping Your Expansion
Your starter plant felt spacious early on. But as your operations grow, available space inevitably shrinks. Before you slap down additional assemblers or refineries haphazardly, slow down and map out your next moves. A little planning goes a long way:
-
Scout Future Sites: Spend 10 minutes or more deciding where and how your factory should grow. Think about new resource nodes you've found--like distant oil patches, or pure-quality iron deposits. Identify these spots early, before you're pressed to keep production running.
-
Group Like with Like: Keep your facility neatly organized by production types or resource tiers. For instance: have a separate area just for iron and steel production, a dedicated electronics factory, and a refinery district. This simplicity helps troubleshooting and upgrading later.
-
Verticality Is Your Friend: When floor space runs tight, grow upward. Build second, third, or even higher factory floors to manage increasing complexity. Use lifts, conveyors, and even hypertube elevators to make multi-floor layouts clean and effective.
Clear planning saves headaches later. It's far easier to move buildings before they're operational and tangled in spaghetti belts.
Modular Construction: Why Playing LEGO Beats Spaghetti Belts
If you're winging it and running belts at random, congrats! You've invented spaghetti logistics. Besides being annoying to troubleshoot, the spaghetti-style construction makes expansion nearly impossible. Instead, adopt modular building methods--it's clean, organized, and stress-free.
A modular approach means thinking in groups. You build standardized manufacturing "modules" capable of taking base materials and outputting finished goods independently. This could be your reinforced iron plate modules, modular frames sections, or motors and rotors hubs. Here's how you make modular factories a habit:
-
Standardize Setup: Design compact production loops you can easily repeat. Every module should have simple inputs and outputs clearly defined at the outside edges, making them simple to chain together or place side-by-side.
-
Leave Breathing Room: A clean footprint gives flexibility down the road. Leave enough distance between modules to conveniently expand, insert new belts, or reroute outputs. Space is your greatest asset in modular factories.
-
Repeatable Design: Save your favorite setups and conveyor layouts for quick future reference. Building precise repeats is easier than redesigning reactions fresh each time. Plus, it'll help you tweak and optimize modules later with minimal headaches.
The result? Welcome logical order, goodbye spaghetti nightmares.
Supercharging Expansion: The Power Question
Every factory expansion raises energy needs. Sudden blackouts or overloaded grids quickly halt your efficiency. Factor power generation into your plans from the start:
-
Expand Coal or Oil Early: Coal and fuel generators made from oil products provide steady, reliable power in early- to mid-game transitions. Expanding your energy infrastructure frequently prevents surprise brownouts when factories suddenly triple in size.
-
Transition to Nuclear and Geothermal Late Game: Nuclear reactors (once you master uranium mining and waste storage) deliver vast power reserves that scale effectively to mega-factories. Geothermal power offers consistent, passive energy--but geothermal nodes are rare, so combine sources.
-
Backup Storage: Giant battery arrays, unlocked later-game, alleviate peak demands and instantly refill depleted grids after surges. Battery banks keep lights on and conveyors running smoothly.
Keeping an eye on power meters gives peace of mind as your factory mushrooms in size. Big, reliable power setups make scaling up painless.
Transportation Upgrades: Tackling Long Distance Expansion
Your first factory only expanded a half mile from iron nodes--you might have used belts exclusively. Expanding further means reconsidering logistics:
-
Mid-Distance Hauling (500m to 2km): Time to adopt vehicles--tractors and trucks beat belts at moderate hauling distances, leap obstacles like cliffs or rivers, and handle big loads nicely. As we talked about, a little preparation to clear routes and fuel stops becomes time saved in the long run, compared to belts endlessly weaving through cliffs.
-
Long-Distance Logistics (2km and further): At multi-kilometer distances, trains rule supreme. They rapidly connect distant resource nodes to your sprawling factories, all without the glitches or headaches conveyor belts invite.
-
Fast Personal Transport: Don't forget hypertubes--once your factory sprawls, walking becomes tedious. Quick, efficient travel helps you stay hands-on at every far-flung outpost, every bustling assembler district.
Make transport choices according to how much expansion room you'll require. Pick tools suited to distances (vehicles for medium, trains for long-distance), and spare yourself frustration.
Scaling Responsibly: A Dash of Optimization
Growing factories means complexity stacks fast. As your building stretches toward distant horizons, optimization matters more than ever:
-
Eliminate Bottlenecks: Check inputs and equipment outputs regularly, especially after expansions. Upgrade slow belts to higher tiers or add throughput loops to reroute jammed inventory.
-
Use Logistics Smartly: Splitter and merger chains are your best friends during expansions. It frequently makes more sense to split output streams toward several modules than feed from one single line, causing inevitable backups.
-
Decommission & Repurpose: As your factory progresses, certain areas become obsolete--such as early-game iron rod lines by mid-game or crude refineries after advanced oil setups unlock. Clear and repurpose old structures to create spacious, functional areas that won't choke your growth.
Routine optimization makes explosive scaling feel effortless. Rather than panicking each time production units quadruple or octuple, you'll smile knowing your efficient, modular approach and clear methods can handle the load just fine.
Expanding with Style
Factory expansion in Satisfactory doesn't have to spiral into conveyor chaos. Practiced organization, clever modular setups, solid power management, and thoughtful transport upgrading goes a long way to preserving your sanity as your factory grows from starter hub to colossal industrial wonder.
Get comfortable planning expansions in advance--your future self, standing atop your clean high-rise fabrication plant, will thank you for keeping spaghetti confined to your dinner plate.