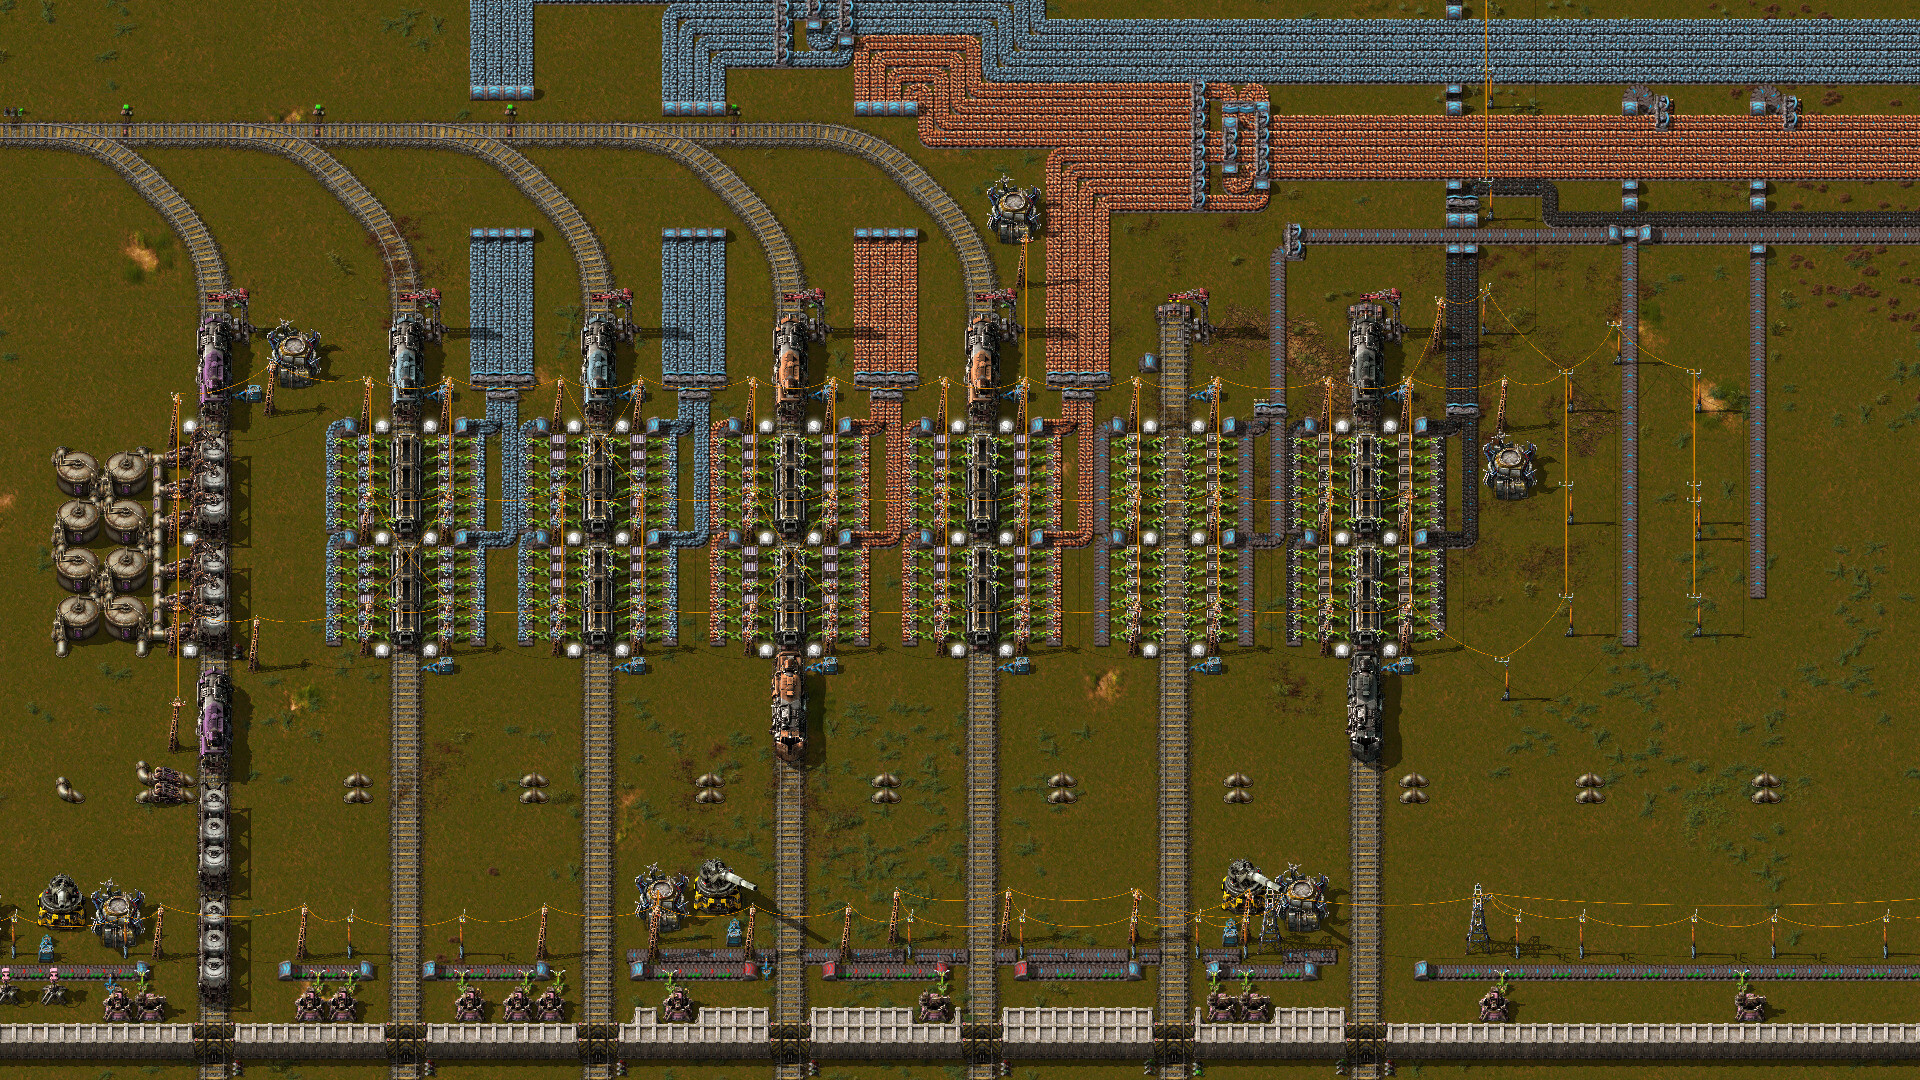
Factorio Production Automation Guide
Master automation in Factorio with expert tips on belts, inserters, circuits, trains, and blueprints for efficient factory setups.
Getting your factory up and running in Factorio is just the beginning—the real challenge comes when you want your machines to keep working perfectly without constant attention. Building production lines that can handle everything from raw ore to complex circuits is both a puzzle and an art form, and one that often separates a tidy outpost from an overwhelming spaghetti of conveyor belts. Automation isn’t just a feature in Factorio: it’s the backbone of efficient progress, and understanding how to set up reliable, scalable production chains can make all the difference as your factory grows. The game rewards careful planning, thoughtful placement, and a solid grasp of how different machines fit together in the bigger picture, so getting a handle on automation early can smooth out many of the bumps on the way to launching your first rocket.
Belt Management
Conveyor belts are the lifelines of any Factorio factory. They move raw resources from miners to furnaces, ship intermediate goods to assemblers, and carry finished products to storage or rocket silos. Managing your belts with care (instead of chaos) makes scaling up far less stressful—and keeps everything running smoother, without you running loops to fix constant jams.
Understanding Belt Types
There are three main belt tiers in Factorio:
-
Yellow Transport Belts These are the starting belts. They move 15 items per second and are good for small-scale operations or early production lines.
-
Red Fast Transport Belts These upgrade your throughput to 30 items per second. Great for mid-game builds or when you have larger mining drills and assemblers.
-
Blue Express Transport Belts The fastest option at 45 items per second—necessary for mega factories or areas with high item flow.
When deciding which belt type to use, always think ahead. Upgrading later can be tedious, especially if your layout is tight, so leave space for bigger belts from the start when possible.
Basic Belt Layout Principles
Laying out clean belts saves lots of headaches later. Here are some ground rules:
-
Straight Runs Over Zigzags: Straight belts are easier to follow, upgrade, and connect. Bend belts only when necessary.
-
Bus Systems: A “main bus” is a set of straight, parallel belts running down your base, each carrying a specific item. This lets you pull off resources whenever you need them. Keep related items side by side (e.g. iron plates, copper plates, green circuits).
-
Avoiding Crossings: Crossing belts lead to messes. Use splitters and underground belts to bridge over or under other lines without turning your base into spaghetti.
Splitting, Merging, and Prioritizing
Tools for belt management include:
-
Splitters: These divide or combine belt contents. Use them to feed two places from one input, balance loads, or prioritize items—especially helpful with mixed belts. Setting priorities on splitters helps direct key resources like iron or circuits where you need them most during shortages.
-
Underground Belts: Perfect for routing belts beneath others or through tight spaces. Remember underground belts maintain their direction, so they’re not just for hiding lines, but also for keeping everything organized.
-
Balancers: A balancer splits items evenly between lanes (e.g. a 4-to-4 balancer for four belts). This is useful if you notice one side of a bus is overloaded and the other is empty.
Managing Throughput and Jams
As your base grows, belts may get backed up or starve for items. A few approaches can help:
-
Lane Balancing: Each belt has two sides (lanes). If you only fill one, the other wastes space. Inserters usually stack on one lane at a time, so using splitters to balance both keeps items flowing.
-
Side Loading: Allow new items to “merge” onto a belt side. This is useful for topping up existing lines or adding new resources without ripping up existing belts.
-
Overflow Loops: If a production line gets full, items can loop back to the start. This reduces waste and keeps everything using resources efficiently.
Avoiding Spaghetti
That wild, tangled mess of belts across the map—the “spaghetti base”—happens to everyone. To keep it in check:
-
Plan for Expansion: Leave space between main lines. Future you will thank you when you need to double up a production line or add more belts later.
-
Label with Structure: Place signs, lights, or unique path markers near important belt routes. Easy navigation matters more than you’d think when tracking down jams.
-
Modular Design: Build production areas as blocks, each with clear in and out belts. Connect modules to the main bus sparingly, rather than weaving belts every which way.
Upgrading and Replacing Belts
Eventually, yellow belts won’t cut it. Replacing them with red or blue belts is easier if:
-
You work in sections: Don’t rip up the whole bus at once. Replace belts segment by segment, keeping goods moving during upgrades.
-
You use blueprints: Save favorite bus sections, balancers, or curves as blueprints. This speeds up both building and future expansion.
-
You take advantage of robots: Later in the game, construction bots can tear up and lay down belts for you. Just blueprint an upgraded layout, supply enough resources, and let them do the heavy lifting.
Conclusion
Mastering belt management takes practice and patience, but the payoff is huge—a tidy, scalable, and efficient factory. From building a sensible main bus to learning how to split, balance, and upgrade without losing track of your resources, small decisions early on can save hours of troubleshooting later. Keep layouts clear, anticipate growth, and don’t be afraid to rework messy areas as you learn. Factorio’s automation starts here—so get those belts in order, and keep the science packs rolling.
Inserter Strategies
Inserters play a key role in Factorio’s production lines—picking up items from belts or chests and placing them where they’re needed most. Good inserter setups can significantly boost your base’s output, while poorly planned ones can bottleneck even the most robust belt system. Let's break down smart inserter use, types, placement tips, and some tricks for getting the most out of every arm swing.
Types of Inserters
Understanding different inserter types and their best uses will save you plenty of headaches:
- Burner Inserter: Runs on coal or wood. Handy in the early game, but slow and best swapped out quickly for electric versions.
- Basic (Yellow) Inserter: Cheap and slow. Use these for non-essential or low-throughput jobs.
- Fast (Blue) Inserter: Faster and more reliable for moderate throughput, such as feeding assembling machines or pulling off bus lines.
- Long-handed Inserter: Reaches two tiles. Great for moving items over other belts, like pulling input off the far side of a double belt.
- Stack Inserter: Moves multiple items at once. Ideal for late-game bulk loading (e.g., train wagons, high-speed assemblers).
- Filter Inserter (and Stack Filter): Lets you fine-tune what item gets picked up—super useful for mixed belts or when routing specific materials.
Each inserter has its strengths, so match the tool to the job. Stack inserters are overkill for feeding early-game machines but essential for keeping up with late-game demands.
Inserter Placement Tips
Watch Your Orientation
Inserters pick up from the tile they're pointing from and drop onto the tile they're facing. Make sure the pickup point hits the right side of a belt or input square. Both ends can make or break the throughput if misaligned. Dropping directly onto belts versus dropping into machines also affects timing—so double-check those arrows.
Optimize for Throughput
- Filling Both Belt Lanes: Inserters always drop on the far side of a belt from the way they're facing. If you want to load both sides of a belt from one machine, use two inserters—each facing a different lane.
- Stack Inserter Power: For train loading, smelter rows, or rocket silos, use stack inserters. They move 6+ items at higher speeds after upgrades, making them essential for bulk movement.
- Fast Feeding: Fast inserters (and stack inserters) work best with high-speed belts and assemblers. Slower inserters can’t keep up and could choke your advanced builds.
Prioritize with Filter Inserters
Filter inserters are game changers for handling mixed resources. Set them to only move a specific item—no more manual sorting or unwanted items dumping into the wrong chests. Stack filter inserters are especially handy for train stations pulling multiple product types off a main drop-off belt.
Dealing With Inserter Bottlenecks
Watch Inserter Throughput
Each inserter can only move a certain number of items per second. If you notice machines starving despite belts being full, you may need more or faster inserters. Upgrading belts only helps if your inserters keep pace.
Limit Items with Stack Sizes
You can cap an inserter’s stack size in its settings (after researching stack inserter upgrades). This controls how many items are moved at a time—useful for balancing assembly lines, especially for recipes that require unequal inputs.
Multiple Inserters Per Machine
Sometimes one inserter isn’t enough. Machines with high resource needs (like advanced assemblers or furnaces in a mega smelter) can take two or more inserters for consistent supply. Just be sure you have the space and the belt’s packed tight enough.
Smart Inserters with Circuits
Hook inserters to the circuit network for ultimate control. Examples:
- Only pull items off a belt when a chest is low.
- Feed science packs when lab stock is empty.
- Prevent machine overstuffing by linking inserters to output counts.
Even a single red or green wire can trigger complex, hands-off automation.
Best Practices for Inserter Arrangements
- Parallel Feeding: Split input belts and feed multiple assemblers in parallel rather than stringing them in series. This reduces slowdowns from output blockages.
- Tight Spaces: Long-handed inserters make clever use of space: pull from rear lanes, skip over intermediate belts, or deliver to machines that would otherwise need an awkward setup.
- Power Usage: Burner inserters draw no electricity but need fuel. Smart use early game—later, phase them out for grid reliability.
- Avoid Jams at Outputs: Place fast or stack inserters at outputs where bottlenecks are most likely. Output jams starve production nearly as badly as empty inputs.
Inserter Tricks and Advanced Tips
- Continual Belt Balancing: Place inserters on both sides of a line to feed both belt lanes or outputs evenly.
- Passing Over Belts: Use long-handed inserters to send items across belt lines, handy for creating compact production blocks.
- Side Loading: Inserters always drop to the far side. Use this property to “side-load” onto half-full belts, topping them off without complex splitters.
- Manual Override: Inserters can always be set to manual mode (by right-clicking) if you need to do quick maintenance or want to save energy in rarely used production lines.
Wrapping Up Inserter Mastery
Smart inserter setups are the backbone of any efficient Factorio factory. By using the right inserter for each job, optimizing placement, leveraging new tech such as filter and stack inserters, and not being afraid of a little wiring, you’ll solve countless bottlenecks and keep your lines humming. Take time to watch your production in action: if you ever see a machine flashing yellow for lack of input or backed up with too much output, it’s usually an inserter issue. Fixing those small problems will keep your science packs and rockets flying for hours to come.
Circuit Network Guide
Factorio’s circuit network offers seriously powerful ways to control your base. Whether you want to keep chest contents balanced, prevent overproduction, or set up flashy displays, circuits give you more control than vanilla automation alone. Here’s everything you need to get started and some ideas for what’s possible.
What Is the Circuit Network?
The circuit network is a system of red and green wires (not to be confused with regular electric wires) that connect machines, inserters, chests, lamps, and other components. These wires let you send "signals" (numbers attached to virtual items, such as iron plates or signals like “Each”) from one entity to another. Machines connected by circuits can then behave differently depending on whatever values get sent through the wire.
Signals in the circuit network are either:
- Item counts: Like “if there are less than 100 iron plates, do X.”
- Virtual signals: Colors (red, green, blue, etc.) or letters (A-Z), handy for logical circuits or display.
How to Wire Things Up
You’ll need circuit wire, unlocked early on with the Electronics tech:
- Red wire and green wire are handcrafted from copper cable.
- Both work the same but let you run two separate networks across the same structures.
To connect two objects, click one, then drag the wire to the next entity. You can chain as many as you want, but only circuits that are physically wired together share their circuit signals.
Quick tip: Shift-clicking a wire on an object removes it. Right-click removes only that specific wire—super helpful for untangling mistakes!
Key Components
Constant Combinator
- Lets you create fixed signals (like telling the network “pretend there’s always 5 iron ore”).
- Mostly used in logic builds or train management to give instructions.
Decider and Arithmetic Combinators
- Decider: Runs condition checks. Example: If iron plates > 100, output a green signal.
- Arithmetic: Basic math for network values. Example: Multiply item amount by 2 for more complex setups.
Lamps, Chests, and Inserters
Many base objects become "smart" with circuits:
- Lamps can light up based on item counts or warnings.
- Chests can be monitored—see exactly how much is inside and act on that info.
- Inserters get special controls—move items only when a circuit condition is true.
Building Your First Circuit: Smart Inserter Control
Say you want an assembler fed only when the output chest has less than 100 gear wheels:
- Connect the output chest to the inserter with a circuit wire.
- Open the inserter settings.
- Enable the ‘circuit condition.’ Set it to "enable when gear wheels < 100."
- Now, the inserter only runs if there are fewer than 100 gears in the chest.
This already cuts down on wasted resources and electricity without any manual checks.
Circuit Network Signals
Signals shape how your automation works. Here are the most common types:
- Item signals: Actual in-game items (copper plate, science packs, etc.).
- Virtual signals: Colors, letters, and numbers. Great for logic circuits.
- Each (∑): Catches all signals at once, perfect for more advanced logic.
Note: Every connected machine on a circuit gets access to every signal present on the wire network it’s attached to.
Common Circuit Automation Tricks
Storage Management
Want to keep a buffer chest from overflowing with stone? Connect a smart inserter to the chest, then set it to stop when there’s already a certain amount of stone. You can chain chests and inserters along a storage row, keeping everything balanced without micromanaging.
Science Pack Control
If you’ve got labs idling because they’re short on a specific science pack, use a circuit to count the packs and only feed new ones when needed. Hook all labs to a wire, then control inserter feeding based on aggregate counts.
Train Automation
Circuit networks are indispensable for custom train stations:
- Link a train stop to a chest, then set trains to only arrive when stock meets a minimum.
- Use combinators to calculate totals of all resources at a depot.
- Set up “requester” stations that self-regulate based on actual usage.
Early Warning and Displays
- Lamps flash to warn about resource shortages or power failures—instantly visible, even on complex bases.
- Use combinators to set up “scoreboards” for achievements or production targets.
Avoiding Headaches: Circuit Network Best Practices
- Color Code Your Wires: Red for one network, green for another. Makes debugging easier.
- Plan Layouts: Circuits let you run fewer belts, but don’t get carried away. Direct belt and inserter setups often use less power and are easier to troubleshoot.
- Label With Signs or Blueprints: If you’re going big, a labeled circuit system beats trying to remember what that wire chain does three hours later.
When to Upgrade from Basic to Advanced Circuits
Start simple. Early on, most needs don’t require more than counting items in chests or toggling inserters. As your base gets bigger and demand spikes, loop in combinators for more robust automation. Eventually, you can:
- Balance multiple outposts.
- Throttle resource delivery based on storage.
- Scoreboard every product made per minute.
Wrapping Up the Circuit Network
Factorio’s circuit network is a playground for tinkerers, letting you create automated systems that react to your base’s every need. Begin with basic inserter controls and item counting, then scale up to more intricate builds as your factory expands. When you’re ready, combinators open the door to huge, self-sustaining “smart factories”—just remember to take it one wire at a time.
Train Network Guide
Trains are Factorio’s answer to scaling up your factory. Belts are great, but nothing matches trains when it’s time to move massive loads across a big map. Setting up a train system can seem overwhelming, but once you get the basics, it’s all about tuning and upgrades. Here’s how to get your trains rolling, keep them organized, and avoid the dreaded deadlock.
Setting Up the Basics
To get your first network running, you need these:
- Rails: The tracks for your trains. Place straight for efficiency, and curve as needed.
- Train Stops: The “stations” where trains load or unload. Named, so the train schedule makes sense.
- Locomotives: The engine. Can be front, back, or on both ends for two-way routes.
- Cargo or Fluid Wagons: Hold your items or liquids.
Laying Rails
Keep your layout simple early on—straight lines and 90° turns are easy, but using large, sweeping curves lets trains move faster and reduces jams. For double tracks, leave space for signals and let trains go one way on each track (right-hand or left-hand drive—stick to one).
Placing Train Stops
Train stops have names. When you create a schedule, you’ll pick these by name:
- Place a stop where you want a train to load (mine, outpost) or unload (main base).
- Name each stop clearly; “Iron Outpost N” and “Main Iron Unload” beats just “Iron.”
Train Schedules and Automation
Every train in Factorio has its own schedule.
Setting a Train Schedule
- Click a locomotive to open the train’s menu.
- Add stations by picking stops you’ve named.
- Choose conditions: Wait until inventory full/empty, time passed, circuit signal, or manual departure.
- Loop the route: After reaching the last station, the train starts over.
Most basic trains run a loop from mine (wait until full) to base (wait until empty).
Multiple Trains
Don’t be shy: you can have several trains on the same rails. To prevent chaos, set up signals (next section) and keep your stops unique so trains don’t fight for one platform. More on that below.
Signals: The Traffic Lights
Signals are what let you keep trains safe and moving. The main types:
- Rail Signal: Controls direction on a segment of track. Trains stop if the track ahead is occupied.
- Chain Signal: Looks one segment further ahead. Used at intersections, they prevent trains from getting stuck halfway through a junction.
Simple Signal Tips
- Signals must always pair: place them on both sides of double tracks to control each direction.
- Use rail signals on straights, chain signals where tracks cross or merge.
- Leave at least a train-length between signals so trains don’t block each other.
Example: Basic 2-Way Main Line
Set up double tracks with right-hand drive, putting regular signals along both directions and chain signals at intersections. Trains can pass or wait their turn, and head-ons are prevented.
Loading and Unloading
Fast trains are pointless if load/unload stations bottleneck.
Inserters and Stack Inserters
- Stack inserters unload/load wagons fastest.
- Space out chests evenly along the length of each wagon; line up inserters for max efficiency.
- Use fast belts or buffer chests to handle all the items quickly.
Fluid Wagons
Connect with pumps. Each fluid wagon has specific “loading ports.” Pumps work best with all fluid connections filled.
Network Expansion & Routing
As your factory gets bigger, your train network grows more complex.
- Use dedicated lines for critical resources. Iron and copper may each need their own mainlines.
- Branch lines help connect outposts off the main network.
- Carefully plan intersections and roundabouts to avoid jams.
- Bridges or tunnels: Factorio doesn’t have these, so plan over/underpasses now if mods are used, or keep crossings limited.
Advanced: Circuits, Signals, and Logic
Trains can be fully automated with circuit networks for even more control.
Smart Stations
- Connect train stops to chests or storage with circuit wire.
- Set the stop to be “Enabled” only if there’s enough demand or storage space.
- Trains then skip empty or overfilled stations—huge for balancing resources.
Automatic Train Dispatch
- Use combinators at depots to count idle trains.
- Launch trains only when a request comes in (like base running low on iron).
- Prevents congestion and keeps your supply lines smooth.
Avoiding Deadlocks & Headaches
Nothing’s worse than the dreaded train jam. Some common fixes:
- Avoid crossing tracks where possible. Use bridges (with mods) or stackers—sidings where trains queue up.
- Set enough stackers at busy stations for waiting trains.
- Space signals so every train fits between them.
- Chain signals at intersections, regular rail signals after.
- Keep trains the same length—so they fit everywhere.
Tips from the Pros
- Blueprint everything. Common rail segments and stations can be copied and pasted.
- Leave room for expansion. Double-wide tracks or wider mainlines save pain later.
- Regular maintenance: Keep an eye on high-traffic junctions for clogs.
- Use map view: Click on trains and signals from afar to tweak or troubleshoot.
Conclusion
Once you get the hang of rails, signals, and station tricks, trains set your base free to sprawl without limits. With a bit of upfront thought, your trains will run on time, resources will flow, and your factory keeps humming at full speed—no traffic jams, no fuss. With trains and networks under your belt, automation happiness is just a schedule away.
Blueprint Usage
Blueprints are the unsung heroes of efficient Factorio production. They save time, reduce repetitive work, and help your factory grow without a tangled mess. If you’ve ever found yourself sick of laying the same belts and inserters for the tenth time, it’s blueprint time. Here’s how to get the most out of this powerful tool.
What Are Blueprints?
Blueprints in Factorio are saved layouts—snapshots of any structure, rail network, machine setup, or even an entire outpost. Once saved, you can place this layout as many times as you like. The game gives you a Blueprint tool early on, and once you unlock it, copying becomes second nature.
There are three main types:
- Blueprint: Standard layout for easy replication.
- Deconstruction Planner: Marks an area for your robots to tear down.
- Upgrade Planner: Marks entities for upgrade (like yellow belts to red).
This guide focuses on Blueprints, but you’ll likely use all three in bigger factories.
Creating a Blueprint
Here’s the quick-start guide:
- Get the Blueprint Tool: Hit
B(or open your toolbar and select the blueprint icon). - Drag to Select: Click and drag across the area you want to save—could be a line of assemblers, a mining patch setup, or a section of your rail system.
- Adjust Settings: The menu lets you name the blueprint, add an icon, and even tweak tiles or entity settings.
- Save the Blueprint: Hit Create. Now it’s on your cursor or in your blueprint book.
If you’re setting up for bots, tick the “Tiles” option to include floor patterns or blueprints; this makes your area robot-ready.
Using and Placing Blueprints
With a blueprint on your cursor, click to “stamp” it anywhere you want. Ghost versions of all parts appear; construction robots will start building when you supply the needed materials.
- Overlap-safe: Factorio lets you place blueprints over existing builds. Entities not included won’t get deleted.
- Rotate or Flip: Use
Rto rotate blueprints before placing, or Shift+R to mirror, handy for symmetric builds. - Paste Multiple: Hold the mouse and drag to lay down the same setup many times. Perfect for solar farms or arrays.
Blueprint Books and Organization
Once automation fever hits, you’ll want to keep your favorites organized.
- Blueprint Books: Right-click a blueprint and choose “Add to Book.” This groups related blueprints together. Rename your book for easy access (“Outposts”, “Smelting”, “Rail Segments”).
- Library vs. Inventory: Blueprints in your library (click the blueprint icon at the top-left) are forever—great for multiplayer or saving designs between games. Blueprints in your hotbar or inventory are local to your game.
Making a few master blueprint books for different factory sections saves hours of scrolling.
Sharing and Importing Blueprints
Factorio’s blueprints are super shareable thanks to string codes.
- Export: Right-click any blueprint or book, select "Export to string," and copy the text.
- Import: Hit “Import blueprint” in your blueprint menu and paste the string. Now it’s in your blueprints, ready to use.
Got a favorite design from Reddit or a friend? This is how to bring it into your own world.
Tips for Effective Blueprint Usage
- Standardize Tile Size: Build setups (like smelting or train stations) to a consistent tile width. This helps blueprints fit together without gaps.
- Use Landfill When Needed: If your setup covers water or rough terrain, include landfill tiles so robots fill it first.
- Label Clearly: Name blueprints and add icons. “Copper Smelter 48” makes sense at a glance. Use colors or emojis to set them apart.
- Test Before Mass Use: Stamp down new blueprints somewhere quiet to see if anything is missing or needs fixing.
Advanced Blueprint Tricks
Snap and Grid Alignment
Factorio lets you snap blueprints to a grid. When stamping down high-volume production, this keeps everything tidy. Adjust blueprint placement using the grid preview so belts and pipes line up perfectly.
Circuit and Logistics Network Copying
Blueprints save logic and wire connections. If your outpost has condition triggers or storage chests tied to the logistics network, these copy too. Double-check combinators and wires after placing, since wiring sometimes shifts slightly with terrain or layouts.
Upgrading With Blueprints
If you want to upgrade an old section, change your design (for example, from yellow to blue belts), create a new blueprint and stamp it right over the old build. Bots will handle upgrades, and you won’t need to tear things down by hand.
Common Blueprint Pitfalls
- Missing Components: Blueprints don’t supply parts—you still need the materials and robots.
- Wrong Rotation: Always preview placement, especially for rail blueprints; signals and stations can end up facing the wrong way.
- Unexpected Terrain: Water, forests, or cliffs can block placement. Landfill or artillery can help, but watch for these hiccups.
Quick Example: Rail Blueprint
Say you have a double rail line with signals set up just right. Select a segment and create a blueprint. Next time you want another stretch of rails, pull out the blueprint and stamp it. All signals, poles, and even lamps get placed perfectly.
Using blueprints everywhere—from mining outposts to huge mall factories—saves time and keeps your production running smoothly.
Wrapping Up
Blueprints change the game. With a library of efficient designs at your fingertips, your factory grows faster, stays cleaner, and lets you focus on solving real production puzzles instead of repeating the same build over and over. Practice making and using blueprints and you’ll see a big boost to your automation—and your enjoyment of Factorio.