Factorio: Advanced Automation Techniques Guide
Master advanced automation in Factorio with tips on belts, inserters, circuits, train logistics, and blueprints for efficient factories.
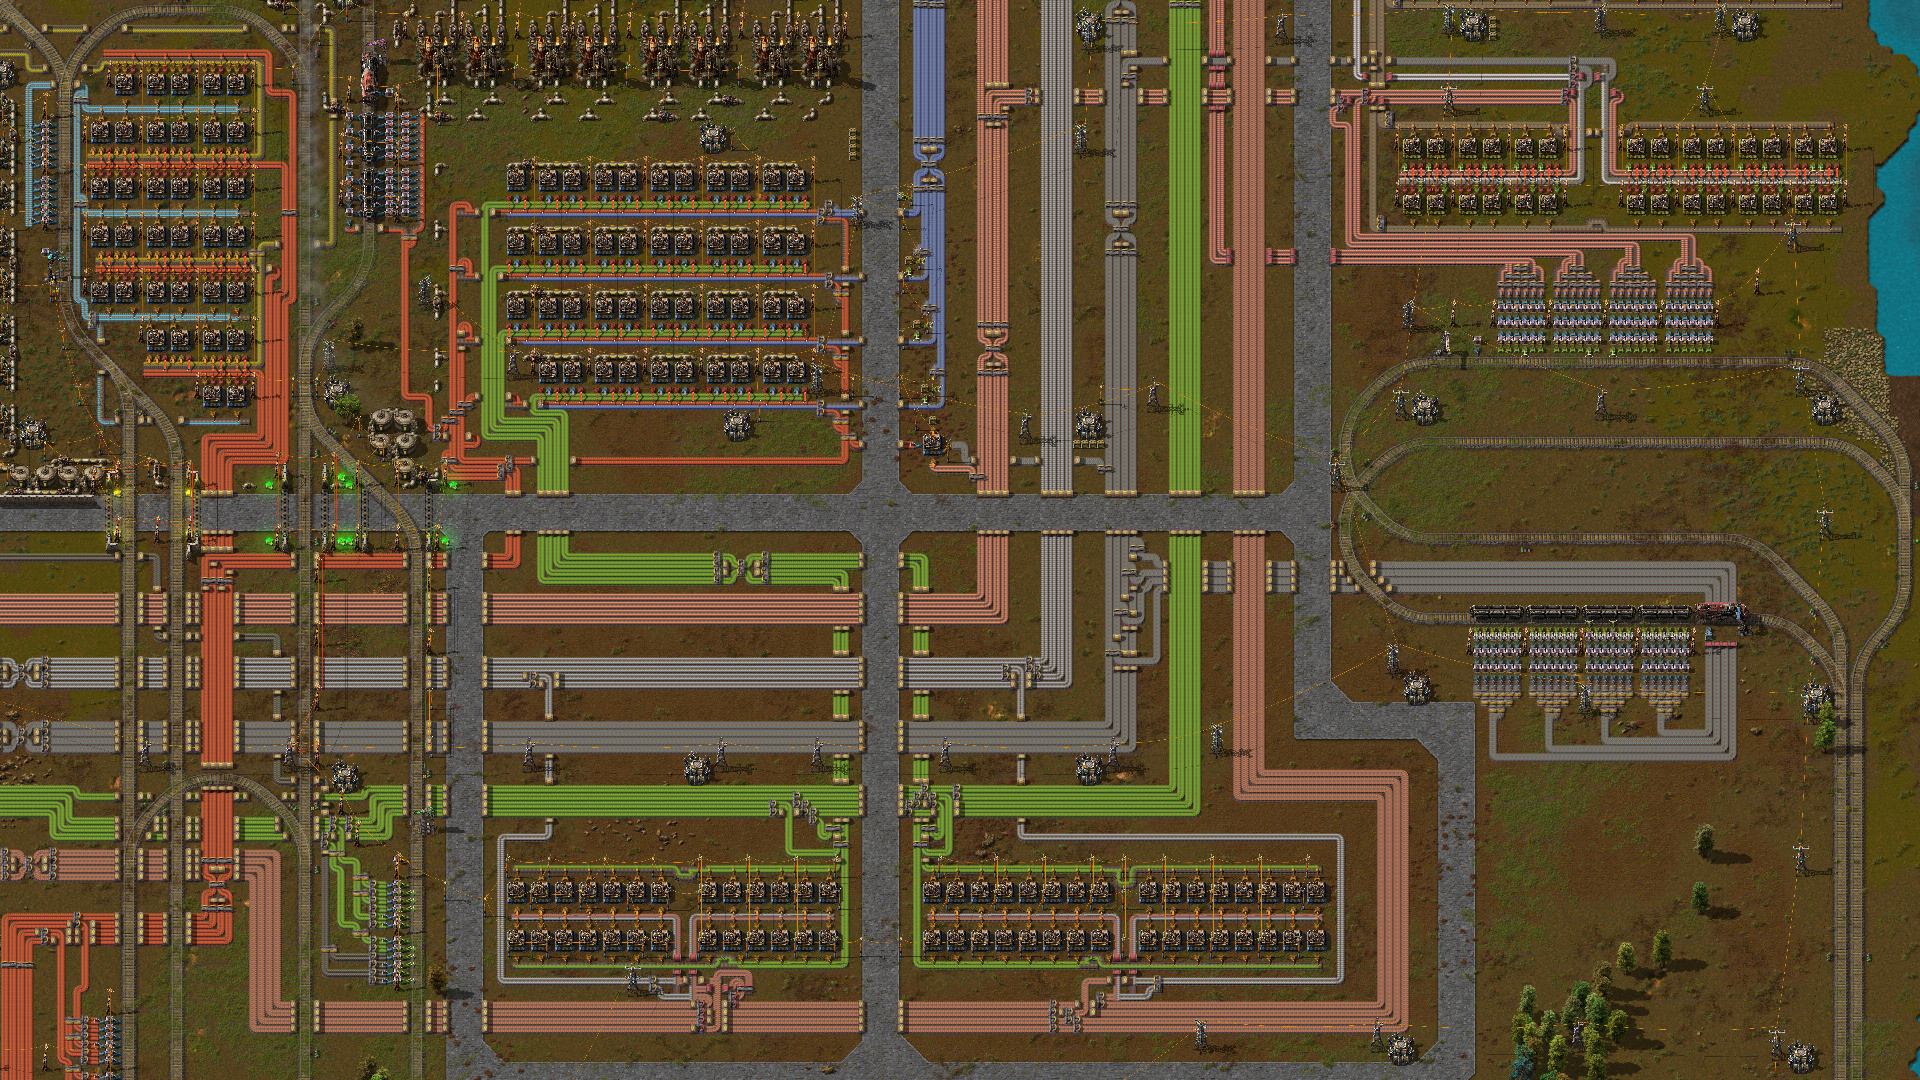
There comes a point in every Factorio run when the basics are handled—a steady flow of iron, copper, and maybe even some oil set up on a sprawling bus—but suddenly, the factory demands more. More throughput, more organization, and much less last-minute belt spaghetti. At this stage, refining automation isn’t just about convenience, it’s about keeping up with the ever-mounting requirements of research, rocket launches, and enemy defense. Navigating those complexities can be daunting, especially when faced with intricate layouts and recipes that seem determined to clog your lines. With some targeted strategies and a few clever tricks, it’s possible to take your modular systems and production chains to a whole new level of efficiency. Whether you’re aiming for launch or just want to see your base run smoother than ever, understanding advanced automation is where everything really starts to click.
Belt Management
Getting your belts under control is one of the biggest leaps in maximizing both output and sanity in Factorio. Sure, it looks cool to have a tangle of belts zipping products around like some kind of factory spaghetti, but that chaos creates bottlenecks and headaches down the line. Smart belt management isn’t just about making things “look neat”—it’s the backbone of any factory that actually works at scale.
Let’s break down how to keep your belts flowing, unclogged, and working like a well-oiled assembly line.
Main Bus vs. Local Belts
The first big belt decision: main bus or local production lines? A main bus is basically a highway for your core resources: think iron, copper, steel, circuits, and sometimes plastic or stone. You run these bulk items in parallel belts typically through the heart of your factory, and smaller builds “peel off” what they need. This design keeps expansion super manageable and makes troubleshooting a breeze.
Local belts, on the other hand, feed niche products or are useful in super modular layouts (like malls or specialized outposts). Mixing the two can work, but keeping your core stuff on a main bus shaves hours off future repairs and upgrades.
Tips for a Cleaner Main Bus
- Reserve space: Leave plenty of empty lanes between key resources for upgrades later.
- Bundle related items: Circuits, for example, often need copper, iron, and steel close by. Organize these together on the bus.
- Avoid overlaps: Each item should have its own exclusive belt lane; don’t stack two products on one belt unless you’re intentionally mixing for a specific recipe.
Prioritizing Belt Flow
Not all parts of your factory are equally important at all times. Sometimes, research must keep humming, while other times, military production is king. Use splitters with priority settings to make sure your most important lines always get what they need, even if supply gets tight.
Priority Splitter Mechanics
- Output Priority: Direct a splitter to favor supplying one side of the belt first, keeping vital machines fed before overflow goes elsewhere.
- Input Priority: Tell the splitter which belt to draw from first if inputs differ in supply (for example, balancing ore from two different mining patches).
Set up these priorities so science, for instance, never starves even when materials are low, and only surpluses bleed off to less urgent tasks.
Avoid Belt Backups (aka Clogging)
One of the most common problems that crops up in huge factories is when items start piling up on belts and the flow grinds to a halt somewhere. This is usually caused by one of three things:
- Output Blocked: The receiving machine is full or can’t use the product fast enough.
- Unbalanced Draw: One side of a belt is overloaded while the other starves.
- Looping: Belts double back on themselves, creating dead zones.
Solutions
- Buffer Chests: Insert buffer chests or storage before and after heavily used machines so that items don’t hold up the line if the machine stalls.
- Load Balancers: Use splitter-based load balancers to spread resources evenly across multiple belts or lines.
- One-Way Loops: Avoid creating belt circuits where items feed backward; always direct items to a single endpoint.
Balancing Multiple Belts
As your bus expands, so will your number of parallel belts. If you just “double up,” you can end up with one belt maxed out and the other empty. Belt balancers redistribute inputs evenly, preventing stuck lines and wasted resources.
Common Balancer Types
- 1-to-2 and 2-to-4 Splitters: Useful for early game and simple builds.
- 4-to-4 or 8-to-8 Balancers: For major bus lines, these keep output even so every assembly gets equal materials.
- Throughput Unlimited Balancers: Advanced designs (find them online or blueprint libraries) ensure full utilization even as demands shift.
Dealing With Mixed Belts
Sometimes it’s tempting to run more than one product on the same belt—maybe iron and copper to an assembly line that needs both. This can be helpful in compact setups, but quickly gets messy. The more complex your recipes, the harder it is to cleanly split items out later.
Useful Tools
- Splitters and Filter Splitters: Filter Splitters can separate out specific items without fuss.
- Underground Belts: Pass one item underneath another belt for tight layouts.
- Priority Splitters with Filters: Combine priorities and filtering to pull the right item for the right machine, fast.
Compacting Space: Underground and Side Loading Tricks
When belt real estate gets tight, underground belts are essential. They let you run one lane under another or squeeze everything into smaller spaces without clashing. Want to put two items on a single belt but keep them separated? Use side loading: feed one item from the left and another from the right, useful when you absolutely need a mixed belt without chaos.
Keeping It Upgrade-Friendly
Factories are never really finished in Factorio. Today’s bus might need twice the capacity tomorrow. To avoid redoing work:
- Keep belt spaces modular—leave room to add extra lanes.
- Use underground belts generously for easy rerouting.
- Standardize belt directions (e.g., all primary lines move rightward or downward).
Common Pitfalls (and Fixes)
- Crossed Belts: Avoid stacking belts on top of one another without underground lanes unless you’re certain it won’t create jams.
- Dead Ends: Double-check that every belt has a destination; no belt should run forever or wrap back on itself without purpose.
- Forgotten Upgrades: Once faster belts are unlocked, gradually upgrade key lines—especially your bus—with the new tech to multiply throughput and reduce clogs.
Conclusion
Nailing belt management transforms any base from half-functioning chaos to production powerhouse. With neat layouts, smart prioritizing, and a little planning ahead, your Factorio belts will keep goods moving where they’re needed most. A tidy bus and organized feeder lines aren’t just for looks—they’re the difference between constant frustration and a factory that feels truly alive. And remember, when everything clicks and the belts hum, it’s just that much sweeter watching your machines do their thing.
Inserter Optimization
Inserters are the mechanical arms of your factory: they're everywhere, endlessly hauling parts from belts into machines and chests. Get them wrong and production stalls; get them right, and your assemblies run at max speed with zero fuss. There’s a lot more to inserters than just plugging them down adjacent to a belt. Let’s break down how to squeeze every last drop of efficiency from these tireless robots.
The Inserter Types
Factorio gives you several inserter options, each tuned for a specific task:
- Basic (Yellow) Inserters: Slow but cheap. Good for light demand or early production.
- Fast (Blue) Inserters: Move items twice as quickly—great for faster assembly lines.
- Long-Handed (Red) Inserters: Can grab from a belt two tiles away. Useful for builds with secondary input lines or dual-belt setups.
- Filter Inserters: Only pick up specific items, perfect for sorting mixed belts.
- Stack Inserters: Transfer whole stacks at once, the go-to for high-volume or late-game lines.
Knowing which inserter to use, and where, is the first step to a smooth-running plant.
Matching Inserters to Their Jobs
Think about how many items a machine will consume or produce per second:
- Assemblers with slow recipes (like gears or green circuits) might only need a yellow inserter.
- Furnaces on a main ore-to-plate line, especially when using steel furnaces or electric furnaces, should use blue inserters or stack inserters to keep up with demand.
- Sidelines handling bulk (trains, rocket silos, massive chest loaders) demand stack inserters with stack size bonuses researched.
Rule of Thumb Table
| Machine Type | Inserter Recommended | |------------------------|---------------------------------| | Early assemblers/furnaces | Yellow | | Fast assemblers | Blue (Fast) or Red (Long) | | High-volume chests | Stack Inserter (+ bonus) | | Sorting from mixed belts| Filter Inserter |
Always watch your inserters—machines starved for parts or with inventory backing up might need a faster arm.
Aligning Inserter Speed with Belt Throughput
Belts only move so fast (and only so many items per second). Hooking up tons of inserters to a slow belt won’t help if the input isn’t there. Upgrading belts without checking inserter speed (or vice versa) leads to wasted upgrades. Try these tips:
- Fast belts need fast inserters: Use blue/stack inserters with blue or red belts.
- Side loading: Put multiple inserters pulling from both sides of a belt into a chest or assembler for high demand.
- Synchronized loading: For very high throughput (like train unloading), use several stack inserters in parallel.
Inserter Placement: Straight Lines vs. Corners
Inserter pathing is shortest and quickest when working straight across (perpendicular to belts or chests). When forced to operate diagonally or via awkward placements, inserters slow down during the pick-up and drop-off animation. This can become a bottleneck, especially with slower inserters. Arrange belts and machines in line whenever possible for optimal transfer rates—especially in high-traffic areas.
Smart Inserters and Circuit Networks
Inserters can connect to the circuit network to automate supply or prevent waste. Here’s where a little wiring pays off big time:
- Conditional feeding: Only let an inserter pull fuel into furnaces if the coal/solid fuel chest is below a set amount. This avoids overstuffing machines.
- Filter by demand: Hook up inserters to chest inventories, so they only fill up intermediate chests when their stock is low.
- Resource-saving: Stop expensive ingredients (like blue circuits) from entering the wrong machine via filter inserters set up with logistics or circuit commands.
Some examples:
- Setting a green inserter to only move iron plates when the output chest drops below 100 items.
- Using a filter inserter to keep a train’s loading chest supplied with only the target ore, ignoring any unwanted stuff.
Stack Size Upgrades
Factorio lets you upgrade stack inserters using research, allowing them to grab more items in a single motion. These bonuses make a massive difference for bulk/fast transfer jobs (like train loading, rocket launches, or large-scale blue science output). After researching, don’t forget to check your inserter settings window and crank that stack size up when appropriate.
When to Max Out Stack Size
- Bulk loading: Loading/unloading trains, cargo ships, or rocket silos.
- Buffer chests: When overnight runs need to move entire stacks at once.
- High-rate crafting: Advanced assemblers burning through hundreds of ingredients per minute.
Timing and Synchronization
Inserters often waste time if their output target is blocked or the item can’t be placed. If you see an inserter swinging but not letting go, that’s time lost. Avoid this by:
- Keeping outputs clear with fast inserters or belts with enough speed.
- Using buffer chests where necessary so items always have a place to go.
- Avoiding "deadlocks"—where two inserters depend on each other’s movement to clear space.
For most setups, stagger inserters so each has direct access to both pickup and drop-off spaces. In congested builds, check for situations where inserters are fighting for the same spot.
Real-World Inserter Layouts
Some tested, practical tips:
- Use paired fast inserters on both sides of a belt or chest feeding the same assembler for double the intake speed.
- For slightly offset layouts (e.g., items on the outside belt lane), long-handed inserters can pair with regular or stack types for hybrid coverage.
- Unloading a train car with six or more stack inserters directly into a line of chests clears full wagons before the next train pulls in.
Conclusion
Getting inserters right isn’t just about speeding up your lines, but making supply smooth, predictable, and stable. Take the time to match inserter speed and type to your machines, play with placement, and use stack bonuses. Paying attention to little things—like minimizing awkward paths and linking up to the circuit network—pays off down the line, giving you a base that never stalls because of a slow-moving arm. When production flows effortlessly, you can focus on the bigger puzzles Factorio throws your way.
Circuit Networks
Circuit networks in Factorio let you move past basic automation and add brains to your belts, chests, and inserters. With a few wires and some settings, you can control how machines behave, make alerts for trouble, and use resources more efficiently. Below, you’ll find a detailed look at how the circuit network works, the parts involved, and practical setups you’ll want to try.
Circuit Network Basics
Factorio has two circuit networks: green (copper wire) and red (red wire). You craft each by hand (from copper cables or copper cable plus electronic circuits, respectively). Both wires work the same way, letting you attach multiple machines and buildings together. Each color creates a separate network, so you can use them for different logic tasks without interference.
What Can You Connect?
- Inserters
- Chests (except Logistic chests, which use the Logistics network)
- Assembling Machines
- Belts, Splitters, Underground Belts
- Train Stops
- Lights, Lamps
- Power Switches and Pumps
- Arithmetic/Decider/Combinators
By combining these, you can set up systems that respond to what’s happening on your factory floor.
Why Use Circuit Networks?
If your factory is always running out of key items, overproducing junk, or you want to keep defenses ready without constant checking, circuits are your solution. Some reasons to use them:
- Save resources: Only run machines when stock is low.
- Balance output: Prevent raw materials from being used too much in one place.
- Fail-safes: Shut down production if a chest is full, or send alerts if ammo is low.
- Production chains: Control complex production steps based on real supply levels.
- Lights as alerts: Use lamps to show when something is wrong.
Connecting With Wires
Hold a circuit wire in hand and left-click the first machine, then the second. Both are now "wired." Repeat as needed to build out a web. Right-click a wire on a connected machine to remove it.
Tip: Green and red wires transmit the same signals, but keep them separate for different tasks or logic.
Understanding Signals
Almost every item in the game, plus signals like ‘Each’ or special values, can exist on a circuit wire network as a "virtual signal." Machines output "signals" to the network—say, 32 iron plates in a chest generates an iron plate signal = 32.
You’ll see three signal types:
- Item signals: Regular stuff—iron plates, copper ore, etc.
- Virtual signals: Colors (red, green), letters, numbers; used for logic or displays.
- Fluid signals: If tanks or pumps are connected.
Everything "reads" the current state of the network and acts based on that.
Reading and Sending Signals
Reading
Set up a chest, inserter, or assembler with the "Read Content" setting in the right-side menu (check the properties window). It will now send the contents out as a signal.
Using Signals
Most often, you use signals to control whether something is on or off—such as stopping an inserter unless a chest is running low.
For inserting machines and belts, set a "circuit condition" such as "[Iron Plate] < 100." This tells the machine to only turn on when the condition is true.
Combinators—Logic Brains
Combinators are mini-programmable logic controllers. There are three main types:
- Arithmetic Combinator: Does simple math (add, subtract, multiply, divide signals).
- Decider Combinator: Compares signals ("If Iron Plate < 100, output Green Signal 1").
- Constant Combinator: Always puts a set signal out on the line (e.g., for signals or displays).
Using combinators lets you chain together complex decisions, count down from a number, or even run a factory-wide alarm system.
Example: Simple Resource Balancer
Let’s say you don’t want more than 200 circuits in a chest:
- Wire the chest to the inserter.
- In the inserter’s settings, set "Enable/Disable > Circuit Condition: Electronic Circuits < 200."
- Now, the inserter only loads circuits while there’s less than 200 in the chest.
Real-World Examples
Auto-fueling Boilers
Connect the chest that feeds your coal line to the inserter, set "Coal in Chest < 50," so excess fuel isn’t wasted, but you'll never run dry.
Ammo Alerts for Turrets
Wire all gun turrets in an area to a lamp through a pole. If "Ammo < 20," the lamp turns red. You’ll spot it right away when defenses need resupply.
Automatic Train Depot
Have a train only enter when the "ore stockpile" is below target: Set "Iron Ore < 10,000" condition at a train stop, connected to storage chests. The stop powers up only if more ore is needed.
Balanced Offloading
Wire a row of inserters, set them to only activate if "Target Chest Contents < 128," and the ore gets distributed evenly, instead of piling up in the first chest.
Common Circuit Mistakes
- Forgetting to check which network wire you’re using (green and red won’t mix).
- Wiring too many machines together, causing lag or confusing signal overlaps.
- Accidentally leaving outputs always active—double check conditions.
- Not renaming combinators/signals for clarity, especially in large factories.
Tips for Getting Started
- Keep your first circuits simple: try pausing inserters or making warning lamps.
- Label combinators or lay them out neatly (use blueprints to help).
- Double-check icons and network colors—small mistakes become big headaches.
- Use "Show on map" or the debug options to track circuit signals and connections if things stop working.
Key Takeaways
Circuit networks turn simple automation into real factory brains. They let you balance inventory, optimize belts and inserters, and trigger alerts when something’s off. Start with basic on/off controls, experiment with combinators, and soon you’ll have a sprawling web of smart systems humming along. Be patient—learning circuits takes some trial and error, but it pays off when your factory runs exactly the way you want.
Train Logistics
Moving huge amounts of raw materials and finished goods across long distances is a pain without trains. Factorio’s train system turns chaos into order, letting you ship stuff across a mega-base efficiently. But to make it sing, you need more than just tracks and locomotives. Here’s how to plan, route, load, and automate trains so you don’t spend half your time chasing traffic jams and shortages.
Why Use Trains?
Once your factory stretches past a screen or two, belts get slow and awkward. Trains let you:
- Haul massive quantities in a single trip.
- Cross lakes, forests, and enemy nests easily.
- Connect remote mining outposts or oil fields to your main base.
- Reduce belt spaghetti by centralizing materials at loading and unloading stations.
With proper design, trains make production scale practically infinite.
Train Basics: Terminology and Setup
A few terms you’ll see everywhere:
- Locomotive: The engine. Drives trains forward or backward.
- Cargo Wagon/Fluid Wagon: Carry items or liquid. Multiple wagons per train.
- Train Stop: Named location where trains arrive and wait.
- Schedule: List of stops and conditions for a train to follow.
- Signal: Controls train movement; prevents pileups and collisions.
Building Your First Train Route
- Lay Rails: Place straight or curved tracks. Keep lines simple at first.
- Add Stations: Place a Train Stop at each location—give each a unique name.
- Build Train: Add at least one locomotive and wagon, facing the train stop arrow.
- Set The Schedule: Open the train’s interface, add stops, and set conditions ("Wait until inventory full/empty", "Wait 30 seconds", etc.).
- Start The Train: Hit the “Automatic” button to send it off on its route.
Loading and Unloading: Getting Goods In and Out
Trains don’t do anything without inserters feeding wagons and taking stuff out. Here’s how to set it up for smooth operation:
Efficient Loading
- Stack Inserters: These move five items at once—faster than regular inserters.
- Parallel Loading: Place inserters on both sides of a train for quick turnaround.
- Buffer Chests: Store materials right next to the station, so inserters stay fast even during supply interruptions.
- Belt Balancers: Evenly distribute input to every loading inserter so all wagons fill at the same rate.
Unloading Tricks
- Splitter Feeds: Use splitters and balancers to evenly split unloaded items onto multiple belts.
- Direct Inserter Chaining: Stack several inserters per wagon for high-throughput lines.
- Prioritized Outputs: Use circuit networks or filters if a wagon should only unload a specific item.
Train Scheduling: Making Routes Automatic
Trains can be set to follow schedules that balance speed and efficiency.
Schedule Settings
- Inventory Full/Empty: Great for cargo trains shuttling ore, plates, or products between base and outpost.
- Wait Time: Simple but can clog stations if resources are low.
- Circuit Network Conditions: Connect stations to chests or buffers. Only allow a train to stop if materials drop below a target, or when enough has built up to fill a train.
Sample Route
- Outpost Stop (Wait until cargo inventory full)
- Factory Stop (Wait until cargo inventory empty)
This style keeps your outposts running efficiently without sending empty trains on useless trips.
Track Signals: Preventing Collisions and Traffic
Multiple trains on the same network need signals so they don’t crash or stack up in long lines. There are two types:
- Rail Signal: Block entrance to a section of track if another train is already inside. Place before junctions and frequently along long stretches.
- Chain Signal: Only allow a train to enter if not just the next block, but every block in the path is clear. Crucial for intersections—prevents trains from getting stuck halfway, blocking everyone else.
Common Signal Layout
- Before and after every junction: Place a chain signal before an intersection, then a regular signal immediately after.
- On double tracks: Separate directions with one-way signals. Keeps trains from meeting nose-to-nose.
Multiple Trains and Station Management
Big factories require lots of trains visiting the same outpost or factory. Avoid traffic jams and slowdowns with these tips:
- Stackers: Add a “waiting area” (a siding with several train stops) before crowded stations. Trains line up instead of blocking main lines.
- Unique Station Names: Add a number or area code so trains don’t get lost.
- Limit Train Numbers: Use circuit network conditions at outpost stations, only inviting another train when room opens up.
- Dispatcher Circuits: For advanced networks, set up a combinator system to direct the next available train to whichever station needs service most.
Train Network Best Practices
- Main Bus Track: Use a double-headed loop or separate incoming/outgoing tracks. Keep high-traffic lines wide and well-signaled.
- Branch Lines: Have outposts link to the main line with simple, well-signaled splits—avoid criss-crossing tracks.
- Compact Stations: Keep loading/unloading areas neat, with plenty of inserters and enough buffer chests to let trains fill or empty fast.
Automation Shortcuts
- Blueprints: Save proven unloading, loading, and signaling setups for future builds.
- Train Limits: Set station “train limits” so you don’t send five trains to a depot with only two bays.
- Automatic Circuit Shut-offs: Temporarily turn stations on/off via circuit logic—send trains only when really needed.
Common Train Pitfalls
- Wrong-Way Signals: Watch signal direction—backward signals confuse trains.
- Stuck Intersections: Not enough chain signals equals constant deadlocks.
- Under-building Stackers: Not enough stacking space = mainline blockages.
- Tiny Buffers: Small chest/buffer setups starve inserters, slowing loading/unloading.
Wrapping Up
Getting good at train logistics takes some tinkering, but trains are the only real way to move tons of stuff efficiently once your factory spreads out. Simple, well-signaled tracks, reliable schedules, and well-designed loading stations make train headaches much rarer. Start basic, tweak things when traffic gets heavy, and soon your trains will keep your giant factory humming—all while you focus on the next big expansion.
Blueprint Usage
Blueprints are one of Factorio’s most powerful features, letting you copy, save, and stamp down complex setups with just a few clicks. They shrink repetitive chores, help keep your base looking tidy, and make sharing builds with friends or the community a breeze. Whether you’re automating your first smelting column or getting ready for megabase-scale rail networks, blueprinting is a skill you’ll rely on constantly.
What Are Blueprints?
In Factorio, a blueprint is a digital template of machines, belts, wiring, rails, or pretty much any structure. Once you’ve saved a pattern, you can instantly recreate that layout anywhere on the map—no need to rebuild piece by piece. Blueprints save everything: not just machines, but also wiring, module setups, train schedules, and even circuit network conditions.
Using Blueprints in Your Factory
How to Create a Blueprint
- Hit the B key (or click the blueprint icon in your inventory).
- Drag to select the area you want to capture. The preview shows what’s included—make sure every belt, inserter, and power pole lines up.
- Click "Create Blueprint." You’ll see a little grid for naming and icons—the clearer your label and picture, the easier it is to find later.
- The finished blueprint pops into your cursor or inventory. You can use it immediately or save it for later.
Placing Blueprints
- Once you have a blueprint, select it from your inventory or the blueprint library.
- Move your mouse around the map. The blueprint “ghosts” will show exactly where machines will land.
- Rotate with R to align with your base.
- Click to stamp it down. If you’ve got construction robots and a personal roboport (or a networked roboport nearby), the bots will get cracking right away.
- No robots? You’ll see ghost images as placeholders. You can then build over those ghosts manually—they’re a perfect guide for precise placement.
Blueprint Books
As your base grows and your favorite designs multiply, you’ll want to collect related blueprints in a bundle called a blueprint book. This functions like a folder, letting you keep intersections, outpost setups, or entire production lines together for easy access.
- Create a book: Click the blueprint book icon or shift+click several blueprints and drag them together.
- Name it something you’ll remember (“Green Circuits,” “Fast Mall,” “4-8 Rail Junctions”).
- Switch between blueprints in the book using the arrow buttons, or pop it open and pick directly.
Blueprint Library
Factorio’s blueprint library is a special cloud-synced space tied to your Steam account (or local saves if playing off-Steam). Anything you put in the library sticks around for every factory you build. Grab designs from old saves, browse community blueprints, or upload your inventions to share with others.
- Open with the blueprint library button (left side of the screen).
- Drag and drop blueprints or books in and out, or organize with folders.
- Steam sync means you always have your best builds handy, even if you start a totally new game or play on a friend’s server.
When Should You Use Blueprints?
Here’s where blueprints shine in day-to-day gameplay:
- Bulk Production: Stamping down large fields of miners, smelting arrays, or module-filled assemblers.
- Rail Systems: Laying kilometer-long tracks, junctions, and signals with precision—especially handy for uniform signaled intersections.
- Outpost Templates: Once you set up a reliable mining or oil outpost, capture the setup to reuse for every new patch.
- Belt Balancers: Instead of wiring up a nightmare spaghetti of splitters every time, blueprint a trusted balancer for quick placement.
- Mall Setups: Standardize your iron gear wheel or science pack lines—blueprint once, reuse forever.
Sharing and Importing Blueprints
Factorio’s community practically runs on blueprints. The game lets you share designs easily:
- Copy to Clipboard: Right-click a blueprint or book, choose “Export string,” then paste it online.
- Import from String: Click “Import blueprint string” in your blueprint menu, paste a code from Reddit or the Factorio forums, and you’re set.
You’ll find blueprints for everything online: beacons, rocket silos, science packs, and entire starter bases. Always inspect unfamiliar blueprints for odd modules or train schedules that might not match your current factory needs before stamping down.
Best Practices
- Label Clearly: Give blueprints helpful names and icons.
- Tileable Designs: Design arrays and modules so they fit together seamlessly when placed next to each other.
- Include Logistics: Make sure requester/provider chests, power poles, and robot coverage are part of every template.
- Update as Needed: When you improve a design, update your blueprint book—don’t get stuck with outdated builds.
- Watch for Mod Issues: Some blueprints include modded items—check compatibility if you’re running vanilla Factorio.
Common Blueprint Mistakes
- Gaps or Overlaps: Double-check blueprints before stamping them. Accidentally missing a belt or having overlapping machines means fixes after the fact.
- Forgotten Power Poles: A missing connection will stall that fancy new smelting array before it finishes its first steel plate.
- Unassigned Filters or Circuits: Remember to set up inserter filters or combinator conditions as blueprints only save settings if they exist at creation.
- Poor Alignment: Always line up blueprint ghosts with your base’s grid—off-grid placements break flow and make expansion uneven.
Conclusion
Blueprints take the pain out of repetitive setup and let creative builds shine. Mastering their use can turn an endless grind of laying belts into a satisfying, quick process. With blueprints, seasoned players swap stalled iron lines for organized mega-factories—and your future self will thank you every time you stamp down a perfect, working setup in seconds. Keep your library organized, keep improving your designs, and you’ll find yourself spending more time expanding and less time fixing mistakes.