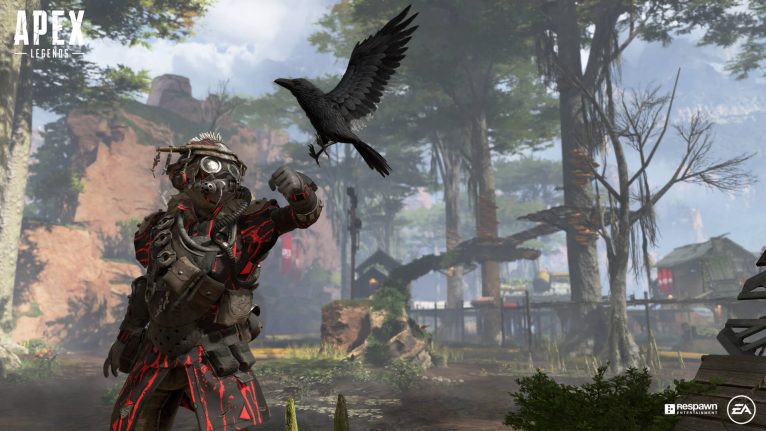
Apex Legends Advanced Gameplay Guide
Master advanced Apex Legends tactics: abilities, team comps, movement, looting, and rotations for victory in every match.
Once you’ve spent some time in Apex Legends, you start to notice the difference between simply surviving and consistently staying ahead of the competition. The basics—looting, shooting, and reviving—only go so far before the game’s finer details come into play. From the nuanced ways players rotate across the map to those split-second decisions in hectic team fights, Apex is full of opportunities to outthink, outmaneuver, and outplay others. Getting comfortable with the deeper mechanics and high-level tactics can make a huge difference, whether you’re gunning for your first win or looking to push your rank even higher.
Understanding Legends Abilities
In Apex Legends, victory often comes down to how well you use your Legend’s abilities. It’s not just about picking a character that looks cool or has a fun voice line—every Legend comes with a unique set of abilities that shapes how you and your squad play. Learning what each Legend brings to the squad lets you make smart decisions, whether you’re fighting up close, scouting for information, or locking down the final circle. Here’s a closer look at how abilities work and how you can use them to give your team the edge.
Types of Abilities: Passive, Tactical, and Ultimate
Every Legend in Apex has three specialized abilities:
- Passive Ability: Always active — gives ongoing benefits.
- Tactical Ability: Activated with a button press — usually has a short cooldown.
- Ultimate Ability: Their most powerful move — takes longer to charge.
Let’s break down how each type of ability changes a match.
Passive Abilities: The Subtle Game-Changers
Passive abilities often go unnoticed, but they make a big impact over the course of a match. Some examples:
- Bloodhound can see tracks left by enemies, letting you predict enemy movements.
- Gibraltar’s gun shield absorbs incoming fire while aiming down sights, giving extra defense in gunfights.
- Lifeline revives knocked teammates with her drone, freeing her hands to defend the revive.
The trick to using passives well is remembering they’re always helping you, without any input. For instance, constantly checking for tracks as Bloodhound or holding angles more confidently as Gibraltar can help your squad make better choices in chaotic moments.
Tactical Abilities: Tools for Every Fight
This is where Legends start to stand apart. Tactical abilities are on short cooldowns—usually 15–35 seconds—so you can use them often. They shape your playstyle:
- Wraith’s “Into the Void” lets her quickly reposition or escape damage.
- Caustic’s gas traps can block paths or flush out enemies from cover.
- Bangalore’s smoke launcher disrupts line of sight or covers retreats.
Timing matters as much as the ability itself. Using Bangalore’s smoke too early could give away your position, but holding it until you need a quick escape can turn a bad situation around. Getting a feel for the right time to use your tactical can mean the difference between a clean squad wipe and a tough respawn run.
Ultimate Abilities: Game-Changers with a Clock
Ultimates have the longest cooldown—often upwards of two minutes—but they’re designed to swing a fight, reposition a team, or lock down a win. Some of the best examples:
- Pathfinder’s Zipline Gun creates a fast travel route for everyone, not just your team.
- Gibraltar’s Defensive Bombardment rains down explosive artillery, great for breaking up enemy squads in the open.
- Valkyrie’s Skyward Dive redeploys the squad, which can save you from a bad circle or third party.
Because ultimates take so long to recharge, it’s smart to save them for key moments—like repositioning in late circles or forcing opponents out of hiding. Communicate with your squad so nobody wastes a big move during a skirmish that could've been handled with basic gunplay.
Synergy Between Abilities
Abilities aren’t just for the Legend using them—they often open up combos for your whole squad. For example:
- Bloodhound can scan a building, then Fuse’s grenades flush out anyone hiding inside.
- A Rampart wall behind a Gibraltar dome gives a bunker to fire safely from.
- Combining Bangalore smoke and Bloodhound’s enhanced vision gives your team a huge sight advantage in chaos.
Picking complementary Legends and planning around their strengths makes a squad feel unstoppable when things get intense.
Cooldown Management and Resourcefulness
Cooldowns can trip up even experienced players. Using an ability just because it’s off cooldown can backfire; you’re left exposed if you burn Wraith’s phase and find another squad seconds later. Keep a mental note—or even call out—to your team if your tactical or ultimate is ready. If you’re alone, use abilities more defensively, saving them for retreats or tricky angles.
Smart cooldown management is about waiting for the right moment, rather than using skills the instant they’re available.
Adapting to the Situation
No two games of Apex Legends play out the same, so flexibility is key. Sometimes you’ll want to save a Gibraltar ult for late zones, other times you need to turn a losing fight early. Learn how your favorite Legend’s abilities can help you escape, attack, defend, or relocate, depending on the match flow.
Practice Makes Perfect
Every ability feels a little awkward the first few times, but you’ll start noticing opportunities with experience. Try different Legends in unranked queues or practice modes, pay attention to cooldown times, and watch pro matches or streamers to see real-world applications.
Wrapping Up
Mastering abilities in Apex Legends is all about understanding the strengths (and limits) of each Legend. Whether you’re a solo queue hero or always running with three, knowing what every toolkit brings to the table is a huge step toward smarter fights and more wins. Learn your cooldowns, spot when to push or hold, and watch your squad synergy grow every match.
Team Composition Strategies
Selecting the right mix of Legends before you drop isn’t just about picking your favorites—it’s often the difference between a close win and going back to the lobby. A squad with balanced roles and well-matched abilities can handle almost anything Apex Legends throws at you, from aggressive third parties to tricky endgame circles.
The Pillars of Team Composition
A balanced squad usually covers three broad areas: offense, defense, and support. Let’s break these down:
Offense: Pushing and Initiating Fights
These Legends give you the first move and keep the pressure on:
- Wraith: Fast repositioning for opening shots or retreating if things get hot.
- Ash: Aggressive teleport that’s great for chasing or cutting off fleeing squads.
- Fuse: Grenade mayhem to soften up or zone out enemies from cover.
Put at least one strong offensive pick on your team if you like controlling fights, starting engagements, or forcing enemies out of hiding spots.
Defense: Lockdown and Fortification
Defenders hold the line, control choke points, and make sure your squad isn’t caught off guard:
- Gibraltar: Dome shield stops pushes and defensive bombardment punishes aggressive teams.
- Caustic: Gas traps deter close engagements and are brutal in tight buildings.
- Wattson: Fences block doors and entryways, plus pylon protects against incoming grenades and ultimates.
Against late-game circles and aggressive squads, defensive picks turn a losing position into an advantage.
Support: Utility and Healing
Support Legends keep your squad healthy, provide extra resources, or scan for threats:
- Lifeline: Fast revives and health top-offs keep your squad in the fight.
- Bloodhound: Scans reveal enemy locations—huge for tracking squads or planning pushes.
- Crypto: Drones for banner recovery, scanning, and disabling traps.
Even if you play aggressively, one support-oriented character boosts survivability and helps control the flow of battle.
Building a Synergistic Squad
Great teams aren’t always made of top-tier Legends—they’re built around combos that play off each other’s strengths.
Example Compositions
Classic Balanced (All-Around Play)
- Bloodhound (tracking/support)
- Gibraltar (defense)
- Wraith (mobility/offense)
This team can push, hold, and escape bad situations. Bloodhound pings enemies so Gibraltar can attack safely with his dome, while Wraith’s portal allows instant rotations or team resets.
Aggressive Pushers
- Octane (speed/jump pad)
- Wraith (escapes/portals)
- Bangalore (smokes/screens/mobility cover)
This lineup is about speed and chaos. Use Bangalore’s smokes plus Wraith’s portal for quick moves; Octane launches everyone into fast pushes.
Fortress Squad (Defensive/Endgame Control)
- Wattson (fences/pylon)
- Caustic (gas/control)
- Rampart (cover/ammo)
This comp excels when you bunker down on high ground or inside buildings in the final circles, making it nearly impossible to be pushed if everyone coordinates their abilities.
Adapting to Your Lobby
No two matches play out the same. Sometimes you’ll end up with teammates who random-pick the same role. Here’s how to adjust on the fly:
- If double support: Play more passively, third-party fights, and look for gear before contesting power positions.
- If double defense: Claim strong real estate early, stack supplies, and don’t get greedy with hunting kills.
- If triple attack: Keep moving, avoid long-range battles, and look for ways to isolate teams for 3v3 fights.
Looking at what your teammates pick, and adjusting your own choice, builds trust and leads to smoother gameplay—even with random squads.
Situational Awareness: Map and Ring Considerations
Your composition should fit your planned rotation path and landing spot:
- Open areas (Storm Point, some parts of Olympus): Legends with long-range reconnaissance (Valkyrie, Seer) or mobile movement excel here.
- Urban/jammed POIs (Fragment on World’s Edge, Estates on Olympus): Defensive setups thrive in buildings and narrow corridors.
Don’t forget to pick with final circles in mind: movement abilities win open endings, while tight defenses decide who survives last in small buildings.
Communication: Combos and Cooldowns
A team comp only works if the squad is actually working together. Here’s what helps:
- Call out when your ultimates are ready and plan team pushes around them (e.g., “Bang smoke on my scan,” or “Gibby dome, go for res!”).
- Use pings for repositioning and enemy positions, even if you’re not on voice chat.
- Stack abilities for layered attacks or defense. For example, Caustic fills a room with gas, then Wattson sets fences at the doors—anyone coming in will be slowed and revealed.
Learning some basic combos—like using Horizon’s Black Hole followed by Fuse’s grenades—makes a good team almost unfair.
Meta Trends: What the Pros Choose
The meta changes with each season’s patches and Legend tweaks. Sometimes certain Legends fall out of favor, while others see more play during tournaments or high-ranked matches.
- Mobility Legends like Valkyrie, Wraith, and Octane are almost always in top teams, thanks to quick rotations out of danger.
- Recon Legends (Crypto, Bloodhound, Seer) help with info and third-party prevention.
- Gibraltar often sees pro play for his versatile dome in sticky situations.
If you want to stay current, check ranked leaderboard team comps or watch the latest ALGS games to see what’s working at the top.
Conclusion
Building a good team in Apex Legends isn’t about always picking the most popular Legend—it’s about crafting a lineup that fits your playstyle, the map, and your goals for that match. Think about blending offense, defense, and support for the best results. Be ready to swap around and cover any weak spots your randoms leave open. With awareness, teamwork, and smart ability combos, your squad will be ready for anything the Outlands throw your way. Apex Legends rewards quick thinking, clever positioning, and, above all, smart movement. Getting around the map efficiently is a massive advantage—whether you’re rushing a fight, dodging shots, or chasing down a fleeing enemy. Below, you’ll find tips, explanations, and practical uses for advanced movement techniques, from the basics to high-skill mechanics that can set you apart.
Movement Techniques
Staying mobile is more than sprinting and sliding. Apex’s fluid movement system is a huge part of its skill ceiling, letting sharp players outplay slower squads or dodge entire teams. These are the core and advanced movement techniques you’ll want in your toolkit.
Sliding: The Foundation
Sliding is one of the first tricks you learn, but it’s much more than a flashy animation. It’s your free speed boost and dodge. To slide, just sprint and hit your crouch button while moving forward. You’ll notice:
- Speed Gain: You move faster than sprinting alone, especially when heading down slopes.
- Hitbox Lowering: Sliding makes you a tougher target to hit mid-gunfight.
- Attack Options: You’re free to shoot, reload, or even pop some abilities mid-slide.
Quick Tip: Chain slides together by jumping out of a slide, then re-sliding as your feet hit the ground. This keeps up your momentum and makes your movement unpredictable.
Bunny Hopping: Staying Fast While Healing
Bunny hopping—“bhopping”—is a staple for seasoned players. It lets you heal or shield up while moving unexpectedly fast.
How To Bhopping
- Sprint and slide, then hold crouch.
- Jump, and while holding crouch, strafe left and right as you land, using your movement keys.
- Move your mouse slightly in the same direction as your strafe, but not too far.
- Keep timing jumps as soon as you hit the ground.
Practice is key—aim for small, quick jumps. Done right, you’ll move quickly and erratically, tough to hit and able to heal safely.
Usage Example: Take cover behind a rock, start your shield battery, and bunny hop away from bullets to a safer spot. Enemies have a harder time tracking your movement than if you’d just sprinted.
Wall Climbing and Mantling: Go Over, Not Around
Apex’s walls and ledges aren’t obstacles—they’re shortcuts.
Wall Climb Tips
- Sprint at a wall and hold the jump key. Instead of just vaulting, you’ll climb vertically.
- The higher you start the jump, the higher you can grab.
- Move left or right to climb around corners and peek without fully exposing yourself.
Mastering climbing lets you take unusual angles, escape through windows, and avoid predictable routes. Some Legends can take this farther—Horizon, Pathfinder, and Valkyrie create vertical flanks even faster.
Tap-Strafing (PC Only, Advanced)
Tap-strafing is exclusive to mouse and keyboard. It lets you whip your momentum mid-air or during slides. In essence, you get an instant, sharp change in direction—a huge edge for dodging and movement outplays.
How To Tap-Strafe
- Sprint and slide-jump forward.
- While airborne, hold your strafe key (A or D) and quickly tap your forward key (W) repeatedly.
- Simultaneously, swing your mouse in the desired direction.
The tap-strafe lets you make sudden, dizzying turns at the last moment. Great for repositioning mid-jump, confusing opponents, or dodging shots in open spaces.
Super Jumping Off Ziplines
Super jumping lets you boost off ziplines, especially the vertical ones you find all over the maps or on buildings.
To Super Jump
- Approach a vertical zipline and press jump to attach.
- Immediately press jump again at the perfect moment (almost instantly after connecting).
Timed right, your character launches much higher into the air than a standard jump, making it a quick getaway or aggressive angle.
Horizontal ziplines also allow momentum tricks:
- Jump repeatedly as you zip off to keep speed.
- Combine with a crouch just before jumping for slightly more distance.
Punch Boosting and Melee Jumping
While sliding downhill or near the edge of rushes, punch-boosting adds a jolt of speed. Tap your melee button while sliding—this gives you a mini speed burst without losing aim control. Great for closing gaps or getting out of danger.
Melee jumping—using a melee right as you hit a ledge—can also give just enough height or distance to complete tough jumps, often when you’re just out of reach.
Zipline Tech (Bouncing, Quick Reversals)
Ziplines are everywhere in Apex. Use these tricks for quick escapes, fights, or rotations:
- Zipline Bounce: Rapidly bounce on/off a zipline by spamming jump and interact. Makes you hard to track and nearly impossible to hit while contesting a rooftop.
- Quick Reversal: Let go of a zipline mid-slide, then immediately press interact to reattach facing the other direction. You’ll instantly flip your movement and can throw off chasers or shooters.
This movement doesn’t just look cool—it can keep you alive while you reposition or heal on high ground.
Crouch Spamming and Strafing
In close-quarters fights, combine crouch spamming with unpredictable strafes. Instead of just strafing left and right, wildly mix in crouch inputs. This makes your hitbox a nightmare to track, throws off shotgun flicks, and can turn shotgun duels your way.
Hot Tip: Mix in jump slides mid-fight instead of just standing—catch enemies off guard or reposition for a quick shield swap.
Legend-Specific Movement
Some Legends push movement boundaries:
- Pathfinder: Grapple for insane speed and repositioning. Swinging sideways adds unpredictability.
- Octane: Stim for extra momentum, slide-jump for massive leaps, and double-jump with his jump pad.
- Horizon: Gravity Lift breaks vertical limits; combine with slides and jumps as you exit.
- Valkyrie: Jetpack thrusts help chase or escape, paired with strafing for dodging.
- Wraith: Into the Void and portals allow risky rotations others can’t match.
Pair advanced movement with each Legend's abilities for maximum impact.
Putting It All Together
Stringing these movement techniques together is what separates a good player from a great one. Start with basic slides and climbs, then layer on bunny hops and tap-strafes as you get comfortable. Legendary plays often come down to movement—dodging shots, rotating first, or catching enemies off-guard with a move they don’t expect.
Practice any new trick in the Firing Range, then try it out in real matches. Soon, your movement will feel instinctive, and you’ll outmaneuver squads who still play with their feet stuck in the mud. Master movement, and everything else in Apex Legends gets a little easier. Looting fast and smart in Apex Legends can be the difference between running the lobby and becoming an early death box. Every second spent picking gear is a second you’re not watching for enemies or moving toward the next fight. Here’s how you can make your looting as efficient — and safe — as possible.
The Golden Rule: Prioritize Safety Over Greed
Your loot doesn’t matter if you’re downed while sorting through it. At the very start of a match, it’s tempting to land hot and grab everything, but awareness should always come first.
- Eyes up: Always glance around between looting piles or opening bins.
- Use cover: Loot behind walls, inside buildings, or with a clear view of likely enemy paths.
- Shut doors: If possible, close doors to buy yourself an extra second or two of warning.
- Communicate: Call out what you see and what you’re missing. Good pings (or quick voice chat) save everyone time.
Early Game Scavenging: What to Grab First
When you drop, you don’t have time to be picky. Grab whatever weapon you see, plus a handful of ammo and shields.
Loot Order in the First 30 Seconds
- Any weapon — Even a P2020 or Mozambique is better than nothing.
- Ammo — Prioritize matching ammo for your gun. Grab extra if you see a second possible primary.
- Body shield and helmet — Shields are a must; helmets are bonus protection.
- Syringes & shield cells — Two to four of each is enough for the early game.
- Grenades — One or two. Highly useful, but don’t overfill your pack yet.
- Knockdown shield — Don’t skip this; you’d hate to miss an easy self-revive block.
- Backpack — Expand your space ASAP for flexibility.
If you see better gear or weapons while looting, take them quickly — don’t stand still swapping attachments unless you’re 100% safe.
Early Game Looting Tips
- Weapon swaps > reloads: In a fight, it’s faster to pick up a fresh gun on the ground than reload if you’re empty and pressed.
- Ping items your teammates need: Don’t hoard. Sharing armor and heals keeps the squad alive.
- Don’t menu loot under fire: Use your mouse scroll or quick-swap keys. Stay fluid, not frozen in the inventory screen.
Mid-Game Looting: Upgrading and Loadout Focus
Once your team’s kitted with at least blue shields and two weapons each, you’re entering the mid-game. Now’s the moment to shape your loadout and stock up.
Loadout Lock-In
- Choose main & secondary thoughtfully: Shotgun + SMG for close brawls, or AR + Sniper for range. Pair guns with non-overlapping ammo types if possible (example: R-301 + Peacekeeper).
- Attachment hunting: Level up sights first, then mags & stocks. Purple and gold extended mags are high priority.
- Backpack management: Dump mismatched ammo, unnecessary attachments, or duplicate items. If you’re not carrying a weapon that needs sniper ammo, drop every round.
Heal and Utility Split
- Medicines: Aim for at least 4–6 shield cells, 2 shield batteries, 4–6 syringes, and 2 med kits if possible.
- Grenades: Arc Stars and Frag Grenades are clutch for pushing bunkered squads — always keep one.
Swapping vs. Sorting
- Fast shield swaps: If you down a squad and their death boxes are all over, look for full or partially charged armor. Shield swapping in mid-fight is often faster than healing.
- Attachment transfer: Use the “equip” button to auto-swap attachments to your new gun. Avoid slow manual transfer unless things are totally safe.
Late Game: Looting Under Pressure
As the ring shrinks, the risk skyrockets. Here’s how to loot in endgame without getting wiped:
- Instant shield swaps: If your armor’s broken, swap to fresh shields from a box, even if the Evo color is lower.
- Don’t overloot: Everyone wants that last gold helmet, but fights break out in seconds. Grab what you need and reposition right away.
- Control the area: If you win a fight, post up (or have a teammate watch) while you loot. Never have all three in the box at once.
- Death Boxes as bait: Teams love to third-party kills. Bait squads by pretending to loot, or lay traps with Caustic, Wattson, or Rampart.
Smart Ping Usage and Communication
Effective looting goes hand-in-hand with clear squad comms.
- Ping upgrades: When you mark an improved shield or scope, your teammates can grab it without hunting themselves.
- Mark enemies: If you spot a threat while looting, ping immediately and back off the box.
- Announce priorities: “I need light ammo,” “Anyone need this gold backpack?” Keeps the whole squad loaded for the next fight.
Backpack Organization: Inventory Tetris for Speed
Quick item management keeps looting quick and panic-free.
- Stack ammo types: Keep all light, heavy, or energy ammo together.
- Health on one row: Top row for heals, bottom for nades, etc. Every second spent searching your pack in a fight is dangerous.
- Use the ‘Hold to Drop’ key: One-button drops make you faster at sharing ammo or medkits.
Looting While Moving
- Strafe while looting: Never stand still. Even while opening death boxes, tap A/D or move your joystick.
- Bunny hop looting: For ultimate speed, loot boxes while bunny hopping or sliding past them if you’ve mastered the trick.
- Rotate out early: If a fight is won, loot the essentials and get moving. Late looting = circle damage or being caught by other squads.
Key Takeaways
Efficient looting is one of the quickest ways to rank up your play. Remember these essentials:
- Prioritize safety before grabbing more loot.
- Organize your inventory for fast swapping.
- Communicate what you need and what you find.
- Always be ready to leave loot behind if pressure comes.
Get these habits locked in, and you’ll stay better equipped, win more fights, and cut down those embarrassing loot deaths. Apex Legends rewards those who can loot fast and keep their heads on a swivel.
Rotations Guide
Every Apex Legends match eventually pivots from gathering loot to choosing where to move next. Knowing when and where to rotate is the difference between picking favorable fights and getting pinched or caught in the open. A tight rotation strategy can set your squad up for kills, safer positions, and more wins.
Why Rotations Matter
The term “rotating” refers to moving from one area to another, usually after looting, to keep ahead of the ring and secure a better position for the next encounters. Bad rotations get you gatekept by other squads, pinned by the zone, or stuck in third-party crossfire.
Reading the Ring
Your first job after dropping is always to check where the first circle is closing and how far you are from it.
- If you’re far from the ring: Prioritize movement over extended looting. Look for rotation tools: jump towers, Valkyrie’s ultimate, Octane’s pad, vehicles if available.
- If you’re near the ring’s edge: Loot with more patience, but watch for gatekeeping teams.
- If you’re in zone: Consider rotating for the best high ground or key buildings before others get there.
Always try to move before the ring begins closing. Late rotations put you at risk for being caught in the open or stuck in chaotic choke points.
Scouting and Pathing
Plan your movement before you take it. Open your map and scan the route to safety, looking for:
- Choke Points: Narrow paths, canyon caves, bridges, and small valleys where enemies love to wait. Either rotate early to avoid these, or flank wide to avoid traps.
- Balloon Towers/Tridents/Gravity Cannons: Quick ways to cover ground, but you’ll be exposed and noisy. Time your escapes carefully.
- High Ground: Hills, rooftops, and cliffs give combat advantage. Plan your route so you arrive on top, not below another squad.
- Building Clusters: Useful for cover but can be dangerous if overrun. Avoid running straight into houses unless you know it’s safe.
Tip: Ping your planned path for squad awareness. A well-marked route keeps everyone together and ready if you run into trouble.
Early Game Rotations
Leaving your drop spot can be the most dangerous move of the match. Here’s how to rotate safely in the early phase:
- Scout with pings: Mark doors, open bins, missing loot, or dead bodies to warn of nearby squads.
- Rotate as three: Don’t leave one teammate lagging. Lone wolves get picked easily during early movement.
- Use Legends’ tools: Bloodhound can scan for recent activity, Crypto can check banners for squad count, Pathfinder or Valkyrie can recon beacons for next ring.
- Loot, then move: Don’t overstay. A quick shield, basic weapon, and medkit is enough—keep ahead of the squads that might drop nearby.
- Third-party awareness: Listen for nearby gunfire, but pick your fights. Early contesting can get you caught between two teams.
Mid-Game Rotations
The map tightens up, teams converge, and you have to think one step ahead of the circle.
- Watch the kill feed: If multiple teams are dying nearby, that area may be volatile or already a hot spot.
- Rotate before the herd: Most squads move as the ring closes. Be ahead of them to secure power positions and avoid running shoulder-to-shoulder with squads.
- Detach from unnecessary fights: Spending time in drawn-out battles, especially outside the circle, will get you pinched. Reset if a fight takes too long or gets noisy.
- Inventory check: Before rotating, top off your heals and ammo. You may not get a safe spot to loot again before the next combat.
Late Game Rotations
When only a few squads remain, every movement is risky. Your focus now should shift to positioning.
- Play the edge or center: Edge strategies let you gatekeep late squads, while center positions guarantee you won’t need to move but are often contested.
- Use cover: Rotate from rock to rock, or building to building. Open field rotations often end in disaster unless you have movement abilities ready.
- Scout for enemies: Use scan legends, crypto drone, or simple audio cues to avoid surprise encounters during tight rotations.
- Timing is everything: Sometimes holding until the very last moment lets you slip by unnoticed, but don't linger so long the ring chips your shields.
Third-Party and Gatekeeping Awareness
Clever rotations mean avoiding third parties and not becoming someone else’s easy gatekeep bait.
- Listen for gunfights: If you hear shooting nearby, pause. Third party after the kill feed drops or rotate wide to avoid getting caught in the crossfire.
- Check your flanks: When you set up to gatekeep, make sure your back is clear. Always expect another squad might be mirroring your plan.
Using Movement Legends
Some characters can turn risky rotations into safe escapes or creative flanks.
- Valkyrie’s Skyward Dive: Best for fast, long rotations out of bad positions or over dangerous terrain. Use it to reposition if you’re pinched by zone or enemy teams.
- Octane’s Launch Pad: For quick bursts over short distances or tricky high ground.
- Pathfinder’s Grapple and Zipline: Ideal for unpredictable movement and reaching high ground first.
- Wraith’s Portal: Great for safely moving your squad through exposed areas or escaping bad fights.
Match your Legend choice to the rotation needs of the map and your usual playstyle.
Common Rotation Mistakes
- Looting too long: The number one killer in rotations is staying too long and getting caught by the zone or a team riding ring edge.
- Predictable paths: Avoid the “everyone runs here” routes. If it’s obvious to you, it’s obvious to others, and you risk gatekeeping.
- Not communicating: Always call your planned move (“Let’s hit Fragment side,” “Swing wide through Lava Fissure,” etc).
- Splitting: Running off alone not only divides your firepower, but makes your squad easier prey for more organized teams.
Map-Specific Rotation Tips
World’s Edge: Watch train tunnel and choke points around Fragment. Be careful of over-rotating through harvester; teams love to gatekeep both directions.
Storm Point: The map is larger, so rotating late with movement tools like Valkyrie or Tridents can be key. Check the map for prowler camps and gravity cannons to plan alternate paths.
Olympus: Lots of open areas—prioritize vehicles for cross-map rotations and use rooftops for cover as you move.
Final Thoughts on Rotations
Rotations turn Apex from a basic loot-and-shoot into a tactical shooter. The best teams plan their moves, use the terrain, and keep comms up. By mastering your mid-game movement and timing your rotations, you’ll dodge most third parties, win more late fights, and clutch those nervy final circles with style. Each match will offer a different journey—so keep learning, adapt, and get moving.