Vampire Survivors Advanced Strategies Guide
Master Vampire Survivors with advanced tips on optimal weapon combos, skill builds, enemy strategies, and survival tactics to conquer higher rounds.
So, you've spent plenty of time with Vampire Survivors, experimenting with different characters, weapons, and item combinations, and now you're looking to level up your gameplay. Maybe you've hit a plateau, or you're aiming to reach that coveted stage completion or endless mode high-score. Either way, stepping beyond the basics involves mastering some deeper strategic elements, understanding subtle mechanics, and making smarter choices when it comes to builds and positioning. Vampire Survivors rewards not just fast reflexes but thoughtful gameplay, where knowing exactly how and when to pivot your strategy can make all the difference. Whether your goal is simply surviving longer waves of enemies or perfecting your nuanced loadout strategies, there's plenty more beneath the surface waiting to improve your runs.
Picking The Right Character: Who Suits Your Playstyle?
It's tempting to stick to one favorite choice, especially since each Vampire Survivors character starts with unique abilities and weapons. But pushing into tougher runs means choosing carefully based on what you’re aiming to achieve.
Antonio--Simple and Solid
Antonio is great for straightforward gameplay. He starts with the trusty Whip weapon and gets a damage boost every five levels. Whip has excellent horizontal reach ideal for crowd-control. Pair Antonio's Whip with passive items like Spinach and Hollow Heart for damage boosts and extra health. Go ahead and snag Garlic or King Bible for an even stronger close-range defense. This build keeps swarms manageable even past twenty minutes of survival.
Imelda--Magic-Focused Havoc
Imelda automatically earns extra experience, which is incredibly helpful to rapidly unlock weapon evolutions. Her Magic Wand is auto-targeting and hits reliably from the start. Go for a caster-heavy strategy here: pair it with Empty Tome for cooldown reduction, Duplicator for extra projectile density, and Spellbinder to stretch projectile duration. Finishing your loadout with evolved weapons like Holy Wand (Magic Wand's evolution) or Vandalier (evolved Peachone and Ebony Wings) can quickly turn Imelda into a late-game damage machine.
Poe--Garlic and Chill
If you're after the Garlic-centered strategy that many players swear by, Poe is unmatched as your undead wingman. Starting off with extra Garlic range, Poe punishes weaker enemies instantly and clears paths through swarms effortlessly early on. Garlic thrives when combined with Pummarola (garlic evolution item) to evolve into the overpowered Soul Eater, absorbing enemy health right back into Poe. Toss in Laurel or Clock Lancet to avoid sudden one-shots later in tougher waves. Poe's biggest limitation is boss-killing speed, so grab axes or knives to supplement his Garlic’s up-close strength.
Mortaccio--Projectile Hell
Mortaccio loves projectiles and gains additional projectiles every 20 levels, stacking projectile count rapidly. Early runs with Mortaccio benefit immensely from Knife, Axe, or Cross. Pairing him with passive items like Duplicator (for even more projectiles) and Bracer (projectile speed increase) guarantees Mortaccio's arsenal fills the screen quickly. Consider grabbing evolved weapons such as Thousand Edge (Knife's evolution) and Death Spiral (Axe evolution) to overwhelm waves through pure projectile spam. Mortaccio scales incredibly well into endgame scenarios thanks to his projectile-heavy nature.
Arca Ladonna--Cooldown Queen
With Arca, your spells will fire off noticeably faster since she inherently reduces cooldowns every few levels. Her default Fire Wand deals hefty damage but requires strong positioning as projectiles shoot randomly at enemies. Arca pairs excellently with Empty Tome to double down on the cooldown reduction. For offense and defense balance, level up King Bible and whip up a devastating combination of AOE and DPS. Due to unpredictable targeting with Fire Wand, complement your loadout with directional weapons (like Axe or Knife) to enhance damage control.
Skill Priority and Weapon Evolutions
Picking your character and initial gear is half the magic, but Vampire Survivors really shines when you smartly prioritize skills and chase powerful evolved weapons. Here’s how you can approach skill builds in general across your survivors:
Weapon Evolution Essentials
Weapons evolve after max-leveling them and pairing them with specific passive items. Notable evolutions include:
- Whip + Hollow Heart → Bloody Tear: Huge lifesteal boost, ideal on tanky builds.
- Magic Wand + Empty Tome → Holy Wand: Constant firing projectiles, great late-game boss melting.
- King Bible + Spellbinder → Unholy Vespers: Permanent circling blades means enemies barely touch you unless charging.
- Garlic + Pummarola → Soul Eater: Extra health-stealing kills groups fast; great for beginners or crowded maps.
- Knife + Bracer → Thousand Edge: Rapid-fire daggers mow down waves easily, provided you aim sharply.
- Axe + Candelabrador → Death Spiral: Circular giant axes clear paths effortlessly in packed encounters.
Focus early experience gains into rapidly max-leveling a primary weapon to unlock evolutions sooner rather than later--these weapons directly improve your long-term survival rate, making your gameplay much easier.
Choosing the Right Passives--A Balanced Approach
Nearly every passive item carries strategic value. Don't ignore defensive and utility skills simply to chase raw damage:
- Defensive items like Laurel or Armor help with survival sustainability, especially past the dreaded 20-minute mark.
- Damage increase passives (Spinach, Bracer, Candelabrador) offer rapid mob clearing.
- Cooldown reduction (Empty Tome) accelerates your attacks, boosting DPS significantly across all builds.
For balanced character building, always include at least one defensive capability and several different evolved weapon types. Versatile builds increase survival likelihood, particularly during lengthy sessions or endless-mode marathons.
Smart Positioning Complements Your Builds
No matter how strong your character build turns out, positioning spells the difference between a satisfying run or sudden demise:
- Frontline builds (Garlic and Whip-oriented) require active movement into crowded enemy clusters, maximizing lifesteal and quickly thinning mobs. Stay aggressive early on.
- Projectile builds (Mortaccio or Imelda types) benefit from circular positioning--moving around groups and carefully timing approaches. Center your attacks so multiple enemies are hit by your projectile spreads simultaneously.
- Always leave yourself escape routes when encountering boss enemies. Even tanky builds benefit from tactical retreats if overwhelmed.
Getting a feel for this dance of positioning and build strengths allows mastery over challenging late-game runs.
Crafting an optimal run in Vampire Survivors means thoughtfully considering character strengths, quickly chasing potent evolved weapons and balance in passive items, plus relying on careful and methodical positioning. By weaving together these smarter character and skill build tactics, your survival rates and high scores rise drastically--giving your future runs plenty of satisfaction as the easy waves fade away into memory.
Maximizing Your Loot: Efficient Item Collection in Vampire Survivors
You've picked your survivor, mapped out your skill priorities, and prepared your strategy--but to truly dominate Vampire Survivors, you've got to get crafty with that sweet item loot. Knowing how to collect gear efficiently means leveling quicker, evolving weapons sooner, and pushing deeper into tougher stages. Here's how to streamline that grind.
Plan Your Path: Grab Essential Items First
It's tempting to snag every shiny bauble littered around maps, but hold back that urge. Vampire Survivors limits passive item slots, meaning you'll have to carefully pick your passives if you want optimal evolved weapons later. Think ahead:
- Start runs by selecting passives needed to evolve your planned weapon builds. If you're running Magic Wand to evolve into Holy Wand, for example, hunt down Empty Tome as soon as possible.
- Avoid unnecessary filler passives. Ask yourself each time: "Do I really need Wings speed boost, or should I save this slot for Spinach or Bracer to evolve something stronger later?"
Planning your passive item slots from the get-go saves you frustration during late-game attempts at powerful evolutions.
Map Awareness: Spawn Locations and Item Drops
In certain Vampire Survivors maps--such as the Library, Dairy Plant, or the Mad Forest--key passive items appear as guaranteed ground spawns in specific spots. This means:
- Check the map thoroughly at the start. Every second counts, so identify exactly where those valuable items are hiding. For instance, Empty Tome regularly appears on the Inlaid Library map, usually far left or far right.
- Strategically delay collecting these guaranteed items until you've already maxed out your six passive item slots. Why? Items picked up off the ground don't count against the slot limit if your passives are already full. This trick nets you powerful "bonus" passives that give your build an incredible edge.
Map familiarity helps you minimize wasted time and effort. When you learn spawn locations and remember this simple ground-item trick, your item collections become infinitely smoother.
Treasure Chests, Elite Mobs, and Maximizing Drops
Elite enemies (bosses) are your best buddies in Vampire Survivors. These tougher mobs always drop experience-filled treasure chests, offering significant level-up benefits.
- Time your boss kills carefully. If you're close to max leveling a certain weapon, finish that weapon first. Opening the chest afterward gives it the potential to instantly provide its evolution, saving you massive time grinding additional levels.
- Multi-level treasure chests (often the fancy, glowing ones or special boss drops) award multiple item upgrades at once. Whenever possible, save a boss chest if you're a step away from multiple meaningful upgrades to really maximize your return.
Optimizing chest use boosts your power quickly and efficiently, granting you a better survival outcome in those brutal late-game stages.
The Luck Stat: Your Hidden Friend
New players often overlook the Luck stat--don't be one of them! Luck affects item drops and treasure chest quality significantly:
- Luck increases the odds of higher-tier chests spawning from defeated bosses. High luck runs might dole out triple or even five-level chests more regularly, giving sizable leveling spurts all at once.
- Luck boosts recovery item drop rates, letting you breathe easier under relentless waves by providing more frequent chickens (healing) or floor pickups.
- Consider slotting Clover passive if your build allows. Even modest luck boosts add beneficial drops without slowing down your run’s momentum.
When pushing harder waves, luck might seem subtle--yet its benefits quietly stack up, rewarding savvy players who give it some attention.
Experience Gems and efficient “Vacuuming”
Enemy mobs litter maps with colorful experience gems. You’ll gather gems naturally through gameplay, but optimizing the pick-up process grants quicker leveling:
- Occasionally walk the paths you've already cleared. Often, enemies expire off-screen, leaving gems you haven't yet touched. These gems persist indefinitely unless too many accumulate off-screen, so sweeping back occasionally ensures none get wasted.
- Save the map-wide vacuum orb powerups (Attractorb pickups) until you're either overwhelmed or after massive mob clears. Gathering multiple screens' worth of gems simultaneously propels you up multiple levels instantly, enabling crucial upgrades at clutch moments.
Perfecting gem vacuuming means hitting key evolutionary checkpoints faster, often the difference between smoothly clearing stage hurdles or painfully grinding through enemies while vulnerable.
Efficient item collection transforms those grueling early runs into smooth victories. By planning ahead, optimizing passive item pickups, and embracing smart chest strategies and gem collection techniques, you set up runs for massive success. Remember: quick thinking and smart item management often separate seasoned survivors from panicked prey.
Survival Strategies for High Rounds: Dominating Late-Game Waves
Early rounds in Vampire Survivors might feel forgiving, almost casual, but climbing into the late-game waves presents a whole new challenge. Enemy density skyrockets, bosses get beefier, and even small positioning errors can end your carefully nurtured run in seconds.
If you're determined to push into higher waves, these proven late-game survival strategies will help you handle the chaos and earn new personal-best achievements.
Know Your Evolutions: Prioritize Crowd Control and Area Denial
While single-target weapons shine early on, late rounds are all about controlling hordes of fast, relentless attackers. To hold out, choose and evolve weapons designed explicitly to handle massive crowds efficiently.
-
King Bible (evolves into Unholy Vespers): Its evolved version surrounds you permanently with swirling orbs, creating a constant protection barrier. When fully leveled, it keeps groups of enemies safely at bay or weakens them before they even have a chance to touch you.
-
Garlic (evolves into Soul Eater): An area-of-effect aura that damages nearby enemies, capable of steadily knocking back weaker foes and softening tougher ones. While less potent at ultra-high levels, it's great combined with other crowd-control gear.
-
Santa Water (evolves into La Borra): Creates expanding damage puddles across the map. By the endgame, these puddles linger longer and stack heavily, creating defensive survival circles and safer zones to maneuver around as enemy aggression climbs.
Efficiently evolved weapons like Unholy Vespers, La Borra, and even Mannajja (evolved Song of Mana) make survival so much more manageable by limiting threats directly around you, allowing strategic movement within limited safe zones.
Positioning Matters: Move in Patterns, Not Randomly
When the screen fills entirely with monsters, random movement will quickly trap and overwhelm you. Instead, develop a habit of careful directional movement to manipulate enemy spawns and maintain breathing room.
-
Circle Strafing Technique -- Move consistently in wide, smooth circles or figure-eights. By steadily maneuvering around in repetitive patterns, you encourage enemy formations to cluster behind you rather than surrounding you. The accumulated horde behind you becomes manageable to attack with rear-focused skills.
-
Edge-Walking (most useful in horizontal maps like Inlaid Library) -- Hugging the top or bottom wall limits enemy spawns from that direction. This lets you bunch your attackers efficiently into a predictable funnel, perfect for directed attacks and evolved area-of-effect skills.
Smart and consistent movement patterns prevent getting boxed in and picked apart, drastically improving your longer-term survivability.
Leveling Your Stats Wisely: Balance Damage and Survival
Once you've evolved your key weapons in late-game waves, remaining level-ups often let you boost passive gear or choose bonus stats. Be strategic to keep pace with escalating enemy power:
-
Armor and Laurel Shield: These aren't weapon evolutions, but they add much-needed durability. Armor reduces all incoming damage, while Laurel provides a short invulnerability shield every few hits. In late-game rounds, several hits are inevitable, making defense invaluable.
-
Cooldown Reduction (Empty Tome) and Area Increase (Candelabrador) become incredibly useful passives. Reduced cooldown speeds up your attacks, continually thinning enemy ranks, while increasing area boosts defensive zones like La Borra significantly.
-
Don't ignore supplementary DPS passives such as Spinach (damage boost) and Duplicator (extra projectile). Consistently upgrading offensive power ensures enemies never manage to entirely out-scale you.
Balanced skill and stat selection lets you push further into brutal late rounds successfully, rather than getting steamrolled immediately once enemy strength surpasses your early power.
Utilize Floor Pickup Orbs Strategically and Wisely
During higher waves, floor pickups are often game-saving items rather than small conveniences. Here's how to integrate them smartly into your late-game runs:
-
Rosary Powerups: Instantly destroys every enemy on screen. Late rounds flood the map entirely, making a single Rosary a huge, instant clear. Save these until you're legitimately overwhelmed--roasting thousands of foes unlocks breathing room and can drop tons of XP gems.
-
Vacuum Orbs (Attractorb items): Instantly gather experience gems lying around from defeated enemies. Wait until a massive wave ends or you've cleared huge battles to vacuum massive XP rewards at once, rapidly boosting multiple levels and strengthening your survival.
-
Floor Chickens (Healing pickups): Position yourself in paths toward previously seen chickens ahead of tougher boss waves. Planning route access to quick health pickups means survival amid sticky situations, especially valuable during desperate moments late-game.
Wise use of floor pickups transforms challenging round transitions into manageable ones, greatly extending longevity as chaos escalates.
Manage Visual Clutter - Filter Through the Chaos
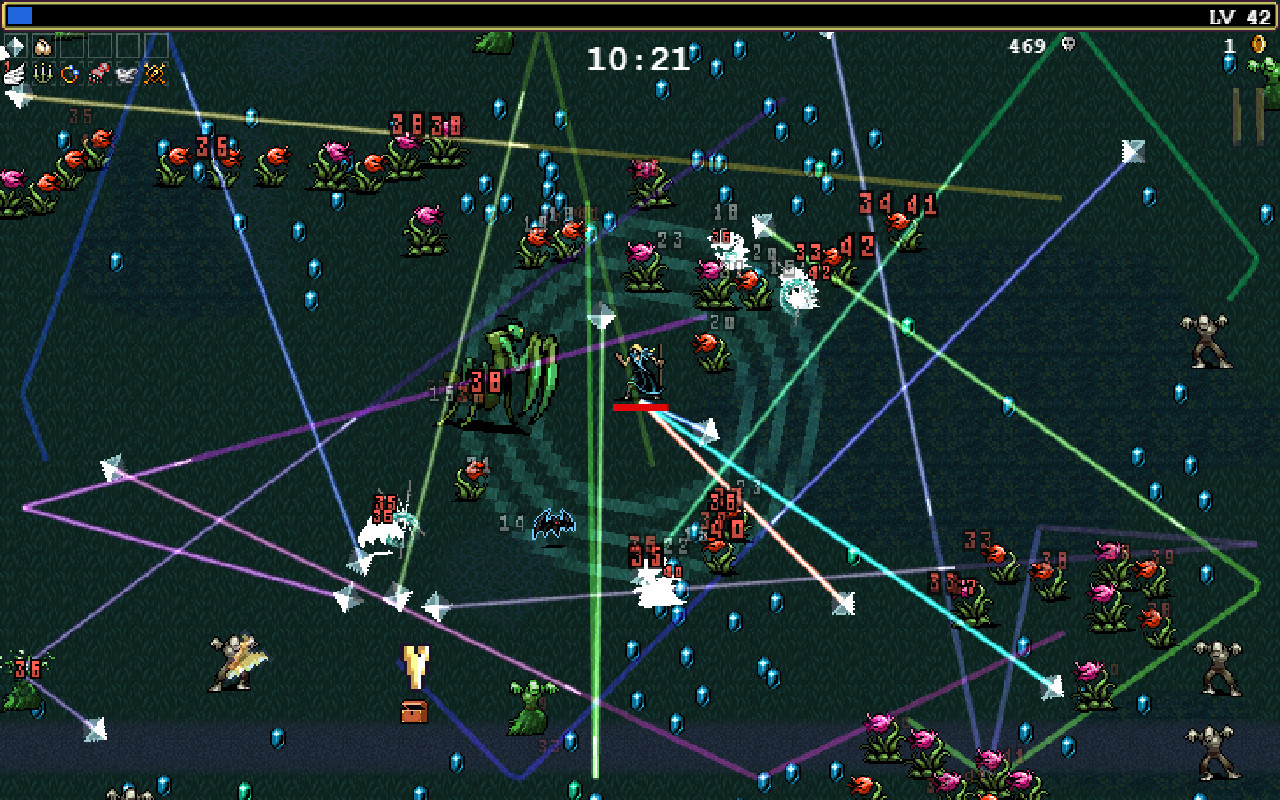
Late-game Vampire Survivors is notoriously overwhelming visually. Explosions, projectiles, and enemy clusters clutter the screen, impairing your ability to notice dangerous enemies slipping through your defenses.
-
Identify your character's effective attack boundaries visually early on (like the circumference of your Unholy Vesper's book circle, or Soul Eater's damage aura border). Once mentally marked, position your character to always keep foes outside this invisible safety line.
-
Choose weapon evolutions carefully to minimize visual noise if clarity is crucial to your survival style. For example, pairing weapons that don't visually overwhelm (Holy Wand pairs quietly with La Borra's stationary puddles) helps you spot enemy gaps before they cause trouble.
Reducing visual confusion grants critical reaction time when things get intense in closing minutes or hyper levels, often proving decisive between a record-setting survival run or frustrating near-misses.
Hitting the high-wave milestone in Vampire Survivors demands consistent strategies, thoughtful weapon selections, focus amidst chaos, smart character positioning, and efficient management of available pickups. Keep these proven survival strategies at your fingertips--the line between record-breaking heroism and devastating defeat is often very slim, decided by split-second judgment.
Optimal Weapon Combos: How to Pair Weapons Efficiently for Maximum Survival
In Vampire Survivors, a good weapon choice can mean a fun run, but smart weapon combos are your ticket to that coveted 30-minute mark and beyond. Let's talk about which weapon combinations dominate the late waves, when enemies flood your screen and mistakes punish hard. We'll look at the strongest combos, why they work, and how they fit into different playstyles.
Evolved Weapons and Their Synergies
Weapon evolutions become your lifeline by mid-to-late stages, improving damage output and attack behavior significantly, while often providing handy defensive traits. But simply evolving weapons individually isn't always efficient. You'll want evolutions that complement each other's strengths and weaknesses.
Here are three seriously powerful combos worth picking anytime they show up:
Combo #1: Unholy Vespers + King Bible and La Borra + Santa Water
This is the holy grail of area denial combos. King Bible evolves into Unholy Vespers, giving you an endless orbiting shield of damage that keeps weaker mobs from overwhelming your immediate space. Meanwhile, Santa Water's evolution, La Borra, drops persistent damaging pools on the battlefield. The chaotic water puddles carve out large safe areas and damage massive groups of enemies simultaneously.
Stacking area-of-effect bonuses from Candelabrador expands both Unholy Vespers' protective circle and La Borra's deadly puddles, multiplying your defensive and offensive range rapidly. Pair this with Empty Tome's cooldown reduction, and monsters will struggle just to reach your character, let alone damage you.
Run this combo for characters like Dommario (who boosts projectile size) or Poppea (who naturally cuts cooldown times), leaning fully into their strengths for maximum effects.
Combo #2: Soul Eater + Garlic and Mannajja + Song of Mana
Unlike the first combo, this pairing is about constantly wearing down enemies before they ever come close. Soul Eater evolved from Garlic creates an aura draining nearby enemy health for constant healing streams. Combined with Mannajja from Song of Mana, which delivers powerful vertical damage blasts to thin approaching mobs, it creates a layered defense front--first stopping enemies at mid-range, then passively healing you from survivors that manage to squeeze by.
This is perfect for tankier characters like Antonio or Gennaro, whose bonus strengths perfectly synergize with continuous heals and holding strong in enemy mobs. With passive boosts to up-close combat and survival, you’ll mow down heavy waves without breaking a sweat--just keep grabbing Spinach and Pummarola passives to enhance damage and recovery rates.
Combo #3: Death Spiral + Axe and Heaven Sword + Cross
For players who like offense as their primary defense, Death Spiral evolved from Axe and Heaven Sword from Cross dish out insane damage across huge distances and wide areas, clearing groups before they're threatening. The Death Spiral sends out powerful circular attacks slicing enemies in all directions, while Heaven Sword darts through mobs with piercing attacks, bouncing continually as it destroys enemies.
Supplemented by Duplicator to add extra projectiles and boosted by Bracer for increased attack speed, these evolved weapons become a destructive storm that hardly any enemy line can survive. Useful for faster-moving characters like Mortaccio or Cavallo, whose movespeed bonuses help reposition effectively and maximize damage potential.
Supplementary Weapon Combos and Supporting Picks
Once you secure one of the powerhouse combos above, fill in remaining weapon slots with complementary gear:
- Holy Wand + Magic Wand: Reliable, auto-targeting projectile DPS that picks off stray monsters sneaking through your primary defenses. Effective with cooldown reduction passives.
- Thousand Edge + Knife: High precision DPS for bosses or tougher mini-boss groups. Ideal when paired with Bracer (speed increase) and Spinach's damage bonus.
- Vandalier (Evolution of Peachone + Ebony Wings): A strong late-game monster-clearing choice offering sustained, wide-ranging damage at high ranks. Takes two weapon slots early, but pays dividends at late-game.
Always consider passive item combos to amplify your chosen weapons further. Empty Tome (lowers cooldown), Duplicator (adds projectiles), and Candelabrador (enlarges area) synergize incredibly well with almost every evolution.
Tailoring Combos to Level Layouts
Your chosen stage matters too. Levels like Inlaid Library are horizontal; effective horizontal damage types like Death Spiral or Mannajja shine. Spacious maps like Dairy Plant or Gallo Tower favor broader area-denial (La Borra and Unholy Vespers excel here). Match your evolved combos to the shape of the stage so you control enemy flow more naturally throughout your runs.
Putting It All Together
There's not a single "best combo," but understanding how weapon pairs complement each other's strengths sets up your runs for success consistently. Remember, powerful late-stage evolutions like Unholy Vespers + La Borra or Mannajja + Soul Eater allow you to handle massive enemy waves confidently. Fill remaining slots strategically, leverage passives wisely, and refine your weapon choice to match stage types--this careful thinking transforms tough late-game scenarios into achievable challenges, pushing your runs to new personal records.
Understanding Enemy Patterns
Learning how enemies behave in Vampire Survivors is essential for advancing your runs consistently--especially if you're trying for new personal bests or aiming past tricky late-game hurdles. Each stage gradually ramps difficulty by changing enemy quantity, strength, and behaviors. Recognizing these patterns helps you foresee what's next and react quickly to threats.
Recognizing Enemy Types and Movement
Enemies generally fall into a few basic categories:
-
Swarmers: Fast-moving mobs, usually weaker individually but dangerous in huge numbers. They rush straight at you, aiming to overwhelm through raw numbers rather than damage per enemy. Good examples: vampire bats, ghosts.
-
Tanks: Slow-moving foes with tons of health and high damage if they touch you. They usually spawn fewer at a time but are harder to take down quickly. Good examples: armored knights, skeleton warriors, minotaurs.
-
Elites & Mini-bosses: Powerful single enemies or small enemy groups, appearing at certain intervals. They have very high HP, deal serious damage, and drop treasure chests upon defeat. Examples include glowing boss bats, big mummy warriors, and giant witches.
Understanding these enemy behaviors helps you choose when to dodge, when to kite (moving enemies in controlled patterns), and how to position effectively. Swarmers need weapons with area denial like Santa Water or King's Bible; tanks require constant direct DPS (like Knife or Magic Wand). Mini-bosses? Prioritize weapon evolutions for heavy damage like Heaven Sword or Death Spiral.
Timed Waves and Enemy Surges
Vampire Survivors runs aren't random chaos--enemy waves follow predictable patterns tied to each level's clock. Early waves (first few minutes) start simple, usually slow standard enemies letting you get established. Between 5 to 10 minutes, small swarming mobs escalate sharply, intended to push your early defenses. Tanks and tougher enemies regularly pop in around the 10-15 minute mark, testing your evolved weapons and survivability.
Mini-boss encounters progressively increase over a run--most commonly at regular five-minute intervals. Anticipating these timed appearances helps position yourself smartly before tougher fights start. During calm moments right before a major wave, carefully reposition, collect dropped Gems (experience), and have cooldowns ready.
For example, at 11-12 minutes on many stages, there's usually an intense swarm wave followed instantly by tankier groups approaching around minute 13. Knowing this order ahead gives a chance to adjust positions and cooldowns so you're ready when enemies intensify.
Kiting and Herding Techniques
Herding means moving in controlled ways to group enemies into predictable clusters. Vampire Survivors is a game that relies heavily on good player positioning: enemies always gravitate straight toward your character. Move methodically, constantly adjusting your path little by little to "pull" enemy crowds together.
Kiting is a sub-skill within herding, involving moving enemies along as you continually damage them. Retreat gradually as mobs pursue--this keeps the enemy count manageable, avoids getting surrounded, and maximizes weapon efficiency.
For example, move horizontally in stages like the Inlaid Library to group enemies tightly behind you. Then, let weapons like Death Spiral and Mannajja deal massive damage to crowded mobs. Larger open maps (like Dairy Plant) reward circular or cautious zigzag movement for grouping mobs, especially if you have La Borra's damaging puddles laid out effectively.
Stage-Specific Enemy Behaviors
Each level adds unique twists that change how you approach enemy patterns:
-
Mad Forest periodically floods the screen with extremely quick bat waves in early and late stages. Without effective AOE weapons, these bats quickly reduce your life. Equip Santa Water, Garlic, or King's Bible early to thin numbers.
-
Inlaid Library, primarily a horizontal corridor, pushes players toward horizontal gap-creating moves. Enemies approach mainly from left and right; vertical weapons (like Axe) cover smaller ground, so adjust accordingly with horizontally-focused gear like Mannajja or Heaven Sword.
-
Dairy Plant mixes tight corridors and open areas, frequently spawning tanky armored enemies and wheel-spinners. It's crucial here to constantly move, controlling chokepoints by creating damaging puddles like La Borra pools at key intersections.
-
Gallo Tower sends groups from all four directions, but vertically-focused mobs (like serpents & gargoyles) dominate. You'll want evolved Mannajja or Soul Eater to manage vertical hordes.
Each map presents these specialized threats consistently, which you can predict and proactively tackle with specific evolved weapon combos explained earlier in our guide. Matching evolved weapons to each map's unique rhythm maximizes your survival time significantly.
Enemy HP Scaling and Late-Game Approaches
Enemies spawn with increasingly more HP and higher damage the longer you survive in your run. After roughly the 20-minute mark, waves increasingly combine all enemy types: huge swarms mixed with tougher tanks and multiple mini-bosses simultaneously.
To counter late-game chaos: ensure strong area denial for swarms, single-target weapons for elite fights, and leverage evolved healing mechanics to mitigate damage. Recognize these escalating enemy combos come quicker toward the 25-30 minute endgame stretch--always be prepped with a balanced build of offense, defense, sustain, and evolved weapons tailored to map demands.
Late-game patterns repeat reliably. Your success depends less on reaction and more on anticipation, knowing what's coming beforehand. Emphasize positioning, relevant combos (Unholy Vespers + La Borra or Soul Eater with Mannajja shines here again), aggressive herding, and proactive movement.
Final Tips on Enemy Patterns
These patterns aren't random. Learn them and predict what comes next:
- Memorize stage-specific waves.
- Perfect herding to group and damage mobs efficiently.
- Use evolved weapon area-denial skills tactically, matching each stage type.
- Always stay moving. Prolonged stationary positions usually cost HP.
- Keep an eye on the timer for mini-boss arrivals and tougher waves to pre-position accordingly.
Understanding enemy movements and attacks transforms how you approach each run. When anticipated consistently, enemy mobs feel less overwhelming--conquerable challenges instead of random chaos.