Vampire Survivors: Advanced Combat and Survival Guide
Master survival, optimize your arsenal, analyze enemy types, and refine strategies to dominate endless waves in Vampire Survivors.
Vampire Survivors may look straightforward at first glance--just fend off waves of undead and see how long you last. But anyone who's spent some real time with it knows there's a lot more beneath the surface. Once you master the basics, staying alive long-term means really paying attention to things like weapon combinations, timing your upgrades, and knowing enemy patterns by heart. Even small decisions can dramatically affect your survivability and combat effectiveness. Getting a handle on these advanced strategies can turn frantic survival sessions into calculated, rewarding runs. It's all about learning how to work smarter, move better, and outlast the increasingly tough hordes trying to take you down.
Mastering Movement and Positioning
In Vampire Survivors, your first instinct might just be to dodge randomly. But as enemy hordes swell, chaotic running will leave you boxed in fast. Efficient movement means planning your path carefully, cutting deliberate routes through thinner enemy ranks rather than weaving aimlessly through dense crowds. Keeping a slight circular or diagonal pattern around enemy clusters can help you herd them into manageable groups, making your weapons hit harder and clearing your escape routes.
Practice "kiting": moving close enough to lure enemies after you, then staying just ahead of their attacks. Kiting enemies away from critical upgrade items or healing pickups lets you safely loop back around to grab them when you're desperate. Be aware of terrain obstacles too--getting cornered against walls or trees can end your run quickly.
Strategic Weapon Selection and Evolution
Knowing which weapons to pick--and crucially, how and when to evolve them--is essential for survival longevity. Weapons evolve by combining a fully upgraded base weapon (level 8) with a specific item. For example, the "Whip" merges with the "Hollow Heart" for the powerful lifesteal weapon "Bloody Tear." Prioritize evolving at least one weapon early to steadily heal and sustain your life--this drastically improves your long-term staying power.
Multiple evolved weapons can dramatically change the rhythm of your runs. Quickly evolved weapons like the King's Bible--focused on close-range defense--can fend off aggressive enemy waves. Meanwhile, projectiles such as the evolved Axe ("Death Spiral") can clear wide spaces for safe maneuvering. Balance close- and long-range evolved weapons to adapt smoothly when enemy difficulty spikes.
Deciding When to Upgrade and When to Wait
Every level-up gives you a crucial choice: weapons, passive items, or temporary boosts. While upgrading weapons promptly is smart, occasionally pausing your upgrades can be equally valuable. Noticing your current build strength and enemy density is key.
If your death-dealing arsenal is crushing foes easily, skipping weapon upgrades temporarily to pick defensive traits--armor boosts, more health, faster movement speed--can ensure safer gameplay later when difficulty ramps dramatically. Conversely, if enemies feel overwhelming early on, investing rapidly into weapon upgrades maintains your offensive advantage, reducing enemy density and giving you breathing room.
Don't neglect strategic items (like the "Duplicator" or "Empty Tome") either--these passives can turbocharge your attacks, bringing massive offensive swings late game. The balance of immediate versus delayed gains separates a long survival run from a short-lived one.
Timing Your Pickups and Health Sources
In difficult runs, food and pickup timing can mean the difference between penthouse victories and basement defeats. Resist the temptation to devour every available chicken dinner right away. Instead, carefully track meal spots and loop back to them once your health is dangerously low, conserving precious healing sources for crucial emergencies.
Similarly, item pickups--such as Rosaries that eliminate all visible enemies or magnets that vacuum nearby dropped XP--are best reserved for desperate moments or when they provide huge immediate benefits. Hold onto Rosaries until entirely swarmed, unleashing that burst damage precisely when needed most. Always keep mental notes of positions on the map for rapid access later.
Recognizing Enemy Patterns and Difficulty Spikes
Enemies aren't random--they spawn predictably, ramping up their aggression steadily. Pay close attention to when intense enemy waves hit--typically every five minutes--to brace yourself mentally and strategically during these difficulty spikes. Having weapons fully evolved before significant spikes (around 10-15 minutes, for example) can carry you safely through dangerous waves.
Certain enemy types follow predictable behaviors too--fast chargers, tough mini-bosses, or swarming creatures--so familiarizing yourself with these patterns helps predict when a situation may turn dangerous. Knowing in advance which enemies will enter the screen lets you prepare relevant tactics and reduce panic-reactive mistakes mid-run.
Managing Your Upgrades Smartly
Always watch the big picture strategy for your desired build instead of just taking random upgrades. Consider synergies between passive items, skill upgrades, and evolved weapons. Will upgrading "Clover" (luck) help you grab rare, crucial upgrade options earlier? Would boosting area-of-effect help with your current weapon spread to safely keep enemies at range?
Also pay attention to your leveling speed itself; keeping a constant flow of xp collection is beneficial, but sometimes slowing down your pace strategically can allow you to control enemy toughness slightly. Enemies become much tougher as your levels rise, so if you hit upgrades too fast without proper defensive items, you'll quickly become overwhelmed.
Keeping Cool Under Pressure
As things escalate late-game, screens filled wall-to-wall with aggressive monsters may tempt you toward panicked movement or hasty upgrades. Instead, stay calm to process the patterns. Efficient, intentional small movements take priority over big panicky sprints that trap you in enemy crowds. Sometimes the best move is standing relatively still or moving just enough to reposition weapons optimally.
Take deep breaths, refocus, and stay patient, even when surrounded. Your strategic build should provide the needed tools, and calculated decisions will improve your survivability significantly.
With practice, patience, and strategic thinking, you'll find yourself consistently surviving deeper into Vampire Survivors' toughest encounters. Remember: survival is a mixture of knowledge, timing, movement, and keeping your cool under pressure. You're not just fighting waves of undead--you're battling your instincts, applying your newfound strategies, and proving yourself the smartest survivor around.
Optimal Weapon Usage
Maximizing your weapons efficiently plays a major part in staying alive longer in Vampire Survivors. While evolving weapons is definitely important, how you combine, position, and upgrade your chosen gear makes all the difference between a quick defeat and a long-lasting run. Let's look at how you can optimize your weapon choices to get the best performance in every run.
Balancing Weapon Types
Every weapon has its strengths and weaknesses, ranging from up-close area attacks like Garlic or the King's Bible, to powerful long-range options like Knives and Magic Wands. Sticking to just one style can quickly spell disaster--mix them thoughtfully.
If you have too many short-range weapons, quick enemies or bosses may overwhelm you. Overly focusing on ranged attacks, however, can compromise protection once hordes break through. Ideally, keep at least one close-range defense tool (e.g., Garlic or King's Bible) active to create breathing space, combined with one or two longer-range attacks (like Lightning Ring or Magic Wand) that safely thin enemy ranks at a distance.
Pay close attention to pairing complementary evolved weapons too--Death Spiral (evolved Axe) and Unholy Vespers (evolved King's Bible) work particularly well together, cleaning out nearby enemies while constantly creating safe paths through crowded battlefields.
Weapon Positioning and Movement
Choosing optimal positioning drastically helps make certain weapons more effective. Weapons like Whip or Knife have directionality--Whip strikes primarily upwards initially, while Knives shoot only in the direction you're facing. Remembering these specifics allows smoother enemy management. For instance, positioning yourself below large mob groups helps you maximize whip damage.
Circular motion can be beneficial with certain weapon setups. King's Bible generates a protective rotating barrier around you, making tight-circle movements very valuable during hectic waves. Garlic provides a constant damaging area around your character, ideal for stationary or slow movements through weaker mobs to accumulate easy XP early on.
Conversely, weapons like Axe or Rune Tracer thrive when you move horizontally or diagonally. Axe projectiles arc upwards before descending vertically downward, dealing damage both on ascent and descent. Learning how these trajectory-based weapons behave and making controlled adjustments in positioning can drastically improve their efficiency.
Prioritizing Game-Changing Evolutions
It's tempting to upgrade every weapon a little, but that strategy won't serve you well later in the game. Instead, focus on evolving essential game-changing weapons early. Garlic, for instance, competes strongly early-game but loses strength quicker than King's Bible as you progress. Upgrading King's Bible faster ensures steady defensive strength going into mid- and late-game situations.
Evolved projectile-focused weapons are another priority because of their long-lasting usefulness at safely thinning enemy groups all game long. Prioritize getting at least one fully evolved powerful projectile early, such as Death Spiral or Heaven Sword (Cross evolution). These tools will continually clear large viewer-friendly gaps for maneuvering, making late-game swarms significantly less overwhelming.
Leveraging Weapon Synergies and Traits
Certain passive items drastically improve effectiveness for specific weapons. For example, "Duplicator" (extra projectiles) pairs amazingly well with Magic Wand, Knife, Cross, or Lightning Ring. Even a single extra projectile dramatically increases the potency of your attacks. Similarly, pairing Spellbinder (longer weapon duration) with King's Bible immensely increases its defensive coverage during dense enemy waves.
Additionally, area-of-effect upgrades through the "Candelabrador" amplify the strength of Axe or Garlic attacks greatly by expanding the hit boxes, providing safer surroundings as enemies steadily grow in number. Consider your current gear carefully when selecting which passive items and boosts to add--bonus effects make powerful weapons exponentially deadlier.
Adapting to the Late-Game Madness
In the game's final minutes, huge enemy waves quickly overwhelm poorly prepared survivors. Optimal weapons choices and upgrades earlier dictate your late-game survivability dramatically. At this stage, weapons with infinite piercing like Death Spiral, Holy Wand (Magic Wand evolution) or Hellfire (Fire Wand evolution) become stars, cutting straight through thick enemy lines.
Pair them thoughtfully with defensive evolved choices--Unholy Vespers remains a must-have late-game option to protect close-range, providing space when tightly enclosed by aggressive enemy packs. Always remain mindful of endgame difficulty spikes and manage earlier optimal weapon upgrades to hit peak evolved status right before the madness arrives.
Mastering your arsenal in Vampire Survivors involves more than mechanically picking upgrades--it ties closely into your overall strategy of positioning, choosing complementary tools, and timing essential evolutions smartly. Doing this intentionally arms you for even the toughest encounters, steadily increasing your survival success and evolving you into a true top-tier vampire slayer.
Enemy Type Overview
Mastering your weapons is crucial, but knowing your enemies inside and out gives you a huge advantage. Vampire Survivors throws wave after wave of increasingly dangerous foes your way, each with their own quirks, attack patterns, speed, and toughness. If you're prepared ahead of time, you'll anticipate threats, preventing panic later.
Early-Stage Enemies: Cannon Fodder and Experience Farms
When a run first starts, enemies move slowly and fall quickly, making it easy for you to collect precious XP and level your character. Basic bats, skeletons, and zombies appear in large groups, typically slow-moving and easy targets. Bats fly straight toward your location; zombies and skeletons shuffle closer but do minimal damage. It may seem relaxing, but these stages shouldn't be underestimated. Early waves are your chance to quickly set yourself up for the tougher fights ahead, so clear out foes efficiently to gather gems as quickly as possible.
However, not every early enemy is harmless. Watch carefully for occasional glowing enemies--these tougher variants, often highlighted or larger in size, drop treasure chests or red gems holding huge XP boosts. Knocking them out quickly can greatly speed up your weapon evolution progress later.
Mid-Game Threats: Rapid Attackers and Durable Tanks
As you approach the 10-15 minute mark, Vampire Survivors ramps up difficulty. Heavier, tougher foes start pouring in, forcing you to strategize more thoughtfully. You'll encounter armored skeletons, larger werewolves, and ghosts that bypass your defenses more easily. Ghost types, in particular, become dangerous because of their high movement speed. They dart in rapidly from all edges of the screen, requiring careful positioning and quick adjustments to avoid damage.
Mid-game presents more dangerous varieties of tank-like enemies--giant mantis creatures, bulky minotaurs, or stone golems--often accompanied by swarms of smaller foes. These heavy hitters absorb far more damage before falling, meaning you must either maneuver around them cautiously or have strong piercing and DPS-heavy evolved weapons activated. Be sure you're equipped properly at this stage; inferior or weakly upgraded weapons won't handle these threats well, leaving you overwhelmed and trapped.
Boss Enemies and Elite Encounters
Periodically, unique larger enemies--often called elite monsters or mini-bosses--arrive onscreen, marked by clearly distinct sprites and significantly boosted health pools. Mini-boss characters can absorb immense amounts of damage, testing your combat effectiveness drastically. The priority with these foes: positioning and projectile focus. Identify their movements early, concentrate evolved weapon firepower, and kite them through your damage-firing line to maximize DPS safely.
Elites come with huge advantages. Defeating these tougher foes often awards treasure chests, XP-rich red gems, and helpful boosts--essential for quickly evolving weapons and unlocking new powers. Ignoring or failing to efficiently defeat elite mobs means you'll lose valuable resource opportunities and will likely struggle during later waves. Stay alert and ready to prioritize damage-heavy evolutions.
Late-Game Swarms: Endless Hordes and Bullet-Spongers
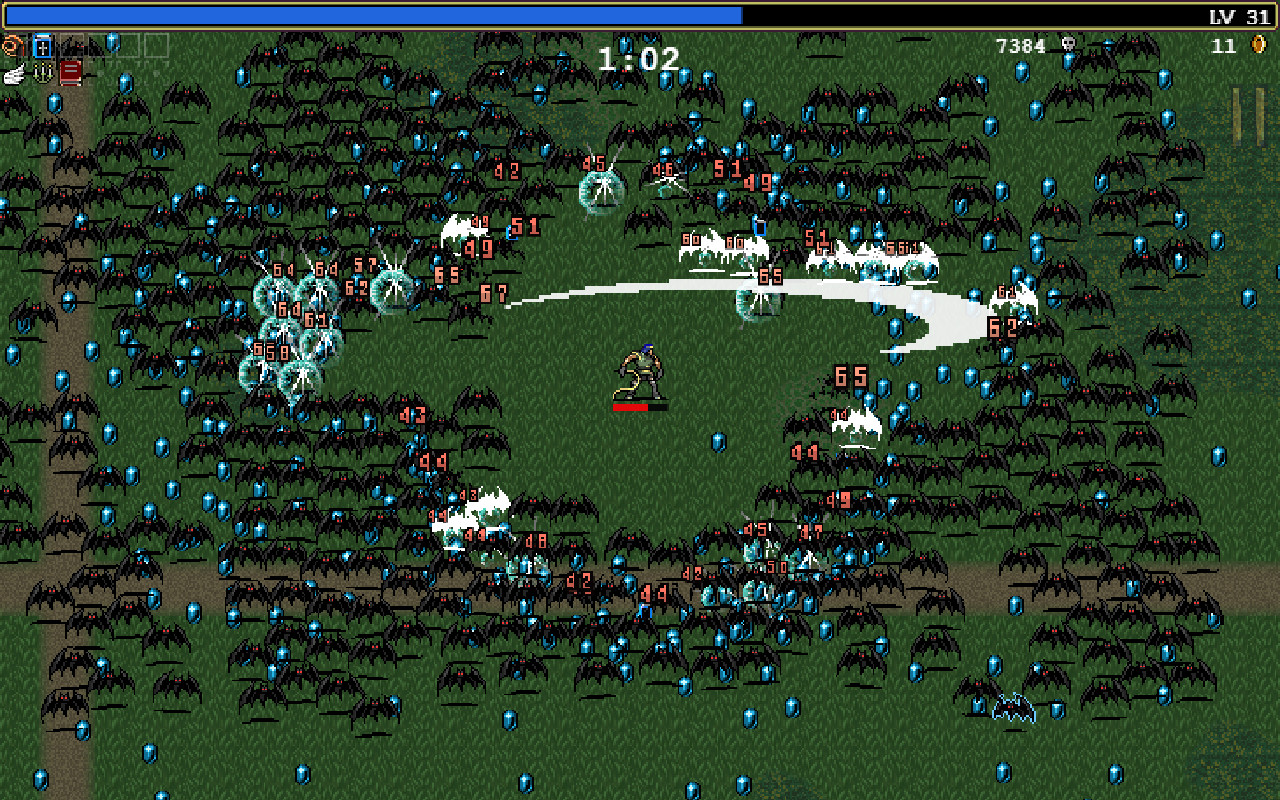
Beyond 20 minutes into your run, Vampire Survivors throws vast swarms of deadly creatures--massive bat waves, vampire knights, floating skull clusters, and legions of armored undead. Enemy density increases dramatically, and movement flexibility disappears swiftly. Waves quickly clog your play area, making navigation and positioning extremely limited. This late-game chaos demands that you have proper evolved weapons and a clear understanding of enemy weaknesses.
Late-game enemies typically have high HP. Armored knights and thick zombie hoards are notably damage-resistant. Projectile penetration, knockback, and sustained damage (via Death Spiral, Unholy Vespers, or Hellfire) grow incredibly important. Knockback and freezing effects--granted by items like the Clock Lancet or evolved Song of Mana--buy valuable breathing room, helping you survive when a screen-filling flood inevitably hits your position. Without these measures, enemies quickly corner you, rapidly draining your HP.
Special and Unique Enemy Behaviors
Keep an eye out for Vampire Survivors' occasional unique enemy behaviors and special boss spawns. For example, giant plant circles occasionally sprout around the player, limiting safe areas and forcing clever movement choices. Strategic positioning earns smoother cooldown recovery and micro-break opportunities here.
Some enemies leave specific effects behind upon death or appear suddenly in unpredictable screens--like exploding enemies or enemy groups coming from unexpected angles. Paying attention to subtle signals, enemy variance, and arrival patterns helps adapt your movements effortlessly. To avoid unexpected doom, remain cautious and observant even amidst late-game turmoil.
Final Thoughts on Enemy Awareness
Your weapon mastery is essential, but understanding enemy types doubles your effectiveness. Anticipate evolving threats at each game stage, position smartly against bosses and elites, and counter late-game swarms intentionally. Each enemy behaves uniquely; learning these patterns enables efficient XP accumulation, weapon evolution, and safer navigation through Vampire Survivors' escalating difficulty curve. Prepared survivors succeed, reaching those coveted high-score runs consistently.
Strategizing Upgrades: Making Smart Choices Under Pressure
While knowing enemy behaviors sets the groundwork, your success in Vampire Survivors hinges largely on how you level up your character. Every time you fill your XP bar, you'll need to choose upgrades--skills, weapons, or item enhancements--to keep pace with growing threats. Picking upgrades might feel random or impulsive early on, but savvy planning helps avoid late-game disasters. Here’s how to optimize your upgrade strategy at each stage of your run.
Always Consider Weapon Evolutions
Your first priority: weapon evolutions. Vampire Survivors provides several extremely powerful evolved weapons once certain conditions are met. To evolve a weapon, you need two ingredients: a fully leveled-up base weapon and its matching passive support item. For example, pairing the Magic Wand with an Empty Tome unlocks the "Holy Wand," boasting increased fire rate and endless projectile spam; similarly, combining the Axe fully upgraded with a Candelabrador gives you "Death Spiral," ideal for late-game crowd control.
Plan your early upgrades according to these combinations. If a chest drops after the 10-minute mark and you possess the correct evolution pair at max level, you gain immediate access to the potent evolved version. Having evolved weapons is not optional--you absolutely need a couple by mid-game to break through heavy waves and elites, or your damage quickly falls behind enemy health pools.
Balance Defensive and Offensive Choices
It feels exciting to go full offense early, blasting through groups easily. But Vampire Survivors is a game filled with sudden shifts, and going purely aggressive leaves you vulnerable to mid- and late-game hordes. Striking a good offense-defense balance ensures survival when maneuverability shrinks and enemies become overwhelming.
Defensive items like Armor, Laurel shields, or Pummarola's passive health regen might seem less appealing during calmer early moments, but their payoffs appear clearly around minute 15 and onwards. Gradually invest in at least one or two defensive passives--especially valuable are boosts like Spinach (damage increase), Bracer (attack speed), and Empty Tome (cooldown reduction), as these enhance both offense and adaptability under pressure. Don’t get caught scrambling for survivability when swarmed late-game.
Avoid Diluting Your Upgrade Pool Unnecessarily
Selecting too many differing weapons or passive upgrades at once spreads your upgrade pool thin, making it tough to max-level vital items quickly. Each time you gain XP, upgrade choices randomly rotate based on your current equipped inventory. Pool dilution causes crucial choices--like that last Magic Wand rank needed for evolution--to show up less frequently, slowing your power curve.
Instead, pick a focused set of synergizing weapons to level early and complement them carefully with their evolution catalysts and limited defensive upgrades. Avoid picking random low-impact items merely to fill slots. If you're hesitant, remember fewer items could mean high-leveled effectiveness much sooner, significantly increasing your overall DPS and survivability.
Power Spike Timing: Focus on Timing Upgrades Strategically
Understanding when game stages ramp up difficulty helps prioritize your upgrades. Early waves with weaker enemies allow careful but powerful setups--such as axes, wands, or whips--to secure quick kills, immediate XP collection, and faster level-ups. Mid-game threats demand prompt evolution of key weapons to handle tougher, faster foes, so aim to have at least one evolved weapon by the 10-15 minute mark.
Late-game needs vary. Evolved AoE or piercing options like Unholy Vespers, Death Spiral, or Heaven Sword prevent enemies from cornering you. During this stage, upgrading movement speed (Wings) or utility (Clock Lancet’s freeze) offers valuable breathing space. Carefully manage this "power spike" timing: be proactive and anticipate game shifts, choosing upgrades that not only help now but provide sustain once chaos sets in.
Treasure Chests and Strategic Patience
Treasure chests tempt instant gratification. But remember once you unlock evolved weapons (after the 10-minute mark), these chests become most valuable. Initially, chests simply add levels to your current weapons--but once you've fulfilled evolution conditions, they grant immediate full weapon transformations. Thus, strategically timing chest collection proves important.
Delaying opening chests slightly--especially if you're just a few weapon levels away from evolution--can substantially speed up your power progression in tight situations. However, never delay chests too long if you're at risk of death: survival still matters most. Balance continued leveling with strategic patience, optimizing resource use whenever safe.
Adaptation is Key: Be Flexible but Intentional
Lastly, upgrades in Vampire Survivors require flexible yet purposeful decision-making. Aiming strictly for textbook builds might leave you frustrated if random choices don't align perfectly. Therefore, adapt general strategies to match available item offerings. Don't stubbornly chase unreachable paths--recognize when your current run calls for a different tactical direction.
For instance, maybe you intended Death Spiral but instead received early access to Garlic and Soul Eater potential. Shifting gears and incorporating a Garlic-focused strategy might salvage the run effectively. Stay mindful of your stable of evolving weapons and viable passives, maintaining awareness for solid synergistic pairings. Flexibility paired with intention means fewer wasted upgrades and higher survivability.
Upgrade Strategizing Makes Winners
Vampire Survivors thrives on randomness; you succeed not by relying purely on luck, but by choosing wisely within each given circumstance. Pursue powerful evolved weapons early, balance your builds thoughtfully, resist unnecessary dilution, carefully timing chests and power spikes, and adapt as your run unfolds. Mastering this adaptable, strategic upgrade approach transforms good players into consistent survivors who smash through hordes and secure high-score victories.
Endless Mode Tactics: Surviving the Neverending Horde
Endless Mode in Vampire Survivors changes the pace significantly. Unlike regular rounds ending precisely at the 30-minute mark, Endless Mode continues indefinitely, relentlessly increasing the intensity until you're eventually overtaken. Here’s how to survive longer, dish out consistent damage, and manage steadily tougher waves that rise without end.
Prioritize Infinite Scaling Items and Weapons
In regular gameplay, many weapons hit a hard ceiling once fully evolved and upgraded. But in Endless Mode, to stand a chance beyond 30-40 minutes, you need scalability. Select weapons and passives with built-in infinite scaling potential, making them stronger as the run continues rather than remaining stuck at a max-level plateau.
- Santa Water + Attractorb (La Borra): This evolved weapon covers more area over time, damage constantly stacking when combined with items boosting speed or duration.
- King Bible + Spellbinder (Unholy Vespers): Gains incredible duration and area, creating a safe bubble of constant knockback around you.
- Song of Mana + Skull O'Maniac (Mannajja): Scales excellently as enemies multiply and your kills rapidly feed experience boosts.
Passives like Spinach (scaling extra damage), Empty Tome (reduced cooldown infinitely improving DPS), and Duplicator (more projectiles, meaning ever-growing total damage) pair exceptionally with these scalable options. Remember, sustainability is key as the challenge continues past regular endgame limits.
Economy of Experience: Managing The Endless XP Curve
As time passes in Endless Mode, enormous and accelerated waves spawn. While intense enemy swarms mean more experience opportunities, returns can quickly diminish since each level increase demands exponentially greater XP. Therefore, direct how you handle your XP carefully:
- Early-game, aggressively level critical weapons to quickly secure essential evolved forms. Those early spikes in power assist in swift and safe XP gains well into later minutes.
- After your weapons are evolved, XP investments gradually shift toward scaling utility. Choosing limit-break upgrades boosts core stats like damage, range, projectile size, or cooldown infinitely without requiring new item slots--meaning your power continually escalates without cluttering your inventory.
- Magnet and Attractorb become late-round MVP passives, pulling experience pickups toward you in massive areas, dramatically improving your leveling efficiency. Consider grabbing Attractorb early rather than late so you're ready for endless pile-ups of enemy drops.
Optimize your XP gains through carefully planned cycling around crowded enemy fields after clearing threats with high DPS AoE weapons. An intentional XP collection loop throughout rounds helps you avoid falling behind against ever-rising enemy HP pools.
Mobility Is Survival: Stay One Step Ahead
Unlike the standard run, endless waves eventually reach incredible speed and density. You can't rely solely on stationary damage bubbles or single positioning strategies. Constant movement becomes essential, and being strategic about your mobility prevents sudden death from crowding. Try these tips for improved mobility:
- Invest incrementally in Wings for movement speed, as small speed increases accumulate into vital late-round maneuverability.
- Limit your personal "safe zone" thinking. Constant repositioning away from densely packed enemy groups to open paths is necessary after minute 35+. Keep eyes peeled ahead, anticipating enemy buildup at screen edges.
- Freeze mechanics from Clock Lancet provide momentary breathing room during intense swarming. Early Clock Lancet pickups mean regular brief pauses in the chaos, serving as precious movement windows late-game.
Movement becomes mandatory, not optional, the deeper your endless run continues. A passive that helps escape tight corners and sudden enemy surges directly equates to survival seconds gained.
Know When and How to Heal
Early on, healing items seem less exciting than damage or cooldown boosts. Later in Endless Mode, however, healing passives emerge lifesavers given monsters’ outrageous damage values at high minutes.
Pummarola and the evolved Garlic (Soul Eater) combo deliver constant passive healing as you mow through weaker foes. Alternatively, the evolved Whip (Bloody Tear) actively heals in limited-range strikes--valuable if you prefer controlling your recovery timing rather than passive slow tick healing.
Chicken item drops conserve your health during critical hectic moments. Plan careful loops returning through previously cleared areas in tight situations--the path behind you often contains leftover healing items. Make a mental map of spare drops for panic-moments, recycling your earlier work into mid-chaos safety nets.
Don't Ignore Crowd Control and Knockback Options
Damage isn't everything when late-round opponents swarm incredibly thick--control methods reducing enemy pressure become equally necessary for long-term survival:
- Rune Tracer + Armor (No Future): Explosive bouncing projectiles forcefully scatter foes outward clearing valuable room.
- Garlic evolution (Soul Eater) and Unholy Vespers produce knockback fields, creating nearby breathing room.
- Pentagram evolution (Gorgeous Moon) periodically explodes the entire battlefield wide open, providing complete safety--briefly resetting densely clustered enemies back to manageable levels.
The sheer number of monsters flooding your screen at high Endless time makes crowd control essential. Balance pure damage-centric builds with strategic knockback and mass-clear tools to avoid direct enemy mob-style death traps after minute 40+.
Endless Means Adaptation--Keep Watching Your Choices
Carefully adapting your build specifically for Endless Mode’s escalating intensity pushes your survival further. While classic builds dominate regular runs reliably, Endless Mode forces attention to often overlooked passive upgrades, timing decisions, and utility choices.
Strategic flexibility, careful early weapon evolution routes, gradual experience management, purposeful sustained mobility, controlled healing, and crowd control consideration--these skills earn veteran survivors precious minutes as challenges compound endlessly. Implement these tactics consistently, managing your expanding battlefield carefully to push ever-higher times on your survival records.