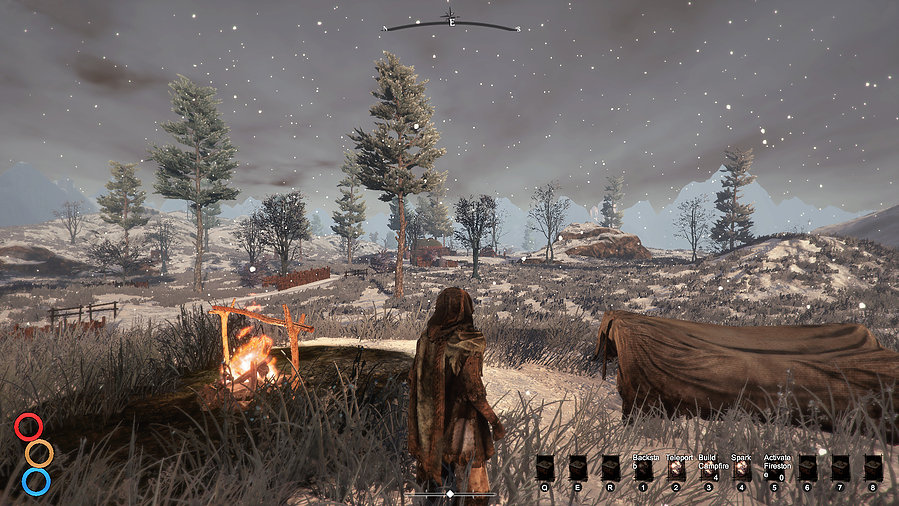
Outward Magic System Guide
Master Outward's magic: rune combos, mana strategies, precise spellcasting, gear selection, and discovering new spells in this essential guide.
Magic in Outward can feel a bit mysterious at first--it's nothing like the straightforward spellcasting found in most RPGs. Instead of typical mana bars and button-mashing spells, magic here requires careful preparation, strategic use of rituals, and a thoughtful approach to managing your resources. Understanding how the system works can definitely smooth out the learning curve and make your magical adventures a bit less daunting. Let's take a closer look at how magic functions in Outward, from handling rituals and spell combinations, to managing the balance between power and resource limitations.
Understanding Runes and Spellcasting in Outward
In Outward, runes take center stage when performing magic. Generally speaking, these are symbols you mix and match to trigger different effects. Rather than selecting a spell from a hotbar, you'll activate runes one after another to create unique combinations. While the system sounds unusual at first, once you get a feel for it, you'll find yourself comfortable stringing runes together quickly. Keep in mind: each rune combo has a specific result, so learning the correct patterns makes all the difference.
Getting Started: Unlocking Rune Magic
Before tossing around runes, you'll need the Runic Magic skill. You can get this by visiting the trainer in Berg (inside the Enmerkar Forest). Find Flase, the Rune Sage trainer, pay the silver, and you'll unlock the basics of rune casting. Initially, you'll have access to four primary runes:
- Fal Rune: Shaped like a "P", represents fire and heat.
- Egoth Rune: Looks like a fancy "X", symbolizes wind and movement.
- Shim Rune: A triangular symbol associated with cold and stability.
- Dez Rune: Looks like an hourglass, embodies life and energy.
Memorizing these four symbols and their effects is the first essential step in mastering rune magic.
Channeling Your Runes: How it Works
Using a rune requires you first equip a Lexicon (think of this as your magical notebook), which you can buy or find during your adventures. Without it, runes simply don't activate. Once equipped, activate runes in a specific order to produce a spell instantly. You don't have a long timeout between inputs--you've got to be quick about it.
Here's why rune memorization matters: inputting the alignments out of order or missing the timing causes the spell to fail. But no worries--failed spells don't punish you beyond wasting a bit of mana. After several attempts, these sequences become second nature.
Essential Rune Combinations & Spells
Let's overview some of the most useful and reliable rune combinations--and what each one does for you during your adventures.
Offensive Rune Combinations
-
Fireball (Fal → Egoth)
Cast Fal followed quickly by Egoth to shoot a small flaming sphere toward enemies. It's ideal for ranged attacks, damaging enemies from a safe distance. -
Powerful Lightning (Shim → Egoth)
Quickly press Shim and Egoth, sending a strong burst of lightning toward your foes. It can hit multiple enemies clustered together, handy for crowd control.
Defensive and Supportive Rune Combinations
-
Runic Protection (Shim → Dez)
Trigger this combo for a short-lasting but handy magical shield around yourself. This provides extra survivability when facing tough enemies. -
Healing Light (Dez → Egoth)
Quickly tap Dez rune into Egoth for a reliable healing spell. While not the strongest heal in the game, it's still valuable as a quick option when potions aren't ready. -
Runic Lantern (Egoth → Shim)
Need light? Activate Egoth and Shim, and you'll summon a hovering light source following your character--a handy alternative to lanterns and torches.
Advanced Rune Techniques
Once you're confident, consider Master Rune Magic training to gain access to more powerful versions of these basic rune combos:
-
Great Runic Blade (Egoth → Dez → Fal → Shim)
Combining all four runes in this sequence summons a potent magical sword. Equip it immediately and dish out heavy damage until it disappears. -
Arcane Trap (Egoth → Fal)
Summons a magical trap that blasts enemies stepping onto it. Great for combat preparation or slowing groups of foes heading your direction.
With practice, you'll speedily execute rune sequences with muscle memory alone, easily switching between offense, defense, and support spells.
Quick Tips for Rune Casting Success
As you become familiar with rune magic, keep these pointers in mind:
-
Don't attempt long chain combos immediately in battle.
Master rune combos in a safe place first--then try them for real. This ensures you remember the order under pressure. -
Pay close attention to your mana supply.
Mana is finite. Wisely manage your spellcasting by mixing rune spells with physical attacks and potions. -
Customize rune set-ups.
Combine your rune magic usage with different skills--maybe start fights with ranged spells, then switch to melee for close-quarters combat. This balanced approach is great for surviving in Outward's harsh landscapes.
Wrapping It Up
Rune combinations in Outward might feel tricky at the start, but like most skills in-game, once you grasp the basic flow, you'll be impressing yourself (and your travel companions). Remember, experimentation is your friend, and a bit of practice makes rune casting second nature. Get out there, find your Lexicon, talk to the trainers, and start chaining those runes together--soon, the magic will feel natural, intuitive, and powerfully rewarding.
Mana Management: Balancing Magic Usage in Outward
Magic is strong, useful, and honestly pretty fun in Outward--but here's the catch: every powerful rune combination costs precious mana points. Because Outward uses a limited mana reserve, unlike games with regenerating mana bars, every spell counts. Mana won't replenish naturally without action on your part. The key to consistently useful magical skills is smart mana management, and it's easier than you might think.
Understanding Mana: A Limited Commodity
Think of mana as another survival resource--just like your thirst, hunger, or stamina. Mana in Outward is limited; once you cast spells and that blue bar empties, you'll need to replenish it yourself. No automatic recharge means being careful and selective when activating rune combinations. Casting willy-nilly leaves you mana-starved when you need magic the most, like in the middle of a tough fight or enemy ambush.
Mana is displayed as a blue resource bar beneath your health and stamina (the red and yellow bars respectively). At the start, when unlocking your mana during the Conflux Mountain quest, you're asked to permanently sacrifice some health and stamina points to create your initial mana pool. The more health and stamina you sacrifice, the bigger your starting mana resource--but too large of a mana pool might leave you overly fragile in direct combat, especially if you're new.
Choosing Your Initial Mana Allocation
When first unlocking mana at the Ley Line in Conflux Mountain, you'll decide how much of your existing health and stamina you're willing to exchange to get magic power. This trade-off is permanent, so consider your playstyle seriously:
-
Small mana allocation (one point)
A conservative approach. Less magic power and fewer spellcasting opportunities per fight, but you stay tougher physically. Great if you prefer melee combat and occasional supportive spells. -
Medium allocation (two points)
Creates a balance between magic potency and physical resilience. Ideal if you mix melee skills and rely frequently on rune combinations. -
Large mana pool (three or more points)
You sacrifice significant health and stamina, making you physically weaker but allowing extensive use of runic spells in combat, exploration, and healing scenarios. Good if you're comfortable staying at longer ranges and relying heavily on magic to get things done.
Remember: There's no "winning" strategy here--pick what fits how you enjoy playing. You can always improve your mana efficiency later with items or potions if your initial choice feels limited.
Replenishing Your Mana Efficiently
Since mana doesn't automatically regenerate, you'll rely on consumables, resting, or gear to fill up your reserves:
Sleeping and Resting
Setting up camp or sleeping in inns quickly refills your mana bar. Sleeping isn't always practical mid-adventure, but it's your easiest option after battles or exploration. Just choose more sleep time, and less on guarding or repairing gear.
Food and Drinks
Outward offers consumables for easy mana restoring. Some basic and helpful choices:
-
Gaberry Tartine: Easy cooking recipe that regains mana quickly. Portable and simple, perfect for early-game adventurers needing budget-friendly mana recovery.
-
Astral Potions: The classic mana potion--fast to use and widely available through merchants or crafting. Don't spam these potions, however; ingredients can get expensive.
-
Turnip Potage: Not quite magical food, but it provides gradual mana regeneration over time--great for lower-intensity exploration where you don't constantly spam big spells.
Gear and Armor
Certain gear grants passive mana reduction--meaning every spell you cast costs less mana overall. Items like Scholar gear or Mage armor sets have these mana cost reduction perks. Equipping these makes your mana stretch further when casting multiple rune spells quickly.
Another helpful item is the Lantern of Souls, obtained from specific quests, which enhances mana reduction when placed in your backpack lantern slot. Combining mana-efficient gear and items is an easy long-term setup for your magical adventures.
Magic-Combat Balance and Usage Tactics
Don't rush into fights spamming rune after rune--quickly draining your mana leaves you defenseless in tough spots. Instead, mix magic and non-magic tactics:
-
Open up battles with runic spells from a distance, using damaging spells like Fireball or Lightning first. Once enemies close distance, swap to physical attacks until you gain mana or need additional support spells like healing.
-
Use Runic Protection sparingly at first, only activating when you're worried about taking heavy damage. You'll save mana for more urgent healing spells later.
-
Cast Arcane Traps in choke points or doorways strategically. Enemy groups funneling into tight spaces walk straight into your trap spells, dealing massive damage without requiring constant mana spending afterward.
-
Avoid redundant casting: Did you summon a Runic Lantern? Great--don't recast unless it's actually fading.
Advanced Tip: "Mana Debt" and Burnt Mana
There's one wrinkle to keep aware of: burnt mana. Some stamina and health-restoring items actually cause "mana burn," temporarily lowering your mana cap. To counter it, drink soothing teas, visit safe rest locations regularly, or manage your consumable intake carefully. Frequent resting helps wipe burned mana clean--so don't skip those rest breaks.
Friendly Takeaways for Practical Mana Management
- Pay attention to initial mana allocation, carefully balancing magic power with your physical abilities.
- Plan your rune usage ahead of time, especially before entering battles to avoid mana starvation.
- Carry a solid selection of mana items (Gaberry Tartine, Astral Potions) for reliable mana recharge anywhere.
- Equip mana-friendly gear regularly, reducing the casting cost of each rune spell.
- Combine rune spells with physical combat methods, spending mana lightly during intense encounters.
- Recover mana with safe sleeping or consumables, removing burned mana penalties before they're problematic.
With these simple rules, mana management becomes second nature, making magic both fun and reliably sustainable throughout your Outward playthrough. Now gear up, set your favorite runes, and enjoy adventuring--mana worries won't stop you again.
Becoming a Smooth Spellcaster: Essential Techniques for Successful Magic Use
Magic in Outward isn't the usual one-click spell system found in other RPGs. Understanding how to effectively perform each technique makes the difference between effortlessly winning battles or fumbling mid-fight. Let's break down the core spellcasting methods, describe their effects efficiently, and highlight exactly when you'll want to use each one.
Runic Magic: Combining Runes to Cast Spells
Runic magic is a powerful and extremely popular spellcasting method in Outward, but its learning curve can feel confusing at first glance. Unlike traditional magic, you don't cast spells by pressing a single button; you use a combination of rune symbols. Think of these runes as "letters." Spellcasting means knowing which letters to use--and in what order.
Here's how it works
- First, you need to visit a Rune Sage trainer in Berg to buy these rune skills. There are four runes available: Fal (Red), Shim (Blue), Dez (Purple), and Egoth (Green).
- Once equipped, cast two runes back-to-back. The combination you make results in your desired spell.
Some rune combinations are essential for everyday adventuring:
- Shim + Egoth: Summons a floating Runic Lantern--perfect for lighting dark caves without torches.
- Fal + Shim: Launches a fiery projectile attack (Runic Fireball), great for initiating fights at range.
- Dez + Egoth: Creates a handy Runic Protection shield, temporarily boosting your defense during difficult fights.
- Dez + Fal: Sets Arcane Traps, devastating enemies that trigger them--ideal for crowded areas.
Important: Order matters. If you accidentally reverse the order, your spell fizzles, wasting precious mana. Key tip? Keep your favorite spells memorized to avoid combat mistakes and mana wasting.
Sigil Magic: Summoning Spell Circles
Sigils are another popular magic style in Outward, based on casting magic circles on the ground. Within these circles, normal items or basic spells turn into stronger, potent magical attacks.
How Sigils work
- First, place the sigil circle spell on the ground. (You learn sigil spells from trainers in various towns.)
- Step inside and cast certain spells or use items to activate special, more powerful effects.
A basic example--a Fire Sigil:
- Cast your spell "Fire Sigil" creating a glowing circle around you.
- Inside this circle, throw a Spark spell, lighting enemies around it on fire, dealing significant area-of-effect damage. You can also use Flint and Steel within the sigil as an easier alternative.
Other common Sigils:
- Wind Sigil (Purple altar): Cast Conjure to unleash mighty lightning bolts, damaging several foes at once.
- Ice Sigil (Bluish-white): Cast Cool boon in circle for powerful frost magic attacks, slowing and incapacitating targets.
Important note: Sigil spells always involve setup time. Use them carefully, before engaging groups of foes or tougher boss-style battles--not ideal amidst chaotic mid-scuffle scenarios.
Spellblade Enchantments: Temporary Weapon Buffs
Spellblades are a hybrid magic style, temporarily imbuing melee weapons with elemental enchantments. Casting Spellblade spells right before engaging in close-combat greatly boosts your damage output and adds specific elemental traits helpful against certain foes.
Example spellblade enchantments:
- Fire Infuse: Adds fire damage to your melee strike, useful against ice-based horror monsters like Wendigos.
- Frost Infuse: Chills targets, slowing enemies significantly--fantastic against quicker, agile monsters.
- Lightning Infuse: Grants electrical power, especially powerful against mechanical enemies.
Pro tip: Spellblade buffs are rapid to cast, low-cost magic, and highly complementary to combat-oriented styles. They turn standard weapons ultra-effective without undergoing expensive upgrading or crafting hassle.
Chakram Spellcasting: Using Disc Weapons as Magical Tools
Chakrams are a unique, "magical throwing-disc" weapon introduced in Outward. Chakram spellcasting consists of martial techniques infused with magic powers. Unlike runes and sigils, you'll need a Chakram weapon equipped first.
The Chakram discipline works like this:
- Equip a Chakram weapon and learn Chakram skills from specialized trainers (available in Monsoon city).
- Each Chakram ability requires certain discipline charges--accumulated through lower level Chakram attacks.
Example powerful Chakram techniques:
- Arc: Your Chakram spins around you hitting multiple enemies simultaneously. Great against groups.
- Piercing Shot: Your Chakram hurtles directly toward distant enemy targets, perfect for quick, ranged openings.
- Defensive Spin: Blocks attacks briefly by causing the Chakram to whirl defensively in front of you.
Why choose Chakrams? They're versatile, controlling enemy groups equally efficiently at range and melee distance--ideal if you like a combat-heavy magic style that feels very active.
Ritualist Summoning: Bringing Assistance From the Ethereal Plane
Summoning rituals briefly summon magical companions or entities during combat for powerful support. These summoned allies have many practical benefits:
- They can tank damage, distracting enemies while you recover mana or health.
- Specific rituals summon offensively strong allies (e.g., Ghost Summon), dealing lasting damage.
Important caveat: Ritualist spells usually consume rare items or conditions to summon companions temporarily, so careful selection and sparing use work best.
One popular invocation:
- Reveal Soul + Spark: First, use Reveal Soul spell to uncover the souls of defeated enemies around you. Cast Spark on these souls, instantly creating a Ghost companion to fight by your side for a temporary duration.
Always make good use of defeated foes, generating combat allies quickly.
Final Thoughts: Mixing and Matching Your Spell Techniques
You're never limited to only one magic type in Outward. A successful mage regularly uses multiple methods:
- Runes for practical everyday needs and ranged combat setups.
- Sigils for strategic bursts during tougher engagements.
- Spellblades when quickly engaging foes close-up.
- Chakrams for flexible, sustained attacking strategies.
- Ritual summons for crucial support in crowded or extended conflicts.
By thoughtfully integrating these diverse magical tools, you will confidently handle a wide variety of combat situations effectively. Mana costs and spell combinations soon become second-nature, leaving you free to travel freely without constantly interrupting your adventure.
That's your arsenal--build your spells smartly, prepare with clean battle plans, and spellcast wisely to always keep your magic flowing.
Magical Gear: Enhancing Your Magic Through Armor and Equipment
No mage is complete without powerful magical gear to augment their spells and grant helpful properties. In Outward, equipment isn't just for protection--armor sets, robes, and accessories directly impact your magical abilities, mana efficiency, and spell-casting power. If you've ever stuck to basic equipment and found your spells flatlining during tough battles, gear choices may be the missing piece to your magical puzzle.
Let's take a look at armor sets, robes, and unique magical accessories that every spellcaster should consider, along with some practical tips to choosing your ideal combination.
Understanding Magical Gear: Stats and Bonuses
Much like weapon choices impact melee fighting, magical gear influences your spellcasting attributes in Outward. Here's a quick rundown on what key terms mean for magical characters:
- Mana Cost Reduction (-%): Makes each spell cheaper, allowing you to cast more magic per mana point consumed. Lower mana costs mean fewer wasted resources and less downtime.
- Mana Regen (+): Speeds up how quickly your mana replenishes passively, essential for lengthy fights.
- Elemental Damage Bonuses (+%): Increases how much fire, ice, or lightning damage your spells dish out.
- Elemental Resistance (+): Reduces incoming damage from enemy elemental attacks (like magical bolts or fire).
Knowing these terms helps a ton when choosing what armor or trinkets fit your magic style.
Recommended Gear Sets for Magic Users
Outward has armor and robes tailored for spellcasters. Let's look at the most popular magical gear sets and their benefits.
Scholar Set (Ideal Starter Mage Set)
Location: Sold by merchants in major cities (like Berg), easy and affordable.
Details
- Strong mana cost reduction for beginner spellcasters.
- Decent weather protection for traveling in cold or hot climates.
- Lightweight with moderate mana efficiency--perfect for novices balancing combat and magic.
- Elemental bonuses aren't mind-blowing, but keep you casting comfortably.
Why Pick It?
It's your best early-game option. Low cost and accessibility make it great for experimenting with your new-found magical talents.
Runic Armor Set (Perfect for Rune Magic Users)
Location: Crafted via blacksmithing or acquired through endgame looting.
Details
- Significant mana cost reduction for rune spells specifically.
- Boosts your runic magic power notably, producing stronger effects.
- Solid overall mana reduction helps other gameplay styles too.
- Good physical and magical defenses suitable for mid to late-game mages.
Why Pick It?
If runic spells make a frequent appearance in your magic rotations, this armor is tailor-made to perfect your runes. Don't prioritize it if sigils or chakram techniques dominate your style.
Gold-Lich Armor Set (Top-tier Spellcaster Set)
Location: Obtained after defeating the Light Mender (Gold-Lich) boss in the Spire of Light, northwest region of the Hallowed Marsh.
Details
- Strongest mana cost reduction available in-game.
- Huge boosts to lightning damage: invaluable for lightning spell users.
- High elemental resistance to lightning-based enemies.
- Fantastic mana regeneration--keeps your mana pool topped off quickly.
Why Pick It?
Endgame magic users widely prize this set. Gold-Lich armor makes lightning spells lethal, significantly reduces mana drain, and regenerates your mana rapidly after your powerful casts. Securing it can shape your ultimate mage build.
Tenebrous Armor Set (Hybrid Mage Combat Set)
Location: Crafted using materials from the Antique Plateau DLC area, requiring some advanced materials.
Details
- Strong bonuses to ethereal damage, giving spellblades who use spirit damage major boosts.
- Good physical protection plus decent mana benefits--excellent choice for magic-melee hybrid builds.
- Provides stamina and mana efficiency together, supporting more versatile hybrid playstyles.
Why Pick It?
You're combining magic and melee weapons heavily? This is your premium late-game choice. Tenebrous armor lets spellblades become devastating, adeptly slicing foes apart with magically-enhanced moves.
Essential Magical Accessories and Trinkets
Accessories in Outward also greatly influence magical output. Always consider rings, necklaces, and charms complementing your playstyle:
- Jade-Lich Idol (Off-hand equip): Massive mana cost reduction; hugely helpful during expensive battle encounters or mana-intensive spells. Acquired from defeating the Jade Lich in the Ziggurat Passage.
- Light Mender's Lexicon (Rune users): Boosts your rune spells considerably, letting you throw around rune magic cheaply and potently. Dropped by Gold-Lich; a must-have if you're regularly casting runes.
- White Priest Mitre (Headgear): Adds large boosts to mana recovery speed, fantastic when paired with heavy spellcasting rotations. Purchase it from priests within Monsoon city--highly recommended as soon as you can afford it.
- Elemental Resistance Potions: Temporary elemental defense increases, critical against enemies stacking dangerous magical attacks. Always have these prepared, particularly before engaging strong magical foes.
Smart Gear Selection: Tips for the Perfect Build
Choosing gear depends largely on your magical specialization and gameplay style. Consider the following quick tips for best equipment practices:
- Ensure gear matches your spell element: If lightning spells dominate your inventory, equip gear boosting lightning damage and resistance.
- Balance mana efficiency and regen: Prioritize mana regeneration if attacking frequently with costly spells. Heavier spell rotations benefit from increased mana recovery to stay combat-ready longer.
- Don't forget elemental defense: Unless you're a strict glass-cannon mage, balance offensive bonuses with adequate defense. Surviving longer often proves just as valuable as doing more spell damage in tough encounters.
Finding Magical Gear and Exploring Your Options
Regularly check merchants in cities, traders on roads, and loot chests inside caves or ruins for potential magical treasures. Enchanting armor through blacksmith crafting stations also upgrades mediocre gear into mage-friendly outfits later on.
Keep trying new gear combinations as you access deeper game locations or recipes. Pay close attention to which magical stats you value most, tailoring equipment choices precisely to your unique mage playstyle.
Final Thoughts on Magical Gear
Magic in Outward feels complex at first: mana management, choosing spells, finding gear--it all feels overwhelming initially. However, picking good magical armor and accessories streamlines your spellcasting, replenishes your mana steadily, and makes conquering tough battles totally doable.
Always experiment with new gear setups and trinkets as you face new threats or learn more spell disciplines. Before long, you'll confidently work magical armor and gear choices seamlessly into your adventuring routine. Trust your instincts and equip thoughtfully--soon enough, casting spells becomes easy and fun as second nature.
Learning New Spells: How Magic in Outward Actually Works
When playing Outward, magic isn't something innate you'll have from the get-go. Forget the way most RPGs hand you spells freely. Here, you'll need to earn them, consciously and methodically. So how exactly do you learn new spells, and what should you expect from the process? Let's break it down.
Preparing for Spellcasting: Unlocking Mana
Before learning your first true spell, you'll need to unlock mana itself. To do this, travel to Conflux Mountain, located centrally in the Chersonese region. Once you navigate through Conflux Mountain's various paths--whether choosing the Blue Chamber, Heroic Kingdom, or Holy Mission route--you'll arrive at a distinctive blue crystal formation called a Ley Line.
Interacting with this Ley Line grants you mana, but be careful: this isn't a decision you can reverse easily. Trading health and stamina permanently for mana means choosing to become vulnerable in melee, so weigh this carefully. A small mana pool is enough for hybrid builds, but pure casters should strongly invest here.
Trainers Are Your Key to New Spells
After getting mana, you'll realize quickly that you don't own many useful spell options yet. Here's where spell trainers come into play. Each major town features one or more dedicated magic trainers. They'll gladly teach a selection of starter spells--for a price, of course--and offer passive skills to enhance your spellcasting.
- Berg (Enmerkar Forest) hosts rune magic trainers, teaching powerful spells that require rune combinations.
- Monsoon (Hallowed Marsh) offers sigil trainers, letting you cast strong spells by combining sigils and specific items or spells.
- Levant (Abrassar Desert) features trainers teaching potent weapon enchantments and fire damage enhancements.
- Harmattan (Antique Plateau, DLC area) houses trainers specialized in Hex Magic and advanced magic options for experienced casters.
Always plan your journey with these trainers in mind. They represent your primary method for expanding your magical capabilities. Early on, stockpile some silver beforehand; the cost per spell varies roughly around 50-600 silver depending on their strength and usefulness.
Spell Types: What's the Difference?
Let's simplify what major spellcasting styles exist and how to pursue learning them:
Runic Magic
Runic spells depend entirely on memorizing specific combinations of runes. They take practice and careful recall to master. Each rune alone does nothing special, but several combined correctly create powerful results, from attack spells to defensive enhancements. Trainers in Berg can teach you both the runes themselves and tips for efficient combos.
Sigil Magic (Circles)
Sigils represent areas drawn on the ground with specific elemental energies. Alone, most sigils accomplish very little. However, casting other spells while standing in sigils triggers extra powerful magical effects. Sigil magic feels rewarding for those patient enough to set up the perfect conditions--Monsoon's trainers specialize in these spells.
Chakram Magic
If you favor spellcasting combined with ranged combat, chakram magic offers a stylish blend. By training with specialists in Berg or Harmattan, you'll gain access to new melee combos and ranged chakram maneuvers--perfect if you don't want magic as your sole combat option.
Advanced and Hybrid Magics (Hexes and Weapon Enchants)
Advanced spellcasters typically opt for more complex types, like Hex magic--marking enemies with effects that blossom dangerously into elemental eruptions or debuffs. Weapon enchantment spells similarly strengthen weapons with elemental energy; trainers for these advanced magical schools reside in Harmattan and Levant.
Finding Spell Knowledge Outside Trainers: Scrolls and Books
Exploring ruins, caves, and dungeons regularly uncovers helpful tomes and scrolls, granting spells without paying trainers directly. Magical scrolls contain single spells, usually cheaper alternatives to purchasing spell lessons. However, scroll locations are random, unreliable, and often dangerous to reach. Trainers are typically the most reliable source for filling out your spellbook quickly.
Passives: Don't Overlook Essential Talents
Besides active magic, trainers offer passive talents improving your magical effectiveness. You'll see options like Mana Cost Reduction, Spell Power boosts, and improved mana regeneration rate, among others. Although less flashy, passive talents significantly improve overall spellcasting strength, efficiency, and sustainability. Consider them carefully when building your caster.
Experimentation and Spell Combos Make Magic Exciting
Outward rewards players who experiment. Don't limit yourself to one school unless your gear heavily suits a specific type (like Rune spells). Certain combos of unique spells and effects create highly effective tricks to handle challenging foes.
Sigils mix particularly well with simple spells like spark or Mana Push to unleash devastating elemental attacks. Hex casters can cripple bosses by stacking different hexes and triggering them at key times. Always keep an open mind, mixing and matching spells across disciplines occasionally. You might find surprising and powerful results.
Wrap-Up: Magic Mastery Takes Patience, But It’s Worth It
Learning new spells in Outward takes deliberate effort: unlocking mana at Conflux Mountain, carefully investing in spells from trainers, and grabbing passive talents. It also encourages curiosity--trying new combinations, exploring diverse options, and seizing prime opportunities when found. Magic is tough initially, but stick with it. Over time, you'll gladly wield massive storms, scorching fireballs, and intricate rune tricks--transforming you into one of Outward's toughest spellcasters.