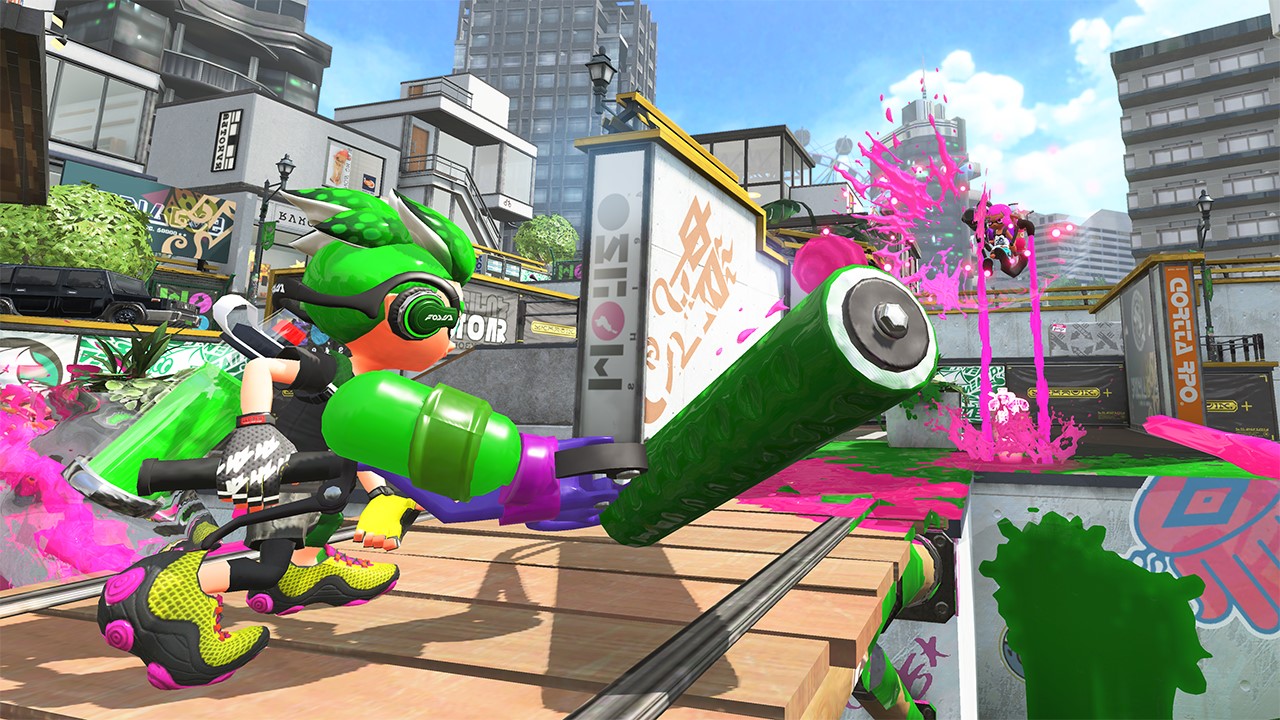
Splatoon 2 Gear Ability Optimization Guide
Master Splatoon 2 gear with tips on ability combos, farming abilities, and tailoring your setup to boost your playstyle.
Finding the right gear abilities in Splatoon 2 can really shape the way you play, whether you’re pushing for ranked victories or just having fun with friends. With so many different options available, making your loadout work for your playstyle isn’t always straightforward. It’s easy to grab gear that looks cool but figuring out which abilities actually make a difference—and how to balance them—can take a bit of trial and error. Understanding how these abilities interact with your weapons and tactics is key to getting the most out of your kit, letting you move faster, survive longer, and keep up with the competition.
What Are Gear Abilities?
Gear abilities are passive bonuses attached to the clothing your Inkling or Octoling wears: headgear, clothing, and shoes. Every gear item comes with at least one primary ability, and as you use a piece of gear in battle, it unlocks up to three smaller secondary abilities. These perks can range from quicker respawns to greater firepower, and even small changes can significantly affect your experience during matches.
Each piece of gear starts with a main ability (the biggest boost), and as you rack up wins and level up your items, you'll roll for sub abilities—minor perks that stack with each other or with mains. Some abilities are exclusive to mains, while others can appear as mains or subs.
Types of Abilities
The game features a variety of abilities, grouped by the type of effect they bring to your gameplay. Here’s a breakdown:
Movement and Mobility
- Swim Speed Up: Move faster through your own ink. Great for aggressive players or those who need to reposition often.
- Run Speed Up: Increases speed while moving on ground (outside of ink). Useful for weapons that restrict movement like splatlings.
- Ink Resistance Up: Reduces slowdown and ink damage when walking through enemy ink, making it easier to escape or push through contested areas.
Ink Efficiency
- Ink Saver (Main): Lowers the ink consumption of your main weapon. Effective for rapid-fire weapons.
- Ink Saver (Sub): Lowers the ink cost of sub weapons, letting you throw more bombs or use special gadgets more often.
- Ink Recovery Up: Replenishes your ink tank at a faster rate when swimming in ink.
Combat and Survival
- Bomb Defense Up DX: Lowers damage taken from non-main weapon attacks like bombs, specials, and object damage.
- Defense Up: Not present in Splatoon 2 (removed from the first game).
- Quick Respawn: Skips the respawn penalty when you get splatted several times in a row without getting a splat yourself—helps risky playstyles.
- Quick Super Jump: Reduces time needed to super jump to teammates or spawn.
Special Weapon Management
- Special Charge Up: Fills your special gauge more quickly for more frequent use.
- Special Saver: Retains more special gauge when splatted, so you lose less progress.
- Special Power Up: Changes based on your chosen special—could mean a longer duration, stronger effect, or faster travel.
Sub Weapon Management
- Sub Power Up: Alters specific sub weapon features, such as extended bomb toss range or faster effect.
Miscellaneous Abilities
- Cold-Blooded: Reduces duration of market status effects (like being tracked by Point Sensor).
- Ninja Squid: Hides your swimming trail but slightly reduces swim speed.
- Stealth Jump: Masks your super jump landing point, making ambushes less predictable.
- Object Shredder: Increases damage to objects such as the Rainmaker shield or Splash Walls.
- Opening Gambit, Last-Ditch Effort, Comeback, Tenacity: These are situational and activate when certain conditions are met—such as at the start of a battle or after being splatted.
Main vs. Sub Abilities
Each gear item’s main slot offers a stronger version of the ability compared to what a single sub slot provides. Stacking multiples of the same sub ability increases the effect, but with diminishing returns—two subs do not double the power. A main ability usually equals about three sub abilities, but the math isn’t always exact.
Stacking Abilities
Some abilities stack linearly (like Swim Speed Up), but most experience diminishing returns; the more you stack, the less additional benefit you get for each new copy. It's common for players to mix and match, prioritizing mains and filling out subs with minor boosts.
Ability Exclusivity
Some abilities are exclusive to certain gear slots. For example, Ninja Squid only appears as a main on clothing, while Object Shredder is only available as a main on shoes. This limits how you can combine certain abilities, so planning ahead is important.
How to Get the Abilities You Want
Getting the right ability often takes effort. Most gear comes with a default main ability, and as you play matches, the gear’s sub slots unlock. You can influence sub abilities by using ability chunks, which are collected by scrubbing gear and splatting enemies, then applied via Murch in Inkopolis Square. There’s some luck involved, but with persistence and smart use of chunks, you can eventually customize your gear.
If you’re looking for a specific combo (like Ninja Squid with maximum Swim Speed Up), you’ll need to match your gear’s brand to the abilities you want—different brands have higher odds for certain abilities, but that’s a deeper topic covered later.
How Gear Abilities Affect Your Playstyle
Your weapon, positioning, and typical movement patterns all affect which abilities help you the most. Aggressive short-range weapons benefit from Swim Speed Up and Ninja Squid, while supportive or long-range setups might prefer Ink Saver (Main), Special Charge Up, or Quick Super Jump.
For instance:
- Slayers (frontline brawlers): Prioritize mobility and stealth.
- Support: Boost ink recovery and special management.
- Backliners: Look for protection and quick getaways.
Experiment with different combos during Turf Wars or private matches, and pay attention to how your choices align with what you want to do in matches.
Conclusion
Learning to match gear abilities to your playstyle can make a noticeable difference in every match. Whether you’re aiming for competitive play or just want to stay fresh with friends, tweaking your gear loadout and understanding the effects of each ability helps you maximize your potential. Keep testing what feels best, watch experienced players for ideas, and don’t be afraid to swap things around depending on the mode or map.
Optimizing Ability Combinations
Fine-tuning your gear abilities in Splatoon 2 goes beyond just stacking your favorites. It’s about creating a loadout that amplifies your weapon’s strengths, covers its weaknesses, and matches your playstyle. Here’s how to think smart about optimizing combinations, with tips and example setups used by top players.
Synergizing With Your Weapon Choice
Every weapon class thrives with certain abilities, but struggles with others. Knowing what your weapon needs can save you from wasting valuable slots.
Shooters and Dualies
These rely on high mobility and frequent ink usage. Abilities like Swim Speed Up and Ink Saver (Main) pair well, letting you zip around and keep the pressure on.
Example combo:
- Main: Swim Speed Up
- Subs: Ink Saver (Main) x2, Ink Recovery Up
Rollers and Brushes
Stealth and covering ground quickly matter. Try Ninja Squid to hide your movements and Run Speed Up for smoother rolling.
Example combo:
- Main: Ninja Squid
- Subs: Swim Speed Up, Run Speed Up, Special Charge Up
Chargers (Snipers)
Survivability and special output count for Chargers. Ink Recovery Up ensures you’re never caught dry, while Special Charge Up helps you trigger powerful specials.
Example combo:
- Main: Ink Recovery Up
- Subs: Ink Saver (Main), Special Charge Up x2
Splatlings
They have slow mobility while firing and chew through ink. Run Speed Up makes you harder to hit, while Ink Saver (Main) lets you sustain fire longer.
Example combo:
- Main: Run Speed Up
- Subs: Ink Saver (Main), Special Charge Up, Bomb Defense Up DX
Blasters
They’re slow and easily targeted but can wipe out clusters. Quick Respawn and Special Power Up help you keep the offensive going.
Example combo:
- Main: Quick Respawn
- Subs: Special Power Up, Swim Speed Up, Bomb Defense Up DX
Building Well-Rounded Loadouts
Stacking one ability all over your slots isn’t always ideal due to diminishing returns. Instead, try a “main-lean + support” approach:
- Pick a core main ability for your primary need.
- Support with complementary subs—each sub provides a smaller buff, but together they round out weaknesses.
Mobility-Focused Set
For ink brush, carbon roller, or any frontline weapon.
- Clothing: Ninja Squid (main), Swim Speed Up (sub)
- Headgear: Ink Recovery Up (main), Quick Respawn (sub)
- Shoes: Special Charge Up (main), Ink Resistance Up (sub)
This setup provides stealth, mobility, and helps you recover if splatted in a risky spot.
Special-Centric Set
For players who like to spam specials or support their team.
- Clothing: Special Charge Up (main), Ink Saver (Sub) (sub)
- Headgear: Special Power Up (main), Bomb Defense Up DX (sub)
- Shoes: Special Saver (main), Ink Recovery Up (sub)
Charge your specials quickly, survive longer, and waste less ink.
Countering Opponents
Think about popular threats in the current meta. Lots of bomb throwers in your matches? Pick up Bomb Defense Up DX. Facing a lot of trackers? Slot in Cold-Blooded on your gear. Matchups can change depending on the mode, so don’t be afraid to tweak your lineup for Splat Zones, Tower Control, or Clam Blitz.
Brand Bias and Ability Chunks
Each gear brand in Splatoon 2 has higher odds for one specific sub ability and a lower chance for another. For instance:
- Inkline: Favors Bomb Defense Up DX.
- Tentatek: Boosts Ink Saver (Main).
- Zekko: Swings toward Special Saver.
Plan ahead by picking brands that naturally roll the abilities you want, then use ability chunks for the last gaps. This saves time and resources.
When To Mix, When To Max Out
Mixing two abilities that synergize (like Swim Speed Up and Ninja Squid) often pays off more than maxing out one. The only time maxing is worth it: when a certain threshold creates a break point. For example, stacking enough Quick Super Jump lets you escape bombs you couldn’t otherwise.
Key breakpoints to know
- Quick Respawn: A couple subs ensure you almost always respawn instantly after a death without scoring a splat.
- Special Charge Up/Sub Saver: Hit just enough to get one extra use per round—not more.
Test your builds, record matches, and check if adding a third sub for one ability actually helps your play, or if you’d rather fill that spot with something different.
Example Loadouts From Top Players
-
Aggressive Shooter:
- Swim Speed Up (main)
- Ninja Squid (main, clothing)
- Bomb Defense Up DX x2 (subs)
- Ink Recovery Up (sub)
-
Support Splatling:
- Run Speed Up (main)
- Ink Saver (Main) (sub)
- Special Charge Up (main)
- Bomb Defense Up DX (sub)
-
Tower Control Slayer:
- Quick Respawn (main)
- Stealth Jump (main)
- Ink Resistance Up (sub)
- Special Power Up (sub)
These are starting points. Fine-tuning and personalization based on your skill level, comfort, and favorite play style usually matters more than copying pro setups.
Experiment and Adapt
Don’t get stuck with one set of abilities. Use SplatNet to preview changes, try new builds in Turf War, and swap out subs when you run into problems. Tournament players constantly adjust based on maps, weapons, and opponent trends—you should too.
In summary
The right ability combo can amplify your strengths and cut down on mistakes. Stacking too much of one stat can waste a slot, while mixing the right supportive perks opens up more effective gameplay. Treat your loadout as an evolving toolkit that shifts with your growth and the match environment. Experiment, adjust, and enjoy the payoff of a finely-tuned gear setup. Obtaining Gear with Desired Abilities
Hunting for perfect gear in Splatoon 2 can feel like chasing a shiny Magikarp—random, a bit frustrating, but super satisfying when it works out. With random rolls, ability chunks, and brand biases all in play, finding gear that matches your needs is practically a mini-game of its own. Here’s how you can target the abilities you want without burning out (or burning through your cash and snails).
How Gear Abilities Are Assigned
Every piece of gear in Splatoon 2 has a “main” ability locked in, plus three sub ability slots you unlock by earning experience in battles. The sub abilities fill in randomly based on the gear’s brand. Some brands favor certain abilities, while others almost never give you what you’re after—the key to tailoring your gear is knowing how to manipulate these chances.
Farming Ability Chunks
Ability chunks cut out the randomness. They let you manually slot your favorite sub abilities onto any piece of gear you want, after a little bit of grinding.
How to Get Ability Chunks
- Scrub Your Gear: Merch in Inkopolis Square can scrub subs off gear you’ve filled with experience. You pay 20,000 coins and get one chunk for each sub scrubbed.
- Level Dupes: Once a single piece of gear earns XP and fills all its sub slots, continue using it. Each level past max gives a random chunk.
- Salmon Run Rewards: Sometimes the Salmon Run prize gear comes with a chunk or two, or you just get chunks directly from bonus meters.
- SplatNet 2 App: Use the SplatNet shop for exclusive gear. Sometimes, it offers near-perfect stat combos with desirable abilities—or provides extra stuff to scrub for chunks.
- Gear Recycling: Limited-time event gear can be recycled, dropping even more chunks into your supply.
How Many Chunks Do You Need?
- 10 chunks for a single sub ability slot.
- 30 chunks for the main ability (only on some special event gear via Merch, not regular methods).
So, if you want to fully customize all three subs on a piece of gear, you’re gonna need 30 chunks per ability type. Most players start by patching one or two essential subs, rather than going full perfectionist.
Targeting Abilities: Brand Biases and Smart Rolling
Not all brands are created equal! Each brand has a favored ability that rolls about 5x more often, and a “shunned” ability you’ll almost never see. Here’s a quick breakdown:
- Annaki: Favor Cold-Blooded, unfavor Special Saver
- Enperry: Favor Sub Power, unfavor Ink Recovery Up
- Forge: Favor Special Power Up, unfavor Ink Saver (Sub)
- Inkline: Favor Bomb Defense Up DX, unfavor Run Speed Up
- Krak-On: Favor Swim Speed Up, unfavor Bomb Defense Up DX
- ...and so on.
Trick: Start with gear from a brand that matches the sub ability you want, especially for “grindy” slots—the first 1-2 you plan to fill naturally, then patch up leftovers with chunks.
Practical Process Example
- Buy or order gear with the main ability you want.
- Play matches with it equipped, focusing on filling sub slots.
- Scrub subs (via Merch) if they aren’t what you like, collecting chunks as you go.
- Replace unwanted subs with crafted choices using the ability chunks once you have enough.
- Rinse and repeat—the more you play, the more control over your subs you’ll have.
Using Ability Doubler and Locked Mains
Some gear comes preloaded with extra-special main abilities. For example, “Ability Doubler” on Splatfest Tees makes sub abilities twice as effective on that gear. These are locked in, so your only customization comes from the subs. Plan chunks accordingly, and if the main is something you love, focus your chunk farming here first.
Trick: SplatNet 2 Ordering
SplatNet 2 (the mobile app) lets you order gear not found in shops, often containing ability combos unavailable elsewhere. Sometimes, you’ll see nearly-perfect pieces with two subs you want—snag them fast. You can place one order at a time via Murch, then pick it up next time you’re in the Square. Perfect for times when you spot a dream combo online.
Splurge or Save? Super Sea Snails and Merch’s Services
Super Sea Snails, earned from Splatfests, let you reroll all sub slots at once. This is high risk, high reward—sometimes you’ll get what you need in one roll, other times, three Bomb Defense Up DX when you needed Ink Saver (Main). Most players save snails for festival/rare gear, or to quickly refill a specific sub to then scrub for fast chunk farming.
Merch also lets you order pieces of gear you see on other players. If you spy a perfect triple Ink Saver (Sub) hat, try ordering it—they reroll, but use the gear brand so you can increase your odds for future scrubs.
Tips for Efficient Customization
- Focus on one piece at a time—100% perfect gear takes a long time.
- Combine brand luck with chunks for the fastest results.
- Use farming sets: Outfit gear you don’t care about, fill it up, scrub, and repeat just to get more chunks.
- Keep checking shops and SplatNet 2 for gear with killer ability rolls—sometimes you get lucky!
In Short
Getting the abilities you want is about working with (and sometimes around) the game’s randomness. Between brand odds, ability chunks, and clever use of Merch’s services, you can shape your gear into something that fits your strategy, not just the luck of the draw. Be patient, spend chunks wisely, and build up your dream loadouts over time.
Using Ability Chunks
Ability chunks are your main tool for customizing gear in Splatoon 2. If you want to go beyond the randomness of sub ability rolls and finally see those perfect stat combos, chunks are how you make it happen. Here’s how ability chunks work, where to use them for the most impact, and the best strategies for making your gear your own.
What Are Ability Chunks, and Why Do They Matter?
Ability chunks let you attach any sub ability (say, Ink Saver (Main) or Swim Speed Up) to any gear slot—if you have enough. This takes the luck out of gear customization and puts you in control. Instead of praying for the right roll, you spend chunks to lock in exactly what you want.
Each sub slot costs 10 chunks of the desired ability. This means adding three Run Speed Up subs to a pair of shoes uses 30 Run Speed Up chunks. For main abilities, it's usually not an option, except for special event gear. So chunks are all about customizing the subs.
Chunks are a grindy resource because you need a dozen or more for each piece of gear you want to perfect. Most of the time, you’ll be blending natural rolls with chunks—using what luck gives you for some slots, then patching the rest with chunks once you’ve collected enough.
Using Chunks: The Step-by-Step Process
1. Pick Your Target Gear
Decide what gear you want to customize. Most people start with a hat, shirt, and shoes that have main abilities supporting their play style (like Ninja Squid or Quick Respawn).
2. Unlock All Sub Ability Slots
Fill your gear’s experience bar by playing Turf War or Ranked. Once you’ve battled enough, each piece should have all three sub slots unlocked.
3. Remove Unwanted Subs (Optional)
If you already have a good sub ability or two on your gear from normal play, you only need to patch the remaining slots. If none of your subs are what you want, scrub the gear with Merch for some coins, then start from a clean slate.
4. Add Abilities with Chunks
- Go to Merch in Inkopolis Square.
- Select “Add Abilities.”
- Pick your gear, then select an empty (or already filled) sub slot to overwrite.
- Spend 10 chunks to pick a new ability.
- Saved up enough? You can do this for all three sub slots.
While you can replace a slot that already has something in it, every overwrite still costs 10 chunks. So double-check before spending.
Should You Go For Full Sets or Just Patch the Last Slot?
Most players don’t use chunks for everything—it would take ages to grind that many. The best strategy is to fill gear with as many favorite subs as possible through natural leveling and brand bias, scrub it when you’re close (or got unlucky), and only spend chunks filling in what you can’t get through normal play.
Experienced players usually wait until a slot or two is missing from their perfect set, then use chunks just to finish things off. This saves you tons of time over trying to slot every sub manually.
How to Prioritize Which Subs Get Chunks
- Key Abilities First: If your playstyle relies on a certain sub (like Ink Recovery Up for chargers or Swim Speed Up for aggressive slayers), patch those first. Don’t waste chunks on abilities you rarely use.
- Rare Subs: Brand-unfavored subs are almost impossible to roll, so it makes sense to use your chunks here.
- Uniform Sets: If you want to stack three of the same ability (triple Swim Speed Up shoes, for example), chances are, you’ll need to use chunks for at least one slot—even with the right brand bias.
Special Notes on Main Abilities
Main abilities are almost always locked, with a few exceptions for special event gear. Merch can swap the main ability for 30 chunks if the gear allows—but this is rare, so don’t expect to overhaul your mains with chunks. Focus on subs.
Saving Chunks: Mistakes to Avoid
- Don’t burn all your coins or scrub super rare event gear unless you’re sure—chunks are valuable, but some gear is irreplaceable.
- Check your ability chunk stock before cashing them in. Accidentally spending chunks on a slot that could have rolled naturally can really set you back.
- If you’re patient, wearing gear with your desired abilities as the brand’s “favored” option may get you what you want with less investment.
Maximizing Your Chunks
- Play Salmon Run often for chunks as rewards.
- Order gear for chunk farming—choose gear with common brands and cheaper price tags.
- Use Super Sea Snails to reroll sub abilities and then scrub, multiplying your chunk gain.
- Stay plugged into SplatNet 2—order gear with good abilities to save time on chunk grinding.
Chunk Spend Checklist
Before you spend 10 precious chunks on a slot, ask yourself:
- Is this ability hard to roll on this brand?
- Could I get this result from farming/rolling instead?
- Am I happy to commit to this stat, or do I want to keep trying for a “jackpot” roll?
Conclusion
Ability chunks unlock total freedom in Splatoon 2’s gear system—but they’re slow to earn, so use them strategically. Plan your main and subs around what you can get through brands and luck, and save your chunks for patching up what luck can’t provide. With a little planning and steady play, you’ll build loadouts that play exactly how you want—no more rolling the dice.
Matching Abilities to Playstyle
Finding the right abilities for your playstyle is what transforms gear from basic stat boosts into actual tools for winning matches. Whether you’re inking turf, picking off opponents, or anchoring from the backline, dialing in a set of abilities that compliments how you play will help you get more wins and make tough matches feel smoother.
Offensive Playstyles: Aggro and Slayer Loadouts
If you’re frontlining with shooters, blasters, or rollers, speed and survivability should be your main priorities. Getting in fast, scoring a pick, and resetting before getting splatted yourself can swing matches hard. Here are the key abilities:
- Swim Speed Up: Keeps you mobile so you can chase or escape after direct confrontations. Pairs well with Ninja Squid (lets you ambush without revealing your location as easily).
- Run Speed Up: Vital for weapons that fire while moving (e.g., dualies, splattershots). Lets you strafe while shooting and survive duels.
- Quick Respawn: Aggressive players get splatted a lot. Quick Respawn helps you jump back into action without lagging behind the enemy’s push.
- Ink Saver (Sub) / Ink Recovery Up: For players who lob bombs to pressure spaces, these help so you’re never caught out with no ink at the worst time.
Example Aggro Loadout
Main: Ninja Squid Sub abilities: 2x Swim Speed Up, 1x Quick Respawn
This combo lets you shark (hide in ink), ambush, and recover from risky plays quickly.
Defensive and Support Playstyles: Anchors and Splatling Users
If hanging back with chargers, splatlings, or brellas is more your vibe, lean toward staying alive and controlling space.
- Ink Resistance Up: Lets you move through enemy ink easier, making escape and repositioning much safer.
- Bomb Defense Up DX: Reduces chip damage from bombs and specials, great for staying alive against spammy teams or missile-heavy matches.
- Main Power Up: Some weapons like splatlings or chargers get direct boosts to damage or charge speed, keeping you competitive.
- Special Charge Up / Special Saver: Get your special more often or keep progress after getting splatted, useful for players who support with specials (Armor, Ink Storm, etc).
Example Anchor Loadout
Main: Special Charge Up Sub abilities: 2x Bomb Defense Up DX, 1x Ink Resistance Up
You’ll last longer under fire and cycle specials faster to defend teammates or break up pushes.
Mobility Focus: Flankers and Disruptors
Players who like sneaking around and ambushing from odd angles can build loadouts that let them move unpredictably:
- Ninja Squid: Hides your wake when swimming, allowing you to sneak up without being noticed.
- Swim Speed Up: Offsets Ninja Squid’s slowdown penalty, so you’re not sluggish in the ink.
- Stealth Jump: Makes your Super Jumps much less visible—useful for flanking without being sniped while landing.
Example Flanker Loadout
Main: Ninja Squid Sub abilities: 2x Swim Speed Up, 1x Stealth Jump
You’ll flank more reliably and escape aggressive pushes by jumping out unseen.
Objective and Utility: Supporting the Team
If you’re about painting, stacking points, or getting key map control for Rainmaker and Tower Control, try these:
- Ink Saver (Main): Supports weapons with high ink consumption, so you don’t need to retreat as often for refills.
- Ink Saver (Sub): Lets you use disruptive sub-weapons (like Splat Bombs or Beakons) without running dry.
- Special Saver: You’ll have your Charger, Baller, or Sting Ray up more, especially if you die while pushing the objective.
Example Objective Loadout
Main: Object Shredder (for breaking Rainmaker shields/towers) Sub abilities: 1x Ink Saver (Main), 1x Ink Saver (Sub), 1x Special Saver
You’ll support pushes better, especially in hectic rounds with lots of splats and specials flying.
Mixing and Stacking: How Many of Each Ability?
Some abilities stack with diminishing returns, so don’t just max out one and ignore the rest. For example, two Swim Speed Up will significantly improve your speed compared to one, but the third slot gives a smaller boost. The same applies for most savers and defense abilities. Testing how much of each feels right for you is key—use the Training Room and Salmon Run to feel out your set between competitive matches.
Sample Ability Stacks
- One or two Quick Respawn is plenty for frontliners.
- One Ink Resistance Up is enough for most backliners.
- Two Swim Speed Up will be noticeable; a third may be overkill unless your weapon needs it.
Experiment and Adjust
Don’t be afraid to change your setup based on weapon swaps, map rotations, or even how you’re feeling that day. What works in Clam Blitz may struggle in Splat Zones, and that build that slays on The Reef might not fit Port Mackerel’s narrow lanes.
Watch top players who use your favorite weapon and take notes on what abilities they run—you’ll often recognize a core strategy behind their choices. Sets are usually tuned for specific weapons (brushes go ink-saving heavy; blasters might want more mobility or respawn), so personal experimentation pays off.
Match Your Gear to Your Goal
In the end, the best abilities are the ones that turn your habits into advantages. If you’re always sprinting into enemy turf, skill up your speed and respawn. If you keep your teammates alive with specials, stack for special charge. Use chunks to lock in those gaps where your playstyle needs a little help, and remember you can always adjust as you grow as a player.
Changing just a sub or two can shift a loadout from “ehh” to “unstoppable.” Don’t be afraid to test, tweak, and swap out abilities as you unlock chunks and find your groove. There’s no single right answer—your playstyle and your gear should work together, not against each other.