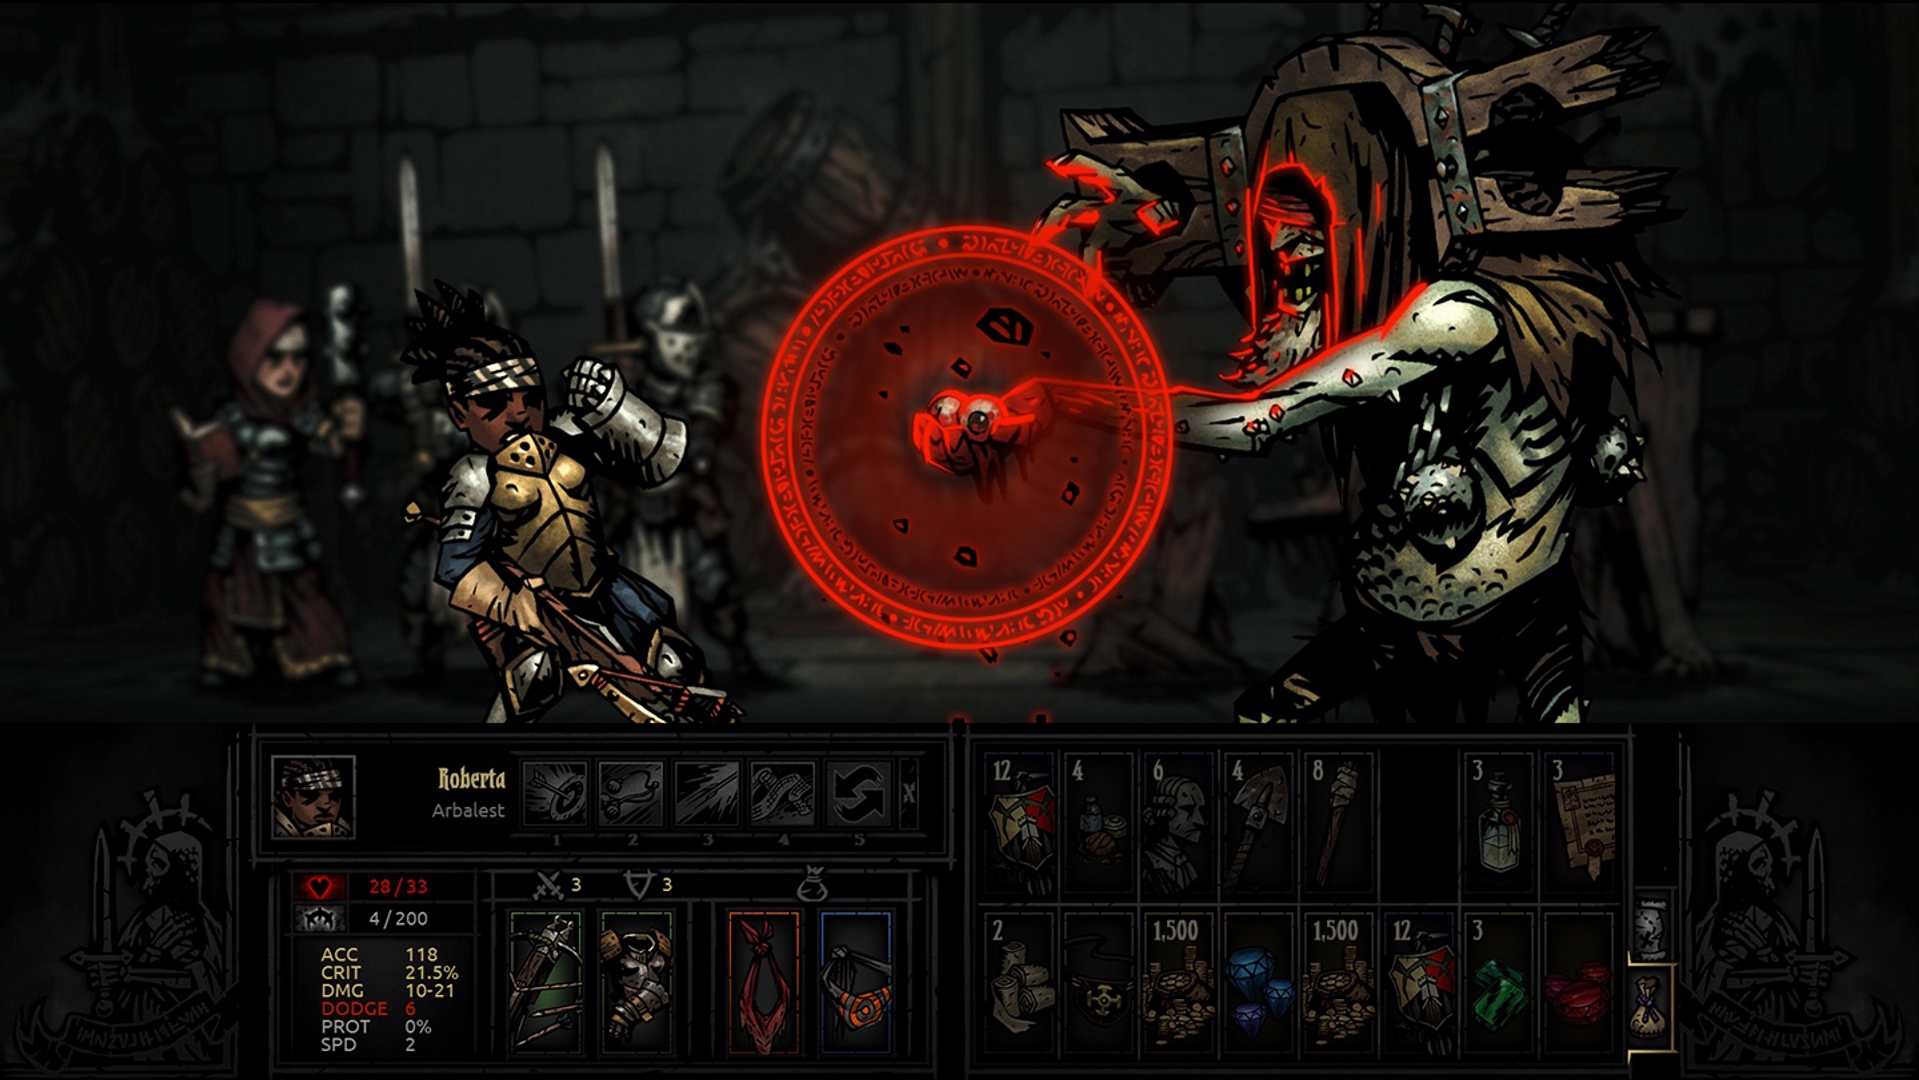
Darkest Dungeon: Optimal Party Composition and Strategy Guide
Master party synergy, manage stress, and optimize your strategy in Darkest Dungeon with this essential guide to roles, skills, and survival.
It doesn’t take long in Darkest Dungeon before you realize that victory isn’t just about slamming the strongest attacks or stacking heals—it’s about building a team that actually works together. Anyone who’s spent time watching their favorite heroes get picked off from the back row knows that party composition is at the heart of what makes a run succeed or fall apart. With quirks to juggle, synergies to discover, and plenty of monsters eager to stress your party to breaking, finding the right blend of classes and tactics can feel overwhelming. Figuring out why certain setups thrive where others constantly flounder can make all the difference, especially as the dungeons get darker and the bosses get meaner.
Stress Management
Stress is just as deadly as bleeding or blight in Darkest Dungeon. The longer your group spends crawling through hallways and fighting monsters, the more stressed out they become. Ignore it for too long and you’ll see heroes snapping, picking up phobias, or, worst case, suffering instant heart attacks. Handling stress is central to keeping your adventurers alive and healthy enough to make it back home—so let’s break down how it works and what you can do about it.
How Stress Works
Each hero has a stress bar that tops out at 200 points. At 100, they hit a breaking point and get an Affliction—a personality quirk that makes everything way harder. Pile on another 100 points, and your adventurer might fall dead from a heart attack. For each point of stress, your odds of disaster creep up, so it’s worth tracking even when things feel under control.
Stuff in the dungeon causes stress: darkness, enemies using stress attacks, walking over traps, starving, or seeing a teammate dropped to zero HP. Even passing your turn can add to the pile. Afflicted heroes will also lash out and spread extra stress to their friends.
Managing Stress in the Field
A solid party composition is your first line of defense. Certain classes and skills are built specifically to tamp down rising panic.
Bringing Stress Healers
- Jester: This is the king of stress control, with “Inspiring Tune” chipping away at a teammate’s stress every round. His “Battle Ballad” helps as an added buff, but Inspiring Tune is the reason to bring him anywhere.
- Houndmaster: “Cry Havoc” lets you roll the dice on lowering stress across the whole team. It’s not quite as steady as the Jester, but it stacks up over longer dungeons.
- Occultist (rarely): “Abyssal Artillery” can mark and clear enemies, but only his one-man “Wyrd Reconstruction” heals HP. He isn’t a stress healer, but if you’re careful with team makeup, he sometimes works to control the flow of a run.
Combat Tactics
- Prioritize stress-causing enemies early in fights (like Madmen or Bone Courtier). Their attacks ramp up stress before you know it.
- Use trinkets that cut down incoming stress (look for ones that say –20% Stress or similar).
- Light management helps. Keep the torch above 75 for less stress, or embrace lower light for more loot if your healing and mitigation are on point.
Camping Abilities
Camping is a big reset button midway through longer quests. Pack classes who bring stress-relief camping skills:
- Jester: “Turn Back Time” and “Encourage” are gold standards for stress removal.
- Crusader: “Inspirational Cry” and in-camp stress removal abilities work as a backup plan.
- Houndmaster: “Therapy Dog” is a great low-cost option for chip-healing group stress.
Plan your camp so the highest-stress members get first pick of these abilities.
Monitoring Afflictions
Once a hero hits 100 stress, things go sideways fast. They can gain an Affliction—Paranoid, Selfish, Abusive, and more—that leads to wasteful bickering or denying heals. Occasionally, a character will resist and become Virtuous (like Courageous or Stalwart), instantly dropping their stress and giving teamwide bonuses. Don’t count on it, though: Virtuous outcomes are rare.
If someone’s become Afflicted, your best bet is to finish the run fast rather than drag it out. Afflicted characters spread stress to others and can refuse actions that save lives.
Town Recovery
Back at the Hamlet, you can shake off stress before it turns into long-term problems.
- Abbey and Tavern: Heroes can recover stress by praying, drinking, or meditating. Some will only accept certain activities due to their quirks, so always double-check.
- Don’t push your luck: A stressed hero left untreated can pick up dangerous quirks, especially if they reach 200 and “snap.” Manage your roster and run downtime missions if your main crew is looking too frazzled.
Tips for Staying Sane
- Keep an eye on torchlight. The darker it gets, the faster your group gets rattled.
- Test party synergy: Some heroes support each other’s stress control. Experiment with combos (for example, Jester + Houndmaster).
- Don’t get greedy: Sometimes it’s best to leave loot behind if it means getting out with your best people intact.
- Cycle out stressed heroes: Always have a B-team in progress so nobody’s forced into a suicidal run.
Stress can’t be ignored. Success in Darkest Dungeon depends on consistently peeling it away before it turns a tough fight into total disaster. Take care of your heroes’ mental health; they can’t win the war for you if they fall apart halfway there.
Combat Roles
Every successful expedition in Darkest Dungeon relies on sending in heroes who can each pull their weight by filling key combat roles. Raw stats matter, but matching up the right set of specialists is what keeps your squad standing when stress climbs or the blood starts to flow. Let’s break down what each major combat role means, which heroes fit where, and why the classic four-slot lineup keeps your team balanced through even the punishing later dungeons.
The Four Main Combat Roles
Your party is made up of four adventurers standing in a row, each able to use certain skills and reach specific targets based on their position. While skills and class quirks can blur the lines, most heroes fall into one or more of these core roles:
- Frontline Defender (Tank)
- Damage Dealer (DPS)
- Support/Healer
- Utility/Disruptor
Frontline Defender (Tank)
Tanks go up front to soak direct hits, guard weaker teammates, and absorb attention from deadly enemies. They’re not just meat shields—they can also control fights through taunt or guard actions, and sometimes hit back pretty hard. Most tanks are designed to sit in position one or two.
Good options
- Crusader: High health, can self-heal, even toss out some stress reduction.
- Man-at-Arms: Decent damage but shines with guarding and buffing allies.
- Leper: Swings hard, shrugs off punishment, mostly brawls from slot one.
- Hellion: Mixes tanking and massive offense; can self-buff for power turns.
You’ll want at least one sturdy hero up front. If you skip a tank, the rest of your crew can get focused down before you finish a single fight.
Damage Dealer (DPS)
DPS heroes cut down monsters fast, whether through big single hits or steady area-of-effect attacks. Some work best up front (Hellion, Leper), while others snipe from the back row (Arbalest, Grave Robber).
Types
- Burst DPS: Delivers huge criticals or multi-hit combos (Occultist “Hands from the Abyss,” Hellion “Iron Swan”).
- Ranged DPS: Attacks from the mid or back, hitting enemy backliners or multiple targets (Arbalest, Houndmaster, Highwayman).
Without reliable damage dealers, even the best tanks will crumble under pressure as fights drag on. DPS classes often have less HP and defense, so tanks or disruptors need to keep them protected.
Support/Healer
Healers keep everyone in the fight by patching up wounds and sometimes lowering stress. This is especially important for missions with lots of damage-over-time enemies or bosses who spike damage suddenly.
Go-to picks
- Vestal: The best dedicated healer by far. “Divine Grace” and “Divine Comfort” are lifesavers.
- Occultist: Heals swing wildly (sometimes healing, sometimes bleeding your ally), but it’s better than nothing.
- Flagellant: Can patch others and himself, especially good in bleed-heavy dungeons.
- Jester / Houndmaster (Stress only): Not classic healers; focus purely on pulling down high stress when things get dicey.
Most winning parties run one dedicated healer. Running without one can work, but it’s far riskier and depends on fast fighting or self-heals.
Utility/Disruptor
Utility classes bend fights in your favor: moving enemies around, stunning them, blinding, debuffing, and blighting or bleeding tougher foes. These heroes make enemy turns less dangerous or set up larger combos for your DPS.
Standouts
- Plague Doctor: Excels at stunning and hitting back row targets with blight.
- Bounty Hunter: Marks targets, pulls dangerous enemies forward, lands stuns.
- Grave Robber: Can shift positions, poison, and even dodge out of danger.
- Occultist: Pulls, weakens, and curses enemies with debuffs.
These heroes aren’t there just for utility—on some missions, their skillset is what lets you prevent ambushes from getting ugly. Two utility heroes can sometimes replace pure DPS or tank picks, as long as your team combos well.
Positioning and Role Overlap
Position matters as much as class role. Some classes can move back or forward on their own (“Lunge,” “Advance”), while others need to stay put. Often, swapping heroes between positions ruins your ability to use certain skills. The flexibility to shuffle without stopping your offense or healing is key for tougher dungeons.
A few classes shine through overlap:
- Hellion: Trades off between tank and DPS, but gets winded if spamming power moves without breaks.
- Crusader: Can tank and heal stress.
- Man-at-Arms: Buffs (rallying), guards, and stuns.
- Houndmaster: Alternates between stress healing, some DPS, and utility via guarding.
Blending roles lets you adapt mid-run, whether you’re facing large swarms or single targets.
Building a Balanced Party
Putting together your four slots, most strong lineups look something like this:
- Frontline Defender (Tank) — Keeps squishier teammates from being targeted early.
- DPS or Off-Tank — Adds more damage or fills in as a backup tank if things get messy.
- Utility/Support — Swaps between status effects, disruption, or softer healing.
- Primary Healer / Ranged DPS — Patches wounds or picks off dangerous backliners.
Balance is everything. Too many glass cannons and you’ll struggle under heavy fire. Stack all tanks and your fights drag on forever, opening you to stress and attrition. A well-rounded squad can handle anything the game throws at them—and can flex if someone gets shuffled or killed.
Quick Reference: Who Fits What
| Hero | Tank | DPS | Support | Utility | |-----------------|------|-----|---------|---------| | Crusader | ✔️ | ✔️ | ✔️ (stress) | | | Hellion | ✔️ | ✔️ | | | | Leper | ✔️ | ✔️ | | | | Man-at-Arms | ✔️ | | ✔️ (buffs)| ✔️ (stun) | | Plague Doctor | | | ✔️ (heals) | ✔️ (DOT) | | Vestal | | | ✔️ (heals)| | | Jester | | | ✔️ (stress)| | | Houndmaster | | ✔️ | ✔️ (stress)| ✔️ (guard)| | Bounty Hunter | | ✔️ | | ✔️ (pull/stun)| | Highwayman | | ✔️ | | | | Arbalest | | ✔️ | | | | Flagellant | ✔️ (self)|✔️ | ✔️ (heals)| |
Adapting Roles for Dungeon Types
Tailor your squad for each dungeon. For example:
- Ruins: Bring more blight resistance and stress healers for undead.
- Warrens: Stun and bleed attack help versus beast enemies.
- Weald: Blight and heavy healing handle venomous bugs and fungal foes.
- Cove: Focus on bleed resistance and stunning backliners.
Check enemy types before locking in your party. Don’t be scared to swap out the whole team if your best heroes are wrong for the job.
Conclusion
Understanding combat roles is what makes the difference between a doomed trip and a clutch victory in Darkest Dungeon. Match the right heroes to each position, cover your weak spots, and play to your team's strengths. Mix up your lineup, learn what each class brings, and you’ll find yourself outlasting horrors that would shred a less prepared group. The darkness is punishing—bring a team that can fight back.
Synergy and Skills
Putting together a strong team in Darkest Dungeon isn’t just about picking the best individual heroes — it’s about how their skills play off each other. Synergy is what turns an average lineup into an engine that can roll through bosses and survive those unpredictable hallway fights. If you want to beat the game’s toughest challenges, you need to know how to stack effects and link moves for bigger impact.
What Is Synergy?
Synergy is all about skills that, when used together, get more effective. This can mean one hero marking an enemy so another does extra damage, or it can mean debuffing an entire enemy party so your stunner can lock down the biggest threat. In Darkest Dungeon, raw stats and big numbers are good, but skill combinations usually save your team from disaster.
Key Types of Synergy
Mark Synergy
Some heroes deal extra damage to enemies that are marked. Others can apply marks quickly to the right target.
- Arbalest, Bounty Hunter, Houndmaster: Deal bonus damage or get other bonuses for hitting marked enemies.
- Occultist, Bounty Hunter, Arbalest: Apply marks with quick cooldowns.
Teams built around Mark synergy focus fire on priority threats and erase them before they can act. For example, the Bounty Hunter’s “Mark for Death” tags an enemy, and then “Collect Bounty” hits for a massive bonus. The Arbalest’s “Sniper Shot” can also melt marked backline targets.
Stun Synergy
Repeatedly stunning enemies keeps them from attacking or healing, and lets your party control the flow of battle.
- Plague Doctor: Can stun back rows with “Blinding Gas.”
- Man-at-Arms, Crusader, Bounty Hunter, Hellion: Stun front-to-mid rows.
Combos often look like this: stun a big enemy, nuke down the smaller ones, then gang up while the toughest foe is still reeling.
Damage Over Time & Debuff Synergy
DOT (bleed and blight) messes up enemies over several rounds. If you can stack enough DOT, even high-protection enemies fall fast.
- Plague Doctor, Grave Robber: Stack blight in Weald or Ruins.
- Houndmaster, Hellion, Flagellant: Layer bleeds in Warrens or on fleshier foes.
Some heroes lower enemy protection (PROT) or stop healing, which pairs well with DOT attacks. For example, the Occultist’s “Weakening Curse” softens up a target for a Houndmaster’s bleed.
Stress and Healing Loops
Don’t sleep on classes that lower stress, heal, or keep your heroes in fighting shape. Jester, Crusader (in a pinch), and Houndmaster all help bring down stress, while healing keeps heroes on the field even as dungeons drag on. A solid combo: Jester dropping stress while Vestal or Occultist keeps everyone patched up.
Skill Combos in Practice
A good synergy party isn’t just about stacking buffs; it’s about creating skill sequences:
- Pull-and-Kill: Occultist’s “Abyssal Artillery” or “Daemon’s Pull” brings a backliner into the front row, where a Hellion or Crusader smashes them.
- Stun-Chains: Plague Doctor double-stuns the back, and Man-at-Arms follows up with a slam on the front, locking down enemy damage for a turn.
- Guard & Counter: Man-at-Arms uses “Defender” on a squishy hero, and the Houndmaster’s “Guard Dog” protects the healer. These guard skills come with bonuses like increased dodge, so bosses targeting your backline miss more often.
- DOT Swarm: Plague Doctor and Houndmaster each stack out their poison and bleed skills, overwhelming enemy armor.
Example Synergy Teams
Mark Team
- Slot 1: Bounty Hunter (marks, stuns, huge mark damage)
- Slot 2: Houndmaster (bleed, guard, mark support)
- Slot 3: Arbalest (finisher, mark synergy, healing on side)
- Slot 4: Occultist (marks, tentacle pulls, backup heals)
Why it works: Targets get marked and destroyed before they can retaliate, with enough backup healing to stabilize in emergencies.
Stun/Disrupt Team
- Slot 1: Man-at-Arms (tank, stuns, guard)
- Slot 2: Crusader (solid DPS and stuns)
- Slot 3: Plague Doctor (back-row stuns, healing)
- Slot 4: Jester (stress heal, damage, can reach most rows)
Why it works: Bosses and elites get locked out of action, and the Jester keeps stress in check during longer fights.
DOT/Bleed Team
- Slot 1: Hellion (bleed, self-sustain)
- Slot 2: Flagellant (bleed, self and party healing)
- Slot 3: Houndmaster (bleed, guard)
- Slot 4: Plague Doctor (blight, additional heals)
Why it works: DOT ignores enemy protection and brings down even chunky bosses. Heals keep HP topped off while status effects pile up.
Picking Skills for Synergy
Don’t just use a hero’s default skills. Usually, you’ll want to unlock and customize skills at the Guild for maximum effect. For a Mark party, you want every relevant hero to have their mark or Mark-bonus skills ready. For stun chains, keep multiple stuns available, even if it means skipping some personal buffs. Always select skills that support your overall party plan, not just what you unlock earliest.
Traps to Avoid
- Stacking Too Much of One Effect: No need for four mark users—resist temptation and bring some variety.
- Blindly Copying Meta Comps: Your roster might not have everyone leveled or free from quirks. Build around who you have upgraded.
- Poor Skill Coverage: Don’t lock yourself out of healing, stress cures, or shuffle recovery just for combo potential.
In Summary
Synergy and skill planning push your party past just “surviving” into consistently finishing runs with fewer casualties and less stress. Build combinations that let your heroes' abilities play off each other, update your skill bars for each mission, and try out different lineups to see what clicks. Mastering this layer turns bad dice rolls into clutch saves and helps you push much deeper into the game. Provisioning is a make-or-break step that can turn a tough dungeon run into a manageable one—or doom your party before they even set foot inside. Bringing the right supplies means countering hazards, managing stress, and leaving with more loot than you spent. Let’s break down how provisioning works in Darkest Dungeon, what each supply type does, and how to tailor your loadout to different dungeons and party needs.
What Is Provisioning?
Before you start a quest, Darkest Dungeon throws you into the “provisions” screen. This is where you buy supplies—food, torches, bandages, shovels, and more—using your hard-earned gold. Supplies don’t carry over between runs, so whatever you bring and don’t use is lost money, but coming up short can be much worse for your heroes’ survival.
Core Supplies Explained
Here’s a rundown of key consumables, what they do, and why (or if) you’ll want them.
Torch
- Purpose: Controls light level. Higher light lowers stress, makes scouting easier, and reduces ambush chance. Lower light increases loot and crits but cranks up the danger.
- Typical Use: 8–12 for short dungeons, 12–16 for medium, 16–20+ for long. Adjust if running a “dark run” (intentionally low light) or have trinkets that affect torch usage.
Food
- Purpose: Essential for hunger events and healing at camp (in medium and long dungeons).
- Typical Use: At least 12 for short, 16 for medium, 20+ for long dungeons. Some players gamble with less, but running out can spike stress and HP loss fast.
Shovel
- Purpose: Clears blockages like rubble that otherwise cause stress and damage.
- Typical Use: 1–2 for short, 2–4 for medium or long. Bring more in Warrens or Ruins, where obstacles are common. Never skip—running out while facing an obstacle is brutal.
Bandage
- Purpose: Removes bleeding from traps or some enemy attacks, interacts with curios.
- Typical Use: 1–2 for short, 2–4 if lots of bleeds expected (Warrens, Weald).
Antivenom
- Purpose: Cures blight. Useful in Weald or if facing spiders.
- Typical Use: 1–2 for short, more for blight-heavy areas.
Medicinal Herbs
- Purpose: Clears debuffs, restores some food curios, interacts with certain curios for loot.
- Typical Use: 1–2 per run, more for farming curios in Weald or Ruins.
Skeleton Key
- Purpose: Opens locked chests for extra loot.
- Typical Use: 1–2, more for treasure runs.
Holy Water
- Purpose: Buffs resistances, interacts with curios (especially in Ruins), can be a lifesaver against eldritch enemies.
- Typical Use: 1–2 for short, 2–4 for Ruins.
Laudanum
- Purpose: Reduces horror effects (Crimson Court DLC content).
- Typical Use: Only needed in dungeons with horror effects.
The Crimson Court & Farmstead (DLC Items)
There are other situational supplies (like the Blood, the Cure, the Tonic, or the Shard Dust, depending on which DLC you have). Only bring these if you’ll run into corresponding DLC hazards.
Curios and Supply Synergies
Certain dungeon curios give specific rewards, healing, or buffs when you use the right item.
- Ruins: Holy Water on confession booths, Skeleton Keys on locked sarcophagi.
- Weald: Medicinal herbs for food or loot, bandages for thorns.
- Warrens: Antivenom and bandages for piles of remains, shovels for giant carcasses.
- Cove: Bandages for snails, medicinal herbs for fish idols.
Mastering which item to save for which curio boosts your gold gains and keeps nasty surprises to a minimum.
Tailoring Provisions to the Dungeon
Each dungeon has a different mix of hazards, curios, and trap types.
Ruins
- Top Picks: Holy water, skeleton key, shovels, torches.
- Enemy Hazards: Stress, disease, debuffs, the occasional bleed.
Weald
- Top Picks: Bandages, medicinal herbs, shovels.
- Enemy Hazards: Bleed, blight, plenty of food curios.
Warrens
- Top Picks: Antivenom, bandages, shovels.
- Enemy Hazards: Blight, bleed, stress, disease.
Cove
- Top Picks: Bandages, medicinal herbs.
- Enemy Hazards: Bleed (lot of it), stress, occasional blight.
Torchless (“Dark”) Runs
Cut back on torches, bring more food and healing, and consider camping skills that help scout or prevent ambushes. Darkness ramps up risk—balance your supplies around staying alive under nastier conditions.
How Party Composition Changes Provisions
Your heroes’ skills influence what you need to bring. Got a Plague Doctor who can cure blight and bleed? You can probably stash fewer bandages and antivenoms. Running a Crusader who can “Inspire” the team’s stress down at camp? Maybe trim back on food and bring more skeleton keys for wealth.
Likewise, a party weak on healing probably shouldn’t skimp on food or restorative supplies, and a party planning to interact with lots of curios should pack extra keys, herbs, or holy water.
How Much is Too Much?
Over-provisioning eats into your profits. Under-provisioning can kill your run.
- Short Dungeons: Play it safe on food; minimal extras otherwise.
- Medium Dungeons: Bring food for two camp meals, extra healing items, 1–2 of every curio item.
- Long Dungeons: Load up, but consider selling off anything excess before leaving town on gold-starved weeks.
If in doubt? Food, torches, and a couple of shovels are the basics you can never really skip.
Advanced Tips
- Money Runs: Want pure gold? Bring a party with healing/cleanse, minimal food, and extra keys—skip everything you think you can get away with.
- Curio Efficiency: Track which items are wasted most often. Adjust next time.
- Secret Rooms: Keep at least one skeleton key in reserve for these rare, high-reward rooms.
Wrapping Up
Provisioning isn’t just about survival—it's about reliably finishing dungeons and turning a profit. Knowing which supplies matter in each area, matching to your party’s tools, and learning from what you waste all add up to smoother, less stressful runs. Remember, when in doubt, a torch, food, and a shovel beat an empty pack. Happy delving! Curios pop up all over Darkest Dungeon’s creepy halls and tunnels. They aren’t just scenery: almost every curio can help, hurt, or do a little of both, depending on your choices and the items you use. Learning what each one does and which supplies to use is one of the fastest ways to boost your loot and keep heroes healthier for the fights ahead.
Curio Interactions
Curios are interactive objects you’ll find in hallways and rooms, ranging from piles of books to ancient relics to grotesque remains. Activating them is optional, but they’re a key part of each dungeon run. What makes them tricky is that they always have a risk—touching the wrong thing, or touching it with empty hands, can dump blight, stress, disease, or even spawn enemies right in your lap.
Let’s break down how curio interactions work, why they matter, and which supplies get you the best results.
How Curio Interactions Work
When you run into a curio, you can:
- Use a supply item on it, if you have one (bandage, key, holy water, etc.)
- Touch it bare-handed
Using the correct supply item usually boosts rewards or removes negative risks. Touching with no item or the wrong item can backfire—sometimes badly. Most curios also have a random element, so there’s always a chance of a bad outcome, but the right item usually tilts the odds way in your favor.
Curio Outcomes
Good Outcomes
- Extra loot (gold, gems, provisions)
- Heals HP, removes stress, cures ailments
- Provides buffs for the next few rooms
Bad Outcomes
- Bleeds, blights, or diseases
- Stress spikes
- Negative quirks
- Triggers enemy ambushes
The value is knowing which items to match. This can be the difference between getting a rare gem or limping home with a full party of rabies.
Common Curio Types by Dungeon
While some curios show up in multiple places, most are unique to one or two dungeon types. Here are the most common ones and the supplies they need.
Ruins
- Confession Booth:
- Best with: Holy Water (removes negative quirk or stress)
- Bare-handed risks stress.
- Locked Sarcophagus:
- Best with: Skeleton Key (extra loot)
- Bare-handed can trigger blight or stress.
- Decorative Urn:
- Best with: Holy Water (rare loot)
- Bare-handed often yields loot, but has a high risk of negative quirks.
Weald
- Beast Carcass:
- Best with: Medicinal Herbs (heals and food)
- Bare-handed often causes disease.
- Shallow Grave:
- Best with: Shovel (loot)
- Bare-handed = disease risk.
- Eerie Spiderweb:
- Best with: Bandage (loot)
- Bare-handed = blight.
Warrens
- Makeshift Dining Table:
- Best with: Medicinal Herbs (loot and food)
- Bare-handed can cause disease.
- Pile of Bones:
- Best with: Holy Water (removes negative quirk or stress)
- Bare-handed = stress or negative quirk.
- Pile of Scrolls:
- Best with: Torch (removes negative quirk)
- Bare-handed can cause stress or bad quirks.
Cove
- Barnacle-Crusted Chest:
- Best with: Shovel (loot without risk)
- Bare-handed = damage or bleed chance.
- Fish Idol:
- Best with: Holy Water (buffs a hero)
- Bare-handed can cause stress or debuff.
- Fish Carcass:
- Best with: Medicinal Herbs (loot)
- Bare-handed = disease or blight.
Prioritizing Curios
Not all curios are equal. With limited supplies, pick your targets:
- Loot-Heavy Runs: Prioritize any curio that gives gold or gems with keys, medicinal herbs, or bandages.
- Healer Shortage: Prioritize those that heal HP or remove stress, especially if you’re hurting.
- Quirk Management: Some curios can cleanse negative quirks—save holy water and torches for these.
Mark down or remember which curios tend to backfire so you can skip them if you’re spread thin on supplies.
Curio Risks and Party Safety
Curios can be tempting, but if supplies are low and your party is in rough shape, sometimes it’s better to walk on by. No pile of loot is worth a disease outbreak or a party wipe.
General Rules
- Touch only what you have the correct item for.
- Teach yourself to recognize curio icons—even mid-run, it helps.
- Sometimes touching is a calculated risk (e.g. hunger curio with low food). Just be ready for side effects.
Memorizing the Best Combos
Here’s a short quick-reference list for the best value curio interactions:
- Holy Water: Confession Booth (Ruins), Decorative Urn (Ruins), Pile of Bones (Warrens), Fish Idol (Cove)
- Skeleton Key: Locked Sarcophagus (Ruins), Treasure Chests (All)
- Shovel: Shallow Grave (Weald), Barnacle Chest (Cove)
- Medicinal Herbs: Beast Carcass (Weald), Makeshift Dining Table (Warrens), Fish Carcass (Cove)
- Bandage: Eerie Spiderweb (Weald), Crate of Supplies (sometimes)
- Torch: Pile of Scrolls (Warrens)
You don’t need to memorize every curio to make smart choices—stick to the most valuable ones and brush up as you play more.
Curio Quirks and Party Management
Some quirks (like Curious) cause heroes to ignore your orders and touch everything. They can trigger bad outcomes more often, so manage these quirks before sending a hero into treasure-rich dungeons.
Also, some positive quirks boost loot found or help resist bad outcomes. Keep an eye on your roster and use those heroes to interact when it’s extra risky.
Conclusion
Mastering curio interactions is core to making safer, richer runs in Darkest Dungeon. Learning which items pair with which curios—and when to skip something entirely—saves supplies, gold, and your party's sanity. With experience, you'll know which temptations are worth the risk and which are just a nasty trap. Keep your cheat sheet handy, pack smart, and use the right supply at the right curio for the biggest win.