XCOM 2 Soldier Customization and Builds Guide
Master XCOM 2 with expert tips on class builds, weapon upgrades, armor, psi skills, and guerrilla tactics customization.
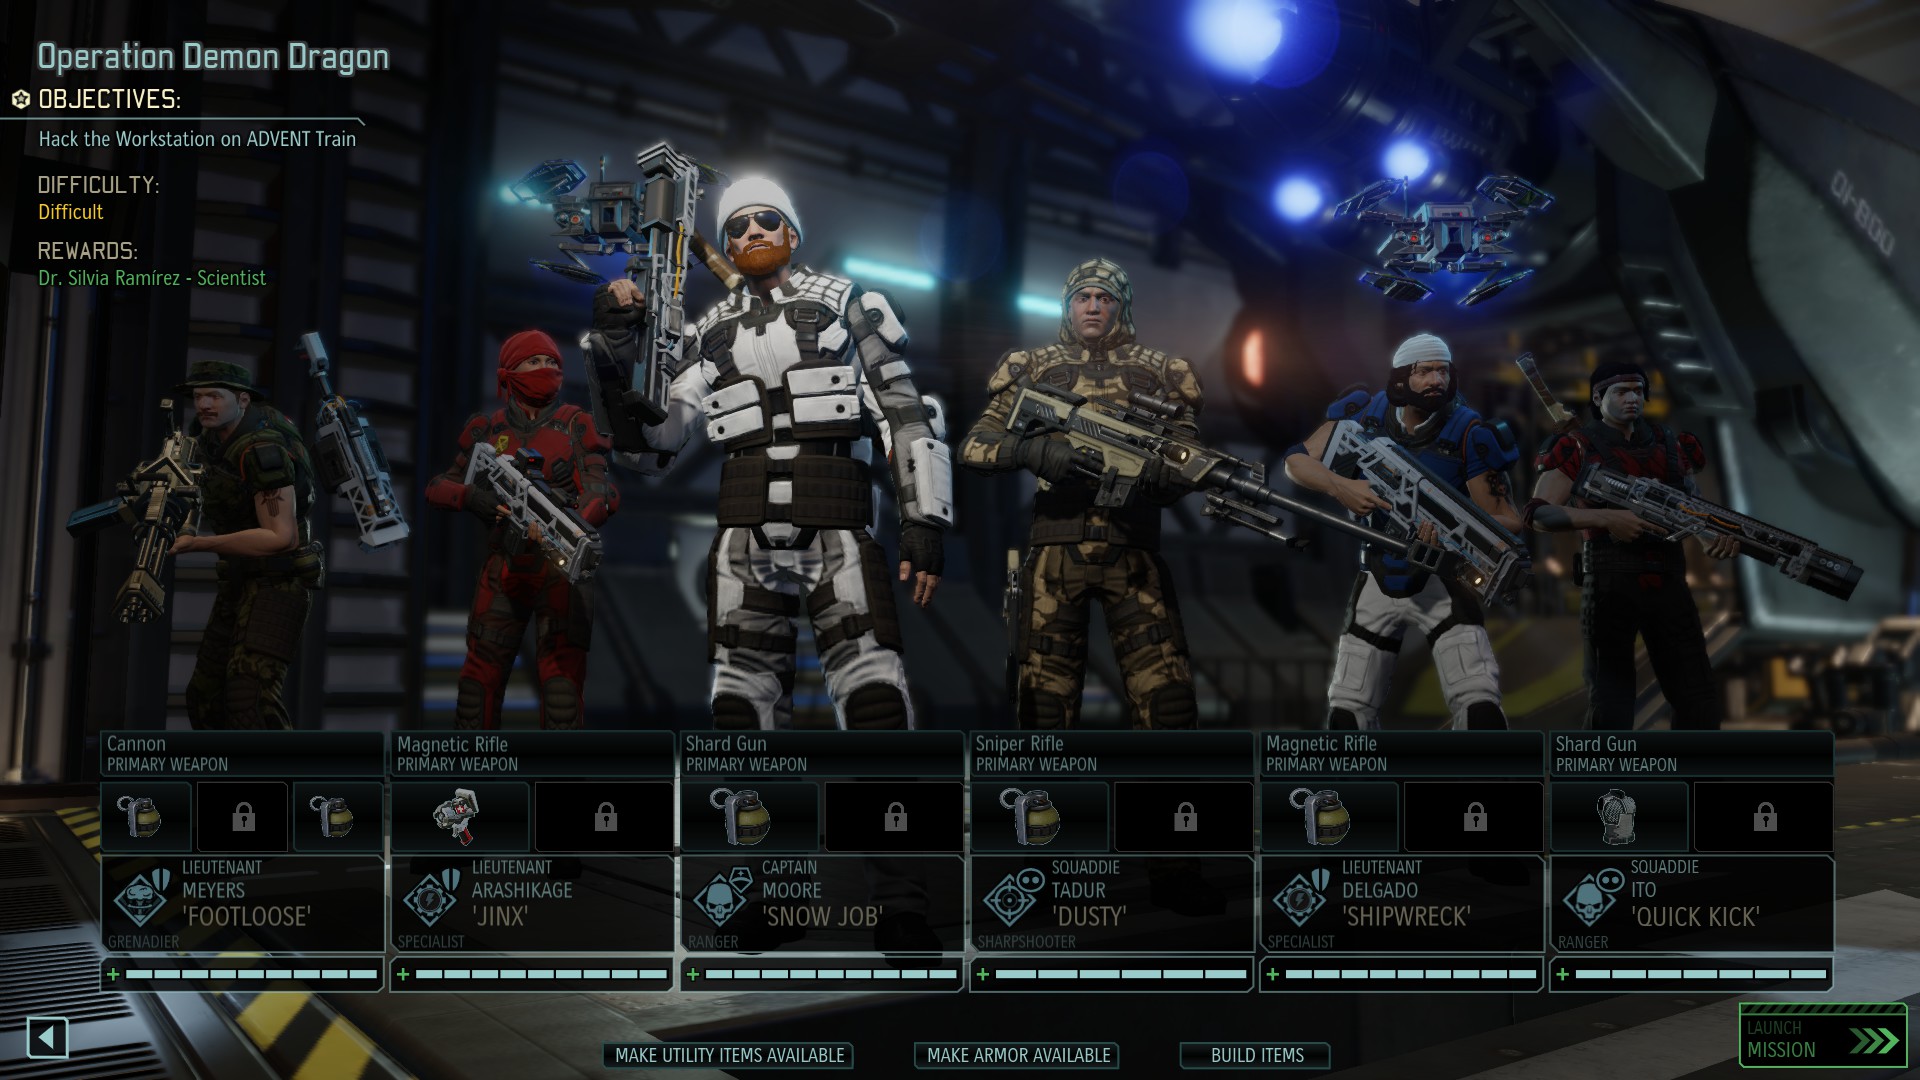
Few things in XCOM 2 are as satisfying—or as crucial—as shaping your own squad of soldiers. Whether you’re building a stealthy recon expert or a heavy-handed grenadier, the choices you make for your operatives can mean the difference between snatching victory and suffering yet another crushing defeat. Every class comes with its own quirks, strengths, and surprising potential, and figuring out how to mix and match their abilities can take your campaign in all sorts of unexpected directions. Tweaking weapons, armor, and skill trees is part of what makes the game so replayable—and so tense, especially when an extra point of health or the right utility item can keep your favorite recruit from landing on memorial wall duty.
Class Builds Guide
Building the ultimate XCOM 2 squad means understanding each class and choosing the right perks for your playstyle. While there’s no single “correct” way to spec a soldier, certain builds serve particular strategies—a stealthy assault scout, a demolition-heavy grenadier, and a long-range sniper all have places in a balanced team. Below, you'll find the basics of each core soldier class, their primary specializations, and a few tips to help you shape operatives that fit your campaign.
Ranger
These soldiers specialize in getting up close with shotguns and swords—or keeping a lower profile with stealth. The Ranger’s skill tree is split between recon and melee.
Popular Builds
- Stealth Scout: Focus on the left branch. Take Phantom (start each mission concealed), Shadowstep (ignore reaction fire), and Conceal (gain concealment once per mission). Great for scouting ahead, scouting objectives, and avoiding trouble.
- Blade Master: The right branch leans into sword use. Pick up Blademaster, Blade Storm (free sword attacks on enemies who move close), and Reaper (chain sword kills). Perfect for players who like taking risks and delivering heavy melee blows.
Tip: Even if you pick sword perks, the shotgun is still handy at close range. Don’t forget to kit out rangers with mobility-boosting or protective gear, since they’re often away from the main squad.
Grenadier
Grenadiers serve as your demolitionists and heavy hitters. Their tree splits between boosting explosives and big gun attacks.
Popular Builds
- Explosives Expert: The left tree enhances grenades and heavy weapons. Heavy Ordnance gives an extra grenade slot, Volatile Mix increases grenade damage, and Salvo allows throwing a grenade and still firing.
- Cannon Specialist: Right branch perks revolve around the minigun. Perks like Shredder, Holo Targeting, and Rupture boost damage and utility against armored targets.
Tip: Grenadiers are slow, so be careful not to leave them trailing. Their demolition skills also help clear enemy cover—perfect for setting up kills for other squadmates.
Specialist
Specialists are split between healing/buffing and hacking/overwatch skills. Their combat drones add strategic depth to any team.
Popular Builds
- Combat Medic: Choose drone healing upgrades, like Field Medic, Revival Protocol, and Restoration. You’ll need at least one Medic on higher difficulties.
- Combat Hacker: Go with Combat Protocol for extra damage, Haywire Protocol for robot hacking, and Capacitor Discharge for group damage. Take on enemy mechs and turrets with confidence.
Tip: Rotate in several Specialists when possible, as both healing and hacking are powerful throughout the campaign, especially in late-game encounters.
Sharpshooter
Sharpshooters can work as snipers or gunslingers, making them flexible and deadly at range or in a pinch.
Popular Builds
- Pure Sniper: Prioritize long-range perks—Deadeye (high-damage shots), Kill Zone (reaction shots in cone), Serial (refreshes sniper abilities on kill). Snipers pick off threats before they get close.
- Pistol Gunslinger: Go with right-branch perks such as Quickdraw, Fan Fire, and Faceoff for multi-target pistol attacks—perfect for crowd control when enemies close the gap.
Tip: Make use of squad sight by keeping snipers on overwatch or high ground. Gunslinger skills work best when flanked or swarmed.
Psi Operative
Psi Operatives bring late-game psychic attacks, able to control enemies, mind-shield allies, and generally sow chaos.
Popular Psi Powers
- Stasis stops an enemy or ally for a turn.
- Void Rift hits multiple targets in an area.
- Domination converts a target to your side for the rest of the mission.
Training: Psi Operatives train individually in a Psi Lab, earning new powers one at a time instead of leveling up like other soldiers. Prioritize mind-control powers for crowd control or panic attacks and healing skills if you’re short on medics.
Skirmisher, Templar, and Reaper (War of the Chosen DLC)
The Chosen DLC introduces three more classes, each with powerful traits:
- Skirmisher: Hybrid between assault and support. Can attack twice per turn and use grappling hooks.
- Templar: Melee-oriented psi troops who build focus with each kill, unleashing bigger attacks or healing allies.
- Reaper: True stealth experts, capable of multiple shots while hidden and massive scouting range.
Each of these classes rewards aggressive but calculated risk and can turn the tide in your favor, especially with their unique tactics and mobility.
Closing Tips for Class Builds
- Mix it up: Running all of one type often backfires. Each mission may call for a different loadout.
- Adapt: Don’t be afraid to build a hybrid if the situation demands it.
- Perk synergy: Some abilities, like a Specialist’s holo-target and Sharpshooter’s killshots, work better together.
Thoughtful class builds turn a group of rookies into an elite squad. Tweak, experiment, and roll with what keeps your favorite soldiers alive—XCOM 2 rewards both boldness and caution in equal measure.
Weapon Upgrades
Weapon upgrades offer another way to push your soldiers past their baseline combat abilities, giving you the edge in tough encounters. These upgrades—known as weapon attachments—slot right into the primary guns of your squad and can grant anything from better accuracy to the chance to take another shot after a kill. Understanding how these systems work and when to use which upgrades can make a huge difference as the campaign heats up. Here’s how weapon upgrades function, which attachments are most valuable, and a few strategies for making the most out of them.
Weapon Upgrade Basics
Weapon upgrades require you to research modular weapons early in the campaign. Once that’s unlocked, each soldier’s primary weapon (shotguns, sniper rifles, cannons, rifles, etc.) can be customized with up to two upgrades at a time—sometimes three if you’ve researched advanced armor or found special weapons. These upgrades are “slotted” into the weapon and are permanent unless you recover the upgrade and re-apply it using the engineering lab’s special tool (which is a limited resource called the ‘Weapon Upgrade Kit’).
Weapon upgrades are found as loot after missions, by scanning “Supply Crates” on the world map, or hidden in ADVENT caches. You might come across Common (basic), Advanced, and Superior tiers—they all offer the same perks but with boosted effectiveness at higher levels.
Types of Weapon Upgrades
Each attachment offers a unique bonus, and which attachment suits which soldier depends on playstyle and soldier build.
Scope
- Role: Increases the soldier’s aim (accuracy) stat.
- Best For: Snipers, Rangers, or anyone struggling with low hit percentages.
- Variants:
- Scope (5% bonus)
- Advanced Scope (10%)
- Superior Scope (15%)
Laser Sight
- Role: Raises the chance of landing a critical hit, especially the closer you are to the target.
- Best For: Rangers, Shotgun Specialists, Gunslingers.
- Variants:
- Laser Sight (5% crit)
- Advanced Laser Sight (10%)
- Superior Laser Sight (15%)
Expanded Magazine
- Role: Raises the weapon’s clip size before a reload is necessary.
- Best For: Grenadiers (cannons), Rangers (shotguns), any “spray and pray” build.
- Variants:
- Expanded Magazine (+1 shot)
- Advanced (+2)
- Superior (+3)
Repeater
- Role: Grants a small chance to instantly kill a target on hit, regardless of HP.
- Best For: Works well on high-fire-rate soldiers or any class where a miracle shot can change an encounter.
- Variants:
- Repeater (5% kill)
- Advanced (10%)
- Superior (15%)
Hair Trigger
- Role: Gives a percentage chance for a shot not to cost any action point—essentially, take another shot for free.
- Best For: Grenadiers, Gunslingers, any class with lots of shots per turn.
- Variants:
- Hair Trigger (5% chance)
- Advanced (10%)
- Superior (15%)
Stock
- Role: Guarantees a minimum damage amount even when you miss. Also functions on overwatch shots.
- Best For: Specialists (who overwatch often), anyone with shaky aim, or close-range classes.
- Variants:
- Stock (+1 damage)
- Advanced (+2)
- Superior (+3)
Autoloader
- Role: Adds free reloads to the weapon. No need to waste an action on reloading until the autoloader is used up.
- Best For: Anyone who empties the clip often, especially Grenadiers and Sharpshooters.
- Variants:
- Autoloader (1 free reload)
- Advanced (2)
- Superior (3)
Custom Triggers (DLC only)
- Role: Some DLCs add new upgrades; these typically offer special tactical boosts (like increased aim on overwatch shots).
Upgrade Strategies
Match Upgrades to Class and Perks
Don’t just slap any upgrade onto a weapon; match them to your soldier’s build and their preferred playstyle:
- Sharpshooters: Scopes and Autoloaders are perfect—better accuracy and less need to break overwatch to reload.
- Grenadiers: Expanded Magazines and Hair Triggers let them keep shooting and suppressing longer.
- Rangers (Blade Master): Laser Sight for higher crit chance up close, plus Expanded Mag for aggressive plays.
- Specialists: Stocks and Scopes help out in overwatch and suppression roles.
Save High-Tier Upgrades for the Right Moment
You can’t recover upgrades early on, so wait to slot Superior upgrades into the weapons you’ll use the longest. With DLC or late game techs, retrievable upgrades mean you can move your best attachments forward as you get stronger gear.
Prioritize Reliability
Repeater can hit or miss in value since it relies on low-chance rolls. If consistency is your style, focus on attachments like Scope or Stock, which guarantee a boost every single shot.
Don’t Neglect Early Game Attachments
Even a basic Scope or Magazine can tip an early mission in your favor. Getting into the habit of checking your inventory and attaching upgrades before every major combat scenario preps your squad for tougher battles.
How to Attach, Remove, and Manage Weapon Upgrades
Go to the Squad Loadout screen, select your soldier’s weapon, and see if there are any empty slots. From there, you can slot in any available attachments, but choose wisely. Unless you have the upgrade recovery engineering project, attachments are stuck on that weapon until you research the tech or find another copy.
Upgrades work on both conventional, magnetic, and plasma weapons. When you acquire a new weapon tier, re-slot your best upgrades onto your new gear to keep your squad ahead of the enemy.
Takeaway
Weapon upgrades in XCOM 2 add much-needed flexibility and power to your units as they progress. The right attachments, paired with custom soldier builds and perks, transform decent squads into deadly ones. Keep an eye out for loot, think carefully about who gets your best upgrades, and don’t be afraid to experiment. A single superior attachment can swing a fight—don’t let those bonus stats sit unused on your benchwarmers!
Armor Customization
Armor isn’t just about looking cool—it’s one of XCOM 2’s biggest tools for keeping your soldiers breathing when things go south. Far beyond simple stat boosts, the game’s armor system opens up layers of options: new abilities, visual changes, and loadout customization. Here’s how it works and what to keep in mind when outfitting your squad.
Core Armor Types and Their Perks
Early on, your soldiers only have Kevlar Vest—plain, minimal protection. As you research and acquire new technology, things get vastly better, letting you mix defense, utility, and playstyle upgrades.
Kevlar Armor
- Unlocked From: Start of game
- HP Bonus: +0
- Utility Slots: 1
- Notes: The default. Offers no damage reduction or extra HP, just a single utility slot for a grenade or medkit.
Predator Armor
- Unlocked From: Predator Armor research (after Modular Weapons)
- HP Bonus: +4
- Utility Slots: 2
- Notes: Massive survivability jump; the best all-purpose armor for mid-game. The extra slot lets soldiers carry a grenade and a medkit or another item together.
Warden Armor
- Unlocked From: Warden Armor research (after Gauss Weapons)
- HP Bonus: +6
- Utility Slots: 2
- Notes: Highest non-specialized armor. Perfect for the late-game as a general upgrade. Keeps soldiers alive and stacked with more items.
Powered Armor (W.A.R. Suit, Wraith Suit, etc.)
Advanced Proving Ground projects and Plasma research unlock unique armors with more flair and tactical options.
- W.A.R. Suit: +8 HP, +2 armor, and lets the wearer mount a heavy weapon like a Rocket Launcher.
- Wraith Suit: +6 HP, +1 armor, and grants the ability “Wraith,” which allows soldiers to phase through obstacles.
Each exotic suit brings its own trick—consider who in your squad benefits most from extra movement, firepower, or tanking.
Armor Mods and Special Add-Ons
Unlike weapons, you can’t slot attachments into most armors, but utility slots make all the difference. Predator and Warden Armors double these, giving you more flexibility:
- Grenades: More slots mean more grenades for Grenadiers or for carrying a specialized grenade, like Acid or EMP.
- Medkits/Nanomedkits: Perfect for supporting Specialists or anyone likely to take hits.
- Mimic Beacon, Smoke, Battle Scanners: Handy for tactical support or drawing fire away from fragile troops, especially after upgrading armor.
Some special armors—like the EXO and W.A.R. Suits—explicitly give a heavy weapon mount or built-in weapon (Rocket Launcher, Shredder Gun), working like additional gear that doesn’t eat up utility space. These weapons recharge between missions and can swing tough fights.
Visual Customization
Armor in XCOM 2 is highly customizable on the cosmetic front. Head into the Armory, pick “Customize,” and you’ll find options for:
- Colors & Patterns: Match by role, class, or just flex your style.
- Helmets, Arms, Legs, Torso: Available as you unlock more gear, including Resistance sets, Tactical Legacy Pack bundles, and DLC pieces.
- Armor Decals: Show off squad nicknames or give your favorite squaddie a signature look.
Visual mods are cosmetic—they don’t affect gameplay stats. But creating a visual theme for medics, snipers, or grenadiers can help identify roles at a glance.
Suit Upgrades and Autopsies
Several armor upgrades come from the Proving Ground or after autopsying tougher enemies:
- Spider/Wraith Suits: Focus on mobility and stealth. Good for Rangers or Sharpshooters needing to reposition.
- EXO/W.A.R. Suits: Built for taking hits and hitting back. Heavy slots attract Grenadiers and frontliners who want big, explosive answers.
- Special Vests: Use autopsy research to unlock items like the Plated Vest (bonus HP) or Hazmat Vest (immunity to fire/acid/poison).
Your Proving Ground backlog will fill up with projects. Prioritize armor suits that match your tactical needs and current threats. For instance: lots of robotics? Get a suit with built-in Shredder. Trouble with poison? Thrown lots of Hazmat Vests around.
Class and Playstyle Synergy
Choosing armor isn’t just “who looks best in this.” Different classes use extra health and utility slots differently.
- Rangers: Benefit from mobility suits and vests; aim for gear letting them close the distance or withdraw when injured.
- Grenadiers: Extra utility slots pair well with more grenades or heavy weapons (EXO/W.A.R. suits). They’re often near the frontline, so stack HP.
- Specialists: Utility upgrades—more medkits means more charges per mission, keeping everyone safe.
- Sharpshooters: Extra HP is always nice, but Spider or Wraith Suits let them reach safe vantage points.
- Psi Operatives: High-value targets, good to give extra HP and defensive vests.
Don’t be afraid to switch loadouts before mission launch. Adjust armor for the map, known enemy types, or mission objectives.
Frequently Forgotten Details
- Armor stacks with defensive PCS chips. Use both for huge survivability boosts.
- Unique suits are single-copy (unless you manufacture more). Pick your wearers wisely.
- Cosmetic mods (like Capeless Models) don’t change stats. But they do look slick and keep squad morale up.
- Upgrade utility items as soon as new versions unlock (like Nano-Scale Vest or upgraded grenades): they give solid bonuses and no drawbacks.
Summary
Customizing armor in XCOM 2 is about more than just stats: it’s a mix of loadout power, tactical flexibility, and style. Choose the right armor for each soldier and mission, make smart use of new tech and utility slots, and fine-tune visuals so your favorites stand out. Proper armor choices often mark the difference between a triumphant campaign and a squad wipe, especially at higher difficulty settings. So don’t sleep on upgrades—even the simplest change can save lives.
Psi Operative Training
Psi Operatives hold a unique space in your XCOM squad. Unlike the main soldier classes, these soldiers aren’t trained through traditional combat or tactical schools. Instead, they unlock extraordinary powers through intense “Psi Training” in a special facility: the Psi Lab. Here’s how to optimize your first and future Psi Operatives, plus what those shiny new powers actually do.
How the Psi Lab Works
The Psi Lab is a late-game facility you’ll build on the Avenger. Rather than promoting rookies through combat, send a rookie or existing soldier to the Psi Lab to start their transformation. This process is different from all other classes:
- No direct combat needed: Psi Operatives never need “kill XP.” They earn abilities through dedicated training projects in the Lab.
- Requires Elerium: The Psi Lab both costs and uses Elerium, a rare mid- and late-game resource.
- Training slots: Initially, the Lab holds one trainee; upgrades offer more slots, letting several soldiers learn Psi skills at once.
Technically, you can pick anyone as a candidate, but rookies are best. Seasoned soldiers keep their old class skills, which don’t mesh with the distinct Psi tree. Always use rookies if possible—they’ll become full-blooded Psi soldiers.
Gaining Psi Abilities
Psi abilities aren’t “leveled up” the normal way. Instead, you slot your recruit into the Lab and select their next psychic ability from a branching skill tree. Each power requires 5–10 days of training, sometimes much longer for advanced skills.
- Training never stops: As soon as they finish, pop them back in—you can repeat the process until every available Psi power is unlocked. No other class can eventually grab every high-tier ability!
- No XP grind: Missions or kills have no impact on Psi development; time in the Lab is all that matters.
- Cannot retrain: Once a Psi Op learns a skill, they keep it. There’s no “forgetting” or respec here.
You’ll notice that, unlike Sharpshooters or Specialists, Psi Operatives can often learn both branches of their tree. This is because their “level up” system isn’t restricted to picking just one choice per tier.
Key Psi Skills and Their Uses
Psi abilities are mostly split between offense, defense, and battlefield control. Here are a few highlights from the Psi tree (names and prerequisites may vary with the War of the Chosen DLC):
- Stasis: Locks a target (enemy or friendly) in a pocket dimension for one turn. Great for neutralizing a boss, buying time, or saving a squadmate from an ugly flank.
- Soulfire: Guaranteed psionic damage, plus it ignores armor and never misses. A reliable option to chip away at enemy health—works wonders on tough Sectoids or Archons.
- Null Lance: Fires a straight-line beam of psionic energy, dealing big damage to anything along its path. It can hit multiple clustered enemies, ignoring cover and armor alike.
- Domination: Seize permanent mind control over an organic enemy for the rest of the mission. This can swing encounters by adding another soldier (or alien!) to your ranks.
Other powers include Void Rift (multi-target mind blast), Inspire (auto-grant an extra action), and Solace (constantly cleanses mental effects from nearby allies). Psi Operatives fill hybrid offense/support roles—tune their power selection for your strategy.
Training Tips and Best Practices
Early vs. Late Psi Training
- Early build = higher payoff. The earlier you get the Psi Lab running, the sooner Psi Ops will catch up to your main squad and reach their prime powers for endgame missions.
- Rookies only: Avoid adding existing soldiers. Let your veterans do their job; recruit new rookies just for Psi development.
- Continuous learning: Never leave your Lab idle. As soon as one skill finishes, send your Psi Op back in immediately. Stagger timings so you’ve always got fresh powers unlocking.
When to Deploy Psi Ops
The first Psi abilities arrive in just 5–7 days, but your Operatives really shine once they pick up critical powers like Stasis, Inspire, and Void Rift. Early on, use them as backup, but by the late game, a maxed-out Psi agent can rival anyone in your barracks.
Equipment and Loadouts
Psi abilities scale from the Psi Amp, which comes in three tiers: basic, Advanced, and Alien. Upgrade these as soon as they’re available to boost power effectiveness and damage numbers.
- Armor: Equip your Psi Operative with gear for survival—Warden or W.A.R. Suit works great. Defensive vests and mimics can keep them alive if their will stat isn’t high enough yet.
- Utility: Given their flexibility, consider medkits, Mind Shields (for anti-psi insurance), or a Mimic Beacon as clutch panic buttons.
Mind Shields and Will
Psi Ops start with high “Will” (the mental stat resisting mind attacks). Mind Shields make them nearly immune to panic, mind control, and other psi effects, which is helpful since they’re top targets for psionic enemies.
Pros and Cons of Training Psi Operatives
Advantages
- Versatility: Unlock powers for nearly every situation, with options for both offense and support.
- Immunity to Mind Control: High Will plus Mind Shield = hard to mess with their heads.
- Late-game heavy hitters: Once maxed, their skills can save whole squads or turn missions.
Drawbacks
- Time investment: The Psi Lab is expensive and slow to start up, and each skill takes days to acquire.
- Not combat-tested: Psi Operatives miss out on regular combat promotions and loot, so they can lag behind in HP and Aim if not leveled up alongside others.
- Doesn’t work well with existing classes: Cross-training an old Ranger as a Psi Op wastes their old skillset.
Summary
Psi Operatives become some of the strongest soldiers in an XCOM 2 playthrough, but they take patience and a dedicated training plan. By starting early, focusing on rookies, upgrading their equipment, and keeping the Psi Lab constantly staffed, you’ll field Operatives who can handle any threat the game throws your way. Few things in XCOM 2 are as satisfying as mind-controlling an enemy Gatekeeper or nullifying a Chosen with a single psychic blast. Just mind the training timers, and your squad’s next legend could be a purple-glowing, mind-scorching Psi Op.
Guerrilla Tactics
Guerrilla Tactics in XCOM 2 are all about adapting quickly, making the most of every tool you unlock, and outthinking the aliens from turn one. This section isn't just about the Guerrilla Tactics School (GTS) back at HQ—though that's where it starts—but also about how you use squad upgrades and new battlefield tricks to shape every encounter and squad build.
What Is the Guerrilla Tactics School?
The GTS is one of the first facilities you should consider building on your Avenger. Its main perk: you can unlock new squadwide perks and train rookies into core soldier classes. These upgrades don't take effect instantly, but the sooner you build the GTS, the sooner your whole team benefits.
Training Soldiers
Instead of randomly promoting rookies and hoping for the right class, you can assign a rookie to the GTS and pick their next promotion (Ranger, Specialist, etc.). This guarantees you can fill holes in your roster, maintain balanced squads, or just stack your favorite class.
Upgrading Your Squad
The heart of the GTS is its upgrades. These perks cost supplies, but every purchase gives you a permanent advantage. Some favorites:
- Squad Size I & II: By far the most important, these upgrades let you bring more soldiers (up to six) to a mission. Always grab these as soon as possible—they directly increase your firepower and tactical options.
- Wet Work: All soldiers gain increased XP from kills. This makes leveling up faster, especially on higher difficulties.
- Vengeance: Entire squad gets a crit boost after a teammate is wounded or killed. Useful for clutch plays or recovering from disaster.
- Lightning Strike, Covering Fire, Integrated Warfare, Vulture, Resilience: Each of these tweaks how soldiers move, survive, or benefit from loot. Prioritize based on your playstyle (offense, defense, or maxing out resource gains).
Guerrilla Warfare: Tactics in Combat
The Value of More Soldiers
Being able to field a squad of six is huge. Not only does this give you room for more class variety (think: two Grenadiers for shredding armor, one Sharpshooter on overwatch, a Specialist for healing/hacking, etc.), but it provides insurance against bad luck. A single missed shot or unexpected enemy patrol is less likely to wreck your mission when you've got backup.
Training and Squad Composition
- Keep Classes Balanced: Early on, it's tempting to bring just your favorite soldiers, but a diverse team prevents wipeouts when faced with different enemy types—Sectoids need a Sharpshooter or Grenadier, mechs require rockets or EMP, etc.
- Leverage Promotions: GTS upgrades like Wet Work mean soldiers rank up faster. Don’t sit on rookies—get them in the field with XP boosts, and rotate new recruits with veterans so you always have leveled soldiers to fall back on.
Using GTS Perks In Missions
- Aggressive Early Game: GTS perks let you play bolder. Lightning Strike lets Rangers close the distance out of concealment. Integrated Warfare means your PCS upgrades shine brighter. The more perks you buy, the more you can push for flanks or gambits that wouldn’t have worked without school-wide upgrades.
- Recovery and Clutch Buffs: Vengeance and Resilience can help when things go bad. Always remember what buffs are active so you can plan riskier maneuvers or hail-mary plays if you’re behind.
Optimizing the GTS: Timing and Priorities
Early Game GTS Goals
- First Build: Make GTS one of your first facilities after Engineering or Guerrilla Comms (depending on campaign pressure).
- First Upgrades: Squad Size I, then Squad Size II, then Wet Work. Everything else is situational.
- Early Training: Don’t waste time hoping your next rookie will randomly become the class you need. Use the GTS to guarantee the right promotions.
Late Game GTS Usage
By mid-to-late campaign, you’ll find your best soldiers are nearly all from GTS promotions. If a few die, retrain replacements here fast, using perks to catch up lost XP or fill crucial gaps. Don’t be afraid to invest in more perks late game—edge-case buffs like Covering Fire or Vulture may save you in tough missions.
Guerrilla Tactics: Real-World Advice
- Always Train When Possible: Don’t leave the GTS idle. The cooldown is short, and there’s always room for another backup Sharpshooter or Grenadier.
- Pair With Covert Actions (War of the Chosen DLC): Synergize GTS-trained soldiers with Resistance Orders or Covert Actions for max squad flexibility and even more XP gain.
- Adapt Your Play: As new perks roll out from the GTS, rethink your strategies—build teams to push the advantages you’ve unlocked.
Conclusion
Guerrilla Tactics are less about flashy moves and more about smart long-term planning. Build the GTS early, grab must-have upgrades, and keep training fresh recruits for the right class mix. On the battlefield, take full advantage of expanded squads and unlocked perks. The best XCOM 2 players aren’t just lucky in combat—they’re always prepping for the next fight with a deep bench of ready soldiers and squad-wide perks nobody else on Earth can match.