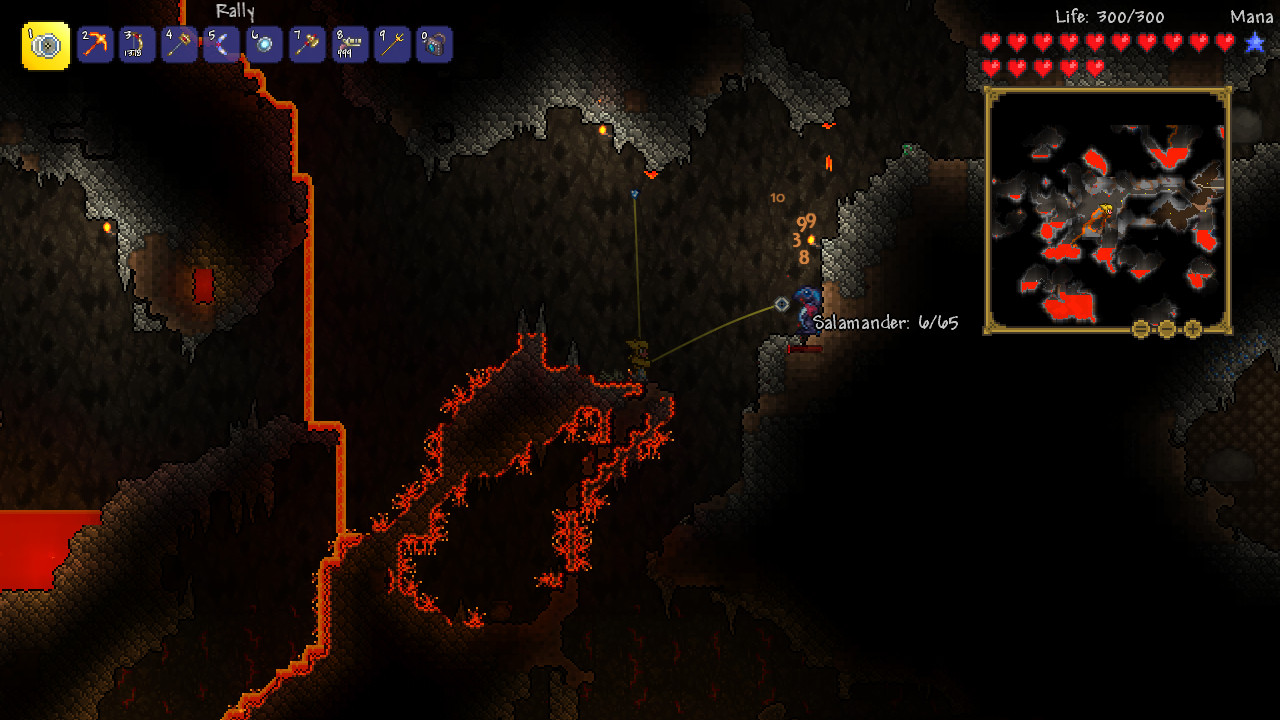
Terraria Boss Encounter Guide
Master Terraria boss battles with key mechanics, optimal gear, arena tips, buffs, debuffs, and combat strategies in this essential encounter guide.
Facing bosses in Terraria can feel intimidating at first, especially when you're not sure what you're getting yourself into. Terraria bosses come in all sorts of shapes, sizes, and difficulty levels, each with unique abilities and challenges that require a bit of preparation and planning ahead. Fortunately, there's a method to the madness. With the right gear, tactics, and a general idea of what to expect, taking on even the toughest encounters becomes a lot more manageable. Whether you're gearing up for your first big encounter or working your way through Terraria's tougher late-game battles, knowing a bit about these bosses beforehand can make all the difference.
Boss Summoning Basics
Terraria bosses don't usually just show up uninvited (though occasionally they do!). Most bosses appear only once certain conditions are met or after you've deliberately summoned them. For instance, the Eye of Cthulhu often pops up randomly once you've reached certain criteria, but you can also summon it intentionally by using a Suspicious Looking Eye. Learning exactly how bosses spawn is the first step in mastering their fights.
Make sure you know the rules. Some bosses, like Skeletron, show up when you talk to specific NPCs or interact with particular parts of your world (talking to the Old Man standing near a dungeon at nighttime, for example). Other bosses, like the Wall of Flesh, trigger only through special rituals--such as tossing a Guide Voodoo Doll into lava in the Underworld. There are even event-based bosses, like the Pumpkin Moon or Frost Moon's spooky baddies, that spawn waves of enemies you’ve got to handle.
Recognizing Attack Patterns
Every Terraria boss uses its own specific set of moves that you can learn and anticipate. Understanding these patterns helps you predict attacks, letting you dodge or counter effectively. Most early bosses, like the Eye of Cthulhu or the Eater of Worlds, display basic attacks in clearly defined phases. Later bosses, such as Plantera or Duke Fishron, bring more varied and aggressive moves to keep you on your toes.
Phases
Bosses tend to change behaviors or attacks as their health drops. This "phase shift" usually happens after the boss takes significant damage. For example, the Eye of Cthulhu charges quickly at the player when it hits roughly half its health, and the Wall of Flesh speeds up dramatically the closer it gets to defeat. Recognizing when these phase changes occur helps you adjust tactics mid-fight.
Leverage Mobility
Successful boss battles in Terraria rely on your ability to move swiftly. Most attacks in this game are dodgeable or preventable with careful positioning. Mounts, wings, grappling hooks, speed potions, and well-constructed arenas dramatically boost your chances of evading hits. Mobility isn't just about running away--it's moving smartly and predictably so you avoid attacks without losing focus on your own offense.
Importance of Arena Building
Terraria veterans know that thoughtful construction before a boss shows up often determines how the fight will go down. A reliable arena provides sufficient space to dodge attacks, platforms to reposition easily, and stations for healing-accessories like campfires or heart lanterns that regenerate your health.
Keeping it Simple and Practical
You don't need elaborately designed arenas--just practical builds that allow mobility and good sightlines. For most bosses, a large rectangular arena with multiple horizontal wooden platform rows spaced a few blocks apart is enough. Litter torches everywhere for visibility and place Campfires and Heart Lanterns regularly across your arena to maximize health regen.
Adjusting Your Arena for Specific Bosses
As you progress, some bosses demand specialized areas for battle. Fighting the Wall of Flesh? You'll want a long, straight platform stretching across part of the Underworld so you can run backward and comfortably attack. For Plantera, carving out a spacious area in the Underground Jungle filled with platforms greatly improves your survival odds. Similarly, outdoor arenas are ideal for bosses like Skeletron Prime or The Twins, giving you lots of vertical and horizontal room to dodge.
Gear and Potion Preparation
Winning battles consistently often depends on having the right gear setup beforehand. A smart item set that boosts speed, defense, attack power, or utility properties will help immensely. Additionally, keeping a stockpile of healing potions or buffs nearby is essential.
Understanding Damage Types
Weapon effectiveness changes depending on your enemy. Some bosses resist specific types of damage, while others might be incredibly vulnerable to ranged, magic, or summon damage. Pay attention to these dynamics so you can prepare your character's loadout appropriately.
Essential Buffs and Potions
Potion buffs can tip a tough boss fight in your favor. Start easy--Iron Skin potions for extra armor, Swiftness potions for more mobility, and Regeneration potions for some passive health recovery. But as you advance, invest time making specialized potions for each challenge--like Archery Potions for Rangers or Magic Power Potions when casting spells.
Minions and Cooperative Multiplayer
Terraria doesn't force you to handle bosses alone--or even rely entirely on your own personal attacks. Utilizing summoned minions or teaming up with friends significantly reduces the difficulty of harder bosses.
Summoning Help
Summoner items--such as the Imp Staff or Spider Staff--grant minions that automatically attack enemies. These companions constantly chip away at a boss's health, leaving you free to dodge and maneuver. Even if you aren't primarily classed as a Summoner, minions give a valuable boost in longer fights.
Playing with Friends
Multiplayer makes bosses less stressful because bosses won't focus all their attention exclusively on you. Coordinating with teammates lets you split boss attention, share buffs and healing resources, and position yourselves strategically within your arena. Clear communication goes a long way toward simplifying chaotic situations that bosses create.
Learning from Losses
Not every battle goes smoothly, and it's normal to lose a few fights. Terraria bosses teach you lessons with each attempt. Were you too aggressive? Did your arena lack sufficient space to dodge? Did you underestimate boss damage and not stock enough healing or potions? Each loss provides valuable clues to improve your future attempts. Terraria encourages experimentation, trial-and-error, and adapting strategies as you progress.
Take defeats in stride. Adjust your tactics, equipment, or arena setup, and try again. Eventually, that intimidating boss becomes manageable, and victories turn these challenging hurdles into rewarding accomplishments.
In summary, beating Terraria bosses takes patience and learning. Keeping track of boss patterns and building arenas carefully dramatically improve your chances. Stock helpful potions, pick suitable gear, or recruit friends as you push forward through Terraria’s escalating challenges. With each boss defeated, you'll steadily improve your skills as you take Terraria's toughest foes head-on.
Weapon and Armor Recommendations
Battling Terraria’s unique bosses isn't just about quick reflexes or clever arena preparation. Picking the right weapons and armor makes all the difference. Terraria’s vast collection of items can leave newer players overwhelmed, but we'll help you easily pick suitable gear based on your class and progression stage.
Let's look at recommended loadouts organized by class: melee, ranged, magic, and summoning.
Melee Weapon and Armor Picks
Melee characters get up close to bosses but still have options that can deal damage safely from mid-range once Hardmode rolls around. Early-game melee players should grab the trusty Blade of Grass (crafted from Jungle spores and stingers), offering decent reach and poison effects. After entering Hardmode, upgrading to legendary blades like the Night's Edge (craftable with unique swords found before Wall of Flesh) and eventually the Terra Blade grants impressive damage and projectile attacks allowing safer engagements.
Armor-wise, melee players benefit from strong defense stats. Early on, craft the Molten armor set, made from Hellstone bars--it provides great defense and extra melee damage. Post-Wall of Flesh, look toward the durable Turtle armor set obtained from Chlorophyte bars and turtle shells. Eventually, upgrade to the Beetle armor set, enhancing defense dramatically and letting you withstand massive hits.
Ranged Weapon and Armor Picks
Ranged fighters shine by keeping their distance, pelting bosses with arrows, bullets, or rockets. Early on, take advantage of the Demon Bow or Tendon Bow paired with flaming or frostburn arrows. Once you hit Hardmode, immediately craft weapons such as the rapid-fire Megashark or Daedalus Stormbow for increased effectiveness.
Armor choices for ranged combatants should prioritize boosting damage and ammo efficiency. Initially, grab the Necro Armor (crafted with bones and cobwebs) to prolong your ammo supply. In Hardmode, Shroomite armor--crafted from Shroomite Bars--provides excellent ranged bonuses like stealth invisibility and substantial offensive stats, drastically improving your ability to handle later bosses.
Magic Weapon and Armor Picks
Terraria magic users fire devastating spells at enemies from medium to long range, but pay close attention to conserving their mana meters. Start your wizard journey with weapons like the Space Gun (paired perfectly with the Meteor Armor set for free mana usage) to quickly chew through early bosses. Once Hardmode begins, casting powerful weapons like the iconic Crystal Serpent (fished underground in Hallowed water) or the dangerous Meteor Staff, becomes essential.
Early magic armor highlights mana efficiency and regeneration. First pick: the Jungle Armor set--crafted with Jungle Spores and gems--for decent mana management and offense. Post-Hardmode upgrade choices include Spectre armor, created from Chlorophyte and Ectoplasm. Spectre armor enables you to heal as damage is dealt (set bonus), perfect for extended boss battles.
Summoning Weapon and Armor Picks
Summoners command minions, letting friendly creatures fight while they dodge bosses and coordinate tactics. Early summoners struggle due to limited minion numbers, so you'll want immediate access to the Imp Staff (made from Hellstone bars) for early damage support. After you've defeated the Wall of Flesh, upgrade quickly to stronger summons like the potent Spider Staff, crafted from Spider Fangs dropped in Spider Cave biomes. Later summons like the fearsome Deadly Sphere Staff (acquired post-Plantera) drastically amplify your overall damage in boss battles.
Summoners should always aim for this dedicated armor early to maximize minion count and damage output. Starting sets include the Bee Armor (crafted from beeswax found after defeating the Queen Bee), offering extra minion slots and strength. In late-game boss fights, Tiki armor or the even stronger Stardust armor from Lunar events significantly boosts your summoning abilities, giving your minions remarkable potency.
Accessories to Improve Survival and Damage
No matter your class choice, Terraria bosses hit hard. Good accessories play a huge part in your survival and improving your damage potential. Items suitable across all classes include:
- Boots and Wings for added mobility.
- Shield of Cthulhu (from Expert Mode Eye of Cthulhu) for a handy dodge maneuver.
- Offensive upgrades like the Avenger Emblem or class-specific accessories (such as magic cuffs or the ranger emblem) further increasing your damage output immensely.
Balanced accessory setups cater to both good survivability and optimal damage. Customize accessories according to your playstyle and class.
These gear recommendations aim at putting you firmly on the path to boss-success over your Terraria adventure. Remember to switch gear around for each boss encounter based on your class, fight challenges, and Terraria progression. Mixing different weapons, armor, and accessories will help you handle every boss Terraria throws your way.
Arena Building Essentials
If you've played Terraria for even a little while, you're probably aware that half the battle with bosses isn't just your gear--it's where you choose to fight them. A thoughtfully built arena can drastically reduce difficulty and prevent some frustrating defeats. Let's break down the essentials you need to know when constructing boss battle arenas, no matter which boss you're facing.
Keep It Flat
Your first goal? Flatten the battleground. Uneven terrain makes movement and dodging unnecessarily complicated, increasing your chances of accidentally running into enemy attacks. Try creating several layers of completely flat platforms made from simple wooden planks, stone slabs, or similar easily-craftable materials. Platforms specifically work best because they’re not solid--you can jump up through them or drop down quickly to dodge incoming strikes.
Spacing out multiple platforms vertically offers flexibility, as bosses often move vertically or fire attacks that you’ll need to dodge. Around two or three layers of platforms, spaced about 8-10 tiles apart vertically, works well for most encounters. With flying bosses--like the Eye of Cthulhu or Duke Fishron--extra verticality and generous spacing reduce hits while airborne.
Light It Up
Don't underestimate lighting. Terraria fights can get chaotic fast, particularly at night or underground. Cover your arena generously with torches, lanterns, or any other glowing decoration you prefer. Proper lighting won't just help you keep track of boss movements--it'll keep pesky normal enemy spawns at bay. That said, consider placing background walls (particularly wooden or stone walls) as well if fighting underground or in low-light biomes, helping increase visibility even further.
Mobility Matters--Build for Speed
Boss battles mean constant movement, dodging attacks, and counterattacking quickly. Beyond flat surfaces, enhancing arena mobility should be a priority. Include plenty of ropes or chains hanging from platforms to let you ascend or descend fast without wasting flight time from your wings. For longer arenas, wood platforms or asphalt blocks boosted by speed-boosting accessories (like Hermes or Lightning boots) or the Asphalt block's built-in speed boost (crafted from Gel and Stone after beating the Wall of Flesh) create effective lanes to outrun quick bosses like Plantera’s second stage form or The Twins.
Teleporters can also be a lifesaver in late-game encounters, instantly allowing you to cross huge distances. Wire teleporters on either end of your expansive arenas to drastically reduce traveling and reposition instantly when needed most.
Essential Buff Stations & Healing Access
Proper pre-battle prep includes more than gear--it extends to strategically placing buff sources within your arena. Some useful utilities include:
- Campfires and Heart Lanterns: These inexpensive items boost health regeneration significantly. Spread a handful across your arena so you're always within their comforting healing radius.
- Stars in a Bottle: Magic-users will greatly benefit from mana regeneration increases. Place several evenly spaced along the platforms.
- Honey Pools: A small, shallow pool of honey grants the health regen "Honey Buff" after stepping through it briefly, lasting for around 30 seconds after leaving the pool.
Sprinkling these simple resources evenly ensures you’ll always enjoy some health bonuses no matter your position.
Traps and Offensive Structures (Optional but Effective)
Sometimes the best defense is offense, right? Consider outfitting higher-level arenas with some strategically placed traps--like spiky ball launchers, dart traps, flame throwers, or spear traps. Wiring these up to Pressure Plates, Timers, or manually-operated switches can deal extra passive damage, especially effective against stationary-style fights like Golem or invasions.
A quick word of caution--if you incorporate automated offensive traps, remember: they aren't smart. Test your placement carefully to guarantee traps punish enemies instead of accidentally damaging you during the fight.
Arena Materials and Size Recommendations
Your arena doesn’t have to win architecture awards, just practically built. Ideal construction materials remain wood or stone platforms which are cheap, easily replaceable, and often forgiving to accidental explosions or attacks. Avoid fragile decorative tiles like glass, snow, or sand--they won’t hold up well to boss assaults.
Arena size typically depends on your progression stage and the boss you're fighting. Early-game bosses (Eye of Cthulhu, King Slime) should be manageable with a moderately-sized platform space, around 100 tiles in width. Mid-game bosses (Queen Bee, Skeletron Prime) often require more space--somewhere around 200 tiles wide or more--to freely dodge attack patterns. End-game bosses, especially those that are notoriously quick (Plantera, Moon Lord, Duke Fishron), frequently demand huge arenas reaching upwards of 300-500 tiles long to handle movement and dodging comfortably.
Adjust the arena according to difficulty--you can always make a small arena larger later on with extra platforms when dealing with tougher bosses.
Know Your Enemy: Customize Your Arenas Appropriately
Each boss behaves uniquely, presenting unique challenges. Tailoring arenas to their attack pattern boosts your survival dramatically:
- Eye of Cthulhu & Mechanical Bosses: Focus on vertical layers for evasive jump and airborne escapes.
- Wall of Flesh: Flattening the Underworld’s naturally erratic terrain into a lengthy horizontal highway dramatically eases this encounter.
- Plantera: Wide-open multi-layered spaces wok incredibly well, as movement is key in dodging its sprawling vine attacks.
- Moon Lord: Large horizontal movements plus high vertical lanes together let you safely avoid devastating beam attacks and projectiles.
Adjusting each arena according to boss behaviors isn’t just clever--it’s necessary preparation.
Wrapping Up: Battle Preparedness
A thoughtfully built arena is half your fight in Terraria. When coupled smartly with your chosen gear, a proper arena’s layout and careful planning will see you overcoming even the toughest Terraria bosses confidently. Regardless of your chosen class--melee, ranged, magic, or summoning--arena setup is key. Remember these guidelines, practice careful customization to specific bosses, and boss defeat becomes significantly easier, even enjoyable for veteran and beginner alike.
Optimal Buffs and Potions: Bottled Success for Terraria Bosses
In Terraria, good preparation makes boss battles smoother, and buff potions are your hidden advantage. The right potions will tip the scales and amplify your character's strengths. Let's check out the most valuable buffs for boss encounters and how to get your hands on exactly what you need.
Which Buff Potions Do You Need?
Boss fights put your skills to the test, and buffs can bridge any gaps in your gear or class weaknesses. Here are the most helpful potions to use:
-
Ironskin Potion: This reliable concoction boosts your defense by 8 points, which adds up quickly, especially for melee or close-range characters. Brew it using Bottled Water, Daybloom, and Iron or Lead Ore.
-
Regeneration Potion: Survival means keeping your health topped up. More regen equals less panicky potion chugging. Mix Bottled Water with Daybloom and Mushrooms found commonly underground.
-
Swiftness Potion: Everything’s easier when you outrun attacks instead of absorbing them. Combine Bottled Water, Blinkroot (found underground), and Cactus to craft it.
-
Endurance Potion: Regularly overlooked but hugely impactful, it cuts incoming damage by 10 percent. Brew one from Bottled Water, Armored Cavefish (caught underground), and Blinkroot.
-
Wrath/Rage Potions: Damage boosts give you the edge offensively. Wrath Potions (giving you a flat 10% more damage) need Bottled Water, Deathweed, and Ebonkoi (found in Corruption waters). If you're playing in a Crimson world instead, craft Rage Potions (giving 10% extra critical strike chance) with Hemopiranha instead of Ebonkoi.
-
Heartreach Potion (situational): Pick up health hearts from farther away. It's convenient during events or fights that spawn minions. Made from Bottled Water, Crimson Tigerfish (found in Crimson waters), and Daybloom.
Don't Forget Well-Fed Buffs
Food buffs in Terraria boost your character’s overall stats--minor improvements individually, but impactful as they stack with your potions. Early-game cooking is simple: a cooking pot and easy-to-find fish or veggies produce meals granting a "Well Fed" buff, lasting up to 10 minutes. Later food buffs, like Pumpkin Pie or Cooked Fish, provide helpful boosts to your damage, defense, crit rate, and health regen--all at once. Always snack before battle--you won't regret it.
Class-Specific Potions for Strategic Advantage
Depending on your class, certain potions shine brighter:
Melee/Tank Players
- Titan Potion: Knockback to mobs increases, helping significantly against bosses who summon smaller minions. Brew from Bone, Deathweed, Shiverthorn, and Bottled Water.
- Flask Potions: Melee attackers benefit from flasks that add damage-over-time or debuffs to enemies. Ichor flasks (crafted at an Imbuing Station using Ichor and Bottled Water) reduce enemy defense, significantly raising DPS.
Ranged Players
- Archery Potion: Bows and arrows gain a 20% damage increase--absolutely vital for ranger builds, and easy to craft from Daybloom and Lens.
- Ammo Reservation Potion: Conserving ammo stretches your powerful bullets or arrows further, helping you maintain DPS without stopping often to reload. Craft from Double Cod (fish found in the jungle biome) and Moonglow.
Mage Players
- Magic Power Potion: Mages love more magic damage, and you’ll gladly brew this potion from Moonglow, Fallen Stars, and Deathweed--it ups your magic damage by 20%.
- Mana Regeneration Potion: Brew using Bottled Water, Moonglow, Daybloom, and Fallen Stars. With this handy potion, you restore mana quickly to keep spells flowing.
Summoning Players
- Summoning Potion: Adds an extra minion slot, boosting your minion count comfortably. Combine Bottled Water, Variegated Lardfish (caught in underground jungle pools), and Moonglow.
Highly Specialized Potions for Challenging Situations
Facing especially tough bosses or expert-mode baddies? Look no further than these specialized brews:
- Lifeforce Potion (Hardmode): Temporarily boosts maximum HP by 20%. Made from Prismite (caught fishing underground in the Hallow biome), Moonglow, Shiverthorn, and Bottled Water.
- Inferno Potion (Hardmode): Surrounds you with a ring of fire, damaging enemies who get close--perfect for up-close boss phases. Crafted from Flarefin Koi (caught fishing in lava), Obsidifish, and Fireblossom.
These high-end potions typically require uncommon ingredients. Invest time fishing and growing little potion gardens for regular access--your survival odds will skyrocket.
Potion Duration and Management Tips
Most buff potions last between 4 to 8 minutes--usually sufficient, but sometimes a prolonged battle stretches beyond a potion’s effects. Always keep multiple potions in your quick-access inventory slots or buff through the Quick Buff (B) key mid-fight for timely refreshments.
Also, don’t underestimate potion-station furniture such as the Bewitching Table, Crystal Ball, Ammo Box, and Sharpening Station--they grant excellent passive buffs lasting 10 minutes, ideal complements to potions.
Smart Brewing Setups Equal Consistent Buff Access
Building a small "Potion Workshop" at your base can streamline buff crafting. Simply set up planter boxes (purchasable from the Dryad) for farming necessary plants--especially Daybloom, Blinkroot, Moonglow, Deathweed, Shiverthorn, and Fireblossom. Place Water containers, potion-crafting Bottles (just set a glass bottle on a flat surface), and a chest or two nearby storing commonly gathered resources like fish, mushrooms, and lens. This setup removes the hassle from potion brewing and keeps buffs consistently available before big fights.
Conclusion--Buff Smart, Fight Easy
When you pair smart potion use with solid equipment and thoughtful arenas, your boss battles shift from frustrating struggles into manageable, satisfying encounters. Stock up your pantry, cook some tasty food buffs, brew wisely, and watch Terraria’s toughest bosses crumble before you.
Debuffs: Your Hidden Combat Advantage
Terraria might feel like it’s all about outfitting yourself in epic gear, flashy weapons, or powerful potions--but ignoring debuffs would be a massive mistake. Mastering the skillful application of debuffs can turn the tide against bosses and hordes alike, helping you deal damage more efficiently or slowing and weakening tough targets.
Let's check out some of the game’s key debuffs you’ll encounter, their effects, and how to best apply them on enemies during boss encounters.
Must-Know Debuffs and Their Effects
Ichor (Crimson-exclusive Debuff)
If you’ve set foot into the Crimson, you might already know how nasty that golden yellow ichor can be on your armor. Well, the same goes for your enemies! Once inflicted, ichor drops enemy defense by a hefty 15 points. Less enemy defense means more damage gets through per hit. For high-defense bosses like Skeletron Prime or Golem, ichor can drastically boost your damage.
Application: Use melee players’ Flask of Ichor, Golden Shower magic spell, or ichor arrows and bullets for ranged attackers. This debuff is particularly effective for group boss fights in multiplayer, allowing the entire team to ramp up DPS.
Cursed Inferno (Corruption-exclusive Debuff)
This purple-green flame sets enemies ablaze with consistent damage over several seconds, slowly whittling down tough bosses. Unlike regular fire-based debuffs, enemies have a tougher time shrugging off Cursed Inferno, making it reliable additional damage.
Application: Best used via Flask of Cursed Flames for melee players, Cursed Bullets for rangers, or the Cursed Flames magic weapon for mages. While it's less helpful for reducing enemy defenses, every bit of damage can count in prolonged boss fights, especially in Expert or Master Mode.
Frostburn & On Fire!
Both of these fire-type debuffs steadily chip away enemy health for solid, passive damage. Frostburn provides slightly more damage than On Fire!, and notably, they stack individually--so hitting a boss with both means double trouble.
Application
- Frostburn: Use Frostburn Arrows, crafted cheaply from Ice Torches or simply purchased in bulk. They outperform normal Flaming Arrows and are accessible throughout the game.
- On Fire!: Easy to apply through Flaming Arrows, various flame flasks, or early-game weapons like Molotov Cocktails. A useful standby debuff.
Venom (Hardmode-only Debuff)
Venom dishes out some of the highest available damage-per-second among debuffs, surpassing basic Poison or fire effects. Although its damage is impressive, some bosses gain immunity, limiting its effectiveness in certain situations.
Application: Venom Arrows and bullets work nicely here, alongside Flask of Venom for melee-oriented folks seeking maximum DPS output against susceptible bosses.
Poisoned/Acid Venom
Standard poisons drain health more slowly compared to Venom or Frostburn. Acid Venom (applied by Acid Venom items) ramps up noticeably more damage per tick than basic Poison, making it decent in certain boss battles--but again, watch for immunities.
Clever Combat Techniques & Combos
Inflicting debuffs is straightforward--but squeezing maximum efficiency and effectiveness from combat tactics separates veterans from beginners. Keep these tips handy during your boss hunts:
Stack and Reapply Debuffs Regularly
Debuffs in Terraria run out after several seconds. Maintain attacks or periodic hits that reapply key debuffs, especially Ichor or Cursed Inferno. No excuse for bosses going even a second without those hefty defense drops!
Combine Debuff Types
Some debuffs can stack simultaneously on enemies (Ichor, Cursed, Frostburn, On Fire!). Spread different effects through weapon swaps or team coordination, creating a constant stream of major DPS. For instance, a mage might spam Golden Shower (Ichor), while a ranger peppers the target with Frostburn arrows--mix and match your team for maximum destruction!
Use Debuffs with Appropriate Classes
Certain classes have better access to particular debuffs--recognize yours:
- Melee: Leverage flask potions at any opportunity and regularly refresh weapon hits.
- Ranged: Use specialized arrows/bullets constantly to keep debuffs active while kiting bosses from a range.
- Magic Users: Spells like Golden Shower and Cursed Flames easily shower bosses in debuffs. Positioning safely from afar makes refresh easy.
- Summoners: Choose minions capable of applying debuffs--from Spider staff (Poisoned) early in Hardmode to Stardust Dragon in endgame. Your summons help maintain steady debuff uptime, amplifying your personal or teammates' damage.
Exploit Boss Vulnerabilities
Each boss has unique weaknesses. For example, mechanical bosses (Destroyer, Skeletron Prime, and the Twins) particularly hate Ichor due to their generally high defense. Conversely, Plantera’s vulnerability to ranged slowdown like Frostburn or On Fire! bolsters ranged attack opportunities. Match debuffs to suitable targets to minimize fight duration and incoming damage.
Securities in Survival: Dodging & Mobility
Applying debuffs won't matter if you can’t stay alive. Terraria rewards agile fighters who dodge enemy attacks consistently:
- Equip mobility-focused accessories (Shield of Cthulhu, Hermes Boots upgrades, Wings)
- Build wide fighting platforms above terrain
- Dodge and jump vertically, maintain safe positioning between attacks
- Know boss attack patterns, and plan your dodging routes accordingly.
Simple positioning strategies go a long way in survival--the fewer hits you receive, the fewer life renewal potions you chug.
Debuff Immunities: Know Your Enemy
Not all debuffs land successfully every time--that’s why it's helpful to know boss immunities upfront:
- Mechanical Bosses: Resist Poison and Venom but weak to Ichor
- Plantera and Golem: Partially resistant to poison and fire, but vulnerable to defense-related debuffs like Ichor
- Moon Lord: Immune to most debuffs, except critical defense-reduction (Ichor) and minor exceptions. Prioritize accordingly.
Final Thoughts: Battle Smarter, Not Harder
Debuffs might seem small individually, but when consistently applied--and cleverly stacked--they drastically impact boss fights. Combining weapon choices, smart class-debuff synergy, and mobility strategies results in smoother battles and quicker victory.
Now loaded with knowledge about debuffs and combat tactics, you’re one step closer to taking down Terraria's fearsome bosses effectively and efficiently. Good luck out there!