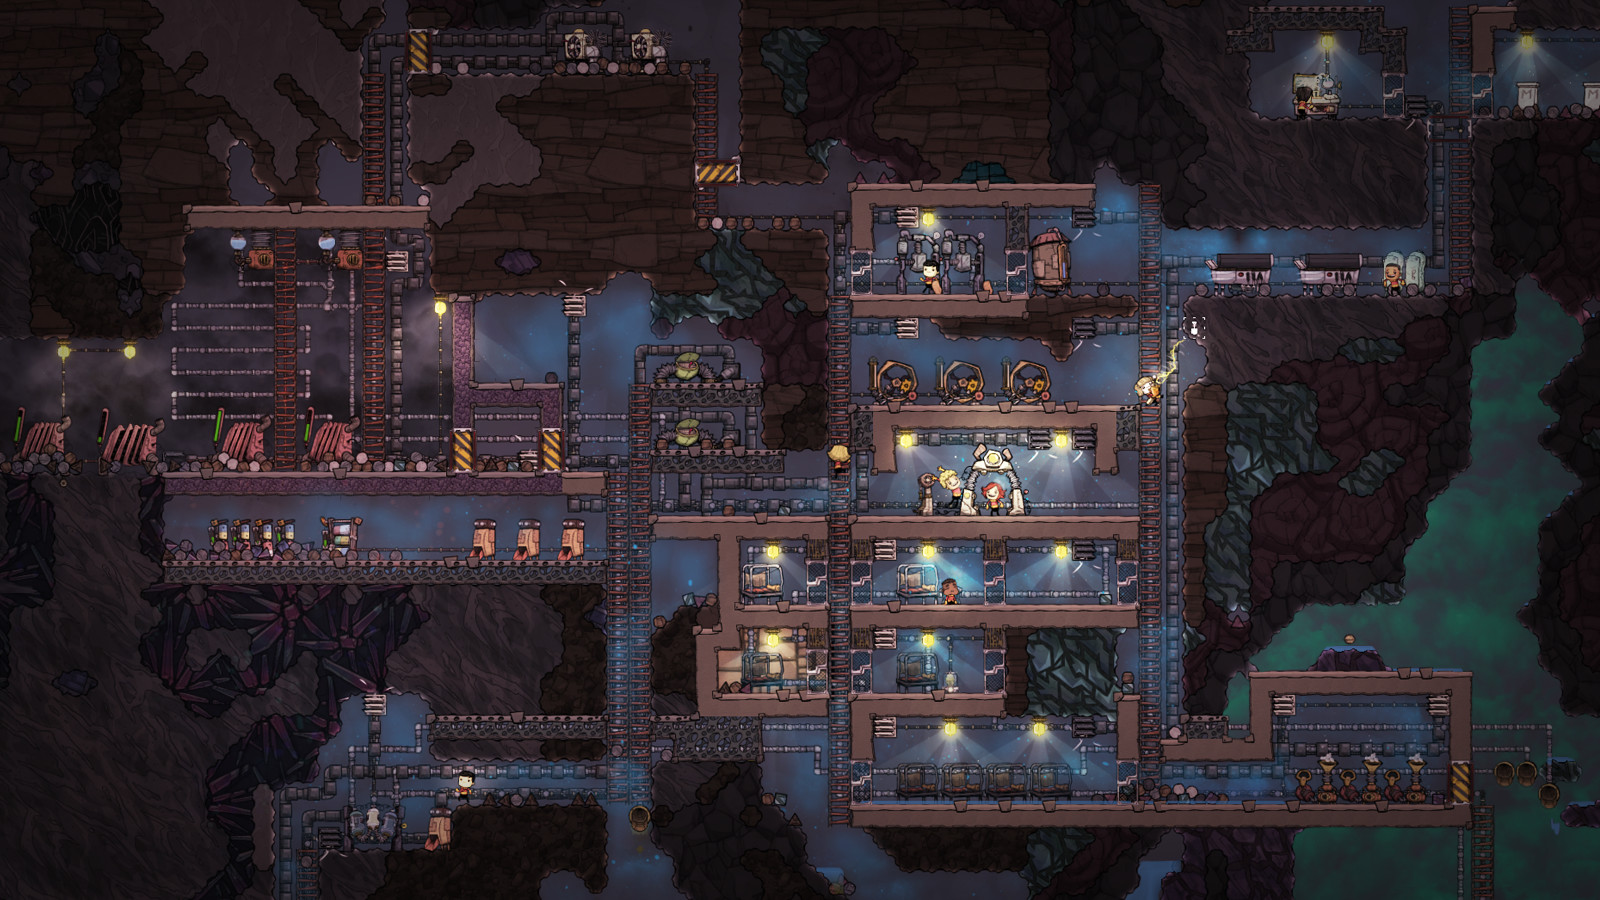
'Oxygen Not Included: Essential Base Systems Guide'
Master key base systems in Oxygen Not Included: manage oxygen, temperature, food, water, power, and duplicant stress for survival!
Managing a thriving colony in Oxygen Not Included means juggling a lot more than just digging tunnels and keeping your duplicants fed. Even early on, setting up reliable systems for essentials like oxygen, water, power, and waste can mean the difference between a bustling base and a panicked scramble. With new players especially, it’s easy to get overwhelmed by the sheer number of things asking for attention. Knowing which base systems to prioritize—and how they all connect—can make your life a whole lot easier, keeping your duplicants healthier and your survival chances much higher as the game ramps up in complexity.
Oxygen Production
Oxygen really is the heart of your colony—without it, your duplicants won’t last long. Managing your O₂ supply means balancing immediate survival needs with plans for expansion. There’s no single best way to keep everyone breathing, but understanding your options, knowing the tradeoffs, and avoiding common mistakes will help you keep things under control.
Understanding Oxygen Mechanics
Oxygen isn’t a “resource” you pick up or store like metal or water. It’s a gas, and in Oxygen Not Included—or ONI for short—it floats, spreads, and settles based on pressure and temperature. Your colony starts with a breathable pocket around your Printing Pod, but that air won’t last forever.
Each duplicant consumes about 100g of oxygen per second, so even a tiny colony starts burning through breathable gas surprisingly fast. Running out of oxygen doesn’t kill duplicates instantly, but they’ll get stressed, then suffocate if you don’t fix things quickly.
Early-Game Oxygen Methods
Getting your first oxygen system set up is top priority. Most players go with one (or a mix) of these options:
Algae Deoxydizer
Think of this as your oxygen training wheels. Plug it in and it eats up algae, spits out oxygen without any fuss. Perfect for your first few cycles. Here’s what you need to know:
- Consumes: Algae and power (120W)
- Produces: 550g/s Oxygen
- Easy setup: Just build it, supply it with algae
- Downsides: Chews through algae fast; algae is limited unless you find more or set up slime processing
Keep an eye on your algae stockpile, because if you run out, all the O₂ in the world won’t help.
Oxygen Diffuser
This one’s pretty similar and also runs on algae. The numbers are almost the same, but with small tweaks to power consumption and output. Both devices will get you through the first section of the game, but neither is a long-term solution.
Mid-Game Options
Once algae starts thinning out, you’ll need a more sustainable oxygen source. That usually means splitting water into O₂ and hydrogen with an Electrolyzer.
Electrolyzer
This is the workhorse for most colonies once you have a steady water supply.
- Consumes: Water (1kg/s)
- Produces: 888g/s Oxygen, 112g/s Hydrogen
- Byproduct: Hydrogen is great for power (if captured correctly)
- Placement: Needs smart airflow design—O₂ sinks, hydrogen rises
You’ll also want to filter the gases or risk pockets of hydrogen building up in dangerous spots. Many players create dedicated “Electrolyzer rooms” with gas pumps and filters. Consider using an Atmosuit system to keep hydrogen contained if things get messy.
Algae Terrarium
If you have excess water and CO₂ problems, try the Algae Terrarium. It converts CO₂ and algae into O₂ and also removes a bit of water. Not efficient for big colonies, but can help in remote corners or as an emergency backup.
Late-Game & Advanced Setups
When water starts getting precious, electrolyzers might not be enough—or you might just want better efficiency.
Rust Deoxidizer
If your asteroid has rust and salt (often on desolate maps), these devices can keep you breathing.
- Consumes: Rust and salt
- Produces: Oxygen, chlorine (a hazardous gas that needs venting away from your base)
It’s a bit niche, but useful if you’re running short on water.
Oxygen from Other Sources
There are some fringe methods for creative players, like boiling polluted water with heat or setting up complex systems using Subterranean Plants. These usually come into play in specialized bases or challenge runs.
Airflow, Pressure, and Gas Management
How you handle the output is as important as the devices you use. Poor ventilation leads to suffocation zones or pockets of “stale” air.
- Tiling: Use airflow tiles or mesh tiles so oxygen travels where you need it
- Doors and Walls: Remember, gas can’t move through regular tiles, so plan accordingly
- Dealing with CO₂: CO₂ sinks to the bottom—dedicate a pit or “CO₂ pit” where it can be siphoned off for processing or turned into useful resources
Common Pitfalls
- Algae starvation: Running out of algae before a better system is ready
- Power outages: Oxygen systems fail if the grid goes down
- Hydrogen leaks: Poor gas separation leads to explosive problems and wasted energy
- Overproduction: Too much oxygen can overpressurize rooms, wasting resources
Monitoring and Tweaking
Keep watch with the Oxygen Overlay (press F1) early and often. If you see lots of pink or black areas, you’re in trouble. Place systems where they’re needed most, automate with smart switches, and don’t be afraid to adjust layouts as your base grows.
Staying on top of oxygen is a juggling act, but once you nail the basics, you’ll have one less thing to worry about as you push your duplicants toward spacefaring greatness. If your base is still full of blue, consider that a small victory in the wild science experiment that is Oxygen Not Included.
Temperature Control
Keeping your base at a stable temperature is just as important as delivering breathable air. ONI’s heat management systems might seem overwhelming at first, but learning how temperature works—and how it affects your duplicants, machines, and food—will make your colony much more resilient.
Why Temperature Management Matters
Temperature affects nearly everything. Duplicants get stressed if it's too hot or cold. Plants have specific ranges for growth; machines run less efficiently or even break down if exposed to extreme temperatures. On top of that, high heat can melt wires, spoil food, and kill crops, turning a once-safe base into a disaster zone.
A few critical numbers to keep in mind:
- Ideal Duplicant Comfort: 19°C–26°C (66°F–79°F)
- Most Plants’ Growth Range: 10°C–30°C, varies by crop
- Food Storage: Below 4°C prevents spoilage (refrigeration helps)
Ignoring heat buildup can quickly spiral into unlivable conditions, especially as your colony gets larger and your machinery more complex.
Where Heat Comes From
A lot of factors generate heat in ONI. Here are the main offenders:
- Machines: Anything that consumes power—oxygen systems, research stations, pumps—all spit out heat.
- Dupes: Even duplicants warm the air around them.
- Cooking and Refining: Food processors, metal refineries, and other heavy machinery are notorious for their thermal output.
- Geysers and Volcanoes: These natural features spew out heat (and, sometimes, hot liquids or gas).
Some processes, like boiling water for oxygen production or smelting metals, can push specific areas into dangerous temperatures very fast.
Spreading and Blocking Heat
Heat moves through your base in three ways:
- Conduction: Direct contact—heat moves from hot tiles to cooler ones.
- Convection: Hot air rises; cold air sinks, so gases help distribute heat.
- Radiation: Some materials and building pieces can absorb or insulate against radiant heat.
The materials you use for tiles, pipes, and machines affect how much heat passes through different parts of your colony. For example, insulated tiles block most heat movement, while regular tiles let it pass more freely. Knowing where to use each kind saves lots of heartache later on.
Early Game Cooling Tips
When you’re starting out, overheating usually isn’t a big threat—unless you set up everything in one cramped spot. Spread out generators and machines, and consider these beginner tips:
- Wire & Machinery Placement: Place generators and refining equipment in isolated “hot rooms” sealed off from common areas.
- Airflow & Open Spaces: Let hot air move up and away from sleeping/eating zones.
- Algae Terrariums/Deoxydizers: These produce minimal heat and can keep early colonies cool.
If you see decor items like the Ice Sculpture unlocked, use them to drop room temp temporarily until you unlock better tech.
Mid-Game Solution: Insulation and Radiators
As your industrial needs grow, so will your heat output. Here are some ways to manage it:
Insulated Tiles
These help keep temperature stable in sensitive areas (like farms and bedrooms). Use refined minerals for better insulation.
Thermal Shift Plates
Place these behind walls, inside refrigerators, or next to machines. Made from materials like granite or gold amalgam, they push heat into or out of a room quickly, letting you fine-tune temperatures for specific zones.
Ice and Snow
Harvest ice from cold biomes and drop it in hot rooms to absorb excess heat. Careful—once it melts, it’ll leave pools of water, so plan your drainage.
Cold Biome Air Exchange
Dig tunnels to chilly biomes and vent hot air from your base into the cold. Or, pull in cold air to cool things down. This trick works well until you exhaust nearby biomes or seal them off.
Advanced Cooling Techniques
As your base becomes more tech-heavy, natural cooling strategies will fall short. That’s where late-game solutions step in.
Wheezeworts
These alien plants absorb heat from their surroundings and cool nearby gases. Stick them in hot spots with lots of airflow for passive, power-free cooling. They require a little hydrogen to thrive, so they pair nicely with electrolyzer setups.
Liquid Pipes and Radiators
Piping cold water (or another liquid) through hot rooms and venting it elsewhere pulls heat out of problem zones. Add radiant pipes for even stronger cooling if you use a cold liquid, like chilled water from ice biomes or melted ice.
Aquatuners and Steam Turbines
For managing high heat loads, these heavy hitter machines can actively transfer massive amounts of thermal energy. An Aquatuner cools liquids by transferring heat to itself—just make sure to remove that heat (usually with a Steam Turbine setup, which turns the waste heat into power).
This type of setup takes serious resources and planning, but once built, lets you run giant factories, keep crops comfy, and chill food storage indefinitely.
Food, Farms, and Temperature Traps
Crops like Mealwood and Bristle Blossom need stable room temperatures. Build insulated farm rooms, add cooling pipes behind tiles, and monitor with thermosensors for automation.
For food storage, use Refrigerators or store food in CO₂ at ice-cold temperatures. Befriend cold biomes early for easy food preservation, and transition to mechanical cooling for late-game fridge space.
Fighting Unwanted Heat (and Cold)
Here’s how to put out temperature “fires”:
- Remove Hot Debris: Sweep up hot rocks or metals after digging so they don't warm the room.
- Shut Off Idle Machines: Every idle generator or research terminal still generates heat. Turn them off with automation.
- Airlocks: Double-layer doors slow down temperature leaks between rooms.
- Manual Ice Drops: Dump ice or snow in containers to soak up stray heat.
If your base gets too cold—less common, but possible—bring in heat from hot biomes, run generators in cold zones, or let some machines stay close to farms.
Monitoring Temperature
Use the Temperature Overlay (F4) to spot “red” (hot) or “blue” (cold) zones right away. Sensors can automate cooling or heating gadgets based on precise cutoff points, reducing micromanagement and making your base more efficient.
Conclusion
Mastering temperature management keeps your colony productive and happy. Start simple—spread out equipment and block problem areas. As things scale up, bring in insulated construction, cooling pipes, and smart automation. Keeping your base in the comfort zone—neither a freezer nor a furnace—is the secret sauce for a thriving, long-term ONI run.
Food and Water Supply
Getting your dupes fed and hydrated isn’t just about survival; it’s the backbone for everything else in Oxygen Not Included. If you run out of calories or water, your colony won’t last long, no matter how cool and comfortable it is. Let’s break down how to set up reliable food and water early—and how to keep things humming as your base expands.
Early Game Food: Quick Wins
Ration Boxes and Foraging
Your duplicants start with some field rations in a Ration Box. These don’t last. As you clear out your starting area, you’ll uncover Muckroot (the default buried fruit) and maybe a couple weird edibles like Nutrient Bars or Hexalent Fruit. For your first cycle or two, have dupes dig out accessible areas to top off calories.
Mealwood Farms
The first sustainable crop is the humble Mealwood. It grows in planters or hydroponic tiles and only needs dirt, water, and a cool room (between -10°C and 30°C). Set up a few planters using the Planter Box research, sprinkle in some compost to manage dirt supply, and you’ll have Meal Lice as a decent base food. Meal Lice are edible but unappetizing—that’s fine for now.
Mush Bars
If you’re tight on Mealwood seeds or space, cook Mush Bars at the Microbe Musher. They combine dirt and water—ingredients you probably have lying around. Mush Bars are low quality, increase bathroom trips, and lower duplicants' morale, but can prevent starvation until you scale up.
Pro Tip: Mush Bars can be further processed into Liceloaf at the Musher for slightly better morale.
Stepping Up: Food Security and Upgrades
Bristle Blossoms
With a stable water supply, Bristle Blossoms become a step up. They need light, water, polluted water (depending on world settings), and cool temperatures. Add a lamp in your farm room and hook up a pitcher pump or plumbing. Bristle Berry offers slightly better calories and improves duplicants’ moods.
Cooking and Morale Foods
Later on, research the Electric Grill and prepare foods like Grilled Prickle Fruit, Pickled Meal, or eventually Frost Buns and Pepper Bread using advanced ingredients. Higher-tier food increases duplicant morale, keeping stress down.
Animal Ranching
Unlocking critter ranching means you can start breeding Hatches (for meat and coal), Dreckos (for reed fiber and phosphorite), or Pacu fish (for fillets). Ranching takes more effort and research but pays off with steady protein sources and byproducts.
Preserving Food
Spoilage is a threat. Here’s how to stretch your resources further:
- CO₂ Storage: Food inside carbon dioxide environments spoils far slower. Set up Ration Boxes at the bottom of your starting base, where CO₂ pools naturally.
- Refrigerators: Powered Refrigerators keep food cold, but chew through energy. Build them in cold rooms or combine with insulated tiles for best results.
- Freezing: If you have an ice biome nearby, store food in it—that’s a natural freezer with zero power cost.
Early Game Water: The Lifeline
Basic Sources
You start with a pool of clean water. Dupes use it for toilets, research stations, the Microbe Musher, and, later, farms. Place a Pitcher Pump so they can fetch it easily.
Managing Wastewater
Outhouses and Mush Bars generate polluted water. Don’t dump this—save it in a dedicated area for treating later. Polluted water left in the open will off-gas polluted oxygen, so tile over it or store in a closed room to keep your air clean.
Clean-Up: Water Sieves
Once you unlock plumbing, run polluted water through a Water Sieve using sand. This produces clean water for farming, research, and more. The Water Sieve doesn’t clean germs, so if your output is germy (e.g., from slime or infected sources), add a Chlorine Room for extra sanitizing.
Toilet Loops
Research Plumbing and build a Lavatory + Sink loop. Both send wastewater straight into your pipes. With Sieve treatment, this setup gives your colony a nearly endless water loop, significantly reducing how much fresh water you’ll ever need to find.
Algae Terrariums and Electrolyzers
Algae Terrariums turn water and algae into oxygen and spit back polluted water. Electrolyzers split water into oxygen and hydrogen, but both use up precious water. Only set them up when you have water recycling in place, or you’ll run dry fast.
Going Long-Term: Advanced Water (and Food) Solutions
Geysers and Vents
Scout out your map for Steam Vents or Cool Slush Geysers. Geysers provide nearly infinite hot or cold water, but need careful automation and cooling. Early game, just bottle the output; mid-game, automate with pipes, pumps, and cooling loops.
Desalination (If Available)
Some maps have Salt Water; add the Desalinator to process this instead of using clean water. Brine and Salt can go to other advanced recipes too.
Sustainable Ranching
Advanced critter ranching cycles poop and waste into food. Pacu release polluted water, Hatches recycle resources, and Dreckos can eat slime for useful excretions.
Water Recovery from Other Sources
- Slush melting (ice and snow collected and melted in controlled basins).
- Distilling Polluted Ice into water, especially in spaced-out asteroid types.
- Later, use Oil Wells or Rocket Return Modules for water in high-tech runs.
Key Risks and Troubleshooting
- Crop Wilting: Check temperature, irrigation, and atmosphere.
- Polluted Oxygen: Keep waste in sealed rooms. Don’t open slime biomes until you have Hazmat or Atmo Suits.
- Germy Water: Don’t feed germy water straight into food crops. Use Chlorine rooms or let water sit until germs die off.
- Infinite Loops: Don’t rely solely on recycling—minerals (like sand) and resource scarcity can break the loop.
Summary
Focus first on harvesting and rationing starter foods, then shift to reliable farming (Mealwood and then Bristle Blossoms) and introduce food upgrades as soon as your tech allows. Water needs a secure clean source and a plan to treat and store polluted water for later recycling. Organize your base so food and water production—plus storage—stays safe, efficient, and doesn’t introduce more problems than it solves. Keep an eye on your resources, balance food types to avoid morale issues, and always look for new water sources before your reserves run dry. A thriving colony is a well-fed and well-hydrated one. Power is the backbone of every thriving colony in Oxygen Not Included. Without electricity, even the best-laid base plans grind to a halt—lights go out, air stops flowing, and stress levels rocket. Building a resilient power grid early helps keep duplicants healthy and productive. Here’s a deep look at the power generation options, how to avoid dead ends, and tips for efficient energy management.
Understanding Power Basics
Every device that does work consumes power (measured in watts). Wire too many machines to a single circuit and you’ll trip breakers, overheat wires, or even set things on fire. From the start, it’s a balancing act: generate enough juice without burning through all your resources.
- Watt (W): Unit of energy consumed or produced.
- Joules: Total energy stored in batteries.
- Circuit Load: Combined wattage of all machines connected by wires.
- Overload: Damage wires receive if the total draw exceeds their rated wattage.
Learn the wattage ratings for basic and heavy wires, and remember: Batteries smooth out spikes, but limited capacity means you’ll lose stored power if you overproduce.
Early Game Power: Manual Labor
Manual Generators (Hamster Wheels)
All you get on day one is duplicant sweat. The Manual Generator turns one unlucky dupe into an energy hamster, sprinting endlessly to keep lights and machines alive.
- Pros: Immediate, low-tech power; runs on duplicant calories.
- Cons: Dupes get stressed and tied up; unreliable if you neglect priorities.
When to use: Powering one or two critical devices (like a Research Station or tiny farm) in the first days. Always hook it to a battery to buffer power for rush hours.
Small Power Circuits
Stick to simple wiring in the beginning. Default wires (max 1,000W) can handle a Manual Generator, a Small Battery, and a few lights or appliances. Use switches to shut off non-essentials when needed.
Mid-Game Generators: Automation and Efficiency
Once you unlock more tech, it’s time to stop stranding your duplicants on wheels and automate the grid.
Coal Generators
One of the most reliable options for early automation. Coal Generators burn coal and emit both heat and carbon dioxide.
- Pros: Continuous and hands-off if you ranch Hatches (for coal); strong output (600W); easy to automate with Smart Batteries.
- Cons: Builds heat quickly; produces pollution (CO₂); depletes coal if you’re not careful.
Tips
- Use a Smart Battery as your “on/off” switch—set thresholds to only run the generator when batteries need a charge.
- Pipe CO₂ to early farms or excess vent areas.
- Keep generators in insulated rooms and set up cooling if heat becomes a problem.
Hydrogen Generators
These unlock once you’ve got an Electrolyzer splitting water into oxygen and hydrogen. The Electrolyzer itself doesn’t generate power, but the hydrogen byproduct is a potent fuel.
- Pros: Free fuel from water splitting; no carbon pollution; synergizes with clean oxygen production.
- Cons: Challenging gas management; hydrogen production can be uneven.
How to pull it off
- Place a gas pump at the top of your Electrolyzer room (hydrogen floats).
- Pipe hydrogen to a Hydrogen Generator.
- Always use a gas filter—never let oxygen clog your hydrogen line.
- Output is unpredictable at first, but can stabilize a base if you tweak your systems.
Wood Burners (If Available)
If your asteroid has Arbor Trees or you’re farming branches, Wood Burners (Lumber Generators) can offer a renewable supply.
- Pros: Burns a renewable resource; avoids CO₂ if vented outside.
- Cons: You’ll need a tree farm and dedicated storage for lumber.
Set up tree farms early if you want to pursue this route.
Late-Game Power: Big Solutions for Big Bases
Petroleum and Natural Gas Generators
Once you reach oil biomes, Petroleum and Natural Gas become top-tier fuels.
- Petroleum Generator:
- Runs on petroleum, outputs massive power (2,000W), plus heat, polluted water, and carbon dioxide.
- Connects well with oil refineries and advanced coolant setups.
- Natural Gas Generator:
- Consumes natural gas, produces polluted water and carbon dioxide.
- Great when paired with Natural Gas Geysers or Slickster ranches producing gas.
Build these in vented, cooled power stations. Route polluted water to water sieves for more clean water.
Solar Panels
Perfect for surface bases or space colonies. Solar power is the only completely passive, no-fuel generation.
- Pros: Zero resource consumption after being built; no pollution; ideal for stable power.
- Cons: Requires surface access; doesn’t work at night; demands heavy-watt wires for large arrays.
Store excess power in Jumbo Batteries or Smart Batteries for overnight use.
Steam Turbines
In the late game, Steam Turbines recover power from waste heat, especially when paired with aquatuners or volcano tamers.
- Pros: Reuses heat that would otherwise hurt your base; scalable.
- Cons: High resource investment; tricky to set up correctly; requires careful thermal management.
Most steam turbine setups need a constant source of high heat (like a volcano or overworked aquatuner) and an understanding of thermal tiles.
Battery Strategies
Batteries let you buffer ups and downs between steady production and peak usage.
- Small Batteries: Early and cheap, but leak power as heat.
- Jumbo Batteries: Larger capacity, still some leakage.
- Smart Batteries: Integrate perfectly with automation; only discharge when below thresholds—reducing waste and letting coal/hydrogen generators shut off.
Always put your batteries in insulated rooms and cool them down with a fan, chill box, or ice chunk if you spot overheating issues.
Tips for Reliable Power
- Separate Circuits: Don’t overload standard wires! Split heavy machinery onto its own line using heavy-watt wire.
- Smart Automation: Use smart batteries or sensors to toggle generators instead of running them 24/7.
- Redundancy: Keep at least two separate fuel types online in case you run out or a geyser goes dormant.
- Cool Down: Excess heat from power plants can wilt crops and spike dupe stress; wall off power rooms and add cooling as needed.
- Prioritize Critical Loads: Oxygen generation and life support get power before creature comforts or automation.
Summary: Building a Strong Power Backbone
Start simple with hamster wheels, then grow into coal and hydrogen as tech allows. Manage circuits to prevent overload, buffer energy with batteries, and use automation to only generate what you need. As your colony grows, mix in high-yield options like petroleum, natural gas, and solar to keep up with heavier power demands. Address heat and pollution, and always have backups in place so your lights never flicker—no matter how wild the asteroid gets.
Duplicant Stress
Managing your duplicants’ stress is a big part of keeping your colony running smoothly in Oxygen Not Included. Stressed-out dupes can spiral from whining to breaking machines, vomiting, or binge-eating supplies. Understanding why stress happens, how it spreads, and the most effective fixes can mean the difference between a happy base and a one-way ticket to disaster.
What Causes Duplicant Stress?
Stress builds when your duplicants have a rough time. It’s tracked on their info panel as a percentage (0–100%). If it hits 100%, expect a stress reaction—and nobody wants a Peed Pants debuff in the dinner hall. Here are some of the most common sources:
- Low Morale: Morale tracks how nice your dupes’ lives are versus their expectations. With each skill learned, expectations go up. If you don’t give better food, better beds, and decorative spaces, morale drops, and stress spikes.
- Bad Environments: Factors include extreme temperatures, breathing yucky air (like CO₂), slimelung exposure, or standing in polluted water.
- Lack of Sleep: Dupe beds placed in loud areas (like next to machinery) or without a dedicated bedroom can leave their sleep interrupted.
- Messy Facilities: No toilets, or toilets filled with germs, crank up unhappiness.
- Long Commutes and Overwork: Duplicants with never-ending work shifts, long walks to job sites, or non-optimized schedules can feel overburdened fast.
- Personal Traits: Some dupes are naturally more anxious, leading them to rack up stress much faster.
The Impact of Stress Reactions
Each duplicant has a specific stress reaction—shown on their profile—that triggers when they top out at 100%. These reactions can cause big problems:
- Binge Eater: Raids your food storage and wipes out a week's supply of BBQ in a night.
- Vomiter: Leaves slicks of polluted water all over your machinery, risking food poisoning.
- Destructive: Punches valuable machines and wires, causing costly downtime.
- Ugly Crier: Not really harmful, but can lower nearby morale further.
A stress reaction doesn’t just affect one dupe—others might see it, get grossed out, and start stressing themselves, setting off a chain reaction. Keep stress below 60% to avoid the risk.
Cutting Down on Duplicant Stress
Smart base design and daily routines keep stress low. Here’s what works best:
1. Meet (or Beat) Morale Expectations
- Better Food: Start with nutrient bars, then upgrade to mush fry, pickled meal, and eventually barbecue or pepper bread.
- Decorator’s Touch: Add blank canvas art, sculpting blocks, or even a couple of flower pots. The more masterpiece art near mess halls and sleeping quarters, the happier dupes become.
- Comfy Beds: Swapping cots for comfy beds increases morale significantly.
- Rec Rooms and Massage Clinics: Build rooms with fun stuff (like water coolers and massage tables) to add flat morale bonuses.
2. Maintain Clean, Well-Defined Spaces
Assign separate bedrooms, schedule downtime, and make sure bathrooms, mess halls, and rec rooms are actually rooms (check room overlay for proper size/requirements).
3. Reduce Unhygienic and Dangerous Conditions
- No Germs in Food or Water: Use sinks, wash basins, and water sieves.
- Keep Air Fresh: Use deodorizers and prioritize oxygen distribution where dupes work and sleep.
- Tame Temperature Extremes: Use insulated tiles and avoid placing beds or dining tables near hot machinery.
4. Handle Workload and Schedules
- Breaks Matter: Use the schedule screen to give each duplicant some downtime or bedtime away from noisy zones.
- Optimize Commutes: Group beds, dining, hygiene, and job stations together. Use fire poles for faster travel.
Stress Relievers: What Actually Works
When stress does get high, you’ve got a few quick-release valves:
- Massage Tables: These consume power, but relax stressed dupes when you set a stress threshold. Place them in rooms with high decor and oxygen.
- New Foods: Surprising dupes with a quality meal jumps morale, acting as a direct reset.
- Temporary Schedule Tweaks: Add more downtime or decrease work shifts until stress drops.
- Hospital or Sick Bay Assignments: Being treated for disease or injury in a hospital with better bedding can help lower stress passively.
Spotting Stress Before It’s a Problem
- Monitor Duplicant Info Panel: Sort by stress percentage to catch spikes.
- Check Morale: If you see red exclamation marks next to dupes, they’re not meeting morale requirements.
- Watch for “Interrupted Sleep” or Low Oxygen Traits: Address bad room placements, missing air flow, or schedule bottlenecks.
Long-Term Solutions
As your colony advances:
- Automate Grunt Work: Use sweepers, conveyor belts, and auto-sweepers to reduce dupe workloads.
- Specialize Jobs: Only train up skills needed for each dupe to avoid skyrocketing expectations too quickly.
- Expand Decor Rating: Unlock higher-tier decor with paintings, mosaic floors, or sculpture masterpieces.
Wrapping Up: Happy Dupes, Happy Base
Keep tabs on morale, design restful spaces, and nip stressors in the bud before chaos hits. Managing duplicant stress gets easier with automation and good base planning—and a few steaks or pretty pictures never hurt. When your dupes are calm and content, you’ll notice fewer breakdowns, better efficiency, and a whole lot less poop where it doesn’t belong.