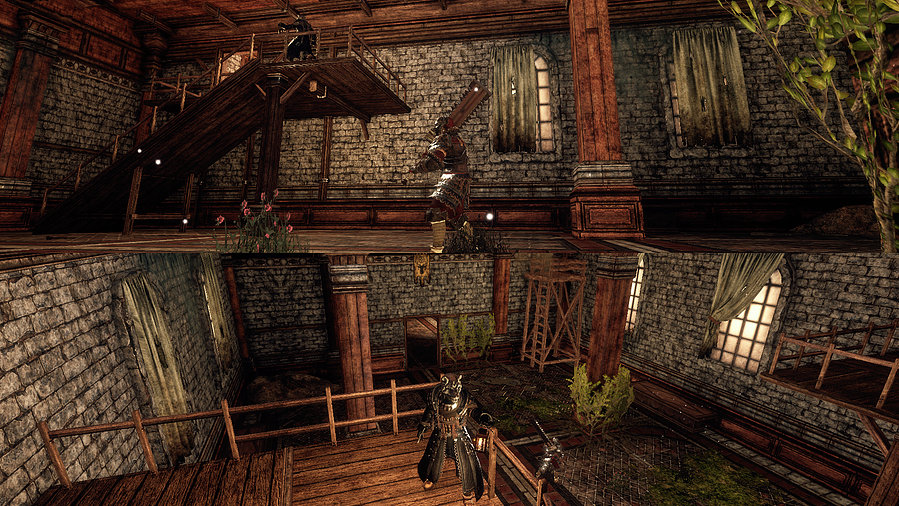
Outward Beginner's Guide
Master combat, survive harsh environments, wield magic effectively, explore confidently, and manage your health in this Outward beginner's guide.
When you're just starting out in Outward, it can feel surprisingly tough--even a bit unforgiving--at first. Unlike many role-playing games, Outward doesn't hold your hand; it puts you directly into a world where survival counts just as much as exploration and combat. You've probably noticed by now that managing factors like hunger, thirst, weather, and rest can become just as critical as winning battles or finding treasure. There's a lot to take in, especially if you're new to games that emphasize self-reliance over heroic fantasy. But don't worry; once you become familiar with some basic mechanics and how to manage your character, you'll start feeling more comfortable in no time.
Understanding the Combat Basics
In Outward, jumping into fights without planning can get you injured--or worse, lose you valuable gear and resources. Here, victory often depends less on raw strength and more on timing, positioning, and smart decisions. Let's look at some essential strategies that'll help you survive and win more battles.
Stamina Management: Know Your Limits
Stamina affects almost everything you do in a fight--swinging weapons, dodging enemy attacks, and blocking incoming damage all draw from this precious resource. If your stamina drops too low, you'll become slowed and open to enemy attacks. To avoid getting yourself into trouble, make sure you:
- Don't spam attacks: It's tempting to button-mash, especially when enemies close in, but each action counts--reserve your stamina carefully.
- Dodge only when necessary: Dodging quickly burns stamina. Get familiar with enemy attack patterns so you can time your dodges wisely.
- Pause attacks to recharge stamina: After landing successful hits, step back briefly. Let stamina recharge by taking breaks between each rush of strikes.
Timing is Everything: Balanced Attack and Defense
Combat rewards patience and observation. Going in aggressively without thought usually doesn't end well. Stay calm and watch your enemy's movements attentively:
- Watch for Patterns: Most enemies clearly broadcast their moves. Wait until they finish attacking, then counterattack.
- Use Blocks and Parry Efficiently: Blocking and parrying save lives. Shields absorb more damage but require careful stamina tracking. Parrying requires precise timing but opens up enemies for major damage. Practice both to find your comfort zone.
- Avoid Being Surrounded: Pull single opponents away from groups. Retreat to safer ground whenever multiple enemies approach you. Outnumbered encounters rarely end up well for newcomers.
Tactics and Weapon Choice
Weapons and armor greatly influence your fighting style. Knowing their strengths and weaknesses helps you choose wisely based on your own preferences.
Find Your Fighting Style
Experiment early. Weapons differ drastically in speed, damage, and range. Here's a quick breakdown:
- One-handed weapons (swords, maces, axes): Faster but lower damage. Good for quick reaction moves, pairing well with shields and agile dodging.
- Two-handed weapons (halberds, greatswords, greataxes): Heavy-hitters that dish out massive damage but drain stamina quickly and move slowly.
- Spears & Polearms: Longer reach keeps enemies at bay. Handy when you prefer distance. Less damage per individual hit but safer positioning.
Take the time to test each category. No single weapon type fits everyone equally. See what feels right and matches your playstyle best.
Armor: Mobility vs Protection
Getting overly ambitious with heavy armor early on can backfire. Heavy armor indeed keeps you safe from significant hits, but you'll move slower and lose stamina quicker. Light armor provides speed and mobility, vital for quick dodging, but leaves you more exposed.
Consider your choice carefully:
- Light Armor: Fast, agile fighting, perfect for staying mobile but takes serious damage if hit directly.
- Medium Armor: Offers balanced protection and agility. Good choice as you learn the ropes.
- Heavy Armor: Maximum defense but heavy stamina costs and reduced dodge effectiveness. Best when you master timing and positioning in battle.
Magic and Preparations
Combat isn't just about sword swings and dodging. Proper preparation and magic usage often mean the difference between defeat and glory.
Buffs, Food, and Potions
Don't underestimate preparation before a fight. Outward encourages crafting buffs and consumables, and it genuinely pays off:
- Food buffs: Eating cooked meals or special dishes temporarily increases strength, health regeneration speed, or resistances. Always have a few cooked dishes in inventory ready when facing a hard opponent.
- Potions and Bandages: Health potions help mid-battle; bandages restore health after combat. Stash healing and stamina potions before venturing into unknown territory.
- Weapon Enchantments: Temporary coatings, like poison or elemental damage, help wear down durable enemies faster. Combine weapon buffs with elemental weaknesses for maximum damage.
Magic: Less Raw Power, More Utility
In Outward, magic isn't typically about brute-force fireballs or lightning. Instead, magic offers utility, strategic opportunities, and battlefield control:
- Runes and Sigils: Casting specific runes within magical circles creates powerful special effects. Tricky at first, but devastating once mastered (e.g., the Fire Sigil to incinerate stepping enemies).
- Support Magic: Learn spells like healing or protective charms to sustain survival. Defensive and support spells can quickly turn tides of battle.
If magic appeals to you, prepare early by acquiring minor mana points at Leyline Conflux. Magic can complement melee beautifully when executed correctly.
Pick Your Battles Wisely
There's nothing wrong with avoiding a fight altogether. Outward isn't always forgiving, and sometimes the smartest tactic is to sidestep a better-equipped or too-numerous enemy entirely. Return well-equipped later--or don't return at all! Retreat when overwhelmed--the game rewards thoughtful caution over reckless bravery.
Learning Outward's combat comes down to patience, preparation, timing, and knowing your toolbox. Trying these battles tested strategies will help you quickly improve, surviving the harsh lands and tackling enemies with confidence.
Wilderness Survival: Staying Alive Out There
Sure, knowing your way around weapons and spells is awesome, but in Outward, just making it through a chilly night or a long trip without collapsing from exhaustion is half the battle. Survival isn't just a neat little side-mechanic--it's literally life or death. Master these essentials early; you'll thank yourself later.
Keep an Eye on Your Bars
You'll quickly notice three key bars holding your adventure together: Health, Stamina, and Mana. It's common sense--let Health drop, and you're toast; let Stamina hit zero mid-fight, and you're a sitting duck. Even Mana has its quirks. Casting spells repeatedly lowers your maximum mana temporarily unless recharged by special items or sleep.
In Outward, none of these regenerate on their own--no quick auto-heal magic here. Every injury, tired dash, or spent spell takes dedicated effort or resources to recover from. Understanding these three bars helps you make better decisions, so manage your resources wisely.
Food and Drink Aren't Optional
You're going to need steady nourishment and hydration. Trust me on this; it's not some optional game fluff. Hunger and thirst directly impact your ability to fight and survive.
Basics of Staying Fed
- Cook Food: Always have cooked meals ready--they aren't just healthier, they provide stamina bonuses, health regeneration, and extra resistances. Eating random raw food? Risk poisoning or disease. A simple campfire and cooking pot mean better meals and safer travels.
- Preserve Provisions: Raw foods decay over time. Salted meats or jerky last significantly longer, perfect for extended journeys when fresh materials become scarce.
Staying Hydrated
- Waterskin Essentials: Always carry at least one waterskin, filled whenever you find clean water. Keep an extra one handy, especially when traveling between distant locations.
- Boil Questionable Water: Drinking raw river water? Bad news--it frequently causes disease. Use a cooking pot, boil contaminated water to cleanse it. Diseases don't vanish overnight, and they come with nasty performance penalties you really don't want.
Rest is Non-Negotiable
Ever pull an all-nighter in another RPG, hacking monsters nonstop? Forget it--no chance here. Exhaustion hits hard and fast in Outward. Sleep deprivation lowers your maximum stamina and mana drastically, slows regeneration rates, and can even kill if left untreated. Your adventurer genuinely needs shut-eye.
- Carry a Bedroll or Tent: Tents are ideal (especially specialty ones offering extra benefits like faster stamina recovery or weather protection), but bedrolls fit easily in your pack. Don't find yourself stuck far from civilization without sleeping gear.
- Safe Sleeping Habits: Always consider safety before bedding down: open wilderness invites nighttime ambushes. Whenever possible, set up camp in safer locations like ruins, caves, or established campsites rather than unpacking out in the open.
Temperature Can End You
In Outward, weather can downright destroy careless adventurers. Desert heat drains stamina; icy snowfields bring freezing dangers that slowly sap your life. Smart clothing choices and proper gear preparation are lifesavers.
- Cold Weather: Pack warm garments lined with fur or wool. Brew warm tea, set campfires, or use torches regularly to create warmth. Letting body temperature fall too far means eventual hypothermia and death.
- Hot Weather: Switch to lighter, breathable clothing. Cool off periodically near sources of shade or water. Special desert attire and crafted teas reduce overheating effects drastically.
Preparation beats frantic scrambling. Simple extra clothing or special brews tucked in your bag mean you’re ready for whatever temperature curveballs the wilderness tosses your way.
Inventory, Inventory, Inventory
While carrying capacity in most RPGs just means slightly slower sprints when overloaded, Outward actively punishes overburdened adventurers. Excessive weight drastically slows movement, reduces dodge effectiveness, and burns stamina faster.
- Prioritize Wisely: Avoid hoarding useless junk loot. Focus on essentials: cooking gear, waterskin, healing items, potions, magic materials, and a compact set of dependable weapons/armor.
- Use a Backpack Smartly: Remember to drop your backpack during combat. Fighting with your pack on greatly limits your dodge speed and effectiveness. Drop it, defeat enemies, then pick it back up afterward.
Diseases and Status Effects: Don't Push Your Luck
Diseases, poison, cold, hunger--status effects add dangerous penalties that snowball quickly if left unchecked. Ignoring them becomes your downfall.
- Bandages and Medicine: Carry simple crafted or purchased cures for common ailments--such as antidotes for poison, medicinal teas for disease, or bandages for bleeding. Don't let a simple illness evolve into a fatal handicap.
- Take Action Immediately: Once symptoms arise, pause and assess the harm. Either use medical items straightaway or retreat somewhere safe until conditions normalize. Never push onward recklessly while severely impaired.
Preparation Beats Bravery Every Time
Rushed adventures without comprehensive preparation nearly never end well. Outward doesn't reward brute force--it rewards patience, planning, and respect for your limits.
What's the big takeaway here? No heroics. If conditions get dicey, back off. Gather resources, heal up, and reorganize your gear. Playing smart, pacing yourself, and treating survival seriously keep you alive far more reliably than reckless courage.
Master these essentials to endure harsh environments and battles Outward throws your way. Survival isn't glamorous--but it's absolutely necessary. Understanding these basics empowers confident journeys, fewer frantic struggles, and much longer lives.
Magic and Spellcasting
Feeling drawn to magic? I don't blame you--Outward makes spellcasting genuinely rewarding. Magic in this game isn't about spamming fireballs endlessly or blowing enemies apart effortlessly. It's about preparation, strategy, and patience. It takes real practice, actual trade-offs, and some clever thinking to unlock the true potential. So pull up your robes, since spellcasting in Outward is refreshingly unique.
How Magic Works in Outward
Magic is powerful but limited by some unique rules. Before casting a single spell, your character must travel to a mountain called Conflux Mountain in the center of Chersonese. This place unlocks your mana, the resource used for spellcasting. But first, you have to sacrifice a portion of your health and stamina permanently to gain mana points. Yep, that's right--becoming magical means literally choosing magic at the expense of total physical prowess. Choose carefully how much mana to invest in; there's no way to reverse that decision.
In addition to using mana, many spells require different conditions or extra preparation. Often you'll need specific runes, casting circles, special gear (like magical tomes and staves), particular skill trees, or even careful positioning during battle. Outward makes spellcasting feel tactical rather than spammable.
Understanding Mana and Burnt Mana
Spending mana in Outward results not only in emptying your mana bar but leads to something called Burnt Mana. Every spell shrinks your usable mana, leaving behind darker sections indicating drained power. You can't access these darkened portions without special rest or by consuming specific potions or foods.
To prevent this "shadow" from overtaking your mana pool, prepare adequately:
- Sleep Smartly: Rest at tents or bedrolls to slowly regenerate Burnt Mana.
- Consume Special Items: Potions and teas like the Astral Potion or Turnip Potage effectively remove large amounts of Burnt Mana, returning resource potential quickly.
- Gear Matters: Certain enchanted armors, robes, or accessories slow Burnt Mana accumulation, making it easier to manage long magical encounters.
Burnt Mana means you can't mindlessly spam spells--you need to think carefully about resource availability during adventures.
Types of Spellcasting: Runes, Rituals, and More
Spellcasting in Outward isn't limited to just flinging elemental bolts. There are diverse ways to practice magic:
Rune Magic
Runes represent the linguistics of magic. To cast rune magic, you'll first need to unlock it from the Rune Sage trainer found in Berg. Runes don't create effects individually--instead, you combine two rune symbols in a specific sequence to cast a complete spell. Master these combinations and you can unleash powers like lightning bolts, traps, magical explosions, or armor spells. Rune magic is versatile, fast, and great for creative fighters who want flexibility.
Sigil Magic (Magic Circles)
Sigils are powerful casting circles placed on the ground. Once drawn, other spells or specific items interact with sigils to release new magical effects. For instance, cast a Fire Sigil, then ignite it with Spark or Flint and Steel to create massive flaming bursts scorching nearby enemies. Sigils need careful timing and positioning to succeed. Spells like Sigil of Fire, Wind, or Ice turn your battlefield into a strategically manipulated environment, perfect when you anticipate encounters.
Chakrams and Spellblades
Weapon specialists won't feel left out with chakram and spellblade skills. Chakrams are melee-range weapons empowered magically by specific talents. Spellblade skills augment melee weapons, temporarily giving your swords or axes elemental powers like ice, fire, or lightning. Perfect if magic interests you, yet you'd still like solid melee usefulness. Visit specialized trainers like the Philosopher in Monsoon or the Spellblade instructors to open these paths.
Magic Trainers and Unlocking Spell Trees
Magic doesn't just appear spontaneously--you'll need skilled teachers scattered across Aurai to learn magical abilities.
- Rune Sages: Found in Berg, unlocking rune magic combinations.
- Philosopher (Chakram Master): In Monsoon, teaches Chakram techniques and magical melee prowess.
- Spellblade Trainers: Available in Monsoon or Berg to teach elemental enchantments and weapon buffs.
- Cabal Hermit: Near Ghost Pass in Chersonese, this mysterious figure offers powerful wind spells and unique magical skills.
Different trainers sell valuable passives, actives, and specialized skills that radically boost your magic potential. Find your favorite magic style and prioritize trainers accordingly to unlock tailored builds.
Crafting and Preparing for Spellcasting
Magic isn't instant gratification. Craft potions, teas, equipment, or gear specifically tailored to magical bonuses:
- Gear Up: Mage robes or robes of mana reduce your mana consumption, letting you cast longer and stronger.
- Stock on Potions: Astral potions rapidly recover burnt mana--always carry several.
- Prepare Foods: Certain dishes grant temporary mana restoration buffs or boost maximum mana points. Jerky won't cut it--you want crafted meals like soothing teas or mana-restoring dishes.
Spellcasting in Outward rewards planners and preppers. Don't charge ahead recklessly; prepare your spells and gear smartly for smoother, more manageable fights.
Magical Combat Strategies
Spellcasters in Outward live or die by positioning, timing, and patience. Keep some ideas in mind:
- Position Wisely: Sigils require foresight--close enough to enemies without letting them get close enough to interrupt casting. Rune and Chakram casters should always judge safe distances.
- Crowd Control Saves Lives: Magical debuffs (freezing, burning, slow effects) buy precious time to position yourself or allies better.
- Combine Tactics: Magical enchantments can stack massively. For instance, laying down a Fire Sigil then combining Spark with rune attacks creates far deadlier combinations. Always experiment.
Outward rewards experimentation and creativity, especially with spellcasting. Magic makes competent but underprepared adventurers legends.
The Magic Mindset: Preparation and Patience
Magical characters shouldn't rush headfirst like warriors. Instead, think tactically: Is your mana sufficient? Do you have enough potions to refill your Burnt Mana? Are sigils in place before combat starts? Magic battles happen long before swords clash--visually inspect your surroundings, anticipate enemy positions, and position yourself confidently.
Conclusion: Spellcasting Is Unique, Powerful, and Rewarding
Outward's magic system demands commitment, creativity, and strategic thinking. It's challenging, rewarding, and refreshingly original compared to other RPG systems. Choosing the magical path means careful preparation and accepting limits--but offers versatile combat tools, satisfying progression, and engaging systems worth mastering. So gather your runes, brew your potions, and get ready to light up Aurai with some serious spell-slinging.
Questing and Exploration Tips
Outward doesn't spoon-feed players with glowing trails or cluttered mini-maps. Instead, quests and journeys depend on your curious mind and careful planning. Here's how to thrive when navigating Aurai's expansive lands and varied tasks.
Stock Up and Gear Prep Before Heading Out
It might feel tedious, but you'll thank yourself later for spending five extra minutes loading your bag with essentials. Potions, bandages, and cooked food all save lives. Pay special attention to:
- Water Skins: Always fill them at safe freshwater sources, since thirst quickly drains your stamina and health.
- Weather Protection: Dress according to your destination. Cold mountains require padded clothing or warming foods, while deserts roast you if you don't wear heat-resistant clothing or carry cooling supplies like cactus fruits.
- Lanterns and Torches: Safe travels require clear vision. Lanterns offer dependable hands-free lighting when affixed to backpacks. Craft and carry extra lantern oil to avoid getting lost in dark caves or nighttime travels.
Little preparations like these prevent the frustration of turning back moments before your destination, or worse, getting stranded in the wild.
Navigating Without Hand-Holding: Maps and Landmarks are Your Friends
Outward ditches map markers and quest arrows entirely. You're armed with just a simple, handwritten map of the world, forcing you to rely on landmarks for navigation. Keep these methods handy:
- Compass and Reference Points: Check your map repeatedly, aligning rivers, mountains, and ancient buildings. Use your compass located atop the screen to orient your movements correctly--remember, north always remains on-screen.
- Travel Guidance From NPCs: Listen to NPC descriptions carefully--they'll often give straightforward clues about directions or recognizable landmarks near quest locations.
- Landmarks as Guides: Never underestimate landmarks. A great stone arch, ruined tower, or notable statue means you're on track. Familiarise yourself with these iconic spots, since you'll pass them regularly.
Get comfortable matching your screen view to your rough map--soon it'll come naturally, and you'll rarely lose your way.
Managing Quest Timelines and Deadlines
Not every quest waits indefinitely for your convenience. Outward introduces quest timelines that impact your experience. Here's what you should remember:
- Check Quest Logs: The journal provides basic hints and quest statuses. Regularly refer to it when attempting longer quests that span days or locations, avoiding the risk of failing objectives.
- Prioritise Time-Sensitive Missions: Story missions, faction quests, or event-driven tasks often require swift action. Leaving towns at critical moments may result in missing important opportunities, rewards, or even entire segments of quests.
- Rest Strategically: Sleeping doesn't just heal; it passes valuable game time. Travel during daylight hours whenever possible, as landmarks stand clearer, enemies become easier to spot, and your overall questing efficiency raises significantly.
Smart time management prevents headaches. Keep track and don't be afraid to set aside minor distractions to tackle time-limited storylines and faction missions.
Exploration Rewards Curiosity and Caution Alike
Outward's landscape spreads far, packed full of secrets hiding in the wilderness. Not every corner holds riches, but those willing to risk uncertainty stand to gain both gear and knowledge:
- Hidden Loot and Supplies: Caches, secret chests, and remote camps often hold money, gear, advanced crafting materials, or even skill trainers. Investigating off-road paths almost always proves worthwhile.
- Danger and Vigilance: Of course, Aurai holds dangers behind picturesque hills and serene lakesides. Wildlife, raiders, and supernatural foes lurk silently--walk attentively with weapons or skills ready to deploy swiftly.
- Alternate Routes and Shortcuts: Outward features multiple pathways to connect regions. Seek hidden passageways, caves, or underground routes to shorten journeys significantly.
Exploration means striking that fine balance. Push cautiously enough to stay alive, boldly enough to gain meaningful rewards--use the environment smartly, and you'll quickly build confidence as a seasoned explorer.
Death Isn't the End: Expect & Prepare For Defeat
Outward stands apart when players die. Instead of simple reload screens, defeat offers unique random scenarios. Understanding how death works prevents panic and promotes readiness:
- Random Respawn Scenarios: After defeat, you might wake up hostage by bandits, carrying minimal gear; unconscious safely in town, rescued by locals; or isolated in an unfamiliar cave system. Scenarios change unpredictably, adjusting your experience each time.
- Insurance Stashes: Leave back-up items, supplies or money stored in towns or supply spots regularly. When things inevitably go sideways and equipment gets lost, a safety stash means recovery without total heartbreak.
- Learn From Defeats: Outward encourages reflection after losses. Carefully consider mistakes during combat, navigation or preparation to avoid repeating errors. It's okay to stumble, so focus less on frustration and more on applying lessons learned next time around.
Death feels unconventional and sometimes harsh in Outward--but recover smartly and adapt strategies afterwards, and those failures turn into breakthroughs.
Wrapping Up Your Questing Adventures
Questing and exploration in Outward reward attentive, resourceful players who enjoy mastering the game's survival emphasis and learning every landscape carefully. Clever preparations, practical navigation, smart time management, careful curiosity, and understanding death multiply your success chances tenfold. Keep this advice close and you'll find yourself thriving--moving from tentative newcomer to confident Aurei explorer in no time flat.
Staying Alive in Outward: Handling Health and Status Effects Like a Pro
There's more to surviving in Outward than just avoiding enemies. Your character's physical health and various states contribute significantly to your ability to succeed (or simply stay alive). Here's how to manage health and deal with common--and some annoying--status effects you'll encounter throughout Aurai.
Understanding Your Health Bar: Burnt Health Explained
You might notice your health bar doesn't work like typical RPGs. After taking damage, a chunk of that precious red health bar is often replaced by gray. That's "burnt health," meaning regular healing items like bandages or simple potions won't fully restore it.
To fully get your health back to normal, you must rest. Depending on your sleep environment and your level of tiredness, restoring burnt health could require anything from a short campsite nap to a comfy night's stay at an inn. Sleep in a safe area with higher-quality amenities to quickly and fully get rid of your burnt health.
Healing Items and Remedies: Know Your Options
Outward throws plenty of medicine your way--herbal teas, cooked meals, potions, bandages--and knowing which items to carry around can mean life or death.
-
Bandages and Simple Healing Items: Craft these from linen cloth to slowly regain health. Bandages require time, patience, and a safe spot away from danger--they won't save you mid-combat but help greatly afterwards.
-
Food and Meals: Cooked dishes and foods like grilled meat or stews offer passive health regeneration. Having at least a small supply of cooked food keeps your health steady during travel, reducing how often you turn to more expensive or complicated methods.
-
Life or Health Potions: These powerful items are ideal for tight situations or battles, providing more immediate healing. Since potions and advanced medicines cost more to craft or buy, use them sparingly and intentionally.
Carry a variety of healing options at all times. The more options you have, the better prepared you'll be for unexpected situations.
Status Effects Are Serious Business
You've probably already noticed how fast small inconveniences snowball into major setbacks. A simple cold or poison might initially seem manageable--until it slowly wrecks your adventure.
Here are a few common ailments, plus straightforward ways to handle them:
-
Cold and Illness:
Exposure to harsh, freezing weather can give your character a nasty cold, eating away your stamina and reducing regeneration rates. Counter this by dressing warmly, sipping Bitter Spicy Tea (crafted simply with water and Ochre Spice Beetle), or sleeping in warm shelters or inns. Don't underestimate cold--treat it quickly before sickness stacks up. -
Poisons:
Poison accumulates fast from traps, spitting creatures, or toxic gases hidden in caves. Without quick intervention, poison slowly chips away your health. Always keep antidotes handy (Antidote potions are reasonably easy to craft from Thick Oil and star mushrooms). Avoid combat until cured--letting poison tick down health mid-fight leads swiftly to defeat. -
Bleeding:
Enemies like bandits and wildlife often cause bleeding wounds. Ignoring bleeding gradually drains health, so stop it immediately with bandages--a cheap and simple remedy. Since bleeding is common, aim to keep several bandages accessible at all times. -
Overheating and Dehydration:
Desert crossings cause overheating, draining stamina and health rapidly. Drink waterskins regularly, cover yourself properly with heat-protective clothing, or consume heat-resistant meals and teas (like the refreshing Mineral Tea) to stay cool and hydrated. Plan carefully when traveling through hot areas. -
Infections:
If left untreated, infections severely limit stamina regeneration and overall combat effectiveness. Treat infections right away by drinking special teas (like Bitter Spicy Tea again--your trusty companion), potions, or seeking medical healers in towns.
Sleep Wisely: Catch Those 'Zzz's Strategically
Resting isn't purely about regaining burnt health. Sleep impacts health, stamina, and overall efficiency.
A good night's sleep in a secure location clears negative status effects, restores burnt health and stamina, and boosts your effectiveness heavily the next day. Choose your resting spots carefully: sleeping in the wilderness risks ambushes if you don't allocate enough time to "Guard" in the sleeping menu, while inns or guarded locations always provide peaceful sleep without ambush risk.
Balance sleep carefully against urgency. If you're recovering from multiple status effects or a tough fight, prioritize a restful spot. But if time presses, quick naps at safe-ish campsites are viable.
Prevention Beats Cure Every Time
To minimize tedious recoveries and costly medicines, approach every expedition practically and sensibly:
- Keep suitable gear for weather extremes and environment.
- Stockfood, bandages, water, and antidotes generously when leaving towns.
- Monitor weather and avoid unnecessary risk exposure.
- Use basic teas frequently--they're cheap, simple to craft, address multiple health issues, and keep you ready.
Taking a proactive approach is far easier on you--and your wallet--than scrambling desperately for medical supplies mid-journey.
Keeping Healthy Means Succeeding More Often
Managing health and status effects is just as pivotal as preparing gear and navigating landscapes. Outward isn't forgiving, but knowing how to keep yourself healthy positions you ahead of danger, ready to handle whatever Aurai throws your way.
A little advance preparation, quick reactions to ailments, strategic resting decisions, and always having cures handy transform a tedious challenge into rewarding survival. Follow these tips consistently, and you'll spend far less time nursing wounds and far more time enjoying Outward's incredible adventures.