Mount & Blade II: Bannerlord Combat and Warfare Guide
Master mounted combat, infantry tactics, siege strategies, weapon proficiency, and effective army composition in Mount & Blade II: Bannerlord.
Mount & Blade II: Bannerlord can often feel overwhelming at first glance--you've got sword fights to survive, sieges to organize, armies to command, and territories to manage all at once. Combat and warfare form the heart of the game, blending strategy, tactics, and raw fighting skills. Whether you're leading a cavalry charge across open plains, holding your shield wall steady under a volley of arrows, or maneuvering a siege tower through enemy fire, knowing how to effectively handle your forces and your weapon can make all the difference. Mastering these mechanics takes time and practice, but becoming comfortable with the rhythms of Bannerlord’s combat transforms battles from chaotic scrambles into engaging strategic challenges. Understanding how each soldier type behaves, how different weapons should be handled, and how terrain and formations can swing the tide is essential to becoming a successful warlord within Calradia.
Mounted Combat: Dominating the Battlefield from the Saddle
Mounted combat in Mount & Blade II: Bannerlord transforms the chaos of warfare into something exhilarating--and absolutely devastating if done correctly. Cavalry units aren't just there for looks. With the right knowledge and tactics, you can personally crush enemy formations, scatter infantry lines, and swiftly disrupt archers before they even know what's happening.
Let's break down what you need to know about fighting effectively while you're on horseback, from picking the right gear to perfecting your timing.
Picking the Right Horse and Equipment
First things first--your horse and weapon combo matters a lot more than you might think. Choosing gear that matches your fighting style is the difference between leading the charge or face-planting into a crowd of angry infantry.
Horses: Speed vs. Armor
In Bannerlord, mounts generally fall into two categories: speedy, maneuverable horses and powerful armored warhorses.
-
Fast Horses: Breeds like Steppe Horses or Desert Horses are quick, turning sharply and sprinting ahead. They're helpful for skirmish tactics, avoiding archers, chasing down fleeing troops, and harassing scattered enemies on open terrain. The downside? They're fragile and go down after a few direct hits.
-
Warhorses: Armored breeds, such as Imperial Chargers or Vlandian Coursers, are beasts bred specifically to handle frontline action. They won't win any races, but their thicker armor and extra health let you charge directly into enemy lines without immediately regretting it. If heavy cavalry charges are your style, go with this option.
Your choices should depend on what you're trying to achieve--do you want to stay mobile to strike quickly at isolated foes, or smash right through enemy ranks in a head-on charge?
Appropriate Weapons for Mounted Battles
Bannerlord lets you swing heavy axes from horseback, fire your bow while galloping at full tilt, and impale foot soldiers with lances. But to maximize your effectiveness, choosing the ideal weapon suited for mounted combat is key:
-
Lances and Spears: Nothing says cavalry warfare like skewering an unlucky foot soldier. Polearms give you reach and let you use the game's couched lance mechanic (lowering your spear into a fixed position, allowing physics to brutally amplify your strike). Master couched lance techniques and enemy troops will fear your approach.
-
Swords, Axes, and Maces: While shorter ranged, one-handed or two-handed blades and axes allow greater flexibility. You can slash enemies as you dash through their ranks. This is a solid choice if you prefer mobility but also want decent power.
-
Horse Archery: If you have a good bow, enough riding skill, and solid archery proficiency, horse archery lets you pepper enemy troops from a safe distance. While mastering the accuracy takes practice, a mounted archer can harass enemy infantry, thin enemy archers safely, and slow down cavalry chases behind friendly lines.
Mastering Mounted Combat Strategy
Once you have your horse set-up and the perfect equipment, it's time to master the strategies that'll help you dominate.
Timing and Positioning Are Everything
Keeping momentum matters because your damage output increases with the speed at which you strike. Whether you're wielding a lance or swinging a sword, hitting enemies while moving swiftly across the battlefield dramatically ramps up damage. For couched lance users especially, hitting an opponent at full gallop often instantly knocks out or kills enemy troops.
Timing your strikes requires practice. Anticipate your movement--and the enemy's--and start your swings in advance. Swinging too early or too late wastes momentum, decreasing or negating the damage bonus you'll get from high speed. Experimenting with practice dummies in training areas or smaller engagements helps dial in that timing.
Managing Your Mobility and Risks
Charging directly at enemy infantry might feel epic--and it definitely can be--but being reckless will end your ride quickly. Enemy spearmen and pikemen are particularly unforgiving if you ride straight into their wall of pointy sticks. Using lateral movement, circling enemy lines while delivering quick slashes, and swooping in at angles gives you a huge advantage with fewer risks.
When opposition cavalry appears on the field, your skill truly matters. Line yourself up behind enemy horses when possible; always avoid head-on collisions. Keep yourself in positions favorable for fast retreats if things go sour.
Using Cavalry Troops Effectively
Don't forget: mounted combat in Bannerlord is more than just your personal prowess. Managing your cavalry properly enhances your effectiveness substantially. Form your mounted troops into wedge or square formations to punch through infantry lines or into loose, scattered formations while chasing archers. Use the "Follow me" tactic to guide horse-mounted companions into carefully executed flanking moves.
Additionally, cavalry units are valuable when enforcing routs. After hammering the enemy infantry, let your mounted units hunt down fleeing enemies, dramatically reducing enemy survivors who might regroup later.
Riding Into Battle, Ready to Win
Mounted combat in Bannerlord is rewarding. Few gaming experiences match charging through opponents at full gallop, sending enemies flying at your feet. With practice, understanding your horse and equipment, mastering technique, and controlling troops effectively, you'll turn cavalry into the deadliest weapon in your army--one that can reliably tip battles in your favor.
Sure, mounted combat seems tricky at first glance. Yet once you get the hang of it, few things in Calradia will stop you. Infantry are the backbone of your army in Mount & Blade II: Bannerlord, and mastering infantry tactics can mean the difference between commanding a disciplined killing force or watching your foot soldiers melt away under enemy charges. Here are some tips and strategies to help you effectively lead infantry units on the battlefield.
Infantry Formations and Their Uses
Formation choice hugely influences your troops' combat effectiveness, morale, and survival on the battlefield. Using the right formation for the right situation is key.
Shield Wall: Defense Above All
The Shield Wall, where troops line up shield-to-shield, gives infantry strong protection against ranged units and cavalry charges. This formation works especially well against horse archers or enemy missile troops due to its enhanced coverage, greatly reducing casualties until the enemy closes distance. Opting for a Shield Wall can save your troops from repeated archer volleys early in a battle.
However, keep an eye on enemy infantry with heavier weapons--they might quickly carve up your stationary troop line. Consider shifting to a looser formation or breaking ranks briefly for offensive pushes in melee.
Line Formation: Balanced and Versatile
Setting your troops into a Line Formation is your basic, flexible face-off setup. It's not as protective as shield walls, but gives your soldiers more freedom of movement, making weapon swings easier and more effective in close quarters.
Line formations make excellent choices when you're confident your troops can win one-on-one melee duels or when you're pushing aggressively forward for quick confrontations. If enemy forces appear scattered or weakly formed, this is your best bet to quickly destroy them without giving ground.
Loose Formation: Against Archer Fire
Spreading infantry into Loose Formation sacrifices some melee power for defense against incoming projectiles. With infantry spaced further apart, enemy arrows and bolts will land harmlessly between your soldiers, dramatically reducing ranged damage.
Once safely in melee range, quickly switch to a tighter formation for full combat effectiveness. Loose Formation is primarily recommended to minimize casualties during an advance toward enemy ranged units, but it won't perform well in hand-to-hand combat.
Square Formation: Anti-Cavalry Powerhouse
This compact formation stacks infantry tight and deep into a defensive square or rectangle, covering each other's backs and sides. Squares are specifically designed to handle enemy cavalry charges. They take thorough advantage of polearms and spears, causing devastating damage to horse-mounted opponents. If enemy cavalry is aggressively circling or preparing to charge your line, quickly organizing infantry into squares can severely blunt their attack.
Be cautious though--square formations move more slowly and can become vulnerable to ranged fire, so don't commit to this option unless you're certain about cavalry danger.
Positioning and Terrain Matter (A Lot!)
Where and how you position infantry units decides the flow of battles just as much as your formations and tactics. Take advantage of terrain and surroundings--these can drastically shift battle outcomes, especially against superior forces.
Elevation Advantage
Keep infantry positioned uphill whenever possible. Enemies pushing uphill move slower, weakening their momentum, reducing blow effectiveness, and making them tired. Your soldiers strike downward, hitting enemies' legs and heads more easily. Higher ground also provides improved field-of-vision and ranged unit accuracy, giving your archers easy kills on approaching foes.
Natural Chokepoints
Use narrow passes, bridges, and canyon lanes as chokepoints for infantry engagements. This limits the enemy's advantage by forcing them into smaller spaces, creating opportunities even against superior forces by restricting their numbers and freedom of movement.
Obstacles and Natural Barriers
Position infantry units with protected flanks, such as lakes, rivers, large rocks, or steep terrain. These barriers deny enemies the opportunity to flank or surround your soldiers, improving survivability and morale.
Cohesion and Tactical Maneuvers
Commanders skilled at moving and rearranging troops gain huge advantages over rigid formations. Keeping soldiers cohesive through changing battle tactics lets them adapt more quickly to threats.
The Hold-and-Charge Tactic
Command your infantry to "Hold Position" initially, forcing enemy troops to approach your set defenses. As enemies approach your line, ordering a "Charge" breaks your infantry forward, catching foes unaware and dealing heavy losses regular battle lines cannot. This push often surprises attackers, breaking enemy morale and prompting their retreat.
The Hammer-and-Anvil Approach
Combine infantry with cavalry and ranged units for maximum effectiveness. Position your infantry as a solid defensive front--the anvil--and use cavalry or smaller infantry units on the side--the hammer--to quickly strike enemy flanks or rears.
Trapped between defensive infantry and aggressive, sudden punches from horsemen or lighter forces, the enemy quickly panics, resulting in an immediate routing. Executed properly, it crushes opponents, letting you swiftly dominate otherwise difficult engagements.
Utilizing Specialized Infantry Effectively
Not all infantry are created equally. Knowing unit types' specialties gives you a serious battlefield advantage.
Heavy Infantry: Shock and Staying Power
Units like Empire Legionaries, Khuzait Darkhan, or Vlandian Sergeants offer durable armor and fierce melee attack power. Place them at strategic spots or positions of intense fighting where stamina counts most, and watch them excel. Just ensure they have suitable support or they'll quickly be isolated.
Anti-Cavalry Specialists
Spearmen, pike troops, like Sturgian Spearmen or Battanians with polearms, are gems against enemy horses. Keep them ready in tight formations or squares whenever mounted charges threaten your lines, turning enemy cavalry into an expensive mistake.
Skirmishers and Light Infantry
Light infantry equipped with javelins or throwing axes, like the Imperial Menavliatons or Battanians’ Wildlings, perform great at troubling enemy shield walls, harassing heavier enemy units with thrown weapons while evading direct melee conflict. Keep them close to your heavier troops, protecting your more valuable fighters, and shift them around to pick away at enemy formations before melee combat fully starts.
Infantry Mastery for Victory
When commanded skillfully, infantry define the battle's rhythm. Understanding proper positioning, formations, and specialized units means you dictate the tempo--attacking fiercely or defending resolutely according to need. Infantry may lack cavalry's glamor, but their steadfast reliability wins wars in Bannerlord. Keep practicing these tactics, adapt to battlefield situations, and your foot soldiers will carry your banner to victory every time.
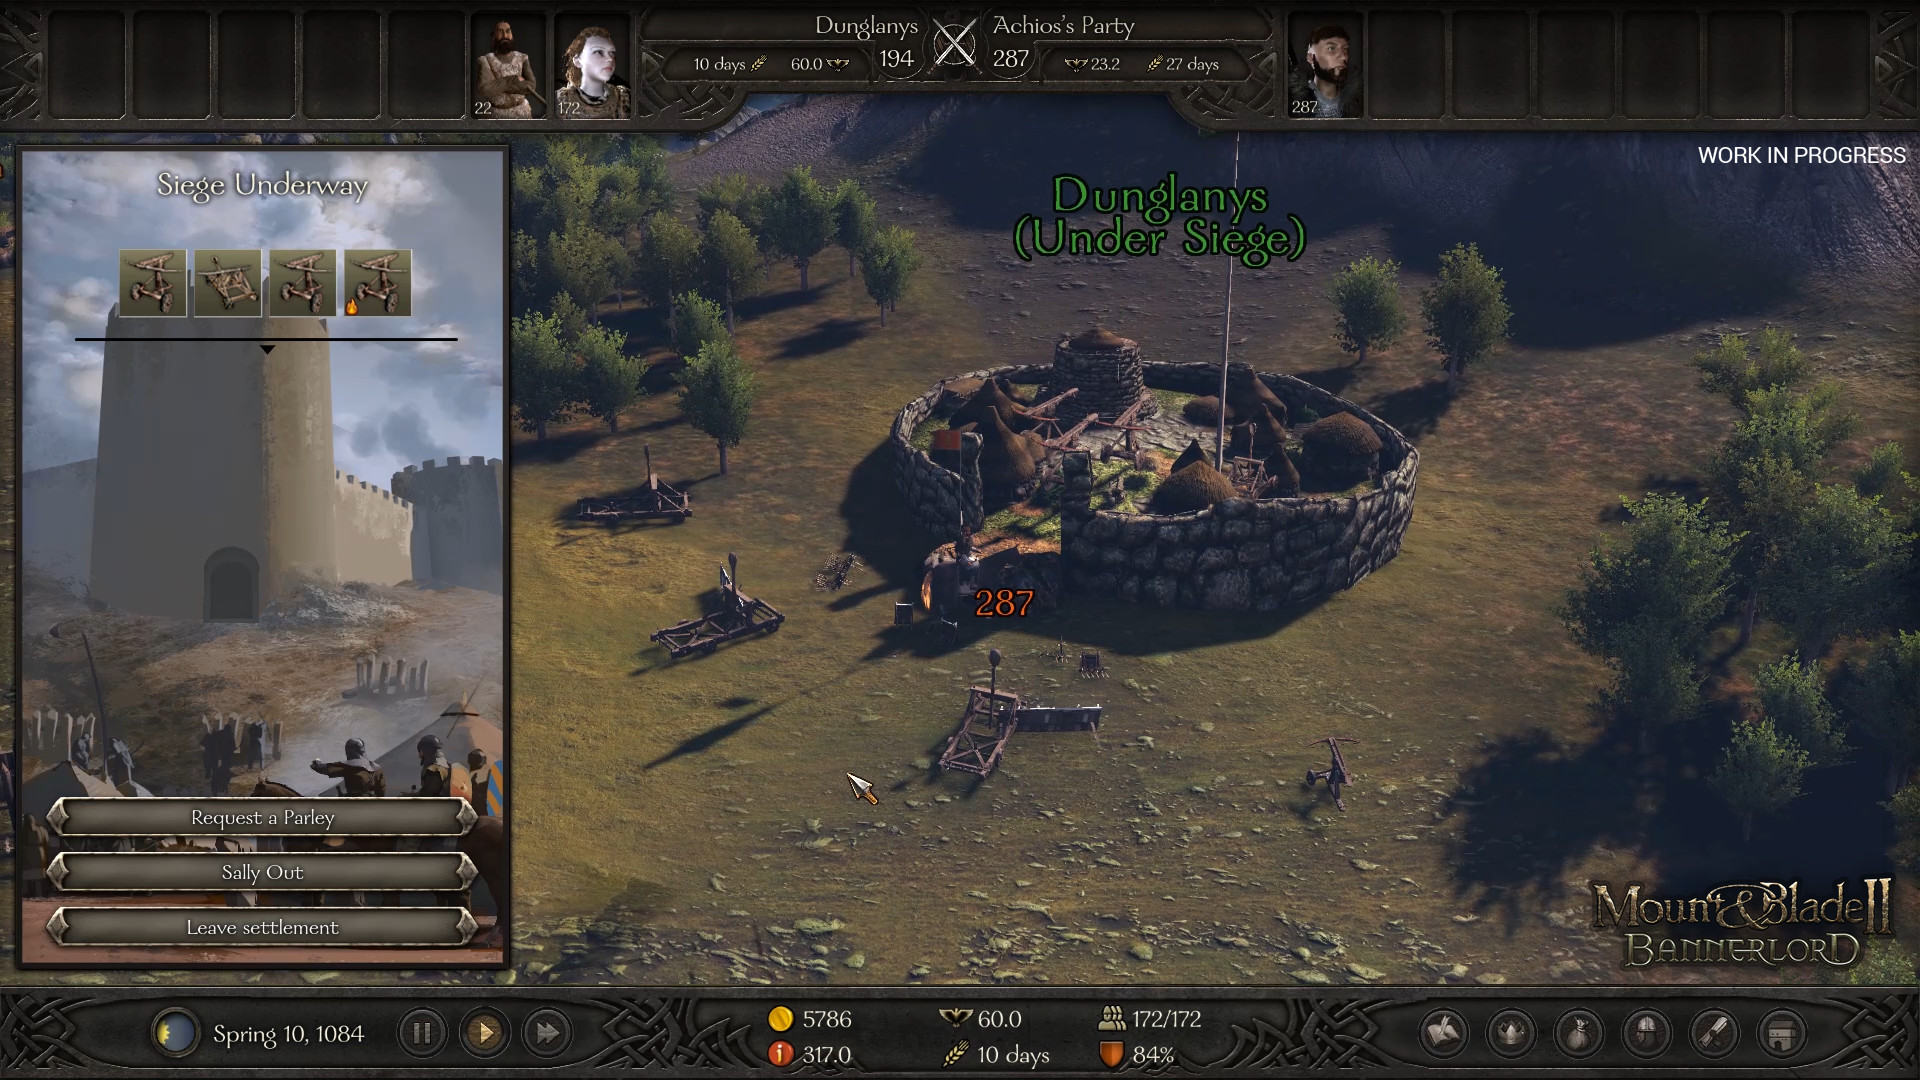
Siege Warfare: Breaking Walls and Storming Castles
Siege warfare in Mount & Blade II: Bannerlord is one of the game's most intense and rewarding experiences. Capturing fortified settlements requires thoughtful strategy, solid troop composition, and patience to succeed. Charging headfirst at castle walls usually leads to heavy losses--sometimes disastrously. Instead, let’s break down siege battles into distinct stages to give you the greatest chance of success.
Preparation: Building Siege Camps and Equipment
Before any fighting starts, attackers must establish a siege camp outside enemy walls. Once your siege camp is ready, you have the options to construct siege engines and battering equipment. Here's a quick overview:
-
Siege Ladders: Automatically available once you attack, these simple ladders let infantry reach castle ramparts. However, defenders can easily counter ladders, inflicting heavy casualties at the top.
-
Battering Rams: Ideal for breaking through a castle's main gate quickly, providing covered protection for infantry against ranged attacks. But rams move slowly, leaving troops vulnerable during their advance.
-
Siege Towers: Siege towers provide safer and faster access onto enemy walls when compared to ladders. Towers shield attackers from enemy archers and give you a more substantial foothold on ramparts. Towers take longer to build, but they're usually worth the wait.
-
Catapults, Ballistas, and Trebuchets: Siege artillery can drastically shift the power balance, destroying enemy defenses and diluting morale before your soldiers even step near the gates. Trebuchets inflict heavy damage to enemy defenses but require extended construction time.
Remember, creating siege weapons takes valuable in-game days. Meanwhile, enemies might call reinforcements or launch counter-attacks, so carefully balancing time spent making siege equipment versus attacking swiftly is essential.
Managing Morale and Attrition During Sieges
Maintaining your army’s morale throughout the siege plays a powerful role. Soldiers standing around waiting in siege camps gradually lose morale and suffer attrition--losses from being idle without supplies. Consider these actions to keep morale and troop numbers healthy:
- Frequently rotate fresh troops or release injured fellows to rest and recover in nearby towns.
- Keep army provisions stocked with high-quality foods and adequate supplies.
- Strike swiftly, especially in prolonged, drawn-out sieges; stalling too long risks morale losses and desertion.
Additionally, watch enemy morale carefully. Repeatedly attacking defenders with siege artillery weakens their resolve, eventually making your final assault significantly easier.
Assaulting the Walls: Executing the Attack Smartly
When it's time to launch your siege assault, careful timing and efficient use of your siege weapons come into full effect. First, utilize ranged units and siege artillery to eliminate archers and crossbowmen on enemy ramparts. Archers stationed at safe distances significantly reduce defenders' numbers and disrupt defensive formations.
When deploying siege towers or battering rams, combine them with sacrificial infantry units to limit high casualties. Your elite troop divisions should wait until your siege engines are properly engaged and gates begin to weaken.
Focus battering rams against main gates while siege towers or ladders simultaneously reach defended walls on multiple sides. These coordinated strikes overwhelm defenders, forcing them to divide their attention and weakening their defensive ability.
Defending Against Enemy Sieges: Holding Your Ground
Sometimes your towns and castles will find themselves under siege. In these moments, effective fortification and positioning are your best friends. Place ranged units atop towers and walls, maximizing their line-of-sight. Enemy siege engines become simple targets, reducing their effectiveness.
Defensive ballistas and catapults placed at gate entrances or key points inflict massive damage upon attackers as they're funneling into choke points. Also, place a group of infantry directly behind your gates, ready to engage charging attackers rushing inside once gates eventually fall.
Remember to rotate defenders during drawn-out sieges. Fatigue can quickly impair your soldiers' fighting ability, so rotating fresh forces into battle maintains combat effectiveness.
Post-Siege Management: Keeping What You've Earned
Capturing a castle or town doesn't end your siege experience. Immediately afterward, you'll have to manage your newly conquered location properly to solidify your gains. Station enough troops within castles to hold the territory against counterattack. Adjusting the garrison protects your new property while your primary army moves elsewhere.
Also, arranging steady food and supplies ensures happiness and prosperity inside settlements to lessen rebellions and unrest. Stay vigilant--recently captured towns might have loyalist nobles or peasants working against you, planning revolts or sabotage.
Final Thoughts: Practice Patience, Strategy, and Flexibility
Siege warfare presents a big challenge and demands careful strategy. Each assault becomes unique, with its own demands and details. Managing morale, deploying effective siege engines, alongside drawn-out and intense battles, create some of Bannerlord’s most memorable moments.
Master siege defense and offense equally, since this will repay your campaign with stability, prosperity, and dominance over enemy kingdoms. Mastering this aspect of Bannerlord takes strategy and experience, but when you finally see your banner waving proudly over that hard-fought castle wall, the effort is always worth the challenge.
Understanding Weapon Proficiency and Why It Matters
Weapon proficiency determines how good your character or companions are at using specific weapons in Mount & Blade II: Bannerlord. Simply put, proficiency reflects how skilled your character is in categories like bows, riding, polearms, throwing weapons, and swords. As your proficiency increases, you'll see noticeable improvements--including better accuracy, faster attack animations, increased damage, and smoother handling. Ignoring proficiency can make combat frustrating and particularly punishing in large-scale battles, whereas mastering it will turn good warriors into great ones.
How Weapon Proficiency Progresses
Gaining weapon proficiency happens naturally through experience gained during battles. Every swing you land, arrow you fire, or spear you thrust adds valuable experience that raises your proficiency in that particular category. Put simply: the more you fight with one type of weapon, the better you'll become with it.
Experience points tend to slow down dramatically as you achieve higher proficiency levels. While it's easy to lift a proficiency from zero to fifty, the climb from one hundred onwards takes progressively more effort. Because of this, it's smart to specialize early in your campaign. Stick mainly to the weapon categories you love best, allowing your warrior to become notably efficient in one or two weapon types rather than average at several.
Breaking Down Weapon Categories and Their Benefits
Bannerlord divides weapon proficiencies into clear-cut categories, each with unique advantages:
One-Handed Weapons
Quick, reliable, and versatile, one-handed swords, axes, and maces use a handy balance of attack speed and damage. They allow you to use shields effectively, offering solid defense against archers. Raising your proficiency here leads to faster strikes and improved handling that significantly boosts survival during messy melee engagements. Since many classes of units carry shields into battle, one-handed weapons stay among the most practical overall.
Two-Handed Weapons
If bigger damage appeals to you more than speed or defense, two-handed weapons like great axes and heavy swords are your ticket to seeing damage numbers soar. With better proficiency comes quicker attacks--even hefty two-handers can become fast enough to hit vulnerable enemy shields before they can react. These weapons are slower in general, leaving players vulnerable to archers, so having higher proficiency means shorter animations that lessen risk.
Polearms
Polearms offer deceptively devastating versatility. Spears, pikes, and halberds can be swung like large two-handers or swiftly thrust towards mounted foes. With high enough proficiency, long-range thrusting becomes exceptionally accurate, giving mounted warriors a deadly advantage versus infantry. For cavalry characters especially, polearm proficiency can define your combat style, damaging foes heavily on horseback charges and keeping melee opponents at bay.
Bows and Crossbows
For any warrior focusing on ranged combat, bow and crossbow proficiency changes everything. Increased skill helps you shoot straighter, reload quicker, and land deadly headshots consistently. While bows fire more quickly, crossbows pack heavier punches at the cost of slower-fire rates. Archers with high proficiency become deadly snipers, thinning enemy numbers from afar or peppering enemy shield walls waiting patiently for infantry engagement.
Thrown Weapons
Often underappreciated, thrown weapons pack surprising punch, often killing outright or severely weakening opponents before melee contact even occurs. Increasing proficiency here helps with accuracy and more quickly aimed throws, essential when an enemy cavalry charge draws near or you're outnumbered. Whether flinging throwing axes mid-charge or picking off soldiers from horseback with javelins, thrown proficiency allows rapid flexibility.
The Influence of Companions and Troops
While your player character tends to gain weapon proficiencies fastest due to your direct control, don't neglect your companions' proficiency growth. Assign companions and followers according to their skills--making dedicated cavalry or archery specialists--and outfit them accordingly. Much like you, their proficiency improves by actively fighting with their preferred weapons.
Additionally, troops vary heavily by faction and training levels, meaning army composition directly impacts unit effectiveness. Choosing units specialized in certain weapon types makes army tactics more effective--like Vlandian crossbows or Khuzait horse archers. Matching troop types with your personal battle style enhances how smoothly combat flows, providing more cohesive and sustainable battle formations.
Boosting Weapon Proficiency Quickly: Effective Tactics
Keeping your character skilled is straightforward enough, but smarter methods make leveling proficiencies easier:
-
Tournaments: Entering tournaments provides risk-free training with set weapons, increasing skill safely without risking death or serious injury.
-
Bandit Hunts and Looters: Early game opponents can become proficiency farms. Equip the weapon you're looking to level and target easy groups of bandits for consistent safe experience.
-
Sieges: Fighting tight-packed infantry in sieges gives concentrated exposure to melee proficiencies like one-handed or polearms, rapidly advancing your skills quickly if managed smartly.
-
Practice Arenas: Found in towns, these arenas allow sparring sessions without actual death or injury, useful for safely raising low-level proficiencies early in your playthrough or getting companions battle-ready quickly.
Final Thoughts on Weapon Proficiency
Mount & Blade II: Bannerlord’s combat system is unquestionably deep, but proficiency remains among its most straightforward aspects to master. Committing early--selecting weapon types carefully and fighting consistently with those chosen--quickly establishes a powerful warrior capable of dominating sprawling battlefields. High proficiency significantly affects survivability and deadliness, so don’t underestimate its value--choose your weapons wisely, fight smart, and let your combat skills do the rest.
Army Composition: Building Your Battlefield Dream Team
Getting your weapon proficiencies sorted helps you dominate their front lines individually, but conquering Calradia demands more than personal prowess alone. The army you march alongside significantly impacts battlefield victories, defeats, or outright disasters. Figuring out the ideal mix of troops shapes how your battles unfold--are you steamrolling infantry-heavy opponents or picking apart enemy cavalries from afar? Let's unpack the essentials of crafting an unstoppable bannerlord army.
Infantry: Your Frontline Shield Wall
Infantry forms the bulk of any Bannerlord army. These troops stay essential for holding enemy troops back, especially in pitched, head-to-head engagements. Selecting tough, shield-carrying infantry like the Empire Legionaries or Sturgian Heavy Axemen adds staying power, absorbing enemy archers' fire as your ranged or cavalry units do damage from safety. Shielded units are also crucial during sieges, blocking arrows while storming ladders or stairs.
But infantry compositions depend partly on your enemy. Facing horse archer-heavy squads like the Khuzaits? Deploy foot units heavily armored and ranged-resistant that can take punishment long enough to trap and defeat cavalry in close-up combat. Infantry can hold steady, funneling enemy charges into unfavorable positions.
Ranged Troops: The Engine Behind Your Victories
Well-positioned archers and crossbowmen often single-handedly sway Bannerlord battles, softening enemy ranks before melee combat. Archers like the Battanian Fian Champions serve as deadly long-distance specialists whose quick rate of fire whittles down enemy forces at frightening speeds. Crossbows, on the other side, offer higher impact projectiles, especially handy against heavily armored foes or mounted troops, though slower reload speeds demand thoughtful positioning.
To maximize ranged troop effectiveness, keep them safe behind infantry lines or atop hills and slopes. Elevated positions mean improved accuracy, greater range, and visibility. Armies actively offering space and protection to ranged troops get far more value from these units, eliminating major threats before touching blades.
Cavalry Units: Swift and Devastating Maneuvers
The shock troopers of the Bannerlord battlefield, cavalry brings devastating power and unmatched mobility into your formations. Used correctly, mounted troops like Vlandian Knights or Imperial Cataphracts shatter enemy infantry lines on impactful charges or chase fleeing enemy archers with ease. Quick repositioning through the field lets cavalry troops respond fast to changing battle scenarios--keeping rival cavalries at bay or eliminating isolated stragglers to lower overall threat.
Quality cavalry recruitment usually comes at steeper costs but proves worth every coin late-game. Elite cavalry units survive longer, inflict enormous casualties, and let you control engagement conditions--using your combined arms tactics to bait the enemy, then punishing with cavalry's bursty strikes.
Horse Archers: Control, Harass, and Outmaneuver
Arguably the most frustrating troops to face yet incredibly entertaining to command, horse archers like Khuzait Khan's Guards or Aserai Mameluke Cavalry disrupt enemy formations expertly. These fast and exceedingly versatile mounted archers move rapidly across battlefields, continuously harassing larger enemy forces, eroding morale, and thinning numbers before bigger engagements begin.
Though powerful, horse archers depend entirely on careful micro-management. Actively circle them safely near enemy flanks, attacking targets of opportunity without becoming trapped by infantry's spears or rival cavalry forces. Horse archers excel at wearing opponents down steadily--often tipping closely matched battles toward victory through patience and positioning.
Finding the Right Mix: Adapting to Your Playstyle
There isn't a universally perfect Bannerlord army. Crafting your ideal forces means weighing your own playing style and enemies ahead:
-
Balanced Forces: A little bit of everything--solid infantry, reliable archers, decent cavalry--creates consistent battle success with flexible battlefield responses, particularly if facing varied opponents through the campaign.
-
Ranged Dominance: Heavy reliance on powerful archer forces demands infantry shields positioned smartly to screen return fire and give archers time to decimate enemy ranks from afar. Battanian or Empire players often fare strongly here, thriving with disciplined arrow fire backing solid defensive positions.
-
Cavalry Rush Tactics: Armies stacked with elite cavalry swiftly exploit terrain advantages, hilly geography, and rival positioning mistakes--wrecking foes quickly through repeated charges. Launching potent strikes on exposed enemy sides during battle chaos can cause entire ranks to collapse or rout.
-
Horse Archer Specialists: Khuzait players, notably, lean heavily into ranged cavalry tactics, slipping enemy attempts to counter easily. Armies mastering horse archers demand attentive battlefield micro but reward skillful commanders who maintain distance, continually breaking enemies apart piece by piece.
Efficiency and Logistics: Troop Maintenance Matters
Finally, match your ambitions carefully against economic realities. Elite units fight brilliantly--but chew through gold. Fielding costly troops exclusively risks bankrupting your treasury or limiting your campaigning capabilities.
Balance more affordable forces with selected elite companions, combining units effectively without wrecking finances. Keeping troops supplied with food, wages paid promptly, and maintaining high morale keeps your army at peak effectiveness. Thoughtful logistical planning goes hand-in-hand with battlefield success.
Army Composition: A Winning Formula
Simply put, Bannerlord army composition sets winners apart from losers. Thoughtfully choosing infantry, archers, cavalry, and horse archers creates versatile and powerful formations primed to handle Calradia's many battlefields. Know your strengths--adapt strategies as needed--and remember, troops fighting as a cohesive team under skilled commanders dominate enemies battle after battle.