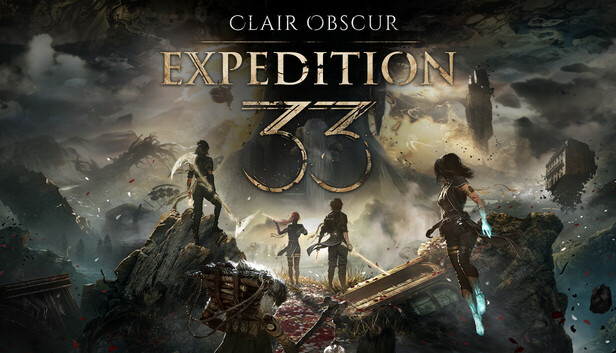
Clair Obscur: Expedition 33 Boss Guide: How to Beat Every Act 1 Boss
How to beat the early bosses in Clair Obscur Expedition 33, covering the Chevalier, Sakapatate, Visages, and the Stone Wave Cliffs finale.
Act 1 of Clair Obscur: Expedition 33 throws a handful of bosses at you pretty early, and a couple of them hit way harder than the regular Nevrons you've been scraping with. The knight enemies in Spring Meadows are where the parry timing finally clicks. The Sakapatate trio in the Ancient Sanctuary punishes bad target priority. And the act caps off at Stone Wave Cliffs with the Lampmaster, followed by a story beat that costs you Gustave. The good news is every one of these fights has a tell you can exploit, and a lot of the mean ones are optional, so you can always walk away and come back overleveled.
The Chevalier Fight Patterns and Weak Points
The knight line in Expedition 33 is the Lancelier, which is basically the game's chevalier, a spear-carrying Nevron you start bumping into all over Spring Meadows. The regular ones are trash mobs, but there's a boss version sitting in the Grand Meadow called the Chromatic Lancelier, and that's the scrap most players remember as the first real "can you actually beat this right now" fight.
Weak point and element
Shoot the black-and-blue orb resting on top of the Lancelier's head. That's the weak point, and Free Aiming it builds stagger fast. Element-wise, the whole line is weak to Ice and resists Earth, so have Lune (or whoever's holding your Ice skills) hit them with that. Earth damage more or less bounces off, so swap off it for these fights.
Reading the attacks
The Lancelier really only does two things as a basic enemy, and the tell lives in the weapon:
- Quick attack: a fast single poke for low physical damage. Short wind-up, hard to parry clean, just block or eat it.
- Slow attack: a big wind-up stab for moderate physical damage. Right before it lands, the weapon glows red. That red glow is your cue to parry or dodge.
The Chromatic version adds a third move, and it's the one that catches people. It's a two-hit combo: a slow strike with a red glow, followed by a second swing where the weapon glows yellow. The trap is dropping your guard after the first hit. You eat the yellow one every time if you do. Treat it as one long combo, not two separate attacks.
Beating the Chromatic Lancelier
It's optional, and it hits hard for the level you're likely sitting at when you first find it. There's no shame in walking past and coming back after a couple levels, since the main story doesn't require you to beat it. If you do fight it clean, the plan is simple: Ice damage, Free Aim the orb, parry the red-glow slow attacks, and respect the red-then-yellow combo.
The payoff is solid. Dropping the Chromatic Lancelier hands you the Augmented Attack Pictos (more on that in the last section, but it's a 50% base attack boost, which is huge this early), two Chroma Catalysts, five Colour of Lumina, and it bumps the Lanceram weapon to level 2. Worth doing before you leave Spring Meadows if you can manage it.
Oh, and the Chevalier name pops up again later as the Gold Chevalière, a tougher elite enemy hanging around Stone Wave Cliffs. Same knight theme, meaner stats. By then you'll know the drill.
The other Spring Meadows boss: Évêque
While you're in Spring Meadows you'll also run into the Évêque, the first enemy in the game that uses shields, so it's where the shield-breaking side of combat finally clicks. Weak to Ice, resists Earth, and the weak point is the glowing orb on its chest. Watch the phase triggers:
- At 75% health it "feels threatened" and starts swinging two spears at once.
- At 33% it enrages and slaps 8 shields onto itself.
- After enraging, it charges up a spell and guards its weak point with its hands. Two turns later it dumps nine spell instances of Earth damage, and the last one hits the whole party.
So the plan here is Ice damage, break shields with Free Aim on the chest orb before it can turtle up, and push it past 33% before the charge-up spell ruins you. When it summons two Abbest minions (it does this around the threatened phase), clean them up quick, because they add chip damage to your back line and they're Ice-weak too. Dropping the Évêque gets you the Cleansing Tint Pictos at level 2, five Chroma Catalysts, a Recoat, and 864 Chroma.
Sakapatate and Early Optional Boss Strategy
The Sakapatate fight waits for you in the Ancient Sanctuary, the rocky home of the Gestral village, and it's less one boss than a three-pack. As soon as you walk in you bump into the Robust Sakapatate, and its two cousins, the Ranger and the Catapult, are right there with it. It reads as optional because nothing forces a clean engagement, but you usually end up fighting at least part of it on the way through.
What all three share
Three things stay constant across the Sakapatate family, and they shape the whole scrap:
- They're weak to Fire and resist Lightning. So Fire is your friend here (Maelle's fire stance, Lune's fire skills), and Lightning skills are mostly wasted.
- When one dies, it Crashes into your whole party for high physical damage. Drop two on the same turn and you eat two crashes back to back, which can flat-out kill a squishy character. Spread your kills across turns.
- Each one has a breakable weak point you can Free Aim. Hitting it builds stagger and turns the fight in your favor.
The Robust Sakapatate (melee)
Weak point is its right arm, the one holding the weapon. The catch: it can raise its shield to cover that arm and set up a counterattack on whoever hits it next. So you either bait the shield raise and then swing, or focus the arm when the shield drops. Its moves are a wind-up slam that hits the whole party, a clunky four-part combo on one character, and a shield slam. Steady, heavy, physical. First kill on this one drops the Sakaram.
The Ranger Sakapatate (melee and ranged)
Weak point is the cannon arm. Two attacks to care about: a heavy sword hit that deals Lightning damage and applies Stun, and the cannon shot that deals Fire damage and applies Burn. The cannon arm is the priority target, because breaking it cuts the ranged pressure way down.
The Catapult Sakapatate (melee and ranged)
Weak point is the shoulders carrying the catapult. Its thing is a five-hit Lightning catapult that picks random characters and can Stun, plus a hidden-blade attack that applies Exhaust. Five random hits means it spreads damage around, which is annoying for keeping one tank healthy.
How to actually win it
So who do you drop first? Usually the Ranger or the Catapult, since the ranged pressure and status effects add up faster than the Robust one's melee swings. But the real rule is kill order across turns, not target choice. Bring Fire. Break the cannon arm and the shoulders with Free Aim. Kill them one at a time, on different turns, so the Crash damage doesn't stack into a party wipe. Pack a cleanse for the Stun, Burn, and Exhaust, because all three statuses show up here. The Cleansing Tint Pictos from the Évêque fight is basically made for this.
The other early optionals
A few more bosses sit in this stretch of the game:
- Goblu (Flying Waters, mandatory): the last boss of Flying Waters, weak to Lightning and resistant to Ice, with no weak point to Free Aim. Its gimmick is flowers. It grows them, and any flower you don't destroy with Free Aim turns into a Shield for Goblu. Near death it sprouts four more on top of the ones already out, up to eight total. So Free Aim the flowers every turn or you end up wailing on a shielded blob. Drops the Shape of Health, which you turn in at camp for a Healing Tint upgrade.
- Bourgeon and Chromatic Troubadour (Flying Waters, both optional): skippable, same tune as the Chromatic Lancelier.
- Chromatic Lancelier (Spring Meadows, optional): covered above.
Same rule applies to all the optional ones. They're tuned to hurt if you do them the second you spot them, and trivial if you come back five levels later. None lock anything important behind them, so skip-and-return is a perfectly good strategy.
The Visages Boss Mechanics Explained
Visages is one of the two Axons, the big story bosses tied to breaking the barrier around the Monolith, and it lives on its own island north of Old Lumière. It's also got a second name, "He Who Guards Truth With Lies," which is a pretty heavy hint about the gimmick. Element-wise it's weak to Fire and Dark and resists Ice.
The twist: Visages is a decoy
The fight has a built-in gotcha. Visages looks like the boss, but it's really a front. The actual Axon is the Mask Keeper hiding behind it. So you're not really fighting Visages so much as doing a warm-up round that exposes the real enemy.
Stage one: break the masks
Visages pulls its power from emotion masks (anger, joy, sadness), and you progress the fight by smashing their weak spots. There's a mirror involved. You Free Aim the weak points on one or both eyes of the masks to break them. Treat the masks as the objective, not Visages' health bar. Its final Ultimate is parryable, and landing that parry skips a chunk of damage, so save your timing for it.
The Mask Keeper
Before the real fight starts, you want to destroy the three Emotion Masks scattered around the island. That's the prep work. Then the Mask Keeper reveals itself as the true Axon. The tactic is simple to say and harder to do: parry its attacks. It's estimated to be weak to Dark, so Dark skills land hard, but the core mechanic is clean parries. The reward comes from the Keeper side, not the Visages decoy.
When to do it
Visages tends to come a little later in the trip for most players, since you need the mobility to reach its island first. Verso himself calls it the weaker and easier-to-reach of the two Axons, and the usual order people go in is Visages first, then Sirène. Whenever you can get out there, bring Fire and Dark, and have your parry timing warmed up, because the Keeper leans on it hard.
Gustave's Final Stand Boss Fight
This is the Act I finale, and it sits at Stone Wave Cliffs. It's really two things back to back: a proper boss fight against the Lampmaster, and then a story beat where Renoir shows up and Gustave falls. Knowing that going in changes how you play it.
The Lampmaster, phase one
The Lampmaster is a pile of arms holding a big sword and several Lamps, and it resists Light damage, so drop your Light skills for this and lean on physical, Dark, or anything else. Phase one moves:
- Jump attack: single physical hit on one character.
- Lamp attack: every active Lamp fires a Light projectile at a random character. More Lamps alive, more shots coming.
- Disrupt aim: three sword hits on one character, can apply Dizzy.
- Dark Explosion: one high-damage Dark hit that applies Exhaust.
The Lamps are a mechanic, not just flavor. If you put out all of them, the Lampmaster wastes a turn relighting them. That's a free breathing window, so knocking Lamps down is genuinely useful, not cleanup.
Phase two, the mean one
Around the phase flip it gets nastier:
- Arm attack: four physical hits on one character.
- Sword of Light: a giant Light blade that hits the entire party for a lot.
- Ball of Light: hits the whole party, and here's the kicker, you can only answer it with a Jump, not a parry. Anyone it tags gets Silenced.
Then there's the Lamp Trial. The Lampmaster does a ritual with its permanent Lamps to set up Sword of Light for the next turn. Your answer is to Free Aim those Lamps in the correct order. Do it right and you deal big Light damage back and cancel the Sword of Light entirely. That sequence is the single most important mechanic in the fight. Learn the order and the whole encounter opens up.
You're not meant to kill it here
The Lampmaster doesn't die in this first encounter. You're supposed to survive it, not burn it down, and it shows up again later in the Painting Workshop for the actual kill. So play to outlast it. Don't blow all your AP and items trying to push a health bar that isn't meant to hit zero.
After the fight: Gustave's last stand
Once the Lampmaster portion wraps, the story takes over. Renoir corners the expedition. Gustave buys time so Maelle can get out, and he's killed defending her. Verso holds Renoir off so the rest of the party, Lune, Sciel, and Esquie, can escape with Maelle. It's a set-piece as much as a fight, so go in knowing Gustave's run ends here. He only comes back much later, and only on one specific ending path.
The Stone Wave Cliffs Lampmaster drops the At Death's Door Pictos at level 8, a Shape of Life, three Polished Chroma Catalysts, a Recoat, and 3,160 Chroma. Grab those before the story pulls you forward.
Party Setup and Pictos for Act 1 Bosses
For most of Act I your roster is Gustave, Lune, and Maelle, with Sciel joining as you push forward. Gustave's your physical hitter. He swings with that Lumina arm of his, and he's also the guy who built the Lumina Converter with Lune, the device that turns defeated Nevron chroma into Pictos. Lune is your elemental coverage. Maelle brings stances, including fire and stone options. Sciel rounds things out once she's in.
Match the element to the boss
The single biggest lever in Act I is bringing the right element. The bosses are kind enough to telegraph it:
| Boss | Weak to | Resists | | --- | --- | --- | | Lancelier / Chromatic Lancelier | Ice | Earth | | Évêque | Ice | Earth | | Sakapatate trio | Fire | Lightning | | Goblu (Flying Waters) | Lightning | Ice | | Visages | Fire, Dark | Ice | | Lampmaster | none listed | Light |
So you pack Ice for Spring Meadows, Fire for the Ancient Sanctuary, Lightning for Flying Waters, and you keep Light off the menu for the Lampmaster. Simple, but it's the difference between a clean kill and chipping away forever.
How Pictos actually work
You can etch up to three Pictos on a character at once, and each one bumps a stat or two and carries a passive called a Lumina. The passives are the real prize. To unlock a Lumina for the whole roster, you master it by finishing four fights with that Pictos etched on someone. Once it's mastered, any character can slot it using Lumina Points (you get one per level, plus more by spending Colour of Lumina at camp). So the move is: grab a new Pictos, slap it on whoever, fight four trash packs, and now everyone can use the passive.
The Pictos worth grabbing in Act I
A few stand out for these specific fights:
- Augmented Attack (from the Chromatic Lancelier): +50% base attack damage. Put this on Gustave and watch normal attacks do real work. Probably the best early pickup in the act.
- Cleansing Tint (from the Évêque): your Healing Tints also wipe all status effects off the target. Carries you through the Sakapatate statuses and the Lampmaster's Dizzy and Silence.
- Auto Shell (from the Unfinished Hexga in Stone Wave Cliffs): pops Shell on the party for three turns at the start of a fight. Great for bursty openers like the Lampmaster.
- Defensive Mode (Stone Wave Cliffs): when hit, spend 1 AP to take 30% less damage. Only costs 1 Lumina Point, cheap and cheerful for a front character.
- At Death's Door (from the Lampmaster): +50% damage when you're below 10% HP. A last-ditch pick. It pairs with the Last Stand family of Pictos if you want to build around low HP, but that's a gambit, not a default.
- First Strike (Stone Wave Cliffs entrance): you play first. Speed-heavy and situationally very strong.
- Perilous Parry (from the Gold Chevalière): +1 AP on a successful parry, but you take double damage if you miss. Only run this if your parry timing is genuinely good.
A couple of loose tips
Save your Colour of Lumina for extra Lumina Points at camp rather than spending it loose. The passive slots are what carry a fight, so prioritize mastering Augmented Attack and Cleansing Tint early, since those two stay useful the entire act and beyond. And the Shape of Health item from Goblu isn't a Pictos, it's a camp upgrade for your Healing Tint, so cash it in at camp for a stronger heal rather than letting it gather dust in your bag.