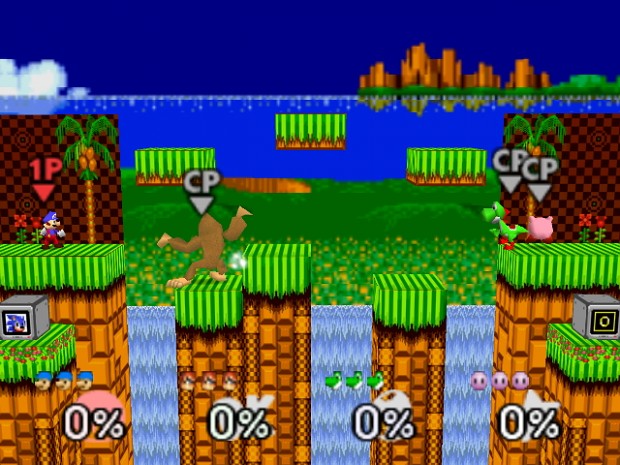
Super Smash Bros. Ultimate Character-Specific Strategies Guide
Master Super Smash Bros. Ultimate with key strategies, combos, and tips tailored for each character to dominate every matchup.
Anyone who’s spent some time with Super Smash Bros. Ultimate knows just picking up a favorite character is only the beginning. Every fighter in the game's huge roster brings their own quirks, strengths, and weaknesses to the table, making the path to mastering them a uniquely rewarding challenge. While experience and adaptation go a long way, there’s always more to learn about how particular moves, combos, and tendencies can affect the flow of a match—especially when the tiniest details can make all the difference. Taking a closer look at what sets each character apart can help whether you’re working on nailing down a main or just looking for a fresh perspective against some of the series’ trickier opponents.
What Makes Up a Moveset?
Every fighter in Super Smash Bros. Ultimate comes with a set of moves that feels like a toolkit, tailored to their style. Getting familiar with these moves isn’t just about memorizing button inputs—it’s about understanding when and why to use each one. Movesets break down into several main categories:
- Standard Attacks (Jab, Tilts)
- Smash Attacks
- Aerial Attacks
- Special Moves
- Grabs and Throws
- Dodges and Defensive Options
Let’s break these down one by one and look at what makes each unique.
Standard Attacks
You’ve got your jab (quick tap of the attack button), forward tilt, up tilt, and down tilt. Jabs are fast, rack up a little damage, and can reset to neutral. Forward tilts provide a longer-range poke. Up tilts often juggle, great for starting combos, especially against airborne opponents. Down tilts tend to trip or pop the enemy up for a follow-up.
Smash Attacks
These are your high-risk, high-reward finishers. Forward smash, up smash, and down smash require a quick flick and hold of the stick plus the attack button. They all have longer wind-up, but the payoff is considerable knockback. Since they’re slower, they’re best for punishing whiffs or catching landings.
Aerial Attacks
Take to the air, and you get five new moves: neutral air, forward air, back air, up air, and down air. Each has a purpose: neutral airs might build damage, forward/back are often used for spacing or finishing stocks, up airs juggle, and down airs spike or cover grounded foes. Spacing and timing matter here since aerials can win or lose you a neutral exchange.
Special Moves
Every character’s “B” moves are where the personality kicks in. Each gets:
- Neutral Special (B): Usually a signature move—think Mario’s Fireball or Samus’ Charge Shot.
- Side Special (Side + B): Often gives the fighter a unique tool for pressure, control, or closing distance (e.g., Fox’s Blaster, Bowser’s Flying Slam).
- Up Special (Up + B): These usually act as recovery moves but sometimes also have offensive uses—Meta Knight’s Shuttle Loop, for example.
- Down Special (Down + B): Can be anything from a counter (like Marth) to a shield or utility tool (like Snake’s bomb drop).
Specials sometimes have additional quirks, like charging or multiple uses in the air. Learn their properties—some can be interrupted, reflected, or used creatively offstage.
Throws and Grabs
Every fighter can grab, and each grab leads into forward, back, up, or down throws. Some throws combo at specific percents (Ness, Mario), set up edgeguards, or rack up quick damage. Spot-dodge on reaction to enemy grabs, and remember—pummels between throws add that bit of extra damage.
Dodges, Rolls, and Shields
Defensive moves include spot-dodges, rolls, and shields. While not technically attacks, they’re still part of a character’s “moveset.” Every character’s dodge/roll length and shield size differ a bit. Known for being strong? Expect slower dodges. Lighter, speedier characters usually have snappier defensive options.
Why Every Move Matters
Each move in a character’s kit isn’t just about hitting hard—there’s strategy in knowing when and how to use it. Is your jab safe on shield? Does your up smash hit through platforms? Do you have any “out of shield” options (attacks fast enough to punish after blocking)? Do you have a kill move you’re saving for the right moment?
Learning this stuff turns random swings into tactical decisions. For instance, Ryu’s specials rely on Street Fighter inputs for extra power, while Peach floats and chain aerials uniquely. Understanding frame data (start-up speed, active frames, end lag) can show why some moves beat out others or why you keep getting counter-hit.
The Importance of Range, Speed, and Power
Not every move hits the same. Some are fast but weak (Sheik’s forward air), some are slow but powerful (Ganondorf’s smash attacks), and some reach absurd distances (Corrin’s side smash, Simon’s whip). Playing to your character’s strengths—spacing with long pokes or looking for up-close brawling—is key.
Likewise, recovery moves define how aggressively you can chase offstage or escape bad spots. Knowing your recovery’s distance keeps you safe, while learning others’ weaknesses helps you secure stocks.
Adapting To Opponents
No two matchups are the same. Some characters stress close combat, others focus on projectiles. Adapting your moveset use—changing up attack patterns, mixing aerials with grounded options—keeps you unpredictable. Watching how top players use moves in creative ways is a shortcut to improving your own game.
Tips for Practicing Movesets
- Spend time in Training Mode. Test how far each move reaches and how fast it comes out.
- Practice combos. See which moves link at different percentages—true combos versus combos that can be air-dodged.
- Watch replay data. Look for missed opportunities or unsafe attacks.
- Play against human opponents. They punish patterns and force you to think.
- Focus on one move at a time. Try building habits with safe jabs or reliable out-of-shield attacks.
Wrapping Up
Digging into character movesets is how you unlock the real depth of Super Smash Bros. Ultimate. Instead of treating attacks as random swings, you’ll make every move count, setting yourself up for game-changing plays. Mastering the toolkit for your favorite fighter is the first step toward winning more matches and having more fun in every battle.
Combo Guide
Super Smash Bros. Ultimate's combo system gives every character at least a handful of bread-and-butter chains, but learning how to string attacks together is more than just pressing buttons fast. It’s about matching your moves to the situation—opponent’s percent, weight, DI (directional influence), and your character’s strengths. Let’s break down how combos work, what makes them “true” or “not,” some universal combos, and then peek at a few character-specific highlights.
How Combos Work in Smash Ultimate
A combo is simply a series of moves that connect before your opponent can escape, block, or dodge. In other fighting games, the idea is similar, but in Smash, hitstun and launch angles, as well as air mobility, make every sequence feel a little different.
True Combos vs. Strings
- True Combo: Each hit connects so tightly the opponent can’t act or air dodge out. Guaranteed damage—super useful for racking early percent or confirming a KO.
- String: A sequence where you guess or react to the opponent’s movement. Not guaranteed, but if you read them right, you get multiple hits.
The trick is recognizing when your sequence stops being a guaranteed combo and becomes a read-based string. At low percents, you’ll have more true combos; at high percents, follow-ups get riskier and depend more on catching air dodges or habits.
Universal Combos Everyone Should Know
While every character has unique follow-ups, a few combos work for most of the roster:
Jab to Grab
At low percent, some fighters' jabs link into a grab. Try a single jab into a dash grab or standing grab—great for surprising opponents mashing shield.
Down Throw into Aerial
So many characters—not just Mario and Ness—can chain a down throw into a short hop up air, back air, or even forward air. The follow-up depends on the enemy’s DI and percent, but testing this with your main is a must.
Up Tilt Chains
Characters like Mario, Kazuya, and Roy can use up tilt (especially under platforms) to juggle. Up tilt, up air, and up smash are the building blocks of many ladder combos and can lead into powerful finishers.
Neutral Air (Nair) Combos
A neutral air’s low knockback at early percent often links into jab, down tilt, or even another nair. Palutena, Mario, and Yoshi are famous for landing nair into up smash or grab.
Character-Specific Combo Examples
Let’s peek at how a few favorites rack up quick damage. Remember, timing, reactiveness, and spacing play a big role, so practice these links in Training Mode to build muscle memory.
Mario
- Down Throw → Up Air → Up Air: Bread-and-butter at low to mid-percent, can add a forward air spike for stylish finish.
- Up Air Chains: Start with an up tilt or up air, then juggle as long as you can, comboing off platforms or into up B for kill confirms.
Pikachu
- Down Throw → Nair → Down Tilt: Racks damage early and sets up edgeguards.
- Up Throw → Thunder: At kill percent, the classic up throw into Thunder smacks for an early stock.
Captain Falcon
- Down Throw → Knee (Forward Air): Classic staple, though the true window is tight.
- Up Air Chains: One up air flowing seamlessly into another is the Falcon special.
R.O.B
- Down Throw → Up Air or Up Smash: Famous “Beep Boop” kill confirm; watch enemy mash speed, reacts fastest at mid to high percents.
- Nair → Grab: Low percent combo setting up more damage or a tech chase.
Peach/Daisy
- Float Cancel Down Air → Forward Air: Floaty characters can link down air into forward air, great for punishing shields or aggressive options.
- Down Tilt → Up Air: Pops up heavier opponents for extended chains.
The Impact of Percent and Opponent DI
Every combo is subject to your opponent’s damage percent and their directional influence. Low percent often keeps them close, making follow-ups easier. As percent rises, the knockback increases, and your combos might stop working or need adjustments.
Pro Tip: When practicing, note the percent ranges where your bread-and-butter works. Against heavier fighters, strings often work for longer; lightweights fly out sooner, so you’ll have to adapt.
Practice and Experiment
Combos aren’t just about memorizing specific attacks. Adapt combos mid-match: watch how your opponent DI’s, note their most frequent panic options (like air dodge), and experiment with different follow-ups. Mix up timing and throw in pummels to keep things fresh.
Training Mode’s frame-by-frame playback and enemy “escape option” settings let you see which links are airtight and which are a coin toss. Some players will air dodge out, others will mash an attack—anticipate those responses to extend your string or go for a harder read.
Advanced Combo Tips
- Weak hits link easier: Moves that send at lower angles or with soft knockback can combo into finishers better than strong hits.
- Stage hazards and platforms help: Use Battlefield’s platforms for extended up air chains, or set up for tech chases on Smashville.
- Watch for DI Mix-Ups: Slight delays or directional changes between attacks can catch predictable defensive habits, leading to more damage.
Quick Reference: Combo Notation
- “>” means leads into: (Down Throw > Up Air)
- Fair: Forward Air, Bair: Back Air, Uair: Up Air, Nair: Neutral Air
- B&B: Bread-and-Butter, a high-percentage simple combo
- Percent range: The typical damage window where a combo works. (e.g., “U-Tilt > U-Air: 0-40%”)
Wrapping Up the Combo Game
Combos are a big part of upping your Smash Ultimate game. Start with a few bread-and-butter strings, then move to mixing up your approach and reading the opponent’s habits. Every character brings something different, so don’t be afraid to check guides, tweak your combos in training, and—most importantly—land those satisfying finishers. Good luck connecting your first zero-to-death!
Edge Guarding Techniques
Edge guarding is one of the biggest game-changers in Super Smash Bros. Ultimate. Landing an early KO by keeping your opponent offstage can turn the tide, and just one clever play at the ledge is often how top players win big tournaments. Let’s break down general edge guard concepts and then list some strong, character-specific ideas to keep your enemies from ever touching the stage again.
Understanding Edge Guarding
At its core, edge guarding is all about intercepting or blocking your opponent’s path back to the stage after you knock them off. Good edge guards capitalize on your rival’s limited recovery options: jumps, up specials, air dodges, and, for some, tethers or wall jumps. If you can predict their options, you can swat away stocks or force mistakes, leading to easy punishes.
There are two main types of edge guard approaches:
- On-Stage Edge Guarding: Waiting on the stage, near the ledge, and reacting to what your opponent does to recover.
- Off-Stage Edge Guarding: Jumping or falling offstage, attacking your opponent before they reach the ledge or blast zone.
Let’s walk through both.
On-Stage Edge Guarding
On-stage edge guards rely on patience and quick reflexes. Here are a couple of the main tricks:
F-Tilt and Down Tilt Pokes
A lot of characters have long-reaching forward tilts (F-Tilt) or down tilts (D-Tilt) that can poke below or along the edge when someone tries to recover. These moves are often fast and safe, covering common ledge grab invincibility timings.
Examples
- Lucina/Chrom: F-Tilt hits just low enough to catch ledge jumps or early up-Bs.
- Ridley: Down Tilt has a spiky hitbox that snags opponents peeking over the ledge.
Two-Framing
“Two-framing” means timing an attack to hit during the tiny window when a character’s ledge snap animation is specifically vulnerable. Most up specials become “two-frame vulnerable”—that is, you can hit them during the two frames where their hurtbox is just above the ledge before the actual grab.
Popular moves for two-framing
- Wolf F-Tilt: Spammable, with just enough reach to consistently punish recoveries.
- Palutena Down Tilt: Disjointed, with a sweetspot that keeps you safe while fishing for the two-frame window.
Ledge Trapping
If you feel risky edge guard plays aren’t going your way, ledge trapping is a safer bet. Instead of chasing the opponent offstage, stand by the ledge and cover their options as they climb or roll up. Many characters set up traps, projectiles, or big hitboxes to keep enemies cornered.
- Samus/Link: Drop a bomb or toss a boomerang, limiting jumps and forcing panic getups.
- Snake: Grenades or C4 near ledge put pressure on anyone stalling recovery.
Off-Stage Edge Guarding
Off-stage edge guards can be riskier, but they’re the best way to secure early KOs on characters with poor recoveries.
Using Aerials Offstage
Most fighters use their back air (Bair), forward air (Fair), or neutral air (Nair) for covering recovery paths.
- Mario: Nair and Back Air are fast, perfect for swatting anyone trying to sneak back.
- Lucina: Fair slices through nearly all recoveries, especially helpful vs. springy up-Bs.
- Ganondorf: Down Air is slow but spikes super hard if it lands.
Edge Guarding with Meteor Smashes (Spikes)
Some aerials spike (meteor smash), sending foes directly down. These are high reward but risky, as whiffing a spike can leave you offstage. Only use when you have a jump and your own recovery is safe.
Characters with spike potential
- Mario Forward Air: “The Dunk."
- Pichu/Pikachu Down Air: Quick spike; excellent against horizontal recoveries.
- Captain Falcon Down Air: If you time it right, goodbye stock.
Edge Guarding with Projectiles
Some fighters have projectiles that force awkward air dodge timing or snipe recoveries.
- Samus: Charge Shot discourages linear up Bs.
- Toon Link: Arrows and bombs disrupt all sorts of recoveries and force high/low approaches.
- Falco: Laser knocks enemies out of jumps or even snipes tethers.
Drag-Down and Rising Aerials
A few characters can “drag down” with certain aerials (multi-hit moves that pull enemies downward), letting them follow up with more pressure or another hit.
- Joker: Nair can drag foes further away from safety, setting up a footstool or back air.
- Pikachu: Short hop Nair -> footstool -> Thunder can clear stocks at low percents.
Character-Specific Edge Guard Highlights
Mario
- Cape reverses most horizontal recoveries—perfect for dunking Little Mac.
- Nair or Fair offstage to clip jumps or force early up Bs.
Pikachu
- Thunder Jolt runs along the stage, shocking those lining up for ledge grabs.
- Down Air spike or drag-down Nair followed by Thunder for kill setups.
Samus
- Bombs near the ledge keep tethers and up Bs guessing.
- Charge Shot covers upward recoveries or people stalling offstage.
Roy/Chrom
- Down Tilt two-frames.
- Fast falling Fair/Bair can snipe short recoveries, but don’t chase too far—both struggle to recover themselves.
Palutena
- Down Tilt two-frames, Nair covers jumps.
- Up Air offstage against anyone trapped above the blast line.
Cloud
- Climhazzard (Up B) pokes below the ledge for two-frames.
- Dash attack or Bair punishes low recoveries, but don’t overextend—Cloud’s recovery is weak if you get reversed.
Tips for Successful Edge Guards
- Watch Habits: Players often recover the same way each time (high jump, early air dodge, panic up B). The first two stocks are for scouting; finish them on the third.
- Stay Safe: Offstage edge guards are riskier for characters with weak recoveries. Know your limits.
- Mix Up Your Coverage: Don’t always swing immediately. Sometimes waiting for a panic option (like an air dodge) nets you a cleaner punish.
- Practice Spacing: You don’t always have to hit—sometimes just threatening a big back air or a drop-zone fair is enough to force mistakes.
Final Thoughts
Learning good edge guarding can level up your stocks-per-game by a ton—especially once you read recovery patterns and act decisively. Mix your onstage ledge traps with offstage spikes and feints to keep your opponent sweating every time they’re off the stage. Try out a few of these edge guarding setups with your favorite fighter and you’ll close out games earlier and more consistently. Recovery is your lifeline in Super Smash Bros. Ultimate. Getting back to the stage safely after being launched off can be the difference between holding onto a stock and seeing that “blast KO” animation. While every character has a unique toolset for recovery, the fundamentals—resource management, choosing your path, and keeping unpredictable—apply across the board. Let’s break down recovery basics, highlight tricks for specific fighters, and sprinkle in pro tips for those clutch moments.
Understanding Recovery in Smash Ultimate
The Anatomy of Recovery
A character’s recovery is the combination of their double jump, up special (Up B), air dodges, and sometimes side specials or wall jumps that help them return to stage. Some fighters have long-reaching recoveries, others are best at vertical jumps, and a few have tricky stalls or direction changes that keep opponents guessing. Success depends on knowing your character’s strengths and weaknesses.
Key Recovery Resources
- Double Jump: Every character has one. Conserving it until you really need a burst of height or directional control can save your stock.
- Up Special (Up B): Usually your main way back to the ledge. Some go super far (Pikachu), others hit hard but travel short distances (Ganondorf).
- Directional Air Dodge: Lets you zip a short way in any direction, but leaves you helpless after—no more aerial actions until you touch the ground or get hit.
- Side Specials: Some fighters can use moves like Fox’s Side B or Banjo’s Wonderwing to cover extra distance.
- Tether Recovery: Certain characters (Lucas, Samus) can latch onto the ledge for a fast grab from a distance.
General Recovery Tips
Mixing Up Recovery Routes
If you always recover low, you’ll get spiked. Always high? Expect an aerial or projectile waiting for you. Mix up your height, timing, and whether you snap to ledge or return to the main platform to avoid becoming predictable. Some examples:
- Use your double jump early one time, then save it on the next attempt.
- Fake a low recovery then jump high at the last moment.
- Air dodge away from the stage to bait edge guarders, then drift back in.
Stalling Your Descent
Dropping a quick air dodge, wall jumping, or using a stalling move midair (like Peach’s float or Steve’s anvil) can throw off an opponent’s timing. This forces them to commit too early or lets you slip past their attempts to edge guard you.
Snapping to Ledge
Most characters’ Up Bs automatically grab the ledge if you’re close. Learn the distance for yours—overshooting means landing onstage (and getting punished), undershooting means dropping too low.
Character-Specific Recovery Approaches
Mario
- Cape can stall midair or reverse projectiles aimed at you.
- Mario’s Up B is short, so save your double jump and focus on horizontal drift. If edge guarded, mix in side-B (Mario Tornado in previous titles; FLUDD for stalling).
Pikachu
- Quick Attack (Up B) allows two angles in sequence. Zig-zag your path, using the walls if needed.
- Pikachu’s small hurtbox makes him tricky to intercept, but beware strong disjoints near ledge (like Cloud’s back air).
Lucina/Chrom
- Dolphin Slash (Up B) is fast and hard to intercept if you recover low, but super punishable if you land onstage.
- Mix up whether you recover at ledge height or just below; Chrom’s vertical recovery is worse, so don’t burn your jump too early.
Samus
- Bombs can be dropped to stall or disrupt would-be edge guarders. Use them to slowly inch back to the ledge, especially if opponents are two-framing.
- Zair (tether grab) reaches far, but be ready to switch to Up B if someone hovers near ledge.
Cloud
- Cloud’s Climhazzard (Up B) barely snaps ledge if you’re not close enough; burn your double jump wisely.
- If you have Limit, don’t waste it for small recoveries—save Limit Climhazzard for when you have to go deep.
- Delay your recovery with a fast fall, but don’t stall too long—Cloud is vulnerable without a jump.
Palutena
- Warp (Up B) lets you angle in multiple directions; go high to avoid ledge traps, or fake out and go straight to the ledge if someone covers the platform.
- Use Nair or explosive flame to force people back if you’re being chased offstage.
Advanced Recovery Techniques
Wall Jumping
Some characters (Mario, Fox, Roy, Joker, etc.) can push off walls to regain height and movement. Edge-hug stages like Pokémon Stadium 2—jump, press toward the wall, then away and jump again to surprise opponents waiting above.
Magnet Hands
Ultimate lets fighters grab the ledge from surprising distances (“magnet hands”). Test how far you can be horizontally away and still grab—being just out of range makes you easy prey for spikes.
Drift and DI
Directional Influence (DI) after being hit can affect your launch angle and position offstage. Drifting back toward stage after a hit, or DI’ing downward for recoveries with fast Up Bs, can put you closer to the ledge and safer routes.
Reversals
Some fighters can attack while recovering, turning the tables on edge guarders.
- Mario’s Up B hits early and can stage spike careless edge guarders.
- Pikachu’s Neutral Air on the way up can catch jump-happy opponents.
- Terry and Kazuya use their Up B as a strong anti-air if someone tries to meet them head-on.
Extra Tips to Survive
- Always keep a jump. Never burn your double jump unless you’re certain you’ll be hit otherwise or it’s needed to snap ledge.
- Respect invincibility. Some recoveries (like Roy or Lucina Up B) are invincible early but vulnerable later—plan accordingly.
- Don’t air dodge early. Air dodges leave you helpless. Wait until you must dodge a hit.
- Mind your percent. Higher percent = farther knockback, so start prepping recovery plans before you even get hit.
- Don’t rush. Sometimes stalling just outside range with a drift or stalling move is safer than snapping ledge right away.
Closing Thoughts on Recovery
Mastering recovery means more than memorizing Up B distances—it’s about staying unpredictable, conserving your resources, and knowing when to risk it all. Each fighter has quirks and tricks, so spend time in training mode intentionally launching yourself offstage. Nail down your character’s options, experiment with double jumps, air dodges, and wall jumps, and you’ll start sneaking back to stage even against the strongest edge guarders. There’s no better feeling than clutching your way back and turning the tides of a match.
Matchup Guide
Super Smash Bros. Ultimate has one of the largest rosters in fighting game history, which means even seasoned players run into unfamiliar matchups all the time. Each character brings a unique playstyle, and understanding how your fighter matches up against others can make a world of difference. This section breaks down key matchup concepts, essential dos and don’ts, plus examples of how to fight—and beat—some of the most popular characters.
What Is a Matchup?
A matchup describes how well one character performs against another. It takes into account each fighter’s strengths, weaknesses, attacks, movement, and tools. Some characters naturally counter others due to longer range, projectile pressure, or tricky movement. Others may struggle versus certain playstyles or get “walled out” by superior zoning.
Learning your best options in each matchup means fewer surprises—even in stressful tournament rounds or high-stakes online matches.
Essential Matchup Dos and Don’ts
General Dos
- Learn opponents’ habits: Watch for predictable patterns, like how your opponent lands or when they go for grabs.
- Study strong moves: Know which attacks are safe (hard to punish) and which are risky from your opponent.
- Adjust your strategy: If you keep getting caught by one move, switch up your approach or timing.
General Don’ts
- Don’t autopilot: Trying to force your favorite combo into a bad spot usually gets you punished.
- Don’t panic: Even a “counterpick” match can be turned around with good spacing and smart choices.
- Don’t forget stage differences: Some characters perform better or worse on certain stages. A flat stage benefits zoners, while platforms help jugglers.
Common Character Archetypes and How to Handle Them
Every roster has different archetypes. Here’s how to approach some of the most common ones:
Zoners (Samus, Young Link, Simon/Richter)
What they do: Zone you out with projectiles and keep you away.
How to counter
- Use platforms to dodge projectiles.
- Shield projectiles as you walk forward, or use a reflector/counter if you have one.
- Dash in fast after you block a laggy projectile move.
Rushdown (Fox, Captain Falcon, Little Mac)
What they do: Get in fast with deadly combo starters.
How to counter
- Don’t roll predictably; they eat rolls for breakfast.
- Space with safe aerials or tilts.
- Punish over-aggressive approaches with grabs or quick jabs.
Grapplers (Donkey Kong, Bowser, Incineroar)
What they do: Land grabs into highly damaging throws.
How to counter
- Stay airborne and poke with aerials instead of landing near them.
- Don’t spot dodge predictably; most command grabs will eat through them.
- Keep a safe range using projectiles or disjointed moves when possible.
Swordfighters (Lucina, Cloud, Shulk, Sephiroth)
What they do: Outrange you with long swords and fast hits.
How to counter
- Stay closer than midrange; swords are weakest up close.
- Attack their landing with anti-air moves or projectiles.
- Shield their aerials and punish landing lag.
Sample Matchup Breakdowns
Mario vs. Pikachu
- Mario wants to juggle Pikachu with up airs and force bad landings.
- Pikachu is small and can out-camp Mario with Thunder Jolts. Use Mario’s cape to reflect or stall, and punish predictable recoveries.
- Don’t try to outspace Pikachu’s forward air with Mario’s; instead, dash in and shield, then act after Pikachu commits.
Cloud vs. Roy
- Cloud’s sword gives him the edge at midrange.
- Roy wants to stay just close enough for the sweetspot hits. Cloud should play defensively, auto-spacing back airs and mixing up Limit charge to bait approaches.
- Offstage, Roy’s recovery is risky. If playing Cloud, force Roy off the ledge and threaten with blade beam.
Joker vs. Samus
- Joker’s mobility lets him weave through Samus’ missiles and charge shots.
- Counter with Rebel’s Guard to gain Arsène and punish with strong moves.
- Don’t stay grounded too long; Samus may catch landings with zair. Use platforms to mix up recovery and approaches.
Tools for Studying Matchups
- Watch Top Players: Search YouTube or Twitch for tournament VODs of pros using your character versus the matchup you’re struggling with.
- Practice Mode: Set the CPU to mimic problem characters and rehearse spacing, shield timing, and punishes.
- Frame Data: Look up what’s safe or punishable to tighten your game plan.
Adapting On the Fly
Sometimes, a matchup seems rough until you recognize patterns. Maybe an opponent relies too much on one option, like always jumping after a missed attack. That’s when you punish with an up smash, anti-air, or grab.
Signs You’re Winning the Matchup
- Forcing the opponent to approach you instead of the other way around.
- Making them abandon their normal game plan—if a Samus stops throwing projectiles and starts running at you, you’re in their head.
Signs You Need to Adapt
- Taking too many hits from a single move (like Luigi’s grab or Sonic’s spin dash).
- Losing neutral repeatedly. Change your rhythm, shield more, or look for whiff punishes.
Conclusion
Understanding matchups is about more than knowing one or two things that “beat” the other character. It’s about adapting, learning habits, and using your character’s best tools at the right times. Remember, a bad matchup doesn’t mean a lost game—just a chance to outplay your opponent with knowledge and patience. Keep experimenting, study those replays, and upgrade your strategy every match.