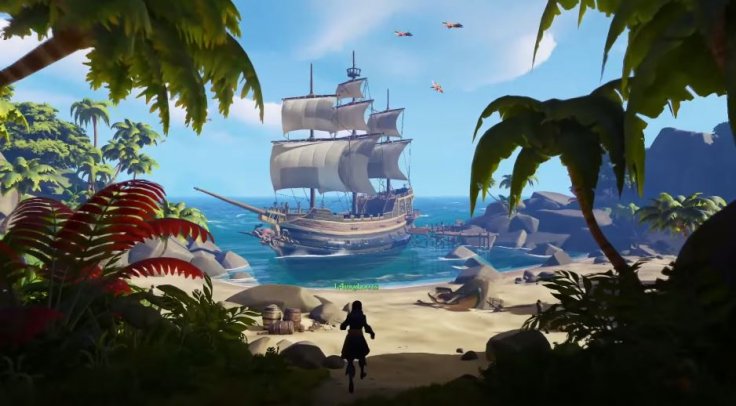
Sea of Thieves: X Marks the Spot Treasure Hunting Guide
Master map reading, sailing tips, handy tools, landmark clues, and how to cash in treasure with this Sea of Thieves treasure hunting guide.
Treasure hunting is right at the heart of what makes being a pirate in Sea of Thieves so compelling. There’s something satisfying about digging up a chest after puzzling over a cryptic map or navigating tricky landmarks. Whether you're sailing solo or with a reliable crew, locating the elusive 'X' takes practice, patience, and a bit of pirate intuition. But even experienced adventurers can occasionally find themselves strolling in circles or questioning their map-reading skills. Thankfully, once you get the hang of a few straightforward techniques, tracking down buried treasure becomes second nature--turning what initially feels like a guessing game into a reliable and rewarding adventure on the high seas.
Understanding the Types of Treasure Maps
Not all treasure maps in Sea of Thieves use the same format. You'll regularly encounter two main types: classic X-mark maps and cryptic riddle maps.
X-Mark Maps
These are the traditional pirate maps you're already imagining--an island sketch with one or more bright red 'X' symbols marking treasure locations. Your mission here is all about pinpointing the exact spots. This might sound easy, but it can be confusing when islands have complicated terrain or lots of vegetation.
Riddle Maps
Riddle maps test your ability to connect poetic lines and vague clues. These maps give you clues gradually, unfolding step-by-step as you reach each destination or solve each puzzle. While not immediately about "deciphering" visually, they're crucial to navigating islands and finding buried chests through logical thinking and careful observation.
In this guide, we'll focus mostly on mastering X-mark maps, since they require a reliable map-reading technique to consistently find treasure.
First Steps: Island Identification
If you're handed a straightforward X-mark map, your initial task is identifying the island itself. Pull out your in-game ship's large navigation table and match the shape or distinctive features of your treasure map island with the landmarks on the larger world map. Identifying key characteristics makes this easier:
- Is your island tiny and rocky? Large and sprawling?
- What's the shape? Crescent-shaped? Rounded?
- Are there unique beaches, bays, or piers to help identification?
Once you match islands accurately, simply plot a course, hoist your sails, and prepare for adventure.
Pinpointing the Spot: Landmarks and Compass Use
Arriving at the right island is just step one--the real challenge begins when you're holding the map up to your character’s face, squinting through palm trees and shrubbery, and wondering exactly where that "X" is hiding.
Use Island Landmarks Wisely
Every island has identifiable features visible on your small treasure map: rocks, beaches, docks, roads, or ancient ruins. Hold your map out (with left-click or trigger) and find points of reference--clear landmarks help anchor your location so you’re not wandering blindly.
For example, if your chest appears near a small rock formation, first find the rock on the island, then navigate around it carefully, matching the relative position compared to the map. Overgrown plants or thick shrubbery might conceal chests, so using structures and landscape features helps you pinpoint the right spot faster.
Trust Your Compass
Despite pirates relying instinctively on intuition and adventure, Sea of Thieves encourages pirate navigators to trust their compasses. Maps are oriented so that north always points upward. This simple rule makes orientation straightforward:
- A spot marked north of a known landmark means facing your compass north and walking carefully in that direction until it lines up.
- Chests to the southwest or east of a specific rock or beach become significantly easier to locate.
When unsure, pull out your compass and take careful bearings often. It saves precious moments spent randomly digging sand dunes and getting frustrated when your shovel hits nothing but clay.
Distance and Steps: Judging Scale
Another frustration many pirates face is misjudging actual map scale. Something that looks close may hide several steps away through thick tropical foliage. A technique practiced by skilled treasure hunters is counting steps or using general measurement:
- Walk a straight line from landmark to landmark, note how many "paces" or "footsteps" it requires.
- Then gauge this distance again from your landmark to your buried chest's location. Your accuracy improves dramatically once your eyes adjust to how Sea of Thieves maps handle distances visually.
If a marked treasure lies about midway between two known points, pacing steps evenly and carefully feeling the space helps immensely when every dig counts.
Digging Techniques: Speed vs Accuracy
When you feel confident you've reached or nearly reached the marker, start digging--don't hesitate to be ambitious with your shovel. But manage digging wisely:
- A quick first dig can confirm location and reveal edges of the buried treasure chest.
- Subsequent digs are quicker and fill a circle indicator. If you hit nothing within two or three attempts, reference your map again to avoid repeated frustrating misses.
Sea of Thieves lets you dig shallow test-holes quickly to verify your guess without committing fully to a prolonged excavation. Combining careful navigation with quick checks gets you treasure faster with less frustration.
Nighttime and Visibility: Use the Lantern
Night offers less visibility overall--making even straightforward maps harder to follow. Remember your lantern. Hold it high when interpreting landmarks at night, brightening terrain and showcasing useful visual reference points clearly.
A lantern can illuminate subtle landmarks like engraved patterns on rocks or faded pathways--things easily missed at night or under dim conditions. Keep a lantern handy in your inventory, and always bring one friend on team voyages who can help shed some light when darkness adds difficulty.
Practice Makes Rewards More Frequent
Even talented pirates miss their treasure the first couple of tries. Don't get discouraged. Sea of Thieves encourages improvement: each successfully located chest helps better your skills and familiarity, making subsequent map-reading a quicker process. In fact, many players recognize island shapes and landmarks instantly after practice, becoming efficient at scooping up treasure and turning in sales quickly at outposts.
Mastering map-reading is rewarding not just in gold but enjoyment--it reduces guesswork, frustration fades, and crew voyages become smooth sailing. Learn well, and claiming buried loot turns reliably enjoyable--a satisfying payoff for your maritime map-reading abilities.
Setting Sail: Steering, Sails, and the Wind
Hunting for treasure sounds easy once you know the basics--but first, you'll need to master navigating your trusty ship across Sea of Thieves' wide-open waters. Don't worry; this guide covers everything from reading the wind correctly to steering safely between rocky spires or dangerous reefs. Soon you'll comfortably chart courses, dock without a hitch, and manage your vessel like a seasoned pirate.
Steering Your Ship: Pirates Behind the Wheel
No matter which ship you choose--a nimble Sloop, sturdy Brigantine, or massive Galleon--basic steering principles never change. When holding the wheel, take note:
- Center Marker: The wheel has golden handles at its center-spoke, producing a satisfying "clunk" as you hit the neutral center. Pay attention to this clue--the sound tells you when your rudder points straight again.
- Balanced Turns: Larger ships like galleons turn slowly. Steer patiently, and when you notice you're overshooting, start turning back well BEFORE you complete your ideal arc.
- Anchor Maneuvers: Dropping anchor results in dramatic handbrake-like turns--perfect for quickly spinning around to escape threats or neatly positioning yourself at treasure islands. Just know the anchor takes precious seconds to raise afterward, making you vulnerable for a brief moment. Keep crew at the ready to raise promptly!
Sails and Wind: Harness Nature, Enjoy Speed Boosts
In Sea of Thieves, your sails determine speed, efficiency, and escape capability. Understanding wind direction can transform frustratingly sluggish voyages into lightning-fast nautical sprints:
Adjusting Sails
- Approach each ship's sail rigging by finding ropes near masts. You'll see "angle" and "length” controls.
- Raise (shorten) sails to slow down; lower (extend) sails to increase speed.
- Angle sails according to wind direction--use the flowing wind trails in-game to tell precisely how the wind blows. If correctly angled, sails inflate and produce a telltale "snap" and visible puff. This signals optimal position.
Wind Direction Indicators
- Watch the moving wind streaks overhead, guiding sail positioning effortlessly. Keep adjusting occasionally as conditions change.
- Steering against wind? It happens. On unfavorable courses (headwind), position your sails "square-on" (straight ahead), and adjust to minimal length. You'll maintain sluggish but manageable speeds in tough weather or position scenarios.
Learning the basics of wind direction and sail management instantly improves your navigation comfort--and nets you more efficient loot-grabs as well!
Using the Map Table: Essential Pirate GPS
Veteran pirates know that plotting routes on your ship's navigation table streamlines your journey from island to island.
- Clearly marked “X” islands from treasure maps make setting courses easy. Cross-reference these marked locations against your larger world-map on your ship's navigation table (usually below deck).
- Circle or mark these targets for clarity and route optimization.
- Utilize compass bearings. If your table shows you southwest toward the marked island, keep checking compass handheld or mounted near your helm while steering, ensuring accurate direction.
This handy routine soon becomes second nature to crews looking to travel greater distances and return safely with maximum bounty.
Staying Alive: Handling Water Hazards and Defensive Sailing
Sea of Thieves oceans aren't peaceful. Battered by storms, towering rocks, ghost ships, and occasional aggressive pirates, smart captains must learn defensive sailing:
Weathering Storms
- Storm-water accumulates in ships, so assign crew to regularly use buckets below decks to bail water when storms hit.
- Storm wind direction changes rapidly--continuously adjust sails, or consider shortening (raising) sails partially until weather clears.
- Your compass spins wildly during fierce storms--navigate carefully using island profiles or known landmarks as guides.
Dodging Hazards at Sea
- Assign one crewmate to watch out for reefs, shallow waters, jagged rocks, or enemy vessels. Vocal communication can save your ship from costly collisions and unwanted interruptions.
- If collision imminent, brace for impact or swiftly throw anchor to take an emergency full stop. Repairs below deck--using wooden planks--quickly fix ship damage if handled promptly.
Using the Spyglass: Plan Ahead, Save Time Later
At sea, your spyglass tool allows effective advanced scouting, providing invaluable intel:
- Before arriving at unknown islands or destinations, examine through your spyglass--spot structures, dangers, or lurking pirate competitors ahead of actually docking.
- Spotting flags at faraway vessels provides crucial knowledge. Skull-and-crossbones markings often indicate aggressive ships, so prepare accordingly--sneak past, steer well clear, or tackle if your crew feels combat-ready.
Early spying cuts down surprises--particularly helpful when transporting valuable treasures back toward distant outposts.
Taking Stock: Coordinating as a Team
On larger ships, teamwork translates directly into smooth navigation. It can't be overstated how much better sailing becomes when your crew efficiently communicates and cooperates clearly:
- Designate roles clearly: captain at helm, one or two crewmates positioning sails, and another navigating or watching hazards and weather.
- Regular updates keep everyone aware, minimizing mistakes or confusion.
- Friendly teamwork encourages quick course corrections, faster escapes, and successful, safe voyages.
Clear communication brings treasure quicker--improving everyone's enjoyment level aboard your sailing home-away-from-home.
Docking Like A Pro: Easy-In, Easy-Out at Islands
Finally, successful pirate navigation means skillfully docking at islands for cleaner getaways and timely treasure exchanges back to waiting merchants at outposts:
- Slow down (sail shortened) approaching islands, calmly steering to docks or suitable beaches.
- Carefully angle anchor-drop, positioning your ship so immediately raising anchor points your ship clear (deep waters) on departure.
- Watch carefully for shallow waters before your ship scrapes or grounds. Keep attentive crewman ready to signal depth warnings.
Neat docking not only impresses your pirate rivals, but leads directly to smoother treasure recoveries--saving you from fumbling around reefs or damage control later.
Becoming a Confident Navigator Means More Treasure
Learning these basics makes navigating Sea of Thieves oceans easy--even enjoyable. Smooth maneuvering, clear team strategies, and weather-ready sailing erase frustration, freeing you to focus more deeply on treasure-spotting and island adventures.
Remember: Pirate legends are simply sailors who know the value of clear sailing skills. Stay sharp, communicate effectively, and soon your confident sailing draws pirates near and treasures plentiful.
Shovel and Compass: Your Essential Treasure-Hunting Duo
When you're chasing after buried treasure, the shovel and compass are the bread and butter of every pirate operation. Knowing how to read your treasure map alongside these two simple tools makes your crew quick, efficient, and richer in no time.
Compass: Your Trusty Direction-Finder
You likely already use your compass for general sailing direction, but on foot, it's essential for hitting that sweet “X” right away:
- Match landmarks: Once you're on an island, pull out the compass and carefully examine your treasure map. Look for natural island landmarks--boulders, distinctly shaped trees, cliff faces--to orient yourself and pinpoint exactly where your treasure lies.
- Follow exact steps: Most treasure maps include clearly marked steps and directions. For instance, "Eight paces northwest from the old, broken mast," becomes far easier once your compass clearly shows northwest.
- Check regularly: It's easy to drift away from a heading as you shuffle along uneven island terrain. Glance down frequently, ensuring you're staying oriented correctly to save frustrating backtracking.
Shovel: Digging for Glory and Getting Rich Quick
Once you've found your suspected "X" marks, don't hesitate! Your shovel can uncover glory, skulls, gems, chests--and sometimes a nasty surprise or two.
- Quick confirmation: A single dig from your shovel produces either dirt or distinctive sounds--the satisfying clunk of hitting treasure or hollow crash against rocks. If your initial dig impresses you with silence, adjust your step just slightly and try again.
- Fast excavation: Treasure doesn't require hours of digging, thankfully. Chests and valuable finds require only a few good scoops before popping from sandy earth into your hands.
- Shared effort: If you're competing with other pirates or pushing against tight timelines, have multiple crew members rapidly dig at once. Two or three pirates working together drastically speeds up grabbing the goods.
Lantern: Your Pirate Night-Light and Problem Solver
At nighttime (or deep inside caves), your lantern can be a pirate's best friend. Beyond just illuminating spooky caves and island pathways, your lantern offers useful tactical applications too.
Lighting Your Way
- Nighttime navigation: Holding your lantern in the dark helps dodge sudden drops onto rocky reefs or hidden encounters with lurking skeletons. Illuminate pathways clearly to help your crew follow directions safely and quickly through dense forests or cave tunnels.
- Cave exploring: Many treasure clues require following hidden paths within dim caves. Pull out the lantern to make navigating twisty passages easier, faster, and safer.
Secrets and Signals
- Spot clue on islands: Special treasure hunting quests sometimes feature hidden clues visible only with your lantern shining its eerie light. Wall markings, hidden symbols, and secret writings can only appear clearly beneath your lamp’s glow.
- Night communication: Can't talk easily with distant crewmates? Flicker your lantern on and off to signal important events, danger nearby, or quick rendezvous points without shouting and alerting foes.
Bucket & Wood Planks: Surviving Pirate Life at Sea
Not all your useful treasure-hunting gear is flashy or glamorous--sometimes the humble bucket or simple plank holds your voyage together when things become chaotic.
Your Bucket: Damage Control and Handy Tool
Let's be honest: Sea of Thieves intends chaos. With battles, leaks, and rogue incidents often happening all at once, the bucket becomes an essential pirate multitool:
- Rapid bailing: During combat, collision, or nasty storms when seawater pours steadily inside, your bucket saves your crew from sinking. Quickly bail water back into the sea steadily until your crew gains control again over repairs.
- Fire control: Putting out deck fires caused by lightning strikes or enemy cannon fire is simple--scoop seawater and pour onto burning boards. Assign a crewmate bucket duty if flames quickly spread above deck or below decks after skirmishes.
- Poison control: Immobilized from snake bites on islands? Quickly fill the bucket at the shore with seawater and splash yourself or poisoned crew to recover from the slowing venom effects swiftly.
Wooden Planks: Essential Repairs
Every ship takes hits eventually, requiring emergency patchwork:
- Quick repairs: When enemy cannonballs pierce your hull or navigational mishaps cause damage, quickly use wooden planks from your supplies. Grab a plank and hold it against damaged wood spots, hammering shut leaks rapidly.
- Stock up regularly: Check barrels at each island stop--wooden planks are common island loot. Ensuring constant supply prevents emergencies from spiraling into disasters when far from outposts.
Your Pirate Watch: Staying Timely, Staying Alive
Though usually forgotten by beginner pirates, your watch is surprisingly useful. You might sigh at first seeing that sun-dial shaped, old-fashioned watch, but it saves valuable daylight and minimizes dangerous island forays at night.
- Track daylight hours: Know exactly how much daylight remains. Sneaking onto islands to steal treasure, complete voyages, or engage in combat often requires planning activities around daylight. Avoid getting stranded or becoming easy prey at night by timing landings and departures meticulously.
- Schedule trips smarter: Ideal voyages return you promptly to safe outposts by sundown. Checking the watch regularly allows timing your pirate schedule precisely to potentially dangerous routes or unknown islands.
Bringing It All Together: Quick and Clever Use of Tools Delivers Pirate Fortune
Pirates who use their tools wisely soon become legends. Whether simple compass direction-finding, rapid digging with your trusty shovel, or clever bucket bailing, Sea of Thieves rewards swift, coordinated, careful effort every time.
Practice your tools often--beyond basic navigation--during voyages, exploration, and combat scenarios. Competent pirates adapt swiftly, use tools proficiently, and ultimately return safely loaded with rewards nearly every trip.
Identifying Landmarks: Mastering the Pirate Compass
Treasure maps rarely come with a handy GPS location. Pirates rely on an observant eye and patience when matching map sketches to their surroundings. In Sea of Thieves, becoming efficient at landmark recognition means you spend less time wandering aimlessly, dodging angry skeletons, and more time hauling shiny loot back to your ship.
Learn Common Landmark Types
Large Rock and Cliff Formations
Most islands within Sea of Thieves feature distinct rock shapes or cliffs easily identifiable from a distance or from your map's drawing. Look for recognizable structures like towering arches, sharp cliff peaks, or oddly-shaped boulders. Cannon Cove, for example, has a towering rocky column that's unmistakable from afar. Memorizing odd shapes speeds up pinpointing your exact digging spot while your boots are still wet from landing.
- Check rock silhouettes against the treasure map drawing carefully.
- See if your landmark has unique gaps, holes, or peaks matching the island sketch.
Shipwreck Remains and Human-made Structures
Scattered wooden shipwrecks, old skeleton buildings, or broken piers appear frequently on treasure islands. Structures like these stick out easily against natural surroundings, making identifying exact locations much simpler. Shipwreck Bay excels here--its scattered wooden wreckage and overturned ships provide you clear reference points to orient yourself quickly.
- Explore around man-made ruins, buildings, and docks--landmark-heavy islands help match landmarks quickly.
- Match partially destroyed rooftops or protruding masts consistently with map clues.
Cave Entrances and Tunnel Openings
Hidden cave mouths can mislead pirates, but they're great fixed landmarks to mark down. When your map scribbles a cave opening, trust your lantern to confirm the entrance and guide your hunt. Crescent Isle contains intricate underground tunnels recognizable through precise map sketches.
- Triple-check map details for cave location and proximity to other notable landmarks.
- Brighten darkest caves with the lantern for clear, easy identification.
Vegetation Variations (Palm Trees vs Shrubs)
Islands frequently feature distinctive plant clusters: groupings of palm trees, bushes, big leafy plants, or lonely coconut trees can narrow your exact point of approach. Matching vegetation can save valuable minutes wandering. On islands like Mermaid's Hideaway, small tree clusters and tall palms make valuable landmark checkpoints.
- Check cluster arrangements and tree height carefully against your map.
- Palm tree clusters are particularly useful, standing visibly apart from shrubs or bushes.
Skeleton Remains and Camp Equipment
Sometimes skeletal remains or abandoned camps scattered near islands' beaches or in cave openings help identify the right digging spot accurately. Skeleton dropped shovels, cooking pots, or strangely arranged bones match up regularly with your drawn map clues.
- Examine small bone piles and camping gear carefully--maps love highlighting these small details.
- Note noticeable patterns or oddly shaped bone layouts marked specifically on the clue sheets.
Combine Your Compass with Landmarks
Landmarks alone won't instantly hand you treasure; use your compass along with landmark spotting to significantly speed up pinpointing precisely where your “X” lies buried. Understanding basic compass directions (North, East, South, West) and comparing angles carefully keeps your pirate searches brief and successful.
For example, your map might instruct you to look for 'three palm trees east from cave entrance.' First, verify you spot the cave. Next, pull out your compass and scan eastward. Once you notice three palms grouped clearly--congratulations! Your shovel digs exactly where it should without endless guesswork.
- Precision: Walk confidently toward the right area rather than guessing haphazardly.
- Efficiency: Cut down wandering time substantially by matching compass orientations accurately to landmarks.
Practice Landmark Recognition Regularly
Skillfully spotting islands' distinctive markers takes minor practice but quickly helps separating dedicated pirates from novices. Each voyage--no matter how minor or uneventful--becomes practice in careful observation.
When you perform easy treasure hunts, glance frequently at map details, verify quick compass angles, and maintain steady mental landmark references. Soon, island navigation feels familiar or intuitive, turning uncertain meandering into accurate, treasure-filled triumph.
Identifying Landmarks in Action: Quick Example
Say your treasure map leads you to Thieves' Haven, detailing an area northward from a large sailboat hull wreckage. First, sail around Thieves' Haven carefully until clearly spotting this landmark. Confirm visually--does the hull look vaguely ship-like, obviously tilted towards the shore?
Next, anchor centrally near this hull, hop ashore, and glance quickly at your compass for true north. Your compass aligns northward, showing precisely where your digging begins. Correct landmark identification--coupled with compass orientation--guarantees treasure collection swiftly.
Final Tips for Landmark Mastery
- Slow down to speed up: Spending an extra moment closely matching landmarks reduces frustration in the long run.
- Use crew collaboration: Multiple pirates scanning from the deck often see subtle landmarks quicker.
- Keep lantern handy: Nighttime hunts depend heavily on good lighting--stay visible.
- Memorize your favorites: Common islands like Snake Island or Plunder Valley have consistent landmarks making future voyages second nature.
The difference between carefree successful treasure hauls and frustrating island marathons often boils down to landmark familiarity. Foster your inner pirate navigator by carefully matching shapes, orientation angles, precise structures--or sometimes even that bent palm clearly sketched onto your map.
Exercise this simple tactic frequently, and your treasure piles accumulate faster, guaranteeing your pirate crew gladly welcomes your steady hand at every island adventure.
Cashing In Your Loot
You've pinpointed the map location, dodged aggressive skeleton crews, and dug your chests out of the sandy ground--but you're not rich yet. Until you turn your loot over to the right merchants, your hard-earned treasure remains worthless. Effective pirates don't just conquer the sea, they master the art of safely and efficiently cashing in. Here’s everything you need to know about turning your chests, crates, and gems into shiny gold, delicious reputation, and some satisfying bragging rights.
Where Do I Sell My Loot?
Finding the right buyer often comes down to the type of treasure you've got. Let's break down the basics:
-
Gold Hoarders: Got a chest pulled from beneath a big red X? Head straight to the Gold Hoarders--these merchants hang out near brightly colored tents at outposts. They're your treasure chest specialists. They also happily buy valuable trinkets like goblets, adorned vessels, opulent curios, and decorative trinkets you stumble upon during your adventures.
-
Order of Souls: Purple tents mark these mysterious merchants. Sell them cursed skulls collected from defeated skeleton captains and ghostly enemies. Anything spooky and skull-shaped goes directly into their creepy collections.
-
Merchant Alliance: Find these practical traders on the docks, waiting at their stalls beside wooden barrels and crates. Sell Animal Crates (filled with pigs, snakes, and chickens), Gunpowder Barrels (careful, they're explosive!), and merchant supply crates to these business-minded sailors.
-
Hunter's Call: Cooked meat and fish sell exceptionally well at tiny docks scattered farther from main settlements. These lonely fishermen hang out at spots like Merrick's hideout. Visit them with your freshly cooked trophies for some quick cash.
-
Reaper's Bones: For adrenaline-loving pirates eager to raise chaos, selling loot at the Reaper's Hideout grants bonuses--and a heightened sense of danger. Here, masked merchants accept every type of treasure--everything from chests to skulls--in exchange for gold and reputation. But be warned: dangerous pirates often patrol this area.
Trading In Your Loot Efficiently
Now that you've located the right merchant, let's cover how to swiftly convert piles of chests into loaded pockets:
-
Know Your Outposts: Have an idea where each merchant sets up shop. Most outposts share similar layouts. Once you’ve memorized these, unloading your cargo becomes second nature, getting your crew back onto open water quickly.
-
Spin That Ship: For quick loot drop-offs, directly face your selected merchant stand when you drop anchor. This cuts steps off your route and reduces downtime, especially helpful when you're hauling dozens of chests.
-
Divide and Conquer: Don't unload alone--your full crew can easily form a pirate relay chain. One pirate tosses loot from ship deck onto the dock while another hauls chests to merchants. Organized teamwork gets the selling done quickly before other ambitious sailors spot your unguarded riches.
-
Use Harpoon Strength: When unloading loot from awkward locations, like when parked beside tall piers, your ship’s harpoon becomes invaluable. Aim at loot sitting on the deck or dock and quickly reel it inward. It saves leaps, stumbles, and accidental plunges into shark-infested waters.
Watch Your Back--Beware Loot-Thieves
Even though selling your loot sounds like the easy part, leaving treasure unattended attracts troublemakers and opportunists. Here are quick tips to avoid losing all your shiny goodies:
-
Scout First: Before docking, spyglass your chosen outpost for sails, movement, or suspicious parked ships. If another ship hides patiently behind rocks, they're likely waiting to ambush you.
-
Quick Selling: Move fast when selling large hauls. Efficiency discourages thieves--pirates don't rob empty holds. If something seems off, consider sailing elsewhere or hiding expensive loot temporarily until waters clear.
-
Hiding Precious Loot: Unloading expensive Athena's Chests, Ashen loot, or priceless gems? Don't display these openly near merchants. Tuck them behind nearby bushes, crates, or rocks close to selling points. Keep your riches hidden until you're sure it's safe to sell.
How to Cash In Special Loot
Special treasure often needs a different selling plan:
-
Stronghold Loot (from Skeleton Fort raids): Stronghold skulls get sold to Order of Souls, stronghold chests and valuable trinkets go to Gold Hoarders, and exclusive crates and gunpowder kegs head to Merchant Alliance representatives. Quickly categorize these prizes on deck, speeding up your selling at port.
-
Cursed Chests: Got a Chest of a Thousand Grogs or a Chest of Sorrows? Move carefully--they affect players transporting them (drunken stumbles or spontaneous flooding). Sell these troublesome chests swiftly at the Gold Hoarder tent to finally rid yourself of their annoying traits.
-
Mermaid Gems: These valuable, glowing gems can be sold to almost any merchant on land or at sea. Give them to whichever faction you currently focus on raising your reputation levels, helping you climb faction ranks fast.
-
Athena’s Treasure: Exclusively valuable chests earned from high-tier Athena’s Fortune voyages must go to the Mysterious Stranger hidden in the tavern. Walk carefully--these attract pirates like moths to a flame.
Final Loot-Hauling Advice
-
Prioritize Valuable Loot First: Grab and sell expensive chests or treasures first, just in case disaster strikes mid-sale.
-
Listen and Look Around: Always keep your ears and eyes peeled to maintain situational awareness. Awkward silence or distant cannon fire signals sudden pirate interest.
-
Sell Frequently: Don't hoard loot endlessly--it invites unnecessary risk. Selling smaller batches periodically ensures consistent progress and protects your booty stash.
You’ve tracked treasure maps, dodged cursed skeletons, and sailed stormy seas. Now, by skillfully cashing in your loot, your newfound wealth helps decorate your pirate in flashy cosmetics, improve faction ranks, and most importantly, earn bragging rights in any tavern. After all, a chest still sitting aboard your ship never made any pirate famous.