Phasmophobia Evidence Identification Guide
Master ghost hunting in Phasmophobia with quick tips for identifying evidence: ghost writing, spirit box, EMF, fingerprints, and freezing temps.
Phasmophobia has turned ghost hunting into a tense team sport, challenging players to figure out just what kind of spirit they’re dealing with before things get out of hand. The key to surviving—and solving each haunting—lies in gathering and understanding the different pieces of evidence left behind by these restless entities. With equipment ranging from EMF readers to spirit boxes and ghost writing books, it can be tricky to keep track of what means what, especially with the pressure of an angry ghost closing in. Knowing how to spot and interpret each clue can make the difference between successfully identifying a ghost type and a panicked escape from the haunted location.
Ghost Writing Guide
The Ghost Writing Book is one of the spookiest and most useful tools in your Phasmophobia evidence kit. When you or your team see eerie scribbles or strange phrases appear in the book, it’s a solid indicator that you’re dealing with certain ghost types. Here’s everything you need to know about how Ghost Writing works and how to use it to your advantage.
What Is Ghost Writing?
Ghost Writing shows up when a ghost interacts with the Ghost Writing Book left in its favorite spot (more on that in a minute). If a ghost has the ability to write, you’ll notice disturbing phrases like “LEAVE OR DIE” or odd symbols—totally normal ghost stuff. But not all spirits will use this method, so knowing which ones do is key.
Ghost Writing can be counted as one of your three pieces of evidence that help you lock in a ghost’s identity. Ghosts that potentially leave writing include:
- Demon
- Mare
- Myling
- Poltergeist
- Spirit
- Thaye
- Deogen
- Revenant
- Moroi
If you see writing but your other evidence doesn’t match the above types, one of your clues is probably off.
How To Set Up the Ghost Writing Book
Basics
You always start with at least one Ghost Writing Book in your van’s equipment stash. Here’s what you need to do:
- Select the book from your inventory.
- Head to a room where you’ve seen ghost activity (lights flickering, cold temps, EMF spikes, or misplaced objects).
- Drop or place the book using the placement button (default: F on PC) on a flat surface like a table or the floor.
You can place more than one book if your team brought extras, giving the ghost more chances to write.
Placement Tips
- Place the book in the ghost’s favorite haunt: where you pick up signs like freezing temps, spirit box answers, etc.
- Don’t leave the book in the middle of a hallway unless you know activity happens there.
- Avoid putting the book in tight spots or corners—ghosts tend to write where there’s space to interact.
Maximizing Chance of Ghost Writing
Timing and patience matter. Sometimes a ghost will write in the book right after you set it down, but often you have to wait. Here are some tips to improve your odds:
- Drop the book as soon as you find room with the most activity.
- Stay out of the room for a few minutes; ghosts often interact with the book when no one’s around.
- If you don’t get a result after several minutes and you’re seeing lots of activity elsewhere, try moving the book.
- Using a video camera pointed at the book lets you keep an eye on it from the safety of the van (handy on Professional difficulty and up).
You’ll hear a scratching sound and see the book shake if the ghost is writing. Once it’s done, check for writing before marking off “Ghost Writing” in your journal.
Which Ghosts Can Give This Evidence?
Not every ghost is a scribbler. Here’s a quick list of those that may write in the book, confirmed by current patch notes:
- Spirit: Common ghost, often aggressive.
- Revenant: Wants you to panic; very fast when chasing you.
- Demon: Hunted by many, feared by all; likely to write quickly.
- Myling: Known for quiet footsteps.
- Poltergeist: Messes with items—writing is a favorite trick.
- Mare, Thaye, Deogen, Moroi: Each with their own quirks and evidence patterns.
If you’re narrowing down your ghost and Ghost Writing pops up, you can cross out any options that never use this evidence, like Jinn or Banshee.
Combining Ghost Writing With Other Evidence
Finding writing is huge, but you’ll need two more clues to finish the job. Use Ghost Writing alongside things like Spirit Box responses, EMF Level 5 readings, and Freezing Temperatures. For example:
- Spirit needs: EMF Level 5, Spirit Box, and Ghost Writing.
- Demon asks for Freezing Temperatures, Ghost Writing, and Spirit Box.
- Revenant narrows down to Ghost Orbs, Freezing Temps, and Ghost Writing.
Check your journal to compare your findings. If you’re stuck, reconfirm your evidence—sometimes Ghost Writing appears last, right when you’re losing hope.
Common Issues and Troubleshooting
The book is empty—now what?
- Confirm you’re in the ghost’s favorite room. The ghost usually won’t write if it’s elsewhere.
- Try moving the book to different spots.
- Make sure teammates haven’t accidentally picked up or thrown the book somewhere you can’t see.
The ghost is aggressive, but no writing
- Some ghosts take their time. Demons, though, tend to write fast—so if nothing’s happening, it may not be a Demon.
- Keep a camera pointed at the book to avoid getting caught off guard.
No time or the haunting’s too dangerous?
- Sometimes leaving the book and running isn’t the worst plan—some evidence can be risky to chase.
Conclusion
Ghost Writing can be one of the most straightforward clues—if the ghost’s in the mood to play along. Use it alongside your other tools, pay attention to where and when you set it down, and don’t forget to double-check which ghosts are connected to this creepy evidence. With a little patience, you’ll piece together your clues and send that ghost packing, all while keeping your team as safe as possible.
Spirit Box Guide
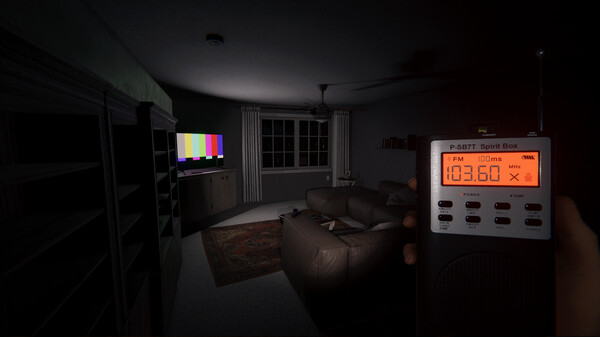
Getting a Spirit Box response is both one of the spookiest and most useful moments in Phasmophobia. This piece of gear lets you “talk” to the ghost in real time and, if the haunting entity feels chatty, it’ll talk right back—sometimes with threats, sometimes with a laugh. Here’s everything you need to know about how the Spirit Box works and how to get reliable evidence without getting yourself jump-scared in the process.
What Is the Spirit Box?
The Spirit Box is a handheld radio device that rapidly scans through frequencies. Ghosts with the right abilities can “speak” through it, giving you direct verbal responses to your questions. These responses are a major evidence type for narrowing down ghost identities.
A Spirit Box answer will be obvious: you’ll hear words or creepy sentences (like “Behind you” or “Kill”). Ambient noises and radio static don’t count—you want an answer loud and clear, often with a slightly unnatural tone.
Ghosts that interact with the Spirit Box include:
- Spirit
- Wraith
- Poltergeist
- Mare
- Phantom
- Onryo
- Yokai
- Deogen
- Moroi
- The Twins
If you’re sure you’re asking the right way and get a response, you can cross-reference with other evidence to zero in on the ghost type.
How To Use the Spirit Box
Basic Operation
- Grab the Spirit Box from the equipment shelf in the van.
- Head to the suspected ghost room—preferably after seeing other signs (cold breath, flickering lights, EMF readings).
- Turn the Spirit Box on by right-clicking (hold in hand) or placing it down and pressing the activation button (default: right mouse).
- Make sure your microphone works and the in-game voice recognition is set up—if your questions aren’t working, double-check your mic settings.
- Ask questions—try both global (press V for voice chat) and local chat (default: no push-to-talk) for the best chance.
Effective Questioning
Ghosts listen for certain keywords. Here’s what you can try:
- “Where are you?”
- “Can you speak?”
- “Are you here?”
- “What do you want?”
- “How old are you?”
- “Are you angry?”
Open-ended talk doesn’t get picked up as easily, so stick to clear, direct questions.
Setting the Scene
Spirit Box responses only work under these conditions:
- The lights in the room must be off (including lamps and ceiling fixtures, not just flashlights).
- At least in Amateur and Intermediate difficulties, the ghost must be close to you (within about 3 meters).
- On higher difficulties or with specific ghosts, sometimes you might get a hit further away.
You can use the Spirit Box either while holding it or by placing it on the floor or a surface. Placing lets you leave the room (much safer), but some players swear by holding it while soloing for quicker reactions.
Reading and Recognizing Spirit Box Responses
You’ll know it’s a real Spirit Box answer when:
- The device’s text display says "Nothing Detected" until a real answer pops in.
- The audio is clear—responses often sound warped, but it’ll be in English (or the game’s language).
- You might hear “adult,” “attack,” “away,” “behind you,” or other creepy stuff.
If you’re just getting steady white noise with no words, either the ghost isn’t a Spirit Box user or you’re in the wrong spot/time.
Tips for the Best Chance at Spirit Box Evidence
- Turn off all room lights (leave hallway lights on if you want, but complete darkness is better).
- Stand in the ghost room or right outside the doorway.
- Have one person question the ghost at a time—multiple voices can confuse the game’s detection.
- If you’re struggling, try alone and with a teammate, sometimes the ghost responds better to a solo investigator.
- If you get no answer after five or six questions, move to another spot with activity.
Remember: Some ghost types, like the Spirit or Mare, are more willing to talk, while others may be stubborn.
Which Ghosts Give Spirit Box Evidence?
Here’s a current list of ghosts you can confirm or rule out based on Spirit Box responses:
- Spirit: Known for its chattiness.
- Wraith: Likes to taunt.
- Poltergeist: If it’s tossing stuff and talking, you’ve likely found it.
- Mare: Only talks in darkness; keep lights off.
- Phantom: Responds often, but shy if people are crowded.
- Onryo, Yokai, Deogen, Moroi, The Twins: Each has Spirit Box as one of their telltale signs.
If none of your other evidence lines up with these ghosts and your Spirit Box stays silent, it might be time to rule it out and focus on the other options.
Common Problems and How to Fix Them
“Nothing Detected” No Matter What
- Make sure you’re in the right room—check with EMF or Thermometer.
- The ghost may only answer alone or with a group—check the journal to see the ghost's preferences.
- Lights still on? Even a desk lamp will block answers.
- Try resetting your Spirit Box or swapping out for another one if bugs hit.
Ghost Talks, But It’s Not Recognized
- Only answers from the Spirit Box itself count as evidence—not disembodied whispers or ghost events.
- Check that your microphone is working and that your voice is clear.
Everyone’s Spooked, No Response
- Move to the spot with the most activity. Some ghosts only answer close to their favorite room.
- Double-check if it’s a Spirit Box ghost—it’s easy to miss in the heat of a hunt.
Using the Spirit Box Safely
Talking to ghosts is risky business, especially on higher difficulties. A chattery ghost often becomes more aggressive with each interaction.
- Don’t linger after a response—get your answer, mark it in your journal, and leave the room while you plan your next move.
- Keep an eye on your sanity, as low sanity speeds up ghost hunts, especially after provoking them with questions.
- Use sanity pills to top up if things get too dicey after repeated questioning.
Wrapping Up the Spirit Box
The Spirit Box is one of the core tools for identifying many ghost types in Phasmophobia. It’s fast, direct, and has a high spook factor. With the right setup and a bit of patience, you’ll get clear evidence—just watch out for a vengeful response if you push your luck. Pair Spirit Box results with other clues like Ghost Writing and EMF readings to build a solid case, and you’ll have all you need to banish (or document) even the chattiest spirits.
EMF Reader Guide
The EMF Reader is one of Phasmophobia’s staple ghost-hunting gadgets. It detects electromagnetic field changes in the haunted location, helping players track supernatural activity and gather critical evidence for identifying ghost types. Here’s how to get reliable results from this tool—and what its signals actually mean.
What is the EMF Reader?
The EMF Reader looks like a small, handheld remote with a row of bright LEDs on the top. When switched on, it starts scanning for electromagnetic spikes caused by ghostly interactions. It has five lights, numbered EMF 1 through EMF 5. Only when it flashes all five lights (EMF 5) does it count as evidence toward certain ghost types.
How to Use the EMF Reader
Start by grabbing the EMF Reader from the van—Phasmophobia always provides at least one. Turn it on with right-click (mouse or controller), and you’re ready. It works both in your hand and dropped on nearby furniture or the floor, as long as it’s powered up.
Where and When to Use It
- Go to Hotspots: Bring the EMF Reader to rooms with suspected ghost activity—look for signs like cold temps, flickering lights, or objects moving.
- Track Interactions: The EMF Reader reacts to a wide range of ghost actions. This includes doors opening, objects thrown, lights switching, ghost sightings, and even some noises.
- Stay Near the Action: Some readings are brief, especially after interactions. You’ll need to be close—within about three meters—for the EMF Reader to pick up the signal.
Understanding EMF Levels
The EMF Reader lights up based on the strength of nearby ghostly activity:
- EMF 1: The device is powered on, but no paranormal activity detected.
- EMF 2: The ghost interacts with objects (e.g., touches a door, throws a mug).
- EMF 3: The ghost interacts with the environment in a more intense way, like moving multiple objects at once or appearing briefly.
- EMF 4: Usually triggers during physical ghost events, like a ghost manifesting for a few seconds.
- EMF 5: The necessary evidence for certain ghosts. EMF 5 means the reading shot up to the max in response to ghost actions—it won’t show up every time.
EMF 5 as Evidence
EMF 5 is a real game-changer. Only a handful of spirits leave this behind, so keep a close watch for that all-lights-maxed spike. Not every interaction can hit EMF 5; the ghost randomly chooses whether to generate one during evidence-worthy events. If you see EMF Level 5, log it fast—it can help you narrow your choices.
Ghosts that can give EMF 5 evidence
- Spirit
- Myling
- Goryo
- Jinn
- Oni
- Raiju
- Shade
- The Twins
- Obake
If you get several readings of 2-4 but never see 5 after plenty of activity, you can usually rule EMF 5 out.
Pro Tips for Reliable EMF Evidence
Timing is Everything
Bring your EMF Reader early, especially when temp checks or ghost orbs seem unreliable. If you hear a sudden noise, see a door move, or witness an object tossed, rush the EMF Reader to that spot right away. The reading resets fast—sometimes within seconds—so react quickly.
Placement Tricks
Don’t want to stand in the danger zone? Place the EMF Reader where the ghost is most active—on a table, near a light switch, or at the door. This way, you’ll catch evidence without constant exposure.
Combine with Other Tools
The EMF Reader works well when used alongside other evidence tools. For example, place it with a camera or dots projector in the ghost room. If you see an object move or hear a ghostly noise, scan the area with EMF for a reading.
Avoid False Positives
- The EMF Reader only detects ghost interactions—not player actions. Don’t waste time testing it on doors or items you move.
- It won’t help during a hunt phase; ghostly chasing doesn’t set off the reader.
- Always check your journal for activity logs to help match high EMF spikes to visible events.
Troubleshooting Common Problems
No EMF Spikes Despite Activity
- The EMF Reader needs to be close to the source—if you’re too far, it won’t register.
- Some ghosts rarely interact with the environment, making EMF 5 much less likely. Try coaxing activity by toggling lights or calling out the ghost’s name.
EMF Reader Stuck or Not Responding
- Occasionally, the reader can bug out. Turn it off and back on, or pick it up and put it down again.
- Make sure it’s not out of batteries (rare, but sometimes items glitch). If in doubt, swap for a spare in the van.
Confusing Evidence
- Some haunted spots have multiple rooms with minor activity. Focus on where the strongest, repeatable readings show up.
- If you get mix-and-match readings (like constant 2s, but never 5), try provoking the ghost or waiting out a ghost event for the high reading.
Final Thoughts: Making the Most of Your EMF Reader
The EMF Reader’s simplicity makes it a go-to for early evidence gathering—but don’t rely on it for everything. Coupling it with other tools and paying close attention to what triggers a reading is key. Watch for that all-important EMF 5 spike, and use your journal to track when and where it happens. With quick reactions and a bit of patience, you’ll land the evidence you need and get out before the ghost grows too aggressive. Keep calm, follow the beep, and trust those flashing lights to guide your ghost hunt.
Fingerprints Guide
Fingerprints stand out as one of the most consistent pieces of evidence in Phasmophobia, offering strong clues about specific ghost types. Knowing how to track them, what counts as a fingerprint, and how best to use the tools at hand makes it much easier to rule out suspects—or lock one in.
What Are Fingerprints?
Fingerprints are ghostly marks left behind when a spirit interacts directly with the environment. Unlike EMF spikes, which can happen after any interaction, fingerprints only show up after a ghost touches particular objects—usually doors, light switches, and windows. These glowing prints point directly to certain ghosts and help you narrow your evidence quickly.
Fingerprints are visible evidence for the following ghost types:
- Banshee
- Goryo
- Hantu
- Obake
- Phantom
- Poltergeist
If you log fingerprints, immediately reference your journal to trim your suspect list.
When and Where Fingerprints Appear
Ghosts only leave fingerprints after direct contact with specific surfaces. Here’s where to look:
- Doors: Both regular and closet doors can show prints after a ghost moves or touches them.
- Light Switches: If lights flicker or switch on/off with no player input, check the nearest switch.
- Windows: Especially common with certain ghosts, any window open/close event might leave a smudge.
Prints don’t last forever—they typically disappear in under 2 minutes, though the Obake can cause shorter print lifespans (sometimes just 30 seconds!). Time is of the essence, so check quickly after you hear or see an interaction.
Tools for Finding Fingerprints
You’ll need either the UV Flashlight or the Glowstick to spot these ghostly clues:
- UV Flashlight: Point and scan across doors, switches, or windows. The greenish-purple glow reveals hand prints or even finger tips.
- Glowstick: Activate and toss or place it near suspect areas. They bathe the immediate surroundings in UV light, making prints visible in the same way.
Both tools work well but the flashlight is easier for actively searching while walking. Glowsticks illuminate a scene for longer if you want to set and forget.
Step-by-Step: Checking for Fingerprints
- Bring Your UV Tool: Make sure you’re carrying a UV Flashlight or Glowstick before following up on any noise or event.
- Pinpoint the Interaction: Did a door suddenly move? Was a light switch flipped? Focus on that exact spot.
- Shine or Place the Light: Sweep your UV flashlight across the edge of the door, light switch, or window panel. For glowsticks, toss (G key by default) right next to the hot spot.
- Look for the Evidence: Genuine fingerprints glow bright green or purple, with full hand prints or just a set of glowing finger pads.
- Screenshot or Log: You don’t need to snap photos for evidence, but it’s worth doing for extra cash at the end of the run.
Ghost-Specific Print Clues
Certain ghosts tweak how fingerprints appear:
- Obake: Sometimes leaves deformed or oddly shaped prints. Rarely, an Obake won’t leave prints at all after an interaction, which can actually help identify it.
- Poltergeist: Rapid-fire interactions mean way more chances for prints. Scan after every shifted object.
- Banshee, Phantom, Goryo, Hantu: These ghosts always drop prints after the correct kind of interaction.
What Does Not Count as a Fingerprint?
- Touches on objects like plates or cups won’t ever show fingerprints.
- Ghost writing in the book never produces prints.
- Doors or switches used by players don’t show fingerprints—only ghost interactions count.
Bonus: Photo Rewards
Capturing fingerprints with a photo camera nets extra money at the end of the investigation. Each clear photo counts as a “Fingerprint” or “Interaction” for your rewards tally, so keep a camera handy if you want to cash in—especially after triggering an event.
Troubleshooting: Why Can’t I Find Prints?
- Wrong Surface: Only check doors (including closets), light switches, and windows. Nowhere else.
- Too Slow: Prints fade away in about 2 minutes.
- Obake Tricks: Sometimes Obake will “erase” its prints early, or even skip leaving them after an event—don’t be fooled.
- Lighting Issues: Bright lights can wash out UV marks. Try turning room lights off to improve visibility.
- Not a Fingerprint Ghost: If several valid ghost events fail to produce any prints, the ghost might not be one of the fingerprint types.
Tips for Reliable Fingerprint Evidence
- Listen for Cues: If you hear a door click or window rattle, sprint over with your UV tool.
- Work As a Team: Have one player follow events with UV, while others trigger activity or distract the ghost.
- Mark High Traffic Objects: Drop glowsticks on handled doors or shared switches, making repeat scans easier.
- Double Up on Evidence: If you’re struggling, combine fingerprint checks with EMF or voice box sessions for confirmation.
Final Thoughts
Fingerprints provide hard evidence when you spot them in time, and they’re especially useful for narrowing down tricky ghost lists. Always pack a UV Flashlight or Glowstick, check known hotspots after every ghost interaction, and be quick on your feet. With a bit of teamwork and some fast reaction time, you’ll grab that glowy green print before it fades—and get one step closer to ID’ing your ghost.
Freezing Temperatures Guide
Freezing Temperatures are one of the classic pieces of evidence in Phasmophobia, offering a clear sign that your ghost is—literally—chilling to the bone. While you might not always see a frosty breath right away, learning to recognize and confirm this evidence streamlines the ghost-hunting process and helps separate tricky clues from random cold drafts.
What are Freezing Temperatures?
Freezing Temperatures means a specific room or area of the house drops low enough for water vapor to condense visibly as breath—specifically, the in-game thermometer drops to 0°C (32°F) or below. Not every cold spot counts—other ghost types can lower the temperature a bit, but only qualifying ghosts bring the freezing point.
Here’s the full list of ghosts that use Freezing Temps as evidence:
- Demon
- Hantu
- Jin
- Mare
- Moroi
- Oni
- Onryo
- Revenant
- Shade
- The Twins
- Yurei
If you log freezing temps, cross-reference your evidence to trim your suspect pool accordingly.
How to Detect Freezing Temperatures
Your Three Main Methods
1. Watch Your Breath
The most basic way is with your own two eyes. Once you or a teammate steps into a cold spot, you’ll notice faint white clouds every time a character inhales. This icy breath only appears when real Freezing Temperatures are present. If you’re not seeing it but suspect the area should be cold, double-check location and evidence.
2. Use a Thermometer
Bring the thermometer from the van. Point it at the floor or into a suspected cold room to get a numeric readout. When you see 0°C (or 32°F) on your device, you’ve confirmed Freezing Temperatures. The thermometer is especially reliable at the start of missions since rooms aren’t cold from natural drift just yet.
3. Look for Frozen Objects
Sometimes you’ll spot frost or ice patches around doors, windows, or on certain objects if the update you’re playing supports that visual. This is more of a bonus clue but is a handy confirmation alongside your breath and thermometer checks.
Quick Method Rundown
- Breath fog: Fastest check, but sometimes buggy—room needs to be properly "settled."
- Thermometer: Accurate, even if breath graphics aren’t popping up.
- Frost visuals: Appears in updated versions, but not always present.
Where and When to Check
Finding the "Ghost Room"
Freezing Temperatures only occur in the ghost’s main haunting area. If you’re in the wrong room, all your tools might register as normal. Once you’ve pinpointed the ghost’s room through interactions, EMF readers, or spirit box clues, start scanning with your thermometer and watch for breath clouds as you patrol.
Temperature Drift
It can take a minute or two for the room temp to fully drop, especially if the ghost is restless and keeps shifting locations. If you’re not seeing freezing temps, circle back after some activity or try again post-interaction (e.g., after a door slam or light flicker).
Ghost-Specific Quirks with Freezing Temperatures
- Hantu: Can cause rooms to cool down super fast and even spread cold through open doors, making detection easier—but don’t confuse with false readings outside their target room.
- The Twins: Their area of activity might bounce between spots; check adjacent rooms for cold air before ruling it out.
- Demon: Known for aggressive activity, usually chills a room quickly.
- Moroi: Speeds up the process and can even suck warmth out of a room mid-hunt.
Troubleshooting: Why Isn’t It Freezing?
- Room not settled: The ghost hasn’t chosen a room yet, or temp hasn’t dropped enough. Give it a few moments and refresh your check after activity.
- Wrong location: Try neighboring rooms or connect the dots with other evidence.
- Thermometer bug or lag: Sometimes digital readout gets stuck. Switch tools or step outside and try again.
- Ghost limit: Only specific ghosts create Freezing Temperatures—if you’re not seeing freezing even after lots of activity, consider other evidence lines.
Tips for Consistent Freezing Temps Checks
- Bring at least one Thermometer early game for fast room sweeping.
- Watch for visible breath during group events—sometimes you’ll spot it in a photo or through another player’s camera.
- Compare with EMF or Spirit Box activity; often, a spike or answer means that’s the live room.
- If you’re not getting freezing, rotate rooms with your thermometer to catch wandering ghosts—especially with The Twins or Yurei.
Don’t Be Fooled—What Doesn’t Count
- Seeing your breath in hallways when power is out doesn’t equal Freezing Temperatures evidence unless the thermometer backs it up.
- Small temp drops (single digits above freezing) are normal in some hunts, but only 0°C or below means you have valid freezing evidence.
- Portable items like candles, Salt, or sensors won’t trigger temp drops on their own.
Why Freezing Temperatures Matter
Freezing Temperatures are an objective clue that instantly slices your suspect list in half. They’re reliable, quick to confirm, and don’t depend on voice chat or picky UV tools. If you’re racing the clock on sanity or dealing with aggressive ghosts, locking this evidence quickly helps you plan your next move.
Pro Tip: If you’re especially nervous about a hunt starting, you can lob a thermometer across a suspected room or peek inside with the camera for breath clouds without staying in the danger zone long.
Closing Thoughts
Keep a thermometer handy, remember where the action is, and trust your breath for a cold clue—Freezing Temperatures will fast-track you to a correct ghost ID. Combine this with fingerprints or ghost writing, and your spooky detective run gets a whole lot easier.