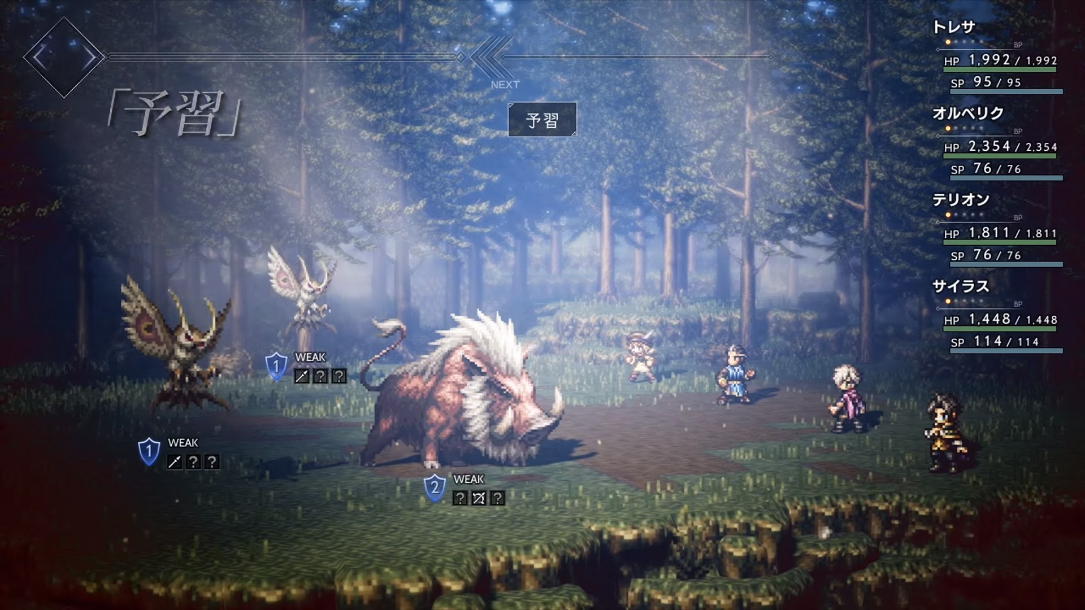
Octopath Traveler Job and Skill Guide
Master every class in Octopath Traveler with tips on primary, secondary, secret jobs, support skills, and powerful divine abilities.
Choosing the right job in Octopath Traveler can feel a bit overwhelming at first, especially with so many options and unique abilities to sort through. Each character starts with their own path, but it doesn't take long before you're mixing and matching jobs, experimenting with combinations, and debating which skills to unlock first. There’s a lot to consider—whether you want to specialize your party members or create flexible, multi-purpose adventurers. Understanding how the job system works and what each ability brings to the table can make a big difference in how your journey plays out, from the heat of battle to navigating the world itself.
How Primary Jobs Work in Octopath Traveler
Every character in Octopath Traveler begins with a primary job—think of it as their default class. This job defines their starting weapon types, available skills, and path actions used outside of combat. Unlike secondary jobs, which let you branch out later, your primary job is permanently tied to a character. It’s their identity throughout the story, and you can’t swap these around. That means Therion is always a Thief, H’aanit always a Hunter, and so on.
Primary jobs shape a character’s core stats and level-up growth: HP, SP, physical and elemental attacks, defense, and speed. When you look at your party’s spread, it helps to consider which roles you want to fill: damage dealer, tank, healer, or support. Since only primary jobs influence a character’s base stats, those roles are baked in from the start—and your party-building decisions should account for that.
The Eight Main Job Types
Let’s look at what each primary job brings to the table and why you might pick certain characters for your main squad.
Warrior
- Character: Olberic
- Weapons: Sword, Spear
- Skills: High single-target and area damage—great for breaking shields.
- Role: Physical attacker and tank
Warriors pound through defenses and have the highest base HP. They learn skills like ‘Cross Strike’ for huge single hits and ‘Level Slash’ for sweeping enemy lines. Olberic also gets Provoke as his path action, letting him protect townsfolk and bait out hidden threats.
Merchant
- Character: Tressa
- Weapons: Spear, Bow
- Skills: Money-making and party support
- Role: Support, utility, secondary attacker
Merchants stand out because they can donate BP (the power-up points you use in combat), and Tressa can collect or buy items from NPCs. Her skill ‘Hired Help’ pays to summon temporary party members—helpful for tough fights or grinding. Tressa’s base stats are balanced, making her a flexible pick.
Scholar
- Character: Cyrus
- Weapons: Staff
- Skills: Elemental magic and enemy scanning
- Role: Magic attacker, analysis
Scholars launch powerful ice, fire, and lightning spells. Cyrus automatically reveals enemy weaknesses at battle start, which accelerates fights. His high elemental attack means he hits hard—especially against shielded enemies. With ‘Study Foe,’ he gives your team a big strategic advantage early on.
Apothecary
- Character: Alfyn
- Weapons: Axe
- Skills: Healing, concoctions, and status recovery
- Role: Healer, support, secondary physical damage
Apothecaries are all about versatility. Alfyn’s healing covers the basics, but his concoct skill really shines, letting him mix items for custom effects—anything from mass healing to reviving allies or inflicting status ailments on enemies. As an axe user, he rounds out the party’s weapon spread too.
Thief
- Character: Therion
- Weapons: Dagger, Sword
- Skills: Stealing and debuffing
- Role: Debuffer, item thief, quick attacker
Thieves hit fast, lower enemy stats, and swipe items both in battle and through their path action. Therion’s speed means he often goes first, letting you pick off weak foes or set up combos. His debuffs can swing tough fights in your favor.
Cleric
- Character: Ophilia
- Weapons: Staff
- Skills: Healing and defense
- Role: Main healer, buffer
Clerics keep the party alive and provide some solid defense-boosting moves. Ophilia’s healing magic covers the whole team, and she can also revive. She comes with the ‘Guide’ ability too, recruiting temporary NPCs for battle or questing help.
Hunter
- Character: H’aanit
- Weapons: Bow, Axe
- Skills: Targeted attacks and beast taming
- Role: Physical attacker, situational support
Hunters specialize in hitting enemy weaknesses and can capture or summon monsters. H’aanit’s role flexibility depends a lot on what monsters she has tamed—sometimes she’ll nuke groups, other times deal single-target damage or inflict status conditions. Her ‘Provoke’ path action draws out hidden challenges and town fights.
Dancer
- Character: Primrose
- Weapons: Dagger
- Skills: Buffs, debuffs, and dark magic
- Role: Support, buffer/debuffer, magic damage
Dancers excel at boosting allies’ attack and defense, making it easier to break enemies or tank big hits. Primrose also deals dark element damage, useful for enemies weak to magic. Her ‘Allure’ ability charms NPCs, who follow her and can assist in battles or open up side quests.
How Primary Jobs Shape Your Early Party
Each character’s primary job locks in what weapons they can use right away, which can make early game fights easier or harder depending on enemy weaknesses you’re facing. For example, if most nearby enemies are vulnerable to axes, Alfyn or H’aanit makes a good first pick. If you need healing or buffs, Ophilia and Primrose are key. Early on, consider spreading out weapon types and skill sets to handle as many enemy weaknesses as possible.
Remember: each character also earns active and passive skills as they gain JP (Job Points) through battle. Unlocking these expands their toolkit, but always starts with abilities tied to their primary job. This means your early battle strategy is closely linked to the mix of jobs in your party.
Skill Progression and Strategy
Every primary job comes with a unique skill tree. The more you fight, the more JP you earn—which means more skills unlocked. These skills include both combat moves and support abilities (passive buffs that apply anytime the character is in the party). Prioritizing passive skills that increase speed, attack, or reduce SP costs can set up your team for long-term success.
Finally, keep an eye on which active skills are required to unlock passive support skills. Sometimes it’s better to grab a lower-cost skill early, just to open up a valuable passive ability down the line.
Picking the Right Mains
No single primary job can do it all. Think about your play style—whether you like direct strength, magical offense, sturdy healing, or flexible support. Try mixing attackers and support so you’re ready for both long dungeon crawls and boss battles. And remember, once you reach secondary jobs, you’ll be able to cover gaps, but your early foundation comes from these primary roles.
This foundation shapes your party’s identity and sets you up for the variety and strategy that make Octopath Traveler’s combat so rich. Next up, we’ll go over how secondary jobs and skill synergy can take your party from good to great.
Secondary Job Guide
Once your party gets their footing in Octopath Traveler, unlocking secondary jobs will take your strategies to the next level. Secondary jobs (or "sub-jobs") let any character equip a different class in addition to their starting one, giving them another set of weapon options and abilities. This system opens up tons of team combinations, lets you patch up weaknesses, and pushes your party’s flexibility. Here’s what you need to know to get the most out of secondary jobs.
What Are Secondary Jobs?
Secondary jobs are extra classes that you can assign to each of your characters after you find the right shrine on the map. With a secondary job, a character gains—
- Access to most of that job’s skills (active and passive)
- The ability to equip that job’s weapons and armor
- The option to unlock new support skills as you use more JP
The only parts a secondary job doesn’t grant are the job’s unique talent (like Tressa’s “Eye for Money” or Cyrus’s skill scanning) and their path action outside of battle. But otherwise, a dancer on your team can moonlight as a hunter, a scholar can double as a thief, and all kinds of wild pairings become available.
How To Unlock Secondary Jobs
Secondary jobs aren’t available from the start. Each one is hidden in a shrine dedicated to that job, scattered around the world map. To find them:
- Reach Chapter 2 towns. The shrines are usually near these areas.
- Look for landmarks. On the minimap, shrines are slightly hidden alcoves or short side-paths off the main route.
- Interact with the shrine. Once inside, touch the icon to unlock the job for everyone.
You only need to find a shrine once. After that, you can assign that job as a secondary to any party member at any time from the main menu. There’s no cost to switch or try out new combinations.
List of Shrines and Locations
- Shrine of the Flamebearer: Cleric’s shrine, east of Flamesgrace
- Shrine of the Healer: Apothecary’s shrine, south of Saintsbridge
- Shrine of the Huntress: Hunter’s shrine, east of Victors Hollow
- Shrine of the Prince of Thieves: Thief’s shrine, north of Noblecourt
- Shrine of the Sage: Scholar’s shrine, west of Atlasdam
- Shrine of the Trader: Merchant’s shrine, east of Quarrycrest
- Shrine of the Lady of Grace: Dancer’s shrine, north of Sunshade
- Shrine of the Thunderblade: Warrior’s shrine, north of North Rippletide Coast
Most shrines have enemies nearby that can be on the tougher side if you’re under-leveled, so bring a balanced party.
Choosing Your Mix: Strategy and Combos
Not every character can use every path action, but every one can take on any secondary job. The real magic (and fun) happens when you pair jobs that shore up each other's weaknesses or unlock new combos. Here’s how to think about picking good matches.
Spread Out Weapon Types
Equipping a secondary job gives a character access to that job’s weapon set. For example, making Therion (Thief) a Hunter too means he can use bows, axes, daggers, and swords—all in one. This makes it simpler to break enemy shields, especially since some bosses have a long list of resistances.
Mix Offense and Support
Giving a Cleric a Warrior job adds much-needed physical punch to an otherwise magic-and-healing focused character. Or, giving someone like Cyrus (Scholar) the Merchant job boosts his SP-sustain and passive income, letting him keep burning through powerful spells.
Support Skills Stack
Support (passive) skills open up deeper options—once you unlock a support skill on a job (by purchasing active skills), you can equip its passive on any character. This lets you, for instance, grant “Inspiration” (regain SP on basic attacks) to just about anyone, regardless of current main or secondary job.
Sample Pairings
- Warrior/Dancer or Warrior/Cleric: Turns your front-liner into a tank who can heal or support between swings.
- Thief/Merchant: Bet on speed and utility, with the ability to debilitate monsters, steal, and donate BP as needed.
- Scholar/Hunter: Unlocks all three elements plus access to bows and axes, making it easy to hit almost any weakness.
- Apothecary/Warrior: A beefy attacker with self-heals or concoctions that can save the party.
Try out pairings that click with your playstyle. There’s no penalty for experimenting—a character’s secondary job can be changed from the menu screen anytime outside of battle.
Experience and JP Gains
Secondary jobs level up right alongside your main one. When a character fights, they’ll earn JP (Job Points) used to purchase skills for whichever jobs they’ve got equipped. This means you can work toward unlocking more abilities even while swapping jobs frequently.
Feeling stuck? Switch a character’s secondary to gain JP in another job, open up new passives, and strengthen your toolkit over time.
Limitations and Tips
There are a few restrictions worth noting:
- One of Each: Only one character can wield a particular secondary job at a time. If Primrose is your only secondary cleric, nobody else can equip Cleric until you unequip it from her.
- No Unique Talents or Path Actions: Only primary jobs grant exclusive talents or outside-of-combat path actions (like stealing or scrutinizing townsfolk).
- Double Up for Efficiency: Mixing two similar jobs (e.g. Warrior/Hunter) doubles weapon types and damage, making a versatile attacker.
- Get the Right Passives: Sometimes you pick a secondary job just to unlock its passive, not to use its skills long-term.
Advanced: Secret Jobs
Besides the core eight, later in the game you’ll run into four secret advanced jobs. These shrines are much tougher to reach, often guarded by tricky bosses. These jobs are:
- Starseer
- Runelord
- Sorcerer
- Warmaster
Each adds another layer to your strategy. You’ll want to build up your regular jobs and passives before challenging for these titles.
Conclusion
Secondary jobs in Octopath Traveler turbocharge your team’s growth and variety. By unlocking them at shrines, pairing clever skill sets, and experimenting with roles, you’ll find ways to break through tough fights and handle just about any challenge. Play around, see which combos work for you, and keep collecting JP to unlock the next big move. The more options you have, the more puzzle pieces you can swap in—and the more fun you’ll get out of every battle.
Support Skill Guide
Support Skills in Octopath Traveler are passive abilities that can change up your party’s strengths in big ways. They stay active once equipped—no need to activate them in battle. These bonuses can be anything from boosting speed to letting someone heal SP after every attack, and they’re one of the main reasons mixing jobs matters so much. If you’re wondering how to make your party all-stars, understanding Support Skills is key.
How Support Skills Work
Every job has four Support Skills. You unlock each one by purchasing active (combat) skills from that job’s list. Once you buy the right number of active skills, a new passive will be unlocked for that job:
- 1 active skill: unlocks the first Support Skill
- 3 active skills: second Support Skill
- 5 active skills: third Support Skill
- 7 active skills: fourth and final Support Skill
Each character can equip up to four Support Skills at a time in the menu, regardless of which jobs they have active. After a Support Skill has been unlocked by any one character, that skill is accessible to every party member who meets the unlock requirements for that job. It doesn’t matter who unlocked it first—once you have it, it’s open for the whole party.
Why Use Support Skills?
Support Skills help sculpt each character’s role. Want Cyrus to cast more spells before running out of SP? Give him “Inspiration” from the Merchant job. Need a tank with major HP? Stack defensive skills from Apothecary and Warrior. These passives can fix weaknesses, push a character’s stats to crazy heights, or even just make the early hours smoother.
They stack, too. You can mix and match Support Skills from different jobs to mold a party member into something totally new.
Unlocking Support Skills Fast
Some paths to getting Support Skills faster:
- Rotate secondary jobs often to gain JP on several tracks
- Catch low JP cost jobs early (like Thief or Merchant) for quick passives
- Grind in high-JP zones with the “Evasive Maneuvers” skill to avoid random encounters, then swap out when done
List of Noteworthy Support Skills
Here are some of the most useful Support Skills you’ll want to chase early on, with a short note on each.
Warrior
- Cover: Take attacks for allies at low HP. Great for tank builds.
- Surpassing Power: Removes the 9,999 damage limit. Essential late game.
Scholar
- Elemental Augmentation: Ups elemental attack. Cyrus and Ophilia love this.
- Percipient: Never get ambushed—super handy, especially mid to late game.
Merchant
- Grows on Trees: Earn more money after battles.
- Inspiration: Restore SP equal to 1% of damage done by normal attacks. Helps keep up spellcasters’ SP.
Cleric
- Persistence: Buffs last an extra turn. Top-tier for support and buff-heavy teams.
- Evil Ward: Increases escape chances from random fights—handy in tough dungeons.
Thief
- Fleetfoot: Raises speed. Thief and Hunter builds benefit most.
- Incidental Attack: Have a chance to deal extra dagger hits when debuffing.
Hunter
- Heighten Senses: Acts earlier in surprise rounds.
- Second Serving: 50% chance to hit twice with standard attacks. Monsters with shield weakness hate this.
Apothecary
- Empoison: Chance to poison on basic attacks.
- Resist Ailments: Extra defense against status effects.
Dancer
- The Show Goes On: Buffs/debuffs last longer (amazing for Primrose).
- Encore: Might survive a fatal blow with 1 HP.
Secret and Advanced Jobs
Each secret job has tailored Support Skills, like Sorcerer’s elemental boosts or Runelord’s dual-wielding. These usually require a big investment in JP, but their passives are extremely strong. For example, Runelord’s “Advanced Magic Mastery” lets normal attacks hit multiple enemies.
Picking the Best Support Skills for Each Role
Different roles want different passives:
- Physical Fighters: Surpassing Power, Second Serving, Fleetfoot
- Spellcasters: Elemental Augmentation, Inspiration, Surpassing Power (for big spell numbers)
- Tanks/Support: Cover, Persistence, Evil Ward, The Show Goes On
- Money Farming: Grows on Trees, Incidental Attack
Support Skills help define your strategy. Need to grind out JP? Stack Evasive Maneuvers and Evil Ward to dodge trouble. Can’t keep Therion’s SP up? Try Inspiration. Facing a boss with massive shields? Equip Second Serving and double those normal attacks.
How to Equip and Change Support Skills
Go to the Jobs menu, pick a character, and select “Support Skills.” You’ll see four empty slots at first. Tap on a slot, and a list of all unlocked skills pops up—pick whichever combo fits your build or what you need next.
You can swap Support Skills anytime outside of battle, so don’t stress too much about making the perfect party forever. Seasonal bosses or dungeons sometimes call for a specialty set, so switch up your loadout before the next big challenge.
Tips for Getting the Most Out of Support Skills
- Prioritize unlocking four Support Skills per job to get access for the entire roster.
- Some jobs (like Cleric or Merchant) offer passives that boost everyone—not just their “main” role characters.
- Don’t sleep on the “utility” skills like Evil Ward or Evasive Maneuvers when crossing tough new areas.
- Most skills “stack” with similar effects; for example, buff/duration skills from Dancer and Cleric reinforce each other.
Support Skills are the backbone for breaking through tough battles and maximizing your party’s weirdest builds. Once you’ve got a variety in your arsenal, going back to battle without them feels like driving with the handbrake on. Mix, match, and tweak until your party fits the way you like to play.
Equipped the right way, Support Skills can flip a close fight in your favor or speed up your farming grind. With a little planning, you’ll make your traveler party a lot harder to stop.
Divine Skill Guide
Divine Skills are the top-tier moves in Octopath Traveler—unique, job-specific finishers that can turn the tide in tough battles. Unlike regular skills, each job has just one Divine Skill, and it sits at the end of their skill list. Using them takes maxed out Boost Points (BP) and a strong strategy, but they pack some of the wildest effects in the game. Let’s break down how they work, how to get them, and which ones stand out.
What Are Divine Skills?
Divine Skills are the final active ability for every job, unlocked after learning all other job skills for that class. You’ll only see the Divine Skill pop up in the job menu after you’ve purchased every prior ability with JP (Job Points). Once unlocked on a character, they can use that skill only when they have that job equipped—each Divine Skill is tied to its job, not the character.
These moves aren’t just stronger versions of regular skills. Many Divine Skills ignore damage limits, hit insane numbers, or unlock unique mechanics, like letting you act twice per turn or make debuffs last forever. Using one always costs 30 SP and all 3 BP (so you must Boost three times before using it). They’re made for boss fights and tricky situations, not regular trash encounters.
How to Unlock Divine Skills
To unlock a Divine Skill:
- Earn JP by fighting enemies.
- Spend JP to unlock every single non-Divine Skill from the job you want (this includes passives).
- Once you’ve bought them all, the Divine Skill appears at the very bottom of the job’s active skill list.
- Now you can use that Divine Skill with any character who has that job equipped as primary or secondary.
Quick tip: If you’re going for a secret/advanced job, expect to burn through a lot more JP—their Divine Skills are especially expensive to reach, but oh so worth it when you finally unleash them.
Using Divine Skills in Battle
You can’t just spam Divine Skills. Here’s what you need:
- 3 BP (Boost x3): You must Boost three times before you can pick the Divine Skill in battle, so save your turns and build up BP.
- 30 SP: Each use burns a ton of SP, so keep an eye on your reserves.
- Correct Job Equipped: The character must have the job with the Divine Skill as either their main or secondary.
Once all conditions are set, you’ll see the Divine Skill light up in your ability menu. Aim to use them when bosses are shield-broken or during a turn when you really need to finish things fast for maximum value.
Divine Skills by Job
Here’s a breakdown of each job’s Divine Skill, what it does, and who benefits most from it:
Warrior: Brand’s Thunder
- Effect: Massive single-target sword attack that outdamages any regular skill.
- Best Use: Perfect for when you need to break a single boss with sword weakness or just want to land the hardest hit possible.
Scholar: Steorra’s Revelation
- Effect: Blasts all enemies with huge elemental damage (element based on equipped weapon).
- Best Use: Great room-clear or multi-target boss fights, especially when enemies share a weakness.
Merchant: Bifelgan’s Bounty
- Effect: Hits one foe hard and gives you money based on the damage dealt.
- Best Use: Use when farming cash, especially in late-game powerful fights where you can hit bosses for high damage numbers.
Cleric: Aelfric’s Auspices
- Effect: Makes the target act twice each turn for three turns.
- Best Use: Use on yourself or another party member for double actions; combine with big spellcasters or physical attackers for wild turns.
Thief: Aeber’s Reckoning
- Effect: Dagger attack to all enemies; damage scales off the user’s Speed.
- Best Use: To nuke fast and clear mobs, especially if you have a speed-boosted Thief/Hunter hybrid.
Hunter: Draefendi’s Rage
- Effect: Extremely strong single-target bow hit.
- Best Use: Use on enemies with a Bow weakness or stack it on Hunters with Second Serving for a reliable boss-slaying move.
Apothecary: Dohter’s Charity
- Effect: Lets a target use any one-use item (like Olive of Life) on all party members at once for three turns.
- Best Use: Makes healing, buffs, or revives cover everyone fast—amazing for clutching through boss phases.
Dancer: Sealticge’s Seduction
- Effect: Target’s skills that normally affect only one ally or foe now affect all for three turns.
- Best Use: Turn single buffs into party-wide boons—pair with strong single-target buffs, heals, or unique abilities for maximum mileage.
Secret/Advanced Jobs
Each secret job also packs a Divine Skill, and these are even more wild—think multi-casting the best spells, auto-boosting, or unleashing multiple weapon types in one turn.
Best Uses and Combos
- Timing is key. Wait until an enemy is broken, then unleash.
- Buff up first! Stack buffs (like strength up, elemental attack, or critical chance) before using a Divine Skill for huge numbers.
- Experiment. Some Divine Skills work best in combos: for example, use Aelfric’s Auspices on a Cleric, then have them spam party-wide heals or breaks for multiple turns.
- Manage SP and BP. Bring along skills like Inspiration, items, or Merchant’s Donate BP to keep fueling Divine Skill use.
Tips for Mastering Divine Skills
- Don’t be afraid to save them for boss fights. Divine Skills are overkill for regular mobs.
- Mix them with secondary jobs. A Dancer with Scholar as a secondary can, for example, use Sealticge’s Seduction then nuke everyone with Scholar’s strong spells.
- BP Recovery items or skills (like Merchant’s Donate BP) let you use Divine Skills more often and chain effects with fewer turns of downtime.
- Rotate who unlocks Divine Skills. Build up JP on characters who can unlock Divine Skills fastest, then equip the job to whoever needs it for a upcoming challenge.
Conclusion
Divine Skills act as each class’s ace-in-the-hole. When the battle looks rough or you’re facing down a powerful boss, a well-timed Divine Skill can carry your squad to victory. Experiment with jobs, line up your buffs, and don’t forget to flex these powerful moves when you need that final push. Try pairing different jobs to see just how much chaos you can cause—Octopath Traveler’s system rewards creative play!
Secret Job Guide
Octopath Traveler isn’t just about picking a main job for each character and calling it a day. Hidden throughout Orsterra are four "secret" jobs—advanced classes that let you push your party’s strengths even further. Unlocking them takes some work, but grabbing these powerful jobs is one of the biggest upgrades you can give your team, especially in the second half of the game. This section covers how to unlock every secret job, which characters mesh best with each, and a rundown of their key abilities.
What Are Secret Jobs?
Alongside the 8 standard jobs, there are 4 extra classes you can unlock by seeking out hidden shrines located in some of the toughest corners of the map. These jobs are:
- Sorcerer
- Runelord
- Starseer
- Warmaster
Think of them as ultimate versions of standard jobs, granting party members access to unique skills not found elsewhere. Any character can equip an advanced job as a secondary, but only one party member at a time can hold each advanced job. If you want to switch, you’ll need to visit a shrine.
How to Unlock Each Secret Job
Sorcerer
Location: Shrine of the Archmagus, East Duskbarrow Trail (Clifftands)
Head to Duskbarrow in the far northeast. From town, step outside and follow the East Duskbarrow Trail. The Shrine of the Archmagus is tucked away here. Map-wise, it's not immediately obvious, but keep to the upper path—look for a hard-to-see cave entrance.
Trial: You’ll have to fight a boss—Dreisang the Archmagus. He hits hard with powerful elemental magic, so bring party members with strong elemental defenses and healers.
Skill Highlights
- Triple Element Spells: Target all foes three times with Fire, Ice, or Lightning—excellent for breaking shields fast.
- Divine Skill – Dreisang’s Spells: Casts three random spells on all foes.
Best On: Scholars or anyone with high Elemental Attack, such as Cyrus or Ophelia. The Sorcerer class turns them into AoE monsters.
Runelord
Location: Shrine of the Runelord, West Everhold Pass (Frostlands)
This shrine sits west of Everhold. It's a snowy route—watch for a cave entrance hidden to the north of the path.
Trial: Defeat Balogar the Runelord. He uses both physical and elemental rune skills, so balance your party with varied resistances.
Skill Highlights
- Runes: Imbue all physical attacks with elemental properties—great for combining weapon types with magic attacks.
- Multi-enhancements: Most skills deal extra effects if the right runes are active.
- Divine Skill – Balogar’s Blade: Strikes all foes with a physical attack for every weapon type you have equipped.
Best On: Characters who can wield multiple weapon types, like H’aanit or Olberic. Runelord buffs regular attacks, allowing them to hit weaknesses more easily.
Starseer
Location: Shrine of the Starseer, Western Wispermill Flats (Flatlands)
Go to Wispermill, then take the western exit. Search for a shrine entrance hidden along the cliffs. It’s easy to miss—look for a cave behind a tree.
Trial: Boss fight against Steorra the Starseer, who specializes in buffing herself and punishing status effects. Bring strong buffs and debuffs.
Skill Highlights
- Buffs and Utility: Many Starseer moves increase BP gain, provide status immunities, or grant automatic BP each turn.
- Divine Skill – Steorra’s Revelation: Hits all enemies with powerful light-based AoE magic.
Best On: Primrose or Ophilia—anyone who already excels in supporting others. This class combined with BP-boosting moves can set your party up for huge turns.
Warmaster
Location: Shrine of the Warbringer, North Riverford Traverse (Highlands)
Head to Riverford then north. Cross the bridge and keep your eyes peeled for a cave entrance on the west side—it’s harder to spot at night.
Trial: Face the Warbringer. She attacks with every weapon type and mixes counters into her move set. Have a party that can survive mixed physical hits.
Skill Highlights
- Every Weapon Attack: Warmaster skills let you attack with sword, axe, spear, bow, dagger, and staff—most skills hit multiple times or target weaknesses fast.
- Massive Single-Target Hits: These cost lots of SP but hit like a truck.
- Divine Skill – Winnehild’s Battle Cry: Unloads six attacks, using all weapon types.
Best On: Olberic, H’annit, or anyone who can stack high physical attack—this job is a damage powerhouse, especially for breaking enemy shields.
Advanced Job Tips
JP Cost and Requirements
Secret jobs ask for a big pile of JP to unlock their best skills and passives. You’ll need 5,000-6,000 JP for the full package, and many must-have passives are at the very end of their trees. Consider giving party members with the most JP-boosting or monster-farming abilities priority for advanced jobs.
Who Gets Which Job?
- Sorcerer: Cyrus or Ophilia for elemental nuking.
- Runelord: Tressa (for multiple weapons and wind magic), or H’annit for flexible damage.
- Starseer: Buffers and support-heavy characters—Primrose benefits from stacking buffs.
- Warmaster: Olberic as a classic tank and damage dealer.
Don’t worry about locking a secret job onto a "wrong" character. You can always swap at a shrine to try new combos or build out your party for tricky dungeons.
Divine Skills and Combos
Secret jobs come with some of the flashiest Divine Skills. Stack buffs before you use them and break shields for double effect. For example:
- Use Warmaster’s Winnehild’s Battle Cry after buffing physical attack to break shields fast.
- Starseer’s boosts can feed BP to a Sorcerer, letting them keep throwing out triple spells turn after turn.
Quick Reference Table: Secret Jobs
| Job | Shrine Location | Best Characters | Specialty | |-----------|--------------------------------|-------------------|-------------------------------| | Sorcerer | East Duskbarrow Trail | Cyrus, Ophilia | Elemental Multi-hit Spells | | Runelord | West Everhold Pass | Tressa, H’annit | Elemental Weapon Attacks | | Starseer | Western Wispermill Flats | Primrose, Ophilia | Buffs, BP/Status Utility | | Warmaster | North Riverford Traverse | Olberic, H’annit | Multi-weapon Physical Attacks |
Final Pointers for Secret Jobs
- Always save before tackling shrine bosses—they’re some of the toughest in the game.
- Bring multiple healing and revive items. Many secret job bosses punish mistakes.
- Try pairing advanced jobs with basic jobs that cover their few weaknesses—like giving Runelord to Tressa so she can use wind magic and physical attacks, or Warmaster to Olberic for even more durability.
The effort to unlock every secret job is well worth it. Each one opens a brand new set of strategies and crazy combos, letting you experiment and build your team in ways that basic jobs never allow. Give each advanced job a try and see which suits your playstyle—you’ll find them invaluable in late-game dungeons and boss fights.