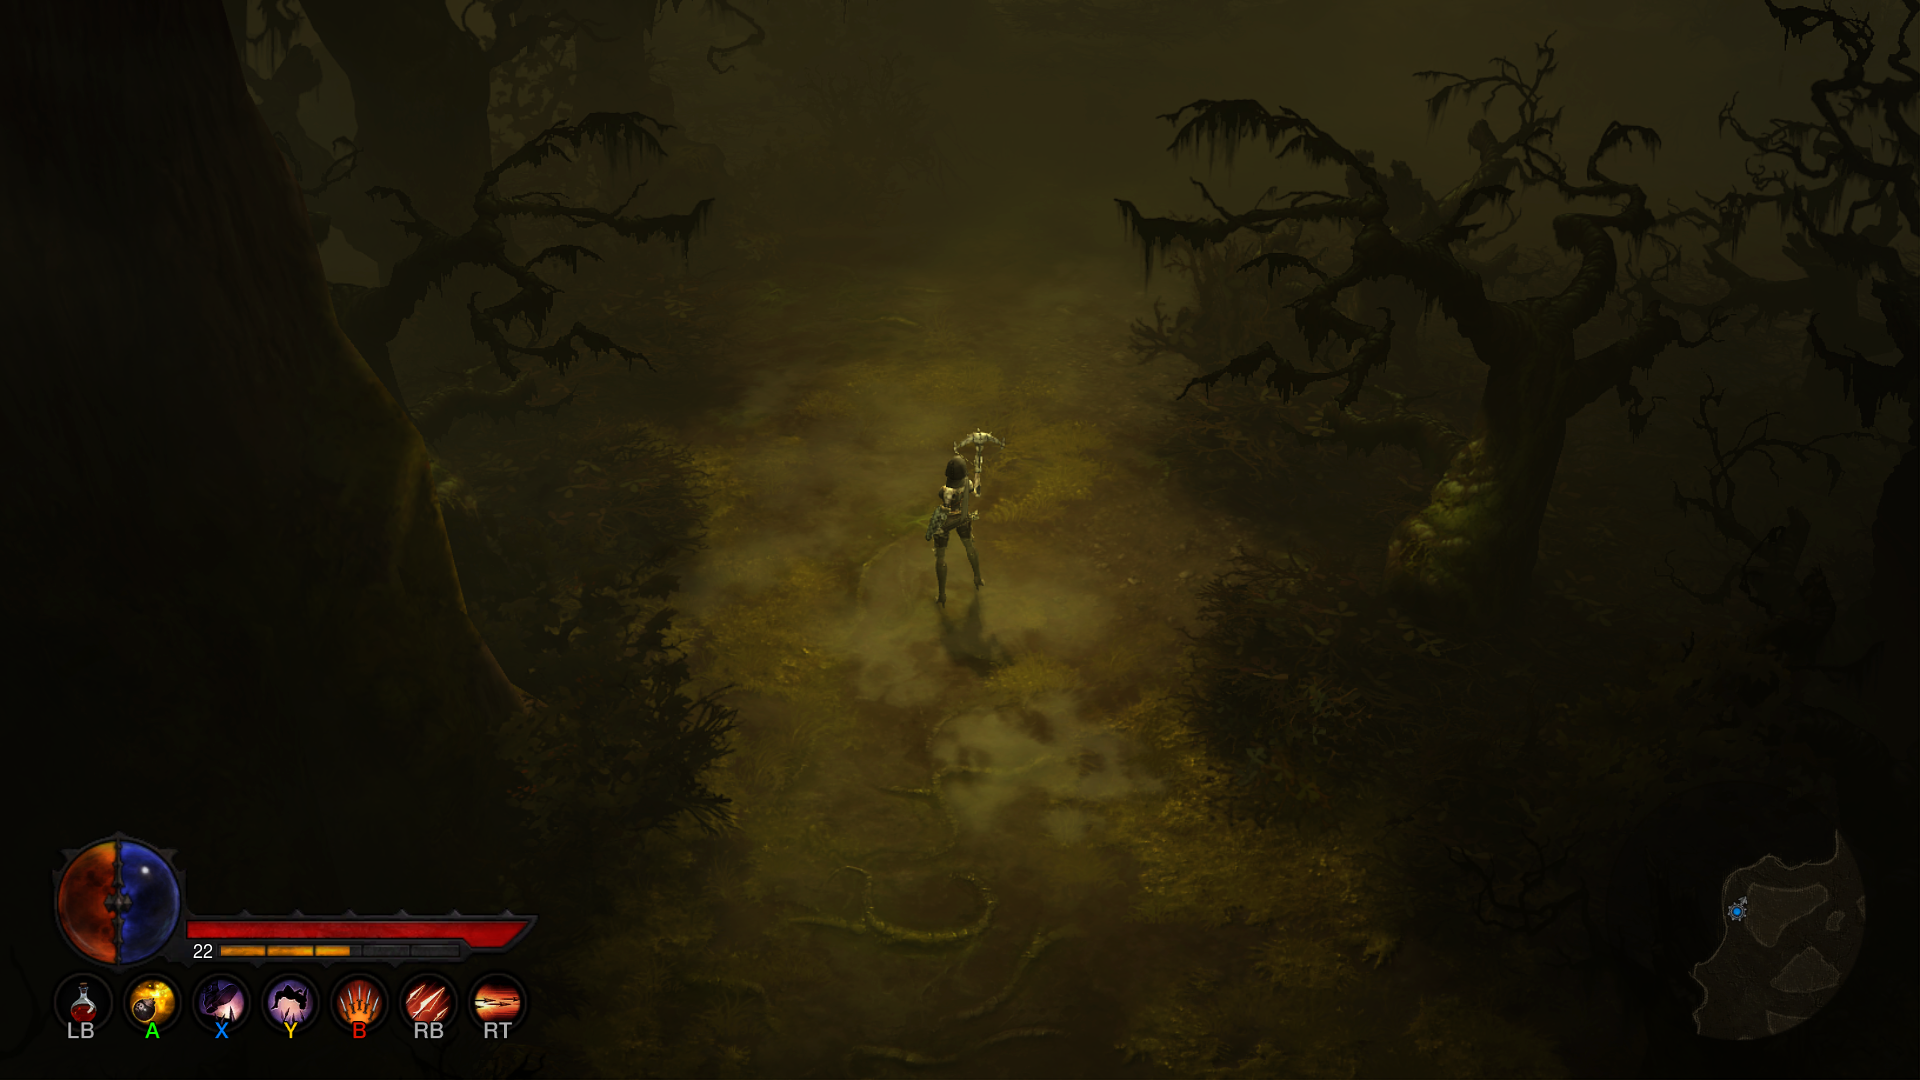
Diablo 3 Character Progression and Combat Guide
Master Diablo 3 with tips on stats, exploring Sanctuary, combat mastery, chapter guides, and choosing the best companions for epic adventures.
When you first step into Diablo 3, figuring out how your character develops and mastering effective combat strategies can feel a bit overwhelming. The game offers plenty of depth in terms of building your hero, choosing gear, and fighting hordes of monsters, but players often wonder exactly how these mechanics interact and how to make smart decisions early on. Knowing how progression options affect your effectiveness in combat--and vice versa--is crucial for staying alive and successfully taking on higher difficulties. Let's break down some of the key aspects of character progression and combat to help you better understand Diablo 3's mechanics and make your playthrough more satisfying and rewarding.
Understanding Stats in Diablo 3: What Do They Mean and Why Should You Care?
When gearing up your character, stats might look like a confusing mess of numbers and variables. But once you learn what each stat actually does, choosing gear and skills becomes way easier--and more fun. Let's break down the key stats in Diablo 3 and learn what they actually mean for your gameplay.
Primary Attributes
In Diablo 3, there are four core primary attributes: Strength, Dexterity, Intelligence, and Vitality. Every class benefits differently from them. Here's a quick rundown of what each stat means for your build:
-
Strength: Primarily benefits Barbarians and Crusaders. Each point of Strength increases your Armor by 1, reducing damage taken from enemy hits. It also boosts Barbarian and Crusader damage directly.
-
Dexterity: Key attribute for Demon Hunters and Monks. Like Strength, Dexterity increases Armor by 1 per point, but more importantly, it directly increases damage output for Demon Hunters and Monks, making it their go-to stat.
-
Intelligence: Vital for Wizards, Witch Doctors, and Necromancers. Intelligence increases resistance to all elemental damage, reducing incoming magic damage, as well as increasing the damage output for Intelligence-based classes.
-
Vitality: Important for everyone, because it increases in value as content gets tougher. Every Vitality point adds to your overall health (Life), making sure you have enough durability to survive attacks from monsters, especially on higher difficulty modes.
Choose gear with your class's primary attribute to maximize efficiency. For example, Barbarians should prioritize gear rich in Strength, while Wizards want items heavy with Intelligence.
Offensive Stats: Making Sure You Hit Hard
You'll also encounter many offensive stats beyond just primary attributes:
-
Damage (DPS): Damage per second (DPS) is your core offensive stat displayed prominently on your character sheet. It scales directly with your class's primary attributes and weapon damage. Higher DPS usually means less time fighting mobs and elites.
-
Attack Speed: This determines how frequently your character strikes. Increased attack speed can mean more damage output overall, but also means spending resources quicker. Some builds prefer slower, heavy hits to balance resource management.
-
Critical Hit Chance and Critical Hit Damage: Critical hits happen randomly based on crit chance. The higher your crit chance, the more frequently your hits deal extra damage. Crit damage affects how much extra damage your critical hits deliver. A healthy balance between crit chance and crit damage can greatly boost your overall damage.
Defensive Stats: Staying Alive
Surviving monster attacks can be just as important as killing them. Here are defensive stats you should understand:
-
Armor: Armor helps reduce all sources of physical damage you receive. Every character gets Armor from their gear, but Barbarians and Crusaders benefit even more due to their Strength bonuses.
-
Resistances ("All Resist"): Resistances lower the damage you take from element-based attacks--things like fireballs, poison clouds, lightning strikes, and other magical damage. Intelligence-based characters naturally have higher All Resist, but every class should prioritize this stat at higher difficulties.
-
Life: Simply put, the more Life (or health points) you have, the longer you can withstand enemy attacks. Life is increased mainly through Vitality but also through special gear enhancements.
-
Life Regeneration and Life on Hit: Life Regen heals you steadily over time, while Life on Hit restores Life every time you successfully hit the enemy. Combining these two stats properly can significantly improve your character's survivability without heavy reliance on healing skills or potions.
Utility Statistics
Finally, there are a few utility stats worth knowing about:
-
Resource Cost Reduction and Cooldown Reduction: Resource Cost Reduction means skills cost fewer resources (like Mana, Fury, or Arcane Power), allowing for more frequent use. Cooldown Reduction shortens the time you'll wait before firing off skills again, enabling more skill rotations and higher uptime on buffs and debuffs. Most endgame builds rely heavily on these stats for maximum efficiency.
-
Area Damage: Area damage lets your hits create small explosions that damage enemies nearby, making quick work of large groups. This stat isn't critical early in the game but becomes increasingly valuable during higher-level difficulties.
Prioritizing Your Stats: Smart Choices Lead to Success
While there's no single “perfect” formula for allocating stats, optimizing your choices around the strengths of your class and current build will significantly improve your gameplay experience. Choose gear that emphasizes your primary attribute and then focus on key supporting offensive or defensive stats that match your role and playstyle. For example, a damage-focused Demon Hunter will prioritize Dexterity, Crit Hit Chance, Crit Damage, and Attack Speed, while a tougher Crusader might focus more heavily on Strength, Vitality, Armor, and All Resistances.
Understanding the stats system might look complicated at first glance, but once you've gotten familiar with what each number truly represents, picking gear and building your character becomes a smooth, satisfying process. Remember: Diablo 3 is all about finding and combining equipment and stats that support your specific style of play. Now that you grasp what those mysterious numbers actually mean, you're well-equipped to make smarter choices as your character advances in the game.
What is Sanctuary?
Sanctuary is the dark and foreboding setting of Diablo 3. Shaped by an ancient power struggle between angels, demons, and humanity itself, it serves as the battleground for your adventures. From gloomy graveyards and haunted forests, to sprawling deserts and frozen strongholds, Sanctuary's diverse lands tell the tragic tale of eternal conflict. While the world holds fantastic treasures and powers, danger never rests--every corner you turn brings fresh threat and new possibilities.
Major Locations in Diablo 3
The adventure through Diablo 3’s Sanctuary spans multiple acts, each with unique environments, challenges, and lore. Here’s a quick breakdown of the main regions you’ll journey through.
New Tristram & Khanduras (Act I)
When your journey kicks off, you find yourself in New Tristram--a bleak area riddled with horrors rising from the crypts. The residents barely scrape by, shaken to their core from persistent undead attacks.
Notable locations here include:
- The Old Ruins and Cathedral: Decayed stone buildings and crumbling catacombs host the earliest monsters you face--namely skeletons, ghosts, horrors, and zombies. Deep below the cathedral, you'll confront the Skeleton King, your first major boss.
- Fields of Misery and Festering Woods: Dangerous wilderness outside New Tristram filled with possessed wildlife, cultists, and grim surprises. Farms and fields reveal signs of a darkness corrupting the land itself--natural wildlife twisted unnaturally.
Caldeum & Kehjistan (Act II)
In Act II, travel to Caldeum, a desert jewel serving as a bustling merchant city--but beneath the busy marketplaces lurks political corruption and evil plots. Scorching sands beyond city walls hold their own perils: giant insects, roaming demonic forces, and shady bandit encampments.
Notable locations include:
- Alcarnus: A ruined town conquered by Belial's minions. The fight here escalates quickly, pushing your skills and reflexes.
- Dahlgur Oasis: Lush compared to the surrounding desert, this area offers hidden caves teeming with treasure as well as harsh wilderness encounters.
- Desolate Sands & Archives of Zoltun Kulle: Here you'll traverse relentless sandstorms engulfing ancient ruins before uncovering the secrets of a mysterious sorcerer’s labyrinthine archives.
Bastion’s Keep & Arreat Crater (Act III)
Act III takes you to Bastion’s Keep, a massive fortress under siege from demonic hordes. Built into towering snowy mountains, the keep proves a strategic stronghold against Hell’s armies pushing upward from a fiery crater below.
Notable locations include:
- Bastion’s Keep: Hold your ground alongside soldiers as relentless waves of infernal creatures crash against the walls.
- Fields of Slaughter and Rakkis Crossing: Traverse icy plateaus and harsh battlefields littered with battle-worn remains. The terrain tests your resolve with frequent enemy ambushes and large-scale battles.
- Arreat Crater: Descend deeper into molten ruins, confronting the demonic lord Azmodan himself in an epic showdown.
High Heavens (Act IV)
Act IV propels you into the heart of the High Heavens themselves, fighting demons amidst angelic battlegrounds suspended among clouds and iridescent light. The sprawling architecture is impressive, though corruption quickly taints its once-pristine beauty.
Notable locations here include:
- Gardens of Hope: Remnants of angelic splendor tarnished by demonic infestations. Familiar creatures now roam the heavens themselves, reinforcing how far evil's hold has stretched.
- Silver Spire: The pinnacle of angelic architecture turned dark by Diablo's corruption. Here you face the strongest demonic forces before coming face-to-face with Diablo in one of gaming’s iconic boss battles.
Westmarch & Pandemonium Fortress (Act V - Reaper of Souls Expansion)
In Diablo 3's Reaper of Souls expansion, your adventure continues into yet new dangerous territory. Westmarch becomes the epicenter, a once-prosperous medieval metropolis now devastated by the Angel of Death, Malthael.
Notable locations include:
- Westmarch Commons and Streets: Once prosperous neighborhoods now overrun by shambling undead and soul-reaping angels, compelling tense encounters through claustrophobic alleyways.
- Blood Marshes: Swamps drenched in ominous mist, full of creatures lurking beneath still waters or hidden in dense foliage.
- Pandemonium Fortress: A grim otherworldly battlefield suspended in chaos itself, home to the game's powerful ultimate villain, Malthael.
Sanctuary Events and Exploration Rewards
Sanctuary always has plenty to offer beyond the main story path:
- Events and Sidequests: Quick encounters are scattered randomly throughout each zone; they're optional but rewarding challenges, offering gold, lore, or special drops upon completion. These random events increase replayability and variety on each run.
- Exploration Bonuses: Unique monsters, treasure goblins, and hidden rooms reward curious players willing to uncover Sanctuary’s secrets. Special elite packs offer increased loot rates--perfect for farming legendary gear.
- Environmental Interaction: Levers, traps, destructible objects, and crumbling walls offer unique approaches to combat. Taking advantage of these adds layer and strategy to your monster slaying.
- Adventure Mode and Bounties: After completing the story, Adventure Mode lets you revisit Sanctuary’s locations freely, providing special bounty missions and challenges to overcome--all while hunting powerful loot.
Quick Navigation Tips
Sanctuary offers fast travel via town portals and waypoint systems. Each act unlocks multiple waypoints as you progress, allowing quick returns to previously discovered locations.
Remember:
- Unlock waypoints when first exploring--they save significant travel time.
- Town portals safely transport you back to town to sell loot or repair gear.
- Finding map exits, entrances, and objective markers speeds your progress considerably.
Concluding Thoughts
Sanctuary in Diablo 3 invites both adventure and terror. Each act presents new landscapes and dangers, making progression continually engaging. Whether chasing legendary loot, facing towering bosses, or uncovering hidden areas, your exploration brings satisfaction equal to earning powerful gear. Understanding these diverse regions and their stories greatly enriches your Diablo 3 journey, making every descent into danger worthwhile. Act I: Tristram and the Return of Evil
Your Diablo 3 journey begins where the series started: in the rolling hills and shadowy forests surrounding Tristram. Where tales of Diablo once haunted villagers, new evils awaken. Old cathedral ruins beckon adventurers to confront hidden dangers lurking in darkness.
Notable Act I Locations Include:
- New Tristram: This humble town becomes your base of operations, providing merchants, blacksmiths, and quest givers. It's a safe haven amid increasing threats.
- The Weeping Hollow & Cemetery of the Forsaken: Creepy graveyards filled with undead foes await, presenting an early test of your combat reflexes and skills. These areas offer basic treasure hunting activities, such as crypt exploration and monster-slaying mini-events.
- Forgotten Tristram Cathedral: A vast subterranean maze under the old cathedral ruins, populated by demon worshippers, undead soldiers, and terrifying bosses, notably the Skeleton King himself. Successfully clearing this labyrinth provides valuable experience and loot opportunities at the start of your character's progression.
- Fields of Misery and Festering Woods: Expansive outdoor regions filled with aggressive wildlife, corrupted creatures, and scattered treasures. Secret dens and caves pepper these lands, giving curious adventurers ideal locations for optional challenges.
The Dark Narrative of Act I:
Initially, you focus on investigating a mysterious fallen star. Soon enough, pursuit reveals that an ancient evil threatens Sanctuary again. Through interaction with compelling characters like Leah and Deckard Cain, details of impending disasters unfold. Act I introduces Diablo 3’s narrative effectively, mixing intense combat encounters with intriguing storytelling.
Managing Early Game Challenges:
Combat scenarios escalated gradually, starting with simpler monsters--such as shambling risen skeletons and wild animals--allowing new players to feel comfortable while testing initial skill combos and combat moves. Boss fights are scaled appropriately; each encounter teaches some aspect of Diablo 3 combat mechanics, such as kite-and-attack strategies, ranged versus melee approaches, and identifying monster behaviors.
Replayability and Loot-Gathering in Act I:
Exploratory players greatly benefit from exploring every nook and cranny. You can discover unique mini-events, shrines granting temporary boosts, hidden stashes of gold, and random spawn legendary enemies that award rare loot. Remembering event hotspots can quicken later playthroughs, especially useful once you've reached higher difficulties.
Act Structure and Its Impact on Character Progression:
Each segment of Act I eases adventurers smoothly along their character growth. The constant progression in hero strength--new skills, runes, gear upgrades--helps players adapt new approaches and experimentation. By Act I's conclusion, most players have developed reliable strategies, positioning themselves effectively for the tougher battles awaiting ahead.
The Importance of Completing Act I:
Act I lays your character’s groundwork. It offers essential skill-building experiences and the foundational loot needed for later acts. Clearing story events here helps you confidently engage tougher monsters when reaching Caldeum or Bastion’s Keep, and anchors you firmly into Diablo 3’s narrative flow.
A Brief Overview of All Acts:
To bring clarity in your character progression and narrative advancement, here’s the acts roadmap for quick reference:
- Act I (Tristram): Establishes your combat style, skills foundation, and primary narrative setup, ending in confrontation with the Butcher.
- Act II (Caldeum): Introduces tougher mechanics, emphasizing defensive skills, crowd control, and movement. Your adventure culminates in a dramatic battle against Belial.
- Act III (Bastion’s Keep): High-intensity combat where planning, tactical mobility, and powerful AoE damage excel. Ends with the Azmodan confrontation.
- Act IV (High Heavens): Swift challenges in beautiful, corrupted angelic environments. Requires mastery of all previously learned play styles, quickly escalating difficulty, climaxing in your fight against Diablo.
- Act V (Westmarch, Reaper of Souls Expansion): Adds further mechanical complexity: more varied enemy tactics, environments that affect positioning, and specialized defensive gameplay. Ends against formidable Malthael.
How Act Progression Enhances Player Growth:
By steadily ramping difficulty and complexity, Diablo 3’s acts progressively force you to reconsider skills and gear continuously. Act by act, your hero's strengths grow, your strategy sharpens, and your understanding of Sanctuary deepens. The Act structure supports steady and satisfying skill improvement, making pro players out of newcomers.
In Closing: Why the Chapters in Diablo 3 Matter:
Diablo 3’s acts aren’t simply cosmetic changes--they influence how your character evolves. From Act I’s welcoming farmlands to Act V’s haunted streets, each serves as character-building stepping stones. By appreciating each act’s unique features, enemies, and storytelling, you'll effectively approach the game’s hardest difficulties, master character progression, and squeeze satisfaction from each moment spent conquering Diablo’s legendary evil.
Combat Mastery Guide
Diablo 3 is all about action: your success often hinges directly upon your combat effectiveness. If you're constantly struggling with enemy hordes or finding yourself frustrated mid-battle, sharpening your combat skills is the easiest way to make the journey smoother (and way more fun). Here's what you need to know to master Diablo 3's combat mechanics--from managing your resources to smartly timing your abilities and attacks for maximum impact.
Understanding Resource Management
Every class in Diablo 3 uses a unique resource system, which directly affects how you fight and strategize. These resources power special abilities and moves, requiring you to keep a close eye on them mid-combat.
-
Barbarian (Fury): Fury builds up as you deal or take damage. If you're a Barbarian, focus on managing Fury carefully--building it with primary attacks before unleashing powerful, resource-heavy strikes. Good Barbarian play involves a rhythm between generating Fury and spending it at the right time on damaging AoE or targeted moves.
-
Wizard (Arcane Power): Arcane Power regenerates quickly but empties fast if you're spamming spells too eagerly. If playing Wizard, learn to pace your bursts of high-cost castings, resupplying your Arcane Power through careful use of passive abilities, runes, or gear attributes.
-
Demon Hunter (Hatred/Discipline): This dual resource requires careful balancing. Hatred is aggressive--used for arrows, explosives, and heavy damage--and naturally regenerates quickly. Discipline regenerates slowly and supports defensive moves like traps or escapes. Strong Demon Hunter play blends calculated aggression with well-timed defensive maneuvers.
-
Monk (Spirit): Spirit doesn't regenerate naturally--instead, Monks generate Spirit through basic melee attacks, allowing for powerful support and defensive moves afterward. Mastering Monk combat means accurately timing spirit-building strikes between powerful spenders.
-
Witch Doctor (Mana): Mana replenishes gradually and is essential for summoning pets and casting offensive spells. Witch Doctors benefit by thoughtfully alternating powerful mana-consuming spells with lower-cost basic attacks and summons to maintain constant battlefield pressure.
-
Crusader (Wrath): Wrath generates through basic attacks or specific activated skills. Crusader players must methodically build Wrath before unloading devastating combat abilities. Achievement comes from timing Wrath-consuming skills across fights most effectively.
-
Necromancer (Essence/Corpses): Essence fuels abilities and regenerates through primary attacks. Corpses dropped by fallen enemies constitute another type of resource. Skillful Necromancers leverage both in tandem, burning Essence early, then recycling fallen foes' remains for efficient battlefield control.
Mastering Positioning and Movement
Success or failure often depends heavily on how you position and move your character. Standing still too long or recklessly rushing into huge enemy packs generally ends poorly. Remember these key tips:
-
Don't Stand Still! Enemy attacks and AoE spells consistently punish static players. Move frequently and intentionally between strikes to stay safe and avoid damage.
-
Utilize Dodge, Dash, or Leap Skills. Every class has options to quickly reposition. Utilize these skills offensively (gaining an advantageous position) or defensively (escaping dangerous areas). For instance, Monk's "Dashing Strike" serves both purposes, ideal for quick offensive strikes or instantly dodging boss attacks.
-
Kiting: Especially beneficial for ranged classes like Demon Hunters and Wizards, kiting involves constantly moving away while dishing damage from afar. Slowing abilities maximize kiting effectiveness, controlling crowds and halting enemies long enough to tear them down safely.
-
Awareness of Enemy Patterns: Diablo 3 enemies signal their biggest blows through visual indicators or audio cues. Learning attack patterns, especially boss monsters, enables you to easily dodge powerful strikes and counterattack swiftly.
Optimizing Skill Builds and Customizations
Skill builds can drastically alter your effectiveness in Diablo 3 combat. While selecting skills, aim for synergy:
-
Complementary Skills: Some abilities clearly enhance or boost others. Combining the Barbarian's "Wrath of the Berserker" skill with area-damage attacks like "Whirlwind" increases both damage and survival.
-
Crowd Control & AoEs: Always maintain at least one crowd control skill (stuns, freezes, slows) to neutralize enemy danger. Area-affecting spells grant increased effectiveness versus the game's frequent large enemy groups.
-
Passive Skills & Runes: Select passives and runes thoughtfully, emphasizing those that boost your selected active abilities, or cover glaring weaknesses (low defense or slow resource regeneration).
-
Experiment: Don't fear changing combinations frequently. As loot and upgrades significantly influence your effectiveness, experiment often with skills, runes, and gear choices as new drops arrive.
Effective Use of Items and Gear Progression
In Diablo 3, equipment profoundly influences your combat potency. Good combat management includes proper gear evaluation and optimization.
-
Compare Stats, Not Just Damage: Weapon damage numbers are important, but quality stats like Critical Chance, Attack Speed, Cooldown Reduction, and Resource Cost Reduction are equally significant. Don't just equip high DPS items blindly; ensure gear benefits your build specifically.
-
Legendary Items & Synergy: Specialized legendaries enhance specific abilities significantly. Learning item effects and choosing gear that complements your favorite skills helps multiply your combat power exponentially.
-
Prioritize Defensive Stats, Too: Diablo pushes users towards heavier offense, tempting players to disregard defense. Resistances, Life On Hit, Armor, and Vitality keep characters alive longer, allowing for riskier--and consequently more impactful--combat strategies without dying frequently.
Co-op Combat Tactics
Diablo 3 truly shines in multiplayer. Skilled groups coordinate closely, combining skills for maximum effect:
-
Skill Coordination: Mix complementary abilities within the party. For instance, Wizards freezing enemies perfectly lines up Monk or Barbarian burst AoE strikes.
-
Role Clarity: Balance frontline characters holding enemy focus (tanks), supportive casters/healers, and ranged specialists dealing heavy damage. Each player understanding their task vastly enhances outcomes.
-
Communication: Share timely, clear updates. Keep everyone informed about your cooldowns, available resources, or dangers/threats incoming--especially in higher difficulties demanding more precise teamwork.
Practice Makes Perfect--Adventure Mode & Rifts
Adventure mode grants the perfect training opportunity, with randomized enemy groups, bounties, and execution challenges. Regularly running Nephalem Rifts provides repeated practice against many boss mechanics, mastering strategies and gear improvements.
-
Greater Rifts for Testing Builds: Attempt various builds within Greater Rifts at flexible difficulty settings that precisely challenge your abilities without overwhelm, refining your style through manageable difficulty increments.
-
Flexible Strategies: Practice your adaptability--regularly encounter various enemy styles. Diverse challenges keep your combat skills fresh and responsive, capable against any randomized or targeted threats.
Perfecting combat techniques drastically improves any Diablo player's experience. By thoughtfully managing resources, practicing intelligent positioning and movement, optimizing class-specific skills and gear, and continually pushing for new challenges, you'll soon find tough fights increasingly simple--and deeply satisfying. Use these tips to hone your Diablo 3 combat prowess until tough opponents pose little danger and Sanctuary's fiercest enemies become your playground.
Best Companions in Diablo 3
In Diablo 3, although your heroes grow strong and legendary on their own, tackling demons alone isn't always the smartest move. Powerful foes and relentless crowds mean you'll want some backup. That's where your loyal allies--followers--come into play. Picking the best companion and optimizing their gear and abilities can significantly change your success during tough battles. Here's a clear and helpful look at the followers you can hire in Sanctuary and how to best take advantage of their strengths.
Know Your Team: Follower Types and Roles
There are three followers available in Diablo 3, each with their own distinct skills, strengths, and playstyle:
- Templar (Kormac): Close-range fighter who distracts enemies and supports with healing and defensive buffs.
- Scoundrel (Lyndon): Swift, ranged attacker who weakens foes, slows targets, and enhances your offensive talents.
- Enchantress (Eirena): Spellcaster whose magic controls crowds, buffs damage, and even provides defense boosts.
Here's a closer look to clarify their ideal roles and how each benefits various classes and builds.
Templar - The Reliable Protector
Kormac, your sturdy Templar, fits perfectly if you're looking for a more defensive alley. He steps in front of danger, drawing enemies away from you--a great option for fragile, ranged heroes or anyone needing extra resilience.
Use his healing spells, like Heal or Loyalty, to stay alive longer. Equip Kormac with gear significantly boosting toughness--remember, the tankier he gets, the safer you'll remain. Weapons providing crowd control, such as "Thunderfury," help him slow and distract enemies effectively.
- Recommended For: Demon Hunter, Wizard, Witch Doctor (any squishy ranged class needing protection).
- Suggested Skills: Heal, Loyalty, Charge, Guardian.
Scoundrel - Your Offensive Sidekick
Lyndon, the tricky Scoundrel, regularly disrupts foes through ranged attacks, slows, and debuffs. Picking Scoundrel means you're emphasizing increased overall damage output above all, offering slightly less protection but significantly more offensive support.
Choose Lyndon's crowd-control abilities like Multishot or Crippling Shot to tame enemy crowds. Optimal gear includes rings like "Unity" to share survival buffs and powerful bows like "Buriza-Do Kyanon," providing hard-hitting crowd-control strikes.
- Recommended For: Barbarian, Crusader, Monk (classes already durable who favor amplified offense).
- Suggested Skills: Crippling Shot, Powered Shot, Multishot, Anatomy.
Enchantress - Magical Crowd-Control Expert
Eirena, the Enchantress, excels at magical support and crowd control, often incapacitating enemies or boosting your offensive and defensive stats. Her versatility lets her adapt easily to most situations.
Use her abilities like Charm and Mass Control to temporarily neutralize enemy crowds. Buff spells like Powered Armor or Focused Mind make your own attacks stronger or grant additional toughness. Equip her with gear enhancing cooldown reduction and attack speed, allowing her to cast spells faster and frequently.
- Recommended For: Almost any class, specifically useful for builds lacking strong crowd control.
- Suggested Skills: Charm, Missile Ward, Disorient, Mass Control.
Essential Gear & Equipment Choices for Your Followers
Properly geared followers add extra utility and support beyond their skills alone. Here's a concise gear overview:
- The 'Immortality Token' - Each follower has an exclusive relic (example: the Templar Relic, "Enchanting Favor," and "Skeleton Key") granting immortality. Always prioritize these relics first, preventing tedious reviving mid-combat.
- Crowd Control & Debuffing Weapons - Legendary weapons such as "Thunderfury," "Eun-jang-do," or "Buriza-Do Kyanon" provide continuous slowing or freezing benefits, giving invaluable combat control.
- Rings & Amulets with Group Benefits - "Unity" effectively splits damage between you and your companion (great in solo play), while items like "The Ess of Johan" bunch mobs together for powerful AoE attacks.
Companion Tactics & Matches: Which Follower Suits You Best?
Ultimately, selecting your ideal follower depends largely on your class, build, and playstyle. Assess your major weaknesses and choose companions who offset those vulnerabilities:
- Fragile mages and Demon Hunters excel greatly with the healing and defensive support from Kormac the Templar.
- As a Barbarian or Crusader able to withstand heavy damage, Lyndon the Scoundrel perfectly enhances your offensive capability, speeding up enemy kills.
- The Enchantress, Eirena, complements nearly every build, strengthening clear speeds by disabling monster groups regularly.
Experiment by swapping companions frequently, testing each one according to evolving gameplay styles and gear set-ups. Followers aren't just dismissible NPCs--they provide meaningful and varied combat options, substantially affecting your Diablo 3 adventures.
Conclusion - Never Fight Alone in Sanctuary
Whether conquering Greater Rifts or farming materials, followers improve survival odds drastically and smooth out gameplay experience. Equip each companion with powerful, supportive legendaries, keep their survivability prioritized, and tailor skill choice to complement your hero reliably. Doing so transforms Diablo 3 combat from simply manageable to downright enjoyable, even on tougher difficulties. Combining the right follower with your playstyle and understanding companion gearing ensures constant wins--and more enjoyment roaming Diablo 3's devastated lands.