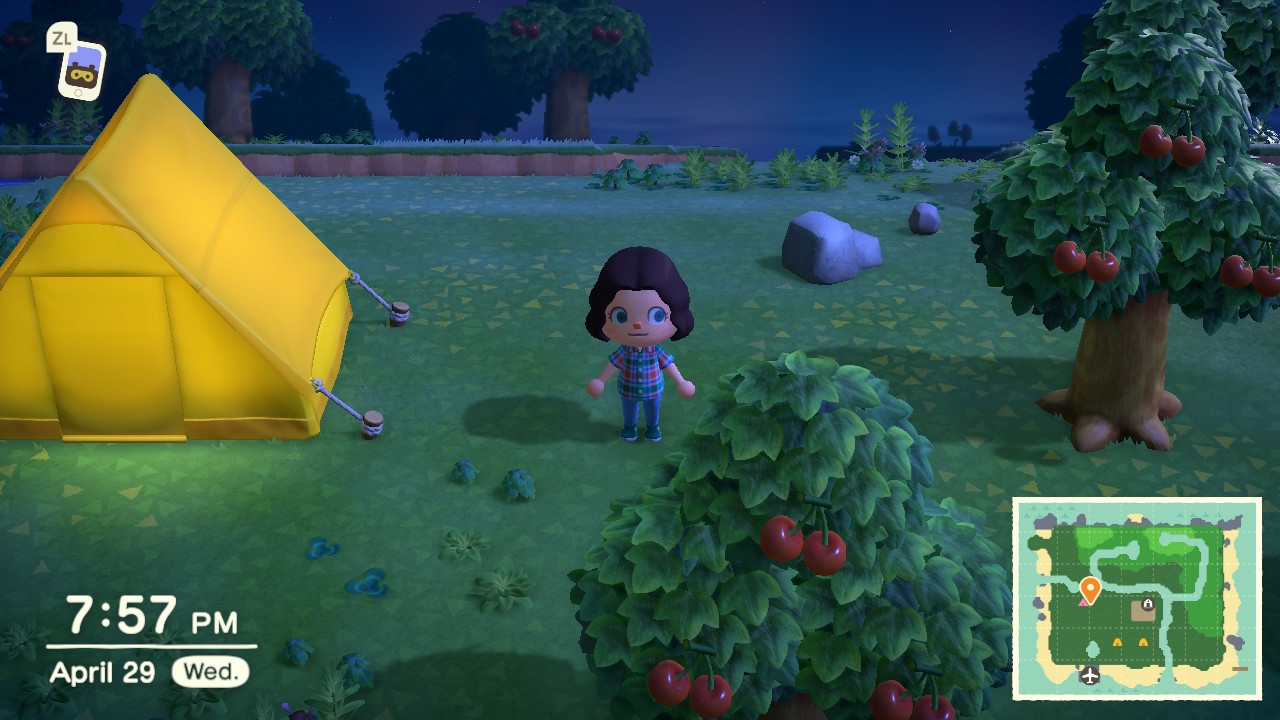
Animal Crossing: New Horizons Island Customization and Design Guide
Master terraforming, flower breeding, furniture tips, custom designs, and boost your island rating in this essential New Horizons guide!
One of the biggest joys in Animal Crossing: New Horizons is shaping your island into a space that feels truly your own. Whether you’re rearranging rivers, planting orchards, or planning the perfect spots for your villagers’ homes, the game hands you a surprising level of creative control. With so many tools and options available, it can be both exciting and a little overwhelming to decide where to begin. Getting to grips with terraforming, path-laying, decorating, and even just choosing a theme for your island turns out to be a game all by itself. There’s plenty to experiment with, and every player’s approach ends up looking a little different.
Terraforming Techniques
Once you unlock the Island Designer app in Animal Crossing: New Horizons, terrain editing becomes your new playground. Terraforming lets you modify cliffs, rivers, and paths, giving you the power to shape your island’s layout in almost any way you like. Before you start making sweeping changes, a little planning goes a long way. Here's how to use terraforming tools and make the most of them.
Getting the Basics Down
First off, to unlock terraforming, you’ll need a 3-star island rating. That means convincing KK Slider to play a concert on your island, which in turn involves inviting new residents, sprucing up your island with furniture and flowers, and keeping things tidy. Once you hit 3 stars, Isabelle will let you know, and the next day, Tom Nook sets you up with the Island Designer app. You’ll start with two basic building permits:
- Path Permit: Add different types of walkways.
- Waterscaping Permit: Edit rivers, ponds, and create land bridges.
- Cliff Construction Permit: Add or remove cliffs to shift your elevation and create layered landscapes.
Permits for waterscaping and cliff construction can be unlocked using Nook Miles at the Nook Stop. Additional path styles need to be bought there too.
Waterscaping: Shaping Rivers and Ponds
The waterscaping tool lets you dig out or fill in rivers, streams, and ponds anywhere that’s not too close to a building or cliff edge.
How to create or modify water
- Equip the waterscaping tool, then stand next to a patch of grass.
- Press A to scoop out a square, creating water. Keep tapping A to extend your river or pond.
- Stand facing the water and tap A to add land back in.
Tips for water terraforming:
- Water will always flow off the bottom edge of your island, so you can’t just cut off parts of land entirely.
- Curved riverbanks and rounded corners look more natural than sharp edges. Use the waterscaping tool on river corners to smooth them out.
- Remember, bridges only span straight sections of water, three to five tiles wide.
- Make fish ponds for rare spawns by digging out rounded pools.
Cliff Building: Controlling Elevation
Cliff construction is what lets you play with your island’s height.
Making and demolishing cliffs
- Equip the cliff construction tool.
- Stand on level ground and press A to raise a cliff block in front of you.
- Face a cliff and press A to break it down, one tile at a time.
Key points about cliffs:
- You can build up to three elevations high, but only walk on the lowest two. The third layer is decoration-only.
- Ramps and inclines let you climb cliffs, but you need Tom Nook’s help to install them.
- Cliffs can't be placed right up against buildings or too close to water.
- Use rounded corners for a less boxy look—stand at an angle and terraform the cliff edge to round it off.
Path Laying: Keeping It Clean and Tidy
Paths aren’t just for looks—they keep your villager’s feet from wearing dirt marks into your grass.
How paths work
- Open Island Designer, select a path style, then use A to lay it down, one square at a time.
- Tap the edge of a path tile again to round out corners.
Popular path ideas:
- Brick or stone for a city feel.
- Dirt paths for something cozier.
- Custom patterns for flower gardens or fun designs.
Experiment with layering paths and layering with in-game or custom designs to give your island trails more personality.
Planning Your Layout
Before firing up the Island Designer app, grab some grid paper or use an online tool to sketch ideas. Consider these planning tips:
- Think about flow. Do you want easy paths between resident houses, shops, and amenities?
- Try clustering buildings together for a town square feel, or spread them out for a rural vibe.
- Mix cliffs, rivers, and flat areas for varied terrain and plenty of visual interest.
Advanced Terraforming Tips
With the basics down, start playing around with more creative techniques:
- Waterfalls: Stand on top of a cliff, then use the waterscaping tool to dig into the edge. Instant waterfall.
- Secret beaches: Hide a tucked-away spot for relaxation or fishing by staggering cliffs and rivers together.
- Island hopping: Make tiny islands in rivers with a single square or two of land—add a duck decoy or rock for fun.
- Hidden pathways: Line paths with trees or cliffs to create hidden alleys and shortcuts.
- Multi-level gardens: Plant hybrid flowers on terraces or build sunken gardens with creative cliff-and-water combos.
What You Can’t Change
Some things are set in stone:
- Resident Services, airport, secret beach, and river mouths can’t be moved.
- The beach and rocks remain as-is.
- Cliffs and paths can’t go onto the beach or right up to water’s edge.
Tips for Keeping It Fun
Terraforming can get tedious if you aim for perfection overnight. Try these ideas to keep the process enjoyable:
- Work on one section at a time instead of the whole island.
- Take before-and-after screenshots so you can see your progress.
- Don’t stress about symmetry—quirky layouts often feel more authentic.
- Invite friends over and show off your hard work!
No matter what your vision, terraforming in Animal Crossing: New Horizons is about shaping your world, one square at a time. Experiment with these techniques, try your own mix, and let your creativity shine.
Flower Breeding Guide
Growing unique flowers is about more than just tossing seeds on the ground. If you want blue roses, purple windflowers, or hybrids in every color, you’ll need to put in a bit of gardening elbow grease and get to grips with breeding mechanics. Here’s how to set up your flower beds, understand genetics, and get those rare hues blooming on your island.
Flower Basics: What You Start With
Every island starts with one native flower type, and you can buy others from Nook’s Cranny or pick them up on mystery islands. The kinds of flowers available in New Horizons are:
- Roses
- Tulips
- Cosmos
- Pansies
- Windflowers
- Hyacinths
- Lilies
- Mums
Each variety comes in classic colors—like red, yellow, and white—but with breeding methods, you can unlock orange, purple, blue, pink, and even black versions.
How Breeding Works
To breed new colors, flowers use a hidden genetic system. It’s sort of like acting out a Punnett square from science class, but you don’t need to overthink it unless you’re chasing the rarest hybrids.
The Rules
- Only fully bloomed flowers breed. Babies come from two next to each other, either horizontally, vertically, or diagonally.
- Watering is required for flowers to breed, either by you, your friends, or a visiting villager.
- Some hybrid colors require specific “parent” flowers, not just generic store-bought ones.
- Rain counts as watering, but friends watering them (shows sparkles) boosts the chance for hybrid offspring.
Setting Up for Success: Best Layouts
Arranging your flowers right matters a lot. Crowded rows or random scatterings might not get you results. Here are the best options:
The Chessboard Pattern
This is the easiest, and often the most effective.
- Plant parents in a checkerboard style: one flower, one empty space, repeat.
- This makes sure every flower touches as many partners as possible.
- Water them all, and next day, check the empty spots—they’re where your hybrids pop up.
The “X” Pattern
Ideal for smaller batches:
- Place two parents diagonally across from each other, leaving the tile between them empty.
- This limits spillage if you’re chasing a very specific pairing.
Fenced-In Beds
If you want to keep things controlled (especially with rare hybrids), build small, fenced flower beds and limit the number inside. This way, no wild pollination happens from unwanted colors nearby.
Unlocking Hybrids: Starter Combinations
Let’s break down some of the classic hybrid recipes. (Note: Some combos only work with certain parent “genetics.”)
Tulips
- Red + Yellow = Orange
- Red + White = Pink
- Orange + Orange = Black
Roses
- Red + Yellow = Orange
- Red + White = Pink
- White + White = Purple
- Orange + Orange = Black
- Black + Red (from seed) = Blue (Actually, blue roses require more complex breeding! See below.)
Windflowers
- Orange + Orange = Pink (eventually)
- White + White = Blue
- Red + Blue = Pink
Pansies
- Red + Yellow = Orange
- White + White = Blue
- Blue + Red = Orange (hybrid oranges only from these blues)
Mums
- Yellow + Red = Pink
- White + White = Purple
- Purple + Yellow = Green
Going for the Rare Ones: The Complex Hybrids
Some flowers, like blue roses, need specific hybrid parents—not just seed flowers or single crosses.
Blue Roses
- Stage One: Start with Orange and White seed roses to make hybrid oranges.
- Stage Two: Cross those hybrid oranges to make special whites.
- Stage Three: Cross special whites with other hybrids to produce (eventually) a hybrid orange with the right genes.
- Stage Four: Cross those new oranges together. Only then, the right pair might finally produce a blue rose.
If that sounds wild—it is. Many players follow step-by-step charts or use guides from sites like Nook Science or Mori Crossing’s guide for each step.
Boosting Breeding: Watering Tips
Watering makes a big difference:
- If you water a flower, the chance it breeds goes up a bit.
- If a friend visits and waters, there’s a bigger ‘sparkle’ boost. The more friends, the higher your odds—up to 5 friends maxing out the bonus.
- Rain also works, but isn’t boosted by visitors.
Managing Your Garden: Clean-Up and Control
- Hybrid flowers can quickly take over your island if left unchecked.
- Regularly dig up unwanted offspring to prevent cross-pollination you didn’t plan for.
- Store rare hybrids on a separate area or build a “breeding lab” for your big projects.
Decorating with Flowers
Don’t forget, hybrids aren’t just for bragging rights—they make your island look awesome:
- Mix colors for rainbow paths, decorate cliffs, or design intricate garden shapes.
- Some island ratings and Nook Miles goals require a certain number of different flower species and hybrids, so keep planting.
Quick Cheat Sheet
- Always buy seeds from Nook’s Cranny for starter parents—they have proper genetics.
- Use grid or checkerboard layouts for best results.
- Water every day; invite friends for sparkle boosts.
- Stick with it! Rare hybrids, especially blue roses and green mums, may take weeks.
Growing a field of shiny hybrids is part rinsing luck, part planning, and part patience. With the right setup and a bit of stubbornness, you’ll soon be buried in blossoms you can’t buy anywhere else. Furniture Placement in Animal Crossing: New Horizons
Setting up furniture on your island is more than just making things look pretty. The way you arrange and position items impacts your daily play, your island’s star rating, and how much your villagers enjoy life on your custom getaway. Whether you want a cozy reading nook, a bustling outdoor café, or a DIY crafting zone, it all starts with knowing how furniture placement works in New Horizons.
Indoor vs. Outdoor Furniture
Animal Crossing: New Horizons gives you a lot of freedom with where you can put furniture—inside your house or outside on the island. Both areas offer unique creative opportunities, but each comes with its own rules and quirks.
Indoor Placement
- Free Movement Mode: Inside your house, press down on the D-Pad to enter placement mode. Here, you can drag and rotate items with precision, pushing them against walls or even layering rugs under furniture.
- Wall Decor: Certain items, like clocks or neon signs, hang directly on the wall. Select and move them up and down for the exact height you want.
- Stacking: Some items can be placed on top of tables or countertops. Try mixing and matching small items for detail, like a magazine on a coffee table or a sewing kit on an ironing board.
- Room Themes: Think about the size and color of the items to bring a room together. Group related decor for themed rooms—like a gym, kitchen, or study.
- Lighting: Floor lamps, table lamps, and ceiling lights all impact the coziness of your spaces. Experiment with placement until your rooms feel just right.
Outdoor Placement
- Direct Placement: Outside, stand in the desired spot, select an item from your pockets, and drop it—your character will instantly plop it down. You'll often need to manually adjust by picking up and repositioning.
- Rotation: After placement, press and hold the item, then press A to rotate it in 90-degree increments.
- Flexibility: Almost every indoor item can go outside, but a few are indoor-only. Likewise, some things like trees, flowers, and paths are outside exclusives, not technically “furniture” but just as important.
- Natural Layout: Outdoor spaces benefit from using terrain features—place benches by rivers, lampposts along paths, or snack machines near shops for a realistic village vibe.
- Functional Designs: Use fences and furniture to define areas: picnic spots, outdoor gyms, cafés, or gardens. Add paths for easy movement.
Furniture Planning Tips
Work with the Grid
The game uses an invisible grid, whether you’re inside or outside. Each furniture item “snaps” to the grid, taking up 1x1, 2x1, or 2x2 spaces (and so on). Understanding this helps plan layouts that don’t feel crowded.
- Test placement: Items that are too close may block movement or prevent use. Always test walking around and interacting after you set things up.
- Leave Buffer Space: Most big furniture needs a space in front to use it. For example, beds must be approached from the side or foot, and chairs need open space to sit down.
Accessibility and Flow
If you find yourself getting stuck or villagers seem unable to reach your furniture, it's probably too tight.
- Open walkways: Leave at least one square wide for main paths, and more for “public” areas like shopping zones or community parks.
- Functional Items: Try placing crafting benches, storage sheds, and wardrobes near your house or in convenient locations rather than tucking them far away.
Symmetry vs. Organic Arrangements
- Symmetrical setups: Using mirrored placements (like two trees flanking a bench) creates a tidy, classic park or entryway look.
- Organic layouts: Arrange items at varying angles and distances for a more relaxed, “lived-in” feel—think scattered picnic blankets or a jumble of garden tools.
Layering and Elevation
Making use of cliffs and terraforming lets you add dimension:
- Place furniture like streetlights or fountains on upper cliffs for dramatic views.
- Use different flooring patterns under furniture to visually break up large flat spaces.
- Consider placing a bench above a waterfall or a telescope at the highest point for unique spots.
Matching Furniture Styles and Colors
Building a themed spot really ties your island together. New Horizons has dozens of furniture “sets” (like Ironwood, Rattan, or Log) and each set contains multiple pieces. Sticking with a theme can make your picnic area or shop stand out.
- Mix and Match: Don’t be afraid to use pieces from different sets, especially if their colors or textures blend well.
- Custom Designs: Use the customization kits to change furniture color or pattern. This helps coordinate mismatched items and adds unique flair.
- Villager Preferences: Sometimes villagers prefer certain styles. If you gift them items that match their tastes, they’ll proudly display them in their homes.
Island Rating Impact
Strategic furniture placement is key for boosting your island to a 3-Star or 5-Star rating:
- Three-Star Goal: Focus on placing a variety of furniture, especially outside. Isabelle will usually comment if you don’t have enough.
- Variety: Mix in Nook’s Cranny items, DIYs, seasonal event furniture, and even simple things like log stools or hay beds.
- Clutter: Too much, too close together, may count as clutter. Spread out your designs.
- Special Areas: Add unique zones like an outdoor cafe, playground, or reading garden to win approval.
Common Placement Problems (and Solutions)
- Can’t Push Furniture?: If there’s even a flower or weed behind the object, you won’t be able to move it—clear the tile first.
- Items Disappear?: If you terraform or add a building where you placed furniture, it’ll get zapped to your storage or mailbox.
- Blocked Entrances: Make sure to leave clear space outside homes and buildings so villagers and visitors aren’t stuck.
Creative Inspiration
Need a little nudge to get started? Try these:
- Courtyard: Use hedge fencing, a water feature, and plenty of benches and plant stands.
- Market: Lay down stall furniture, barrels, and fruit stands near the plaza.
- Outdoor Theater: Place simple panels as a backdrop, rows of chairs, and a stand for musical instruments.
- Secret Garden: Mix garden benches, fountains, and flowerbeds with no straight lines for a wild look.
- Beach Café: Low tables and chairs, coconut drinks, and tiki torches on the sand.
Conclusion
Furniture placement isn’t just about filling space—it shapes how your island feels and functions. Choose your themes, lay out matching and contrasting colors, and keep walkways open. With some thoughtful planning, you can turn every part of your island into a comfortable, creative, and personalized oasis. Try new layouts, get inspiration from friends or online, and most importantly—make the island your own.
Island Rating Guide
Isabelle’s island rating isn’t just a badge of honor—it unlocks features, including K.K. Slider’s concerts and special DIY recipes. Achieving a 3-star rating is necessary to finish the main story. Climbing to 5-stars nets you the golden watering can recipe and marks you as an elite island curator. Here’s a detailed breakdown of the system, how points work, and what you can do to optimize your score.
How the Island Rating System Works
Isabelle, who runs resident services, evaluates your island each day. Talking to her gives feedback and tells you what to work on next. She judges your island based on several factors: scenery, development, and cleanliness. The game doesn’t show the exact numbers, but certain actions and objects award hidden “points” to your rating.
Influencing Factors
- Population: You need at least 7 villagers for a 3-star rating, and 10 for 5-stars.
- Decoration: Place furniture and fence pieces outdoors, not just indoors. Both crafted (DIY) and store-bought items count.
- Flora: Growing a mix of trees and flowers across your island boosts your score. Don’t chop down all the native trees!
- Weeds & Trash: Excess weeds or items dropped on the ground (like sticks or turnips) lower your score. Clean up before checking your status.
Breaking Down the Ratings
One to Two Stars
- Requirements: Just having a few buildings and basic infrastructure. Isabelle might point out that it feels a bit “deserted.”
- Tips: Invite new villagers, plant trees and flowers, and place a few pieces of outdoor furniture.
Three Stars
You unlock Project K (K.K. Slider’s concert) at this level.
-
Essentials:
- At least 7 villagers living on your island
- Dozens of outdoor furniture items evenly scattered (the more variety, the better)
- 100-200 trees (including fruit and non-fruit types)
- A healthy spread of flowers (around 100+ recommended)
- Some fencing—aim for 50+ pieces total, but scattered (not all in one spot)
-
Common Feedback: Isabelle will mention lacking furniture, not enough fencing, areas feeling “bare,” or too many items dropped around.
-
What to Fix:
- Space out your decorations—don’t cluster everything near resident services.
- Avoid dropped tools, turnips, or clothing on the ground; these count as clutter.
Four Stars
The standards get higher, usually needing more of what you did for three stars.
-
Essentials:
- 8-9 villagers
- Well-developed infrastructure (bridges, inclines, shops)
- Even more diverse furniture and conversational groupings (like picnic parks, outdoor cafes, etc.)
- Extra attention to cleanliness
-
Feedback: Isabelle might say the island feels “full of promise” but still has barren patches or not enough decorated zones.
Five Stars
You’ve reached the top tier of island design.
-
Essentials:
- 10 villagers
- Multiple bridges and inclines (about 7-8 each recommended)
- Furniture, fencing, and decor in every corner
- Over 250 placed furniture items (a combination of store-bought and DIYs)
- Flower fields and tree groves well-balanced—not just in one zone
- No weeds, trash, or dropped items
-
Rewards:
- Isabelle gifts you the golden watering can recipe
- Lily-of-the-valley flowers start sprouting, signaling your achievement
Maximizing Your Score
Furniture and Fencing
- Variety is your friend. Use crafted and store-bought items, and try to mix themes.
- Include standing, table, wall, and ground items—this increases different "types" present.
- Seasonal event decorations (mushrooms, Toy Day, Bunny Day items) add unique points.
- Spread fencing around gardens, plazas, houses, and natural features; don’t clump it in one place.
Flora Layout
- Trees: Both fruit and non-fruit trees count. Over 220 can be too many (Isabelle will warn if you overplant), but having at least 100 is safe.
- Flowers: They count by the stem, not clusters; the more colors and hybrids, the prettier in reviews.
Cleaning Up
- Only “placed” items (using ‘place item’ or ‘display here’) count as decor. “Dropped” items (like dropping a tool, fruit, or turnip straight from your pockets) are considered trash by the game and lower your score.
- Pull all weeds and garbage before talking to Isabelle.
Infrastructure
- Bridges and inclines increase the sense of accessibility and are part of the “development” score. Seven bridges and inclines seem to be the magic number, but having more doesn’t hurt.
Isabelle’s Feedback: Decoding Her Hints
- “Feels barren”— Not enough outside furniture or nature items. Add more benches, tables, or scenery.
- “Needs more fencing”— Place fences in at least three or four distinct areas.
- “Too cluttered”— Remove loose items, store excess turnips, and make sure all decorations are “placed” rather than dropped.
Frequently Asked Questions
Q: Do custom designs and pathing help?
A: Yes! Patterns and paths show up as development, so laying out custom designs adds to your score.
Q: Can I move buildings to boost my rating?
A: Rearranging homes, shops, and facilities for more balanced spacing helps prevent “barren” complaints.
Q: Do mannequins and simple panels count?
A: Yes, any item “placed” outside is counted—even mannequins, but don’t forget to clean them up!
Steps to a Five-Star Island
- Invite more villagers until you reach 10.
- Place more than 250 furniture items, making sure to spread them evenly.
- Plant at least 100 flowers and 100 trees. Mix up the colors and put flower clusters in different spots.
- Build at least 7 bridges and 7 inclines for good flow.
- Fence off gardens, yards, and park areas with a variety of fencing styles.
- Patrol your island for loose items or trash daily.
- Regularly check in with Isabelle for feedback and adjust as you go.
Wrapping Up
Island ratings aren’t just about filling space—they reward creativity, neatness, and a lively community vibe. Don’t stress perfection; experiment, decorate, and check in with Isabelle until you hit your goal. The journey to 3 or 5 stars gives you tons of room to express your favorite style, both to visitors and your villagers. And once you’ve earned that golden watering can, your island will truly feel like home.
Custom Design Guide
Custom designs help turn your Animal Crossing: New Horizons island into something that looks and feels like you. With the right tools and a little creativity, you can make everything from cute pathways to custom outfits and even complex murals. Whether you’re new to pixel art or a returning series vet, this section will set you up to use and make custom designs like a pro.
What Are Custom Designs?
Custom designs are pixel-based patterns that you can draw, save, and share in-game. They show up all over your island: clothing, signs, flags, furniture surfaces, ground patterns—even as face paint or phone cases. Each design is a small square (32x32 pixels for most patterns), but with clever tricks, you can create larger images by laying them out piece by piece.
Unlocking and Using the Custom Design App
When you first open your NookPhone, you get the Custom Designs app for free. This basic version lets you:
- Create and save up to 50 patterns.
- Wear designs on shirts, hats, or as face paint.
- Display them as tiny canvas “art stands,” hanging signs, or throughout the island.
Upgrade your possibilities by purchasing the Custom Design Pro Editor from the Nook Stop terminal for 800 Nook Miles. This adds:
- Pro designs (dresses, hoodies, custom hats, and more).
- Access to more tools, like shapes and expanded color palettes.
An even bigger upgrade, the Custom Design Pro Editor+ (added with the Version 1.9.0 update), costs another 2,000 Nook Miles. This unlocks extra slots and custom handheld flags and umbrellas.
How to Make Custom Designs
The Editing Tool
When you open the design editor, you get a grid of tiny squares. Each square is a single pixel. Use the palette along the bottom to pick colors, then “paint” by filling in squares to make lines, shapes, or patterns.
Handy controls
- Fill tool: Color huge areas fast.
- Mirror mode: Draw on one half, and it copies to the other for symmetrical designs.
- Undo/redo: Quickly fix mistakes.
- Multiple color palettes: Mix and match shades.
Pro Design Editor
Pro designs have built-in templates for different clothing items. Each part (front, back, sleeves) is a different panel, offering lots of creative control. Need a jacket with stripes on the sleeves? You’ve got the freedom.
- When designing a hat or top, use guidelines in the editor to line up stripes or logos across seams.
- Preview your work in 3D on a model before saving.
Sharing and Downloading Designs
Design Codes
Once you finish a pattern, you can share it with friends using a Custom Design Code (local sharing) or upload it online if you have Nintendo Switch Online. You’ll need:
- Able Sisters Tailor Shop built on your island.
- Access the pink Custom Designs Portal in the back of Able Sisters.
From there, you can:
- Upload your own designs to generate a code for each pattern.
- Browse and search for public designs using either their eight-digit code or artist ID.
- Download instantly to your active design slots.
QR Codes (from New Leaf and Happy Home Designer)
Got designs you loved in old Animal Crossing games? The Nintendo Switch Online app (on your smartphone) lets you scan older QR codes using the “NookLink” section, then import them directly. They show up in your in-game Custom Designs app under “downloaded.”
Using Custom Designs Around Your Island
Paths and Flooring
Lay down custom patterns using the in-game tool for paths and paint-by-tile. Select your design, then use the “display on ground” option to place it square by square. Great for:
- Trail paths
- Plaza mosaics
- Rug patterns for picnics or dining
Limit: Only 100 custom or pro design slots are available (including all downloaded and made patterns). Plan ahead if you want a path that uses multiple tiles.
Clothing and Accessories
Wear your patterns as shirts, dresses, hats, or carry as umbrellas and flags. You can even outfit villagers—gift clothes featuring your designs, and sometimes they’ll wear them around town.
Decoration
Display custom artwork on easels, signs, or simple panels. Fake windows, city skylines, shopfronts—anything you can sketch in pixel form can decorate building walls or section off spaces.
Stickers and Face Paint
Fun for festivals, parties, or themed events. Use small designs for face art or tiny stickers placed around town.
Finding Inspiration
If drawing pixel art from scratch feels intimidating, check out communities like:
- AC Patterns (web tool for browser-based pixel drawing and code sharing)
- Reddit’s r/ACQR (players share and request codes)
- Twitter and Instagram—search “ACNH custom design codes” for huge galleries
Or just visit friends and see what they’re doing! You can copy or tweak patterns you admire.
Tips for Custom Design Mastery
- Use reference images: Open a favorite logo or photo in another window while you work.
- Layer patterns: Use transparent backgrounds to make overlays, like chalk art on existing paths.
- Don’t overload: Since slot space is limited, reuse flexible patterns for multiple uses (like a single “white tile” path for snow, sand, and plaza areas).
- Test in-game: Colors might look different on the ground, on walls, or on clothes than in the editor.
Troubleshooting and Limitations
- Path “breaking”: Walking across custom paths can pick up the tile if you’re not careful. Use the in-game path tool for permanent walkways if possible.
- Slot management: When you run out, clear old or little-used patterns by overwriting them.
- Layering over terrain: Custom designs can’t stack under items or bridges. Place those first, then fill in with patterns.
Final Thoughts on Custom Designs
Custom designs are key to personalizing your Animal Crossing: New Horizons island beyond stock items or furniture sets. They let you showcase your creativity or borrow from someone else’s style with just a code. Whether you want a town flag that matches your favorite anime, pathways that look like rustic cobblestone, or just the perfect shirt, the tools you need are built in. Once you've started using custom designs, your island transforms into something truly one-of-a-kind.